
Oh, there is nothing quite like the smell of whole wheat bread baking fresh in the oven, right? It just screams ‘home’ in the best possible way. If you’ve been nervous about tackling yeast doughs because you’re worried about ending up with a dense brick instead of a fluffy loaf, please take a deep breath. You truly don’t need to be scared!
When I designed this easy bread recipe here at Frosted Fancies, I specifically focused on creating the softest, most tender homemade whole wheat bread imaginable—and it needs to be foolproof for beginners. Trust me, I know my way around gluten development, thanks to my Food Science degree and years spent as a professional recipe developer perfecting these kinds of formulas. This recipe uses just the right balance of flours and honey to ensure your first experience making whole wheat from scratch is a massive success!
- Why This is the Best Soft Whole Wheat Loaf Recipe (Beginner Approved)
- Gathering Ingredients for Your Honey Whole Wheat Recipe
- How to Make Bread at Home: Step-by-Step Whole Wheat Bread Instructions
- Baking Tips for Perfect Whole Wheat Bread from Scratch
- Storing Your Fresh Baked Bread
- Frequently Asked Questions About Making Whole Wheat Bread
- Nutritional Snapshot of This Wholesome Baking
- Share Your Homemade Whole Wheat Bread Success
Why This is the Best Soft Whole Wheat Loaf Recipe (Beginner Approved)
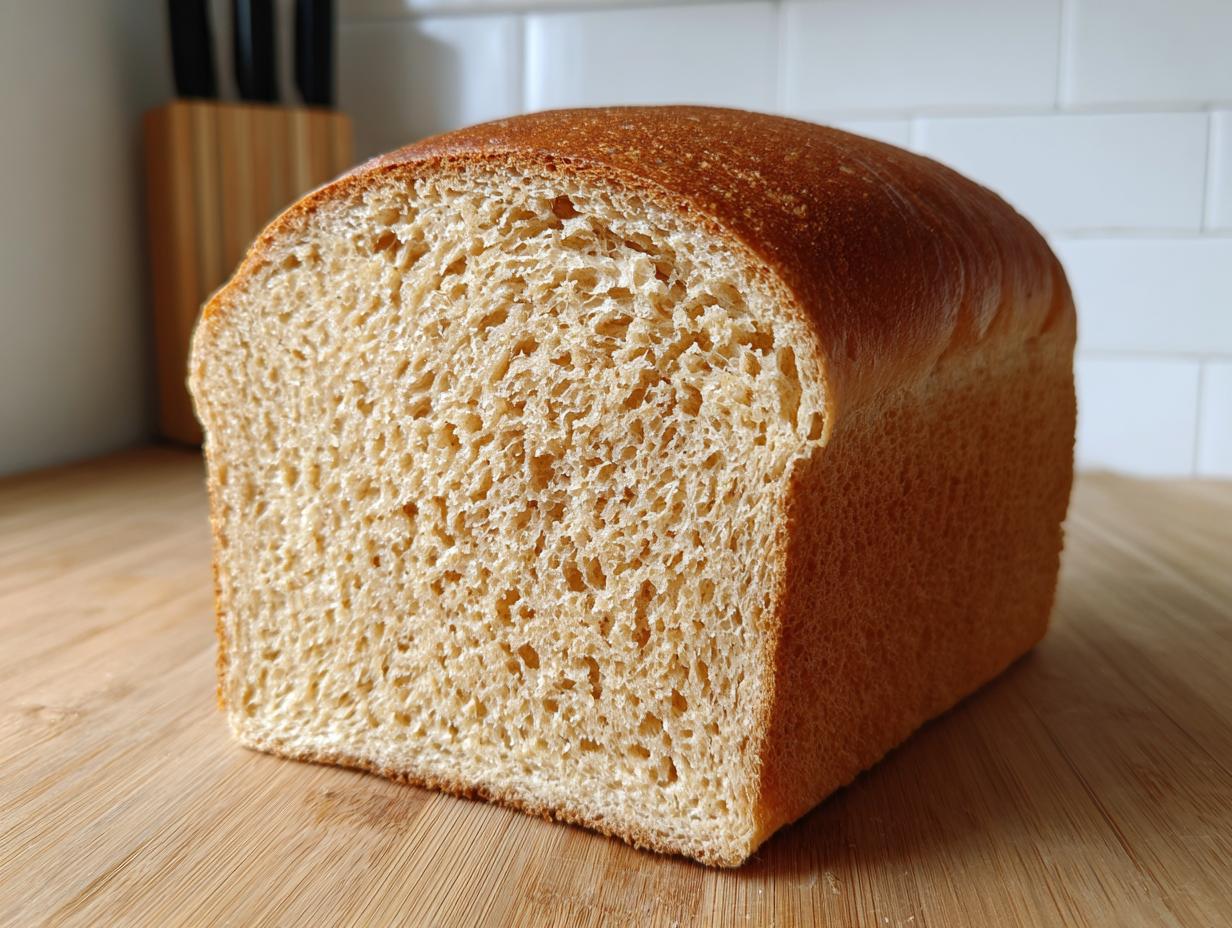
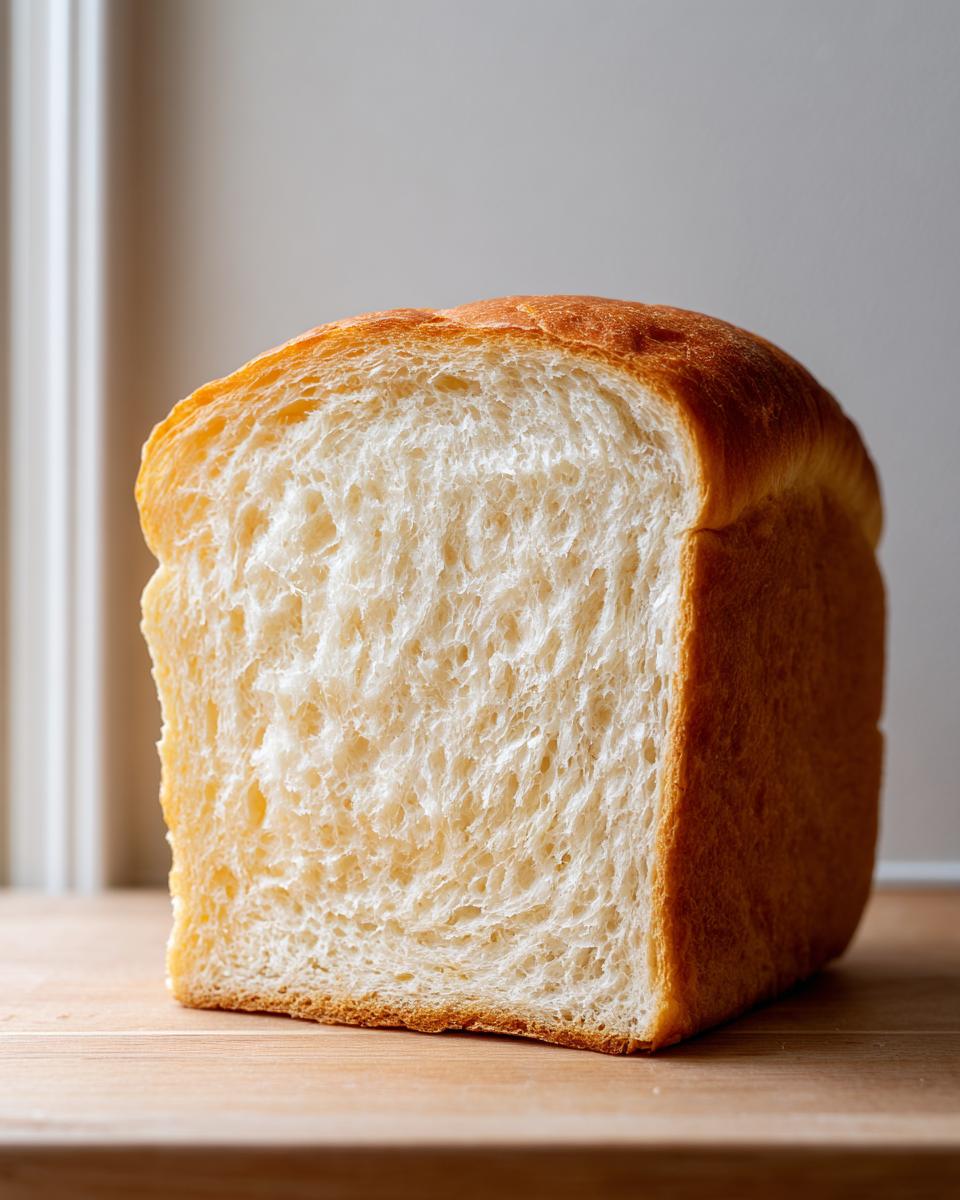
We’re focusing on the *soft* part here because, let’s be honest, nobody wants whole wheat bread that feels like a doorstop! My goal, as a recipe developer, was to nail that incredibly tender crumb that store-bought bread often manages, but with all the wholesome benefits of whole wheat. The touch of golden honey doesn’t just sweeten it slightly; it keeps the crumb supple for days. This is truly the best whole wheat bread recipe for anyone just starting out. You’ve got this!
Achieving Fluffy Homemade Bread Texture
If you want that fluffy homemade bread feel in a sandwich loaf, you can’t just dump in 100% whole wheat and hope for the best. Whole wheat bran loves to absorb moisture and can make the dough heavy. That’s why I include just a half cup of all-purpose flour in the basic formulation; it gives the gluten structure a little lighter scaffolding to hold onto. Keep your kneading to that sweet spot of 5 to 7 minutes. Over-kneading this whole wheat bread is the fastest way to make it chewy instead of soft. We are looking for smooth, not tough!
If you are dead-set on that 100 percent whole wheat, check out my notes later on, but expect a slightly heartier result—though still delicious! For the absolute softest results, stick close to the provided flour mix. You can see a great example of how timing impacts texture over at this wonderful guide.
Gathering Ingredients for Your Honey Whole Wheat Recipe
Okay, let’s get our ducks in a row. Baking bread is really just chemistry you can eat, and chemistry needs the right measurements and temperatures! For this incredibly satisfying honey whole wheat recipe, we are keeping the list short. Why? Because anything worth doing shouldn’t require a trip to a specialty store!
Make sure you have your yeast ready to go, our star natural sweetener—the honey—and the right flour mix. I’ve linked to a beautiful recipe that focuses just on the honey notes over at Bramble Wine Cottage, which is great inspiration for flavor, but here is our go-to list for that perfect soft whole wheat loaf.
Ingredient Clarity and Substitutions for Whole Wheat Bread
The most important starting point: water temperature! Your water absolutely needs to be warm—think bath temperature, not hot tea. We’re talking 105°F to 115°F. If it’s cooler, the yeast takes forever to wake up, and if it’s too hot, say goodbye to your rise. We need that foamy blanket on top as proof that things are working before we add anything heavy!
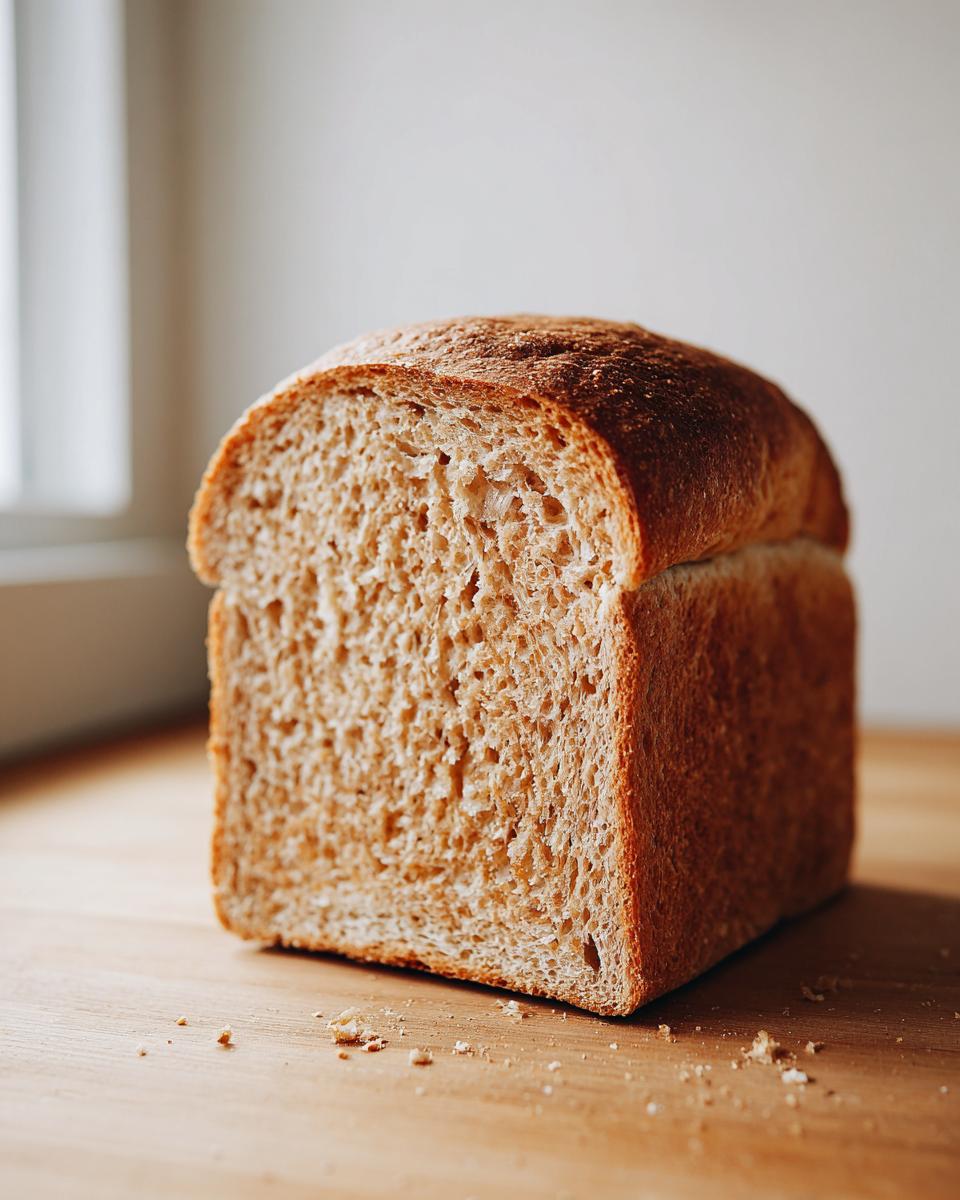
Now, about the flour. The recipe calls for mostly that beautiful, wholesome whole wheat flour. If you want to push this to 100 percent whole wheat, go for it! Just be ready to add an extra tablespoon or two of water when you feed in the dry ingredients. Whole wheat loves liquid, and if you skip the small amount of all-purpose flour we use for softness, that dough might feel a little too stiff too fast. Precision here really helps achieve that healthy sandwich bread texture!
How to Make Bread at Home: Step-by-Step Whole Wheat Bread Instructions
Now for the fun part! Don’t let the steps intimidate you; remember, this is our fail-safe easy bread recipe. We are taking it slow so you get that beautiful, high-rising soft whole wheat loaf every time. It’s all about timing and watching for those visual cues. I’ve broken down the process so you can see exactly what I look for, which is the difference between a good loaf and a great one!
Activating Yeast and Mixing the Dough
Step one is activation. Mix that warm water (remember 105°F to 115°F?) with your yeast and let it sit for five minutes. When you come back, the top should look frothy, almost like the head on a good beer! If it’s not foamy, your yeast is dead, and you can toss it and start over—it saves a ton of disappointment later. Once it’s bubbly, stir in the honey, melted butter, and salt. Now we introduce the flour. Dump in all the whole wheat flour first, mix it until it just shaggies together, and then slowly introduce that little bit of all-purpose flour until you have a messy dough ball. It won’t look pretty yet!
Kneading and the First Rise for Soft Whole Wheat Loaf
Time to get those hands in there! Turn that shaggy mix out onto a lightly dusted counter. We need about 5 to 7 minutes of kneading. You’re looking for the dough to transform from sticky and rough to smooth and elastic. It should feel supple, not rigid. That’s the key to avoiding that dense texture people fear in homemade whole wheat bread. Once it’s smooth, lightly oil your bowl, pop the dough in, turn it over so it’s coated, cover it tightly, and find a nice warm, draft-free spot. Let it double in size—usually about an hour or a bit more depending on your kitchen temperature.
Shaping and Final Proofing of the Whole Wheat Bread
Once it’s doubled, gently punch the air out—don’t be aggressive! Fold it into a nice tight little log shape and place it immediately into your greased 9×5 inch loaf pan. Cover it loosely and let it rest for the final rise, which is shorter, about 30 to 45 minutes. Here is a pro trick for our beginner bread baking friends: Start warming up your oven to 375°F during the last 15 minutes of this second rise. That way, when the dough looks perfectly crowned (about an inch over the pan rim), the oven is screaming hot and ready to capture that oven spring perfectly. This coordination is essential for making bread at home!
You can find some really helpful visual aids for shaping techniques over at this beginner’s guide and see great shapings from Cook Breeze!
Baking Tips for Perfect Whole Wheat Bread from Scratch
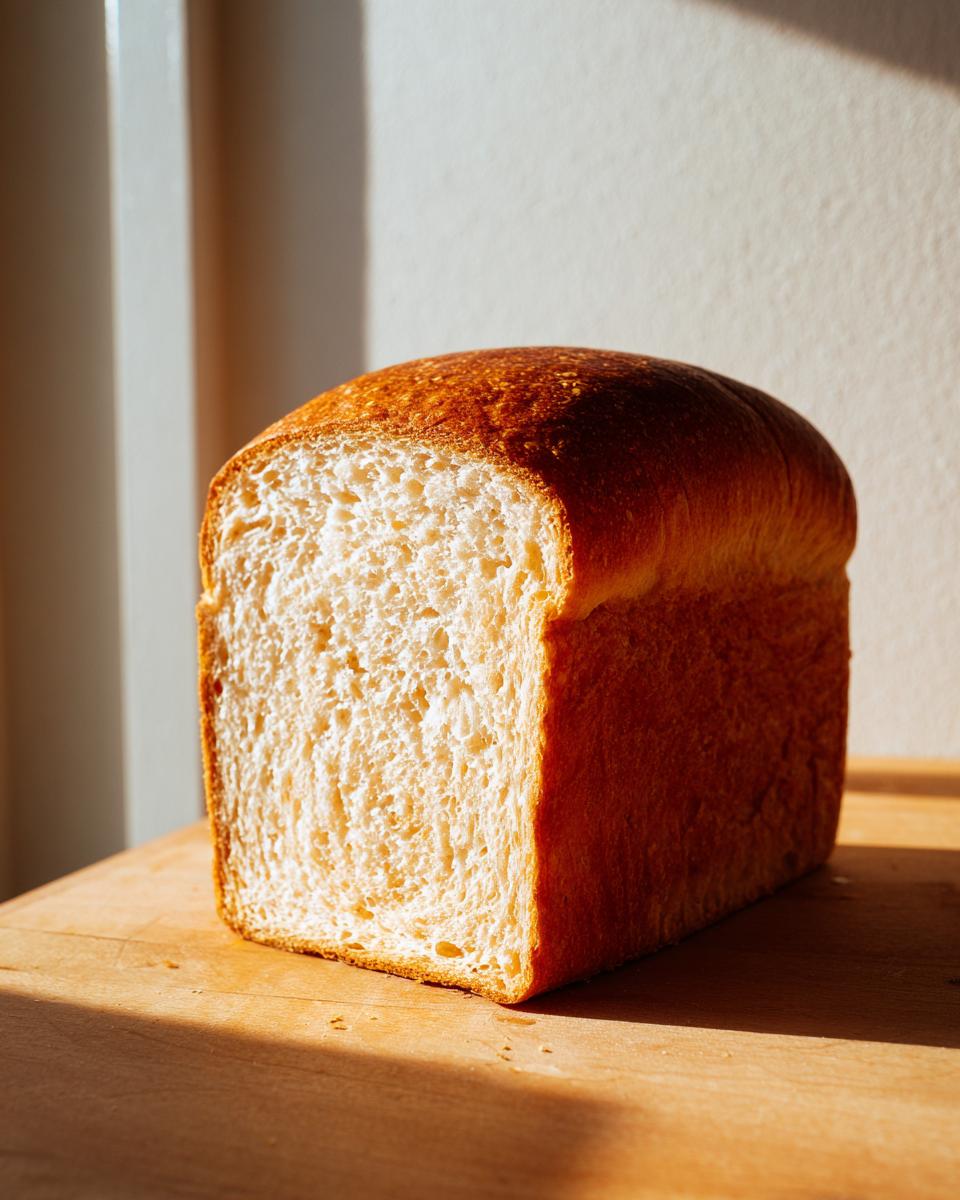
The oven is hot—375°F, ready to receive our beautifully proofed loaf! Now, I know it’s tempting to just pull the bread out when the top looks nice and golden brown, but this is where my Food Science background really kicks in. Color can lie, especially with whole wheat flour which browns faster. The best way to ensure you haven’t undercooked the center of your whole wheat bread is to use a digital thermometer. You are aiming for an internal temperature of 190°F (88°C).
I learned this the hard way early in my career when I pulled a batch out based on color alone—I cut into it and the center was still gummy! Never again! Since then, I always trust the temperature. This ensures you get that perfect, tender crumb throughout.
Once it hits 190°F, get it out immediately! Don’t leave it sitting in that hot metal pan. Slide it right out onto a wire rack. Cooling completely on the rack is non-negotiable for a great texture; if you slice it while it’s hot, those last few steamy pockets will collapse, and you’ll end up with a dense bottom layer, even after all our hard work. Let it cool for at least an hour before slicing into that gorgeous homemade whole wheat bread!
For more reassurance on high-temp baking checks, check out Sally’s guide—she’s fantastic at explaining thermal tests!
Storing Your Fresh Baked Bread
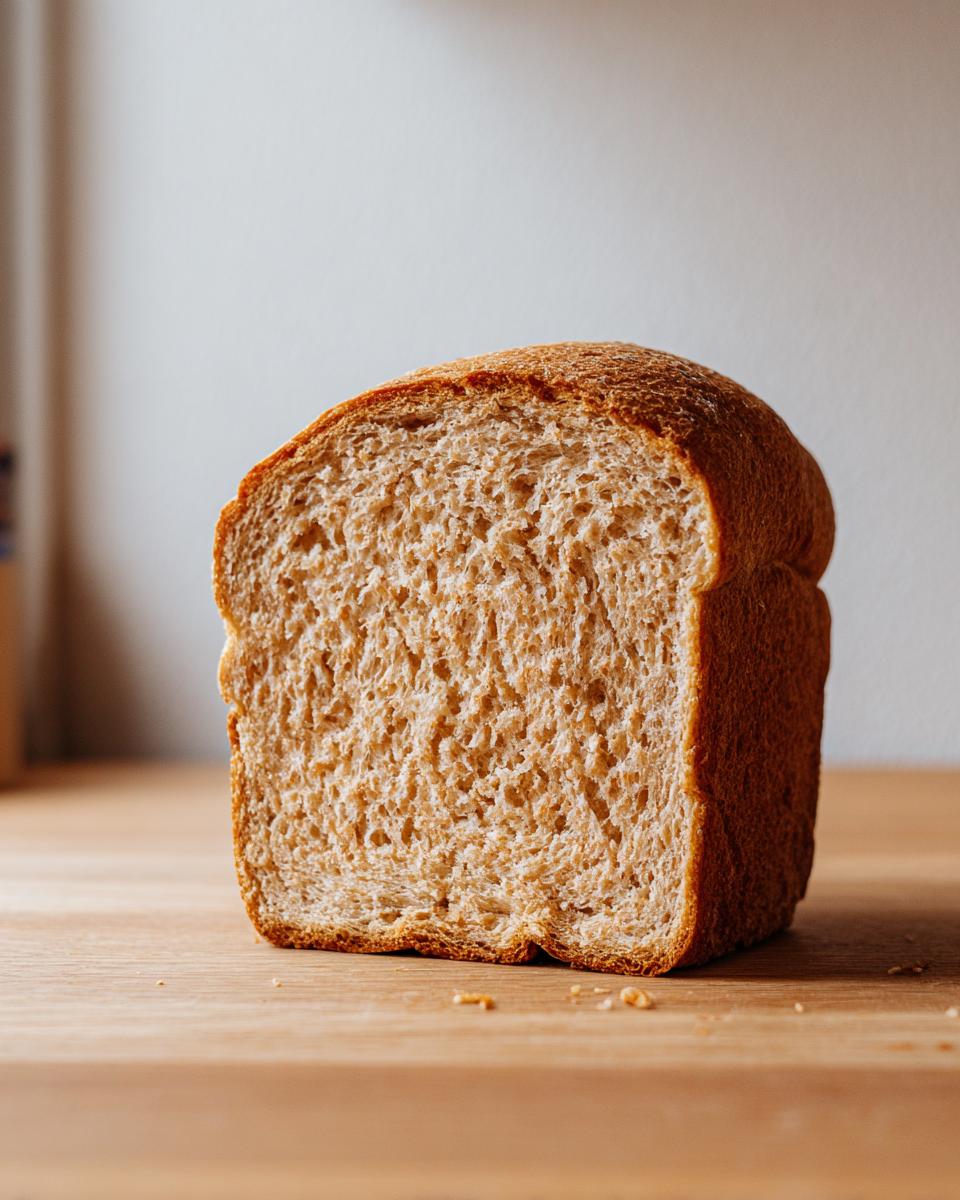
Alright, the hardest part is over—you made the loaf! Now we have to keep it perfectly soft. This healthy sandwich bread is at its peak on day one, and we want to keep it there for as long as possible. My main piece of advice here is to avoid the refrigerator if you can!
I know it sounds counterintuitive, but cold temperatures actually make bread go stale faster; it ruins that lovely soft texture we worked so hard to achieve. As soon as that loaf is completely cool (and I mean *completely* cool, or you’ll trap steam and ruin the crumb!), wrap it up tightly. Most people use aluminum foil or put it in a large zip-top bag. If you keep it on the counter at room temperature, it should stay beautifully fresh for about two to three days. We love using reusable bread bags for this—they keep the air out but let the bread breathe just enough. You can see some great tips on keeping things fresh over at this sandwich bread guide.
What if you have leftovers on day three? Don’t turn it into sad, dry toast! Day-old whole wheat bread reheats like a dream. Just slice what you need, spritz the slice lightly with water (just a tiny bit so it doesn’t get soaked), and pop it into a 350°F oven for about five minutes. It comes out perfectly refreshed, warm, and flexible, ready for a thick spread of butter. It tastes almost as good as when it first came out of the oven!
Frequently Asked Questions About Making Whole Wheat Bread
It’s totally normal to have questions when you first start making bread at home! Even though I designed this easy bread recipe to be super straightforward, yeast can be a little dramatic sometimes. Let’s go over a few things I hear most often from folks trying to achieve that soft whole wheat loaf for the first time.
Remember, every time you bake, you learn something new about your own kitchen environment, so never sweat a small hiccup. We’re all about reliable, wholesome baking here!
Troubleshooting Common Issues with Yeast Bread Recipes
This is where things can go sideways, but usually, it’s a quick fix! The number one reason for a flat, sad loaf is a bad rise. If your dough isn’t doubling after the first hour, check two things: Is your water warm enough (105°F to 115°F)? If the water was too cold, the yeast is just slumbering. If it was too hot, well, it’s toast! Always double-check that yeast packet expiration date, too. Very old yeast won’t give you that beautiful volume needed for fluffy homemade bread.
Secondly, we worry about density. If you followed the 5-to-7-minute kneading rule and your final product still came out heavy, it’s likely one of two things. Either you didn’t let the second proofing go long enough, or you *did* knead it for nine minutes! Bread dough needs that resting time to relax and trap the gas. Be patient during those rise times; that’s when the real magic happens for whole wheat from scratch.
Another big question I get is about using 100 percent whole wheat flour. Yes, you absolutely can! As I mentioned earlier, swap out the half-cup of all-purpose flour for more whole wheat. You might need an extra splash of water—maybe one or two tablespoons—because whole wheat is thirsty. You won’t get quite the same ‘sandwich bread’ springiness, but you get maximum nutrition. To see the difference in texture when using all whole wheat, check out this guide from Bless This Mess Please.
And what about swapping white flour? If you use bread flour instead of all-purpose, it will develop a stronger gluten structure, making your loaf chewier, which some people love for a more rustic whole wheat loaf, but it might disappoint those looking for soft sandwich bread. For this specific recipe, stick to all-purpose or skip it entirely!
Finally, can you use instant yeast? Sure, but you must adjust. If you are using instant yeast, you don’t need to bloom it first! Just whisk it right into your flour mixture, and you can skip the pre-foaming wait time. That’s a great shortcut for anyone who wants to speed up their yeast bread recipes!
Nutritional Snapshot of This Wholesome Baking
I absolutely adore that this whole wheat bread is not just comforting, but it’s genuinely good for you! Because we are using whole wheat flour and keeping added fats low, this recipe really fits nicely into that healthy sandwich bread category we all aim for. It’s what I love about wholesome baking—you can control every single nutrient that goes into the final product.
Now, I have to give you the standard recipe developer disclaimer here: these numbers are close, but they are estimates based on the exact ingredient amounts listed in the recipe. If you decide to go 100 percent whole wheat and swap out that little bit of white flour, or if you use a different brand of honey, the numbers will wiggle just a bit. But this gives you a fantastic benchmark for what you’re eating!
Here is the snapshot per slice—and remember, this loaf makes one generous 9×5 loaf, which usually yields about 12 slices:
- Calories: About 130 per slice
- Carbohydrates: 25g
- Fiber: A wonderful 3g of fiber, thanks to that beautiful whole wheat flour!
- Protein: 5g
- Fat: Just 2g
- Sugar: Only 4g (and that’s mostly came from that touch of honey.)
See? It really is a lovely, dependable **homemade whole wheat bread** that you can feel great about serving your family every day. If you want to compare this profile to other methods of making whole wheat bread, I encourage you to look at how simple ingredients shake out, like the breakdown provided in this post on simple whole wheat usage. It confirms that keeping ingredients clean is the way forward for the best results!
Share Your Homemade Whole Wheat Bread Success
Now that you’ve got your hands dusted with flour and the kitchen smelling absolutely divine, I really, truly want to hear about it! Baking, even when it is easy like this whole wheat bread recipe, is always better when shared. Did you make the switch to 100 percent whole wheat? Or did you find that little bit of all-purpose flour made all the difference in achieving that soft crumb you were hoping for?
Please, please leave a comment below! Tell me how your very first rise went, whether the honey gave it just the right touch of sweetness, and how it holds up for sandwiches the next day. Your honest feedback—especially if you’re new to making bread at home—helps me, as a recipe developer, know that this formula is working for real people in real kitchens.
And if you snapped a picture of your beautifully puffed-up, golden-brown soft whole wheat loaf, I would absolutely love to see it! Tag me on social media so I can share your success. Seeing your perfectly baked loaves makes all the recipe testing worthwhile. Let’s celebrate your first great success in making healthy sandwich bread!
If you’re looking for more inspiration on what to do next with your newfound bread baking skills, check out the fantastic tips over at The Recipe Rebel.
PrintEasy Soft Honey Whole Wheat Sandwich Bread

Bake a soft, fluffy, and wholesome whole wheat sandwich loaf at home using this simple recipe sweetened naturally with honey. This recipe is perfect for beginners.
- Prep Time: 20 min
- Cook Time: 35 min
- Total Time: 1 hour 50 min
- Yield: 1 loaf 1x
- Category: Baking
- Method: Baking
- Cuisine: American
- Diet: Vegetarian
Ingredients
- 1 cup warm water (105-115°F)
- 2 teaspoons active dry yeast
- 1/4 cup honey
- 2 tablespoons unsalted butter, melted
- 1 1/2 teaspoons salt
- 3 cups whole wheat flour
- 1/2 cup all-purpose flour (or more whole wheat flour for 100% whole wheat)
Instructions
- Combine the warm water and yeast in a large bowl. Let it stand for 5 minutes until foamy.
- Stir in the honey, melted butter, and salt into the yeast mixture.
- Add the whole wheat flour to the wet ingredients. Mix until just combined.
- Gradually add the all-purpose flour, mixing until a shaggy dough forms.
- Turn the dough out onto a lightly floured surface. Knead for 5 to 7 minutes until the dough is smooth and elastic. If you prefer a softer loaf, knead slightly less.
- Place the dough in a lightly oiled bowl, turning to coat. Cover the bowl with plastic wrap or a clean towel. Let it rise in a warm place for 1 to 1.5 hours, or until doubled in size.
- Gently punch down the risen dough. Shape it into a loaf and place it into a lightly greased 9×5 inch loaf pan.
- Cover the pan loosely and let the dough rise again for 30 to 45 minutes, or until it has crowned about 1 inch over the rim of the pan.
- Preheat your oven to 375°F (190°C) during the last 15 minutes of the second rise.
- Bake for 30 to 35 minutes, or until the top is golden brown and the internal temperature reaches 190°F (88°C).
- Remove the bread from the pan immediately and cool completely on a wire rack before slicing for the best texture.
Notes
- For a 100 percent whole wheat loaf, substitute the 1/2 cup of all-purpose flour with more whole wheat flour, but you may need to add 1 to 2 extra tablespoons of water if the dough seems too stiff.
- To achieve a very soft crumb, ensure your water temperature is correct for activating the yeast and avoid over-kneading.
- If your kitchen is cold, place the covered dough bowl in a slightly warm oven (turned off) to help it rise faster.
Nutrition
- Serving Size: 1 slice
- Calories: 130
- Sugar: 4
- Sodium: 250
- Fat: 2
- Saturated Fat: 1
- Unsaturated Fat: 1
- Trans Fat: 0
- Carbohydrates: 25
- Fiber: 3
- Protein: 5
- Cholesterol: 5