
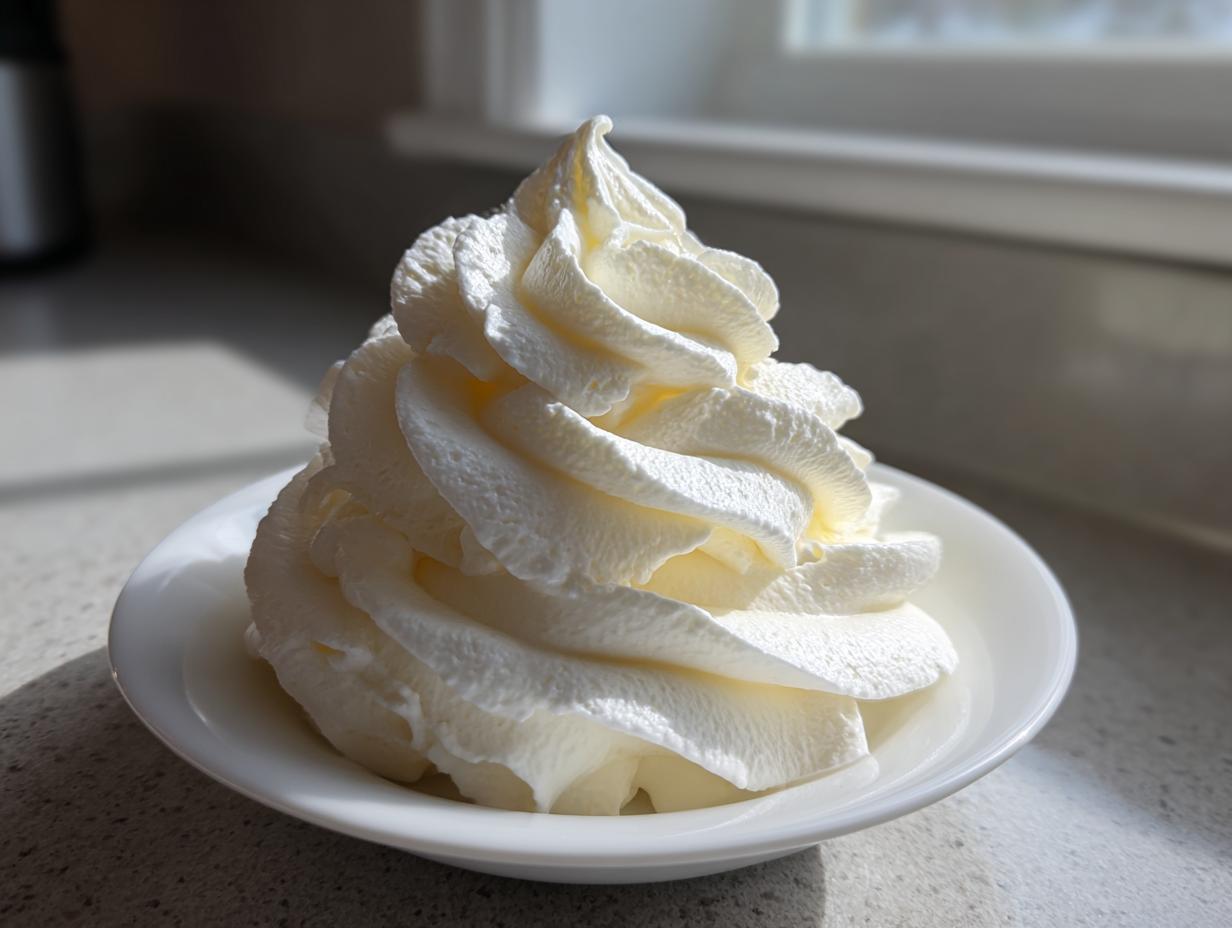
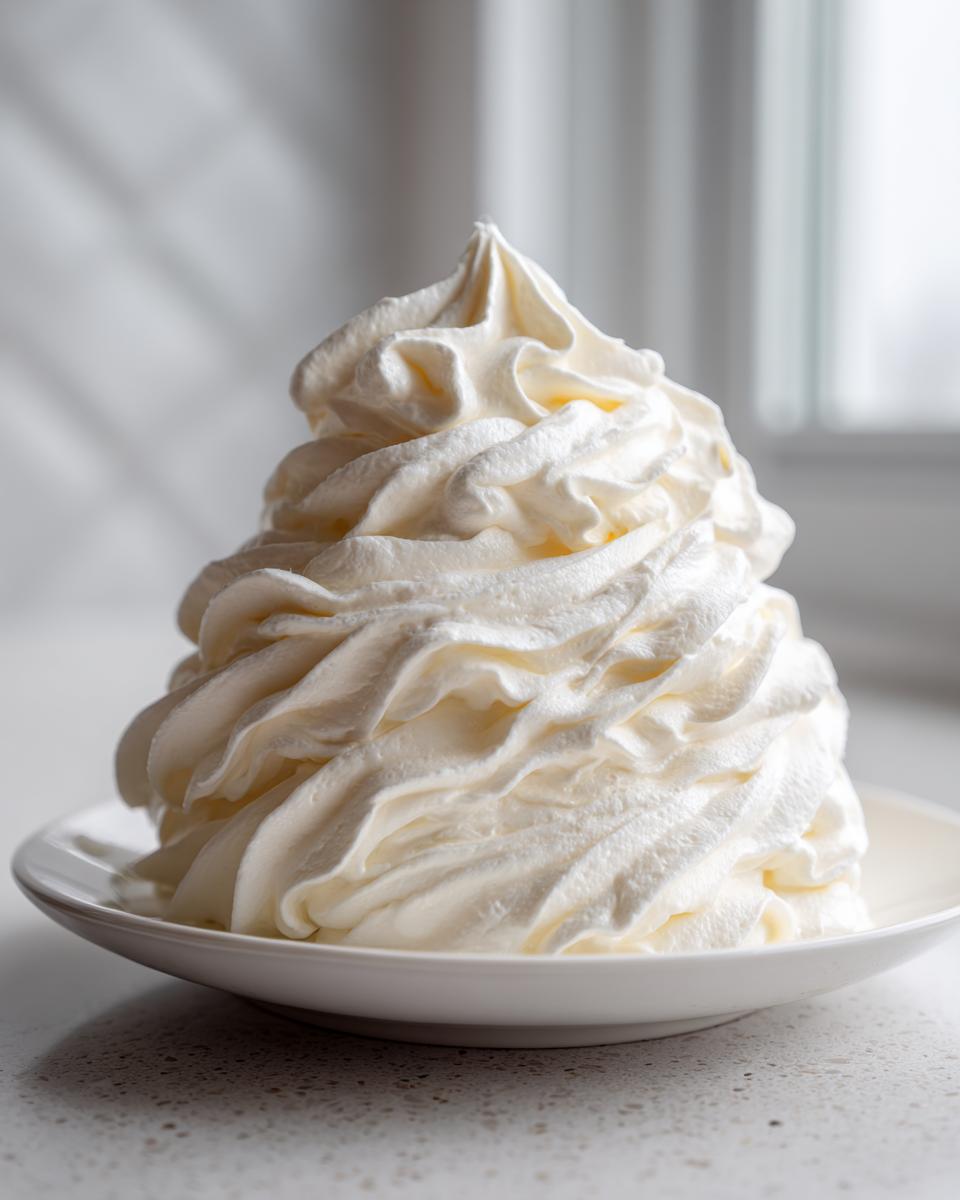
Hello there, welcome to Frosted Fancies! I’m Katie, and I am so excited you’re here looking for the secret to truly magnificent frosting. Forget those gritty, overly sweet toppings you sometimes get. Today, we’re diving deep into what I consider the gold standard: our **vanilla buttercream frosting**. This isn’t just any recipe; it’s the ultimate guide for achieving a texture that is unbelievably smooth, perfectly fluffy, and—this is key—holds its shape like a dream for all your piping and decorating needs.
The biggest thing I want you to take away today is reliability. After years spent in professional test kitchens understanding the physics of texture, I promise you this recipe works every single time. We’re ditching the cookbook hassle because this magic happens in about ten minutes flat, and you don’t even need the stove!
- Why This is the Ultimate Vanilla Buttercream Frosting Guide
- Ingredients Needed for Perfect Vanilla Buttercream Frosting
- How to Prepare Creamy Buttercream Without Heating: Step-by-Step Instructions
- Tips for Achieving Smooth Buttercream Method Success with Vanilla Buttercream Frosting
- Making Your Vanilla Buttercream Frosting Perfect for Piping
- Storage and Reheating Instructions for Your Vanilla Cake Icing Recipe
- Frequently Asked Questions About Classic American Buttercream
- Estimated Nutritional Data for Your Vanilla Buttercream Frosting
- Share Your Success with This No-Fuss Frosting Recipe
Why This is the Ultimate Vanilla Buttercream Frosting Guide
If you are searching for the absolute best buttercream for cakes, stop looking immediately—you’ve found it! What I love most about this recipe, and what my Food Science education helps ensure, is that we nail the texture every time. We are aiming for incredible creaminess and that beautiful, soaring fluffiness that makes decorating fun. This isn’t just about sweetness; it’s about structure! That’s why this recipe delivers the stable consistency you need for crisp borders and perfect rosettes on your cupcakes.
I’ve spent years perfecting the ratios so you get a foolproof classic American buttercream that tastes incredible without any complicated steps. Trust me, this technique sets the standard for a truly luxurious fluffy frosting recipe.
Quick Preparation Time for Your Vanilla Buttercream Frosting
You have zero time to wait around for butter to melt or sugar to dissolve, and frankly, neither do I! That’s the beauty of this method: we focus entirely on beating air into room-temperature ingredients. You get a fantastic, luscious, and absolutely smooth frosting ready to go in about ten minutes total. This is true, dreamy creamy buttercream without heating, making it fast and foolproof for those last-minute needs.
Ingredients Needed for Perfect Vanilla Buttercream Frosting
Alright, let’s talk ingredients! The reason this recipe shines as a simple dessert topping is that we only use the basics, but we use them *correctly*. I measure everything out before I even turn the mixer on; that’s my professional habit coming through! This batch yields about 5 cups, which is perfect for generously covering a standard two-layer cake.
Here is what you need for this fantastic vanilla buttercream frosting:
- 1 cup unsalted butter, softened to room temperature (This temperature is crucial, don’t skip it!)
- 4 cups powdered sugar, sifted (Trust me on the sift!)
- 1 teaspoon pure vanilla extract (Only the good stuff here!)
- 2 to 3 tablespoons heavy cream or whole milk
- A tiny pinch of salt (It cuts the sweetness beautifully)
Ingredient Substitutions for Your Homemade Vanilla Icing Tutorial
If you find yourself missing one thing, don’t panic—that happens to all of us! If you only have salted butter on hand, that’s fine, but you’ll want to skip the added pinch of salt in the main recipe. Also, heavy cream absolutely gives you a richer, more stable frosting, which is best for piping, but whole milk works in a pinch if you need something runnier for spreading.
When it comes to flavor, please use pure vanilla extract. The imitation stuff just doesn’t give you that deep, aromatic warmth that defines the perfect vanilla buttercream frosting flavor. It really makes the difference in this straightforward recipe.
How to Prepare Creamy Buttercream Without Heating: Step-by-Step Instructions
This is where the science meets the mixer, and trust me, the temperature of your butter is the single most important factor here for that smooth homemade vanilla icing tutorial result. Your butter needs to be genuinely softened—think slightly pliable if you press it with a finger, but absolutely not greasy or melted. If it’s too warm, it throws off the entire chemical reaction while we beat in the air, and we end up with soup instead of frosting!
First things first: get that butter into your stand mixer bowl with the paddle attachment running on medium speed. You want it light and fluffy. This usually takes about two full minutes. We are creating tiny air pockets here, which is how we get that gorgeous lift later on without using any weird stabilizers.
Next comes the powdered sugar, and this step requires patience! You must add it slowly, one cup at a time, keeping the mixer on low speed. If you dump it all in at once, it will create a sugar cloud that will haunt your kitchen for days. Scrape down the sides often because every speck of sugar needs to incorporate.
Once the sugar is mostly mixed in, turn the speed up to medium-high. Now, add in your vanilla extract and that pinch of salt. Let it whip! You need to let the mixer run like this for a solid three minutes. This is what builds that characteristic fluffy frosting quality we’re after.
Finally, we introduce the liquid to get that perfect piping consistency frosting. Start with 2 tablespoons of heavy cream or whole milk. Beat it hard again on medium-high for another two to three minutes. If it still feels stiff—and remember, we want it perfectly spreadable—add that last tablespoon of cream, a tiny bit at a time, until it looks like the silkiest cloud you’ve ever seen. Remember, smooth butter is the secret weapon!
Tips for Achieving Smooth Buttercream Method Success with Vanilla Buttercream Frosting
Okay, let’s talk about troubleshooting because, even with the best recipe, sometimes things go a little sideways. Achieving that perfect smooth buttercream method really comes down to ensuring your butter isn’t melted! If it gets too soft during the initial creaming, the frosting will be greasy instead of fluffy.
If you’re trying to figure out how to make stable buttercream for warm days or elaborate piping, I have a trick. After you finish the standard mixing process, I always give it one final, high-speed whip right before I bag it up for decorating. Beat it on medium-high for a full extra minute. This incorporates just a touch more air, making it stiffer without needing more sugar, which is my favorite way to lock in that beautiful decorative structure.
If your frosting is just slightly too soft when you finish, don’t rush to add more powdered sugar. That often makes it taste chalky! Instead, just pop the whole bowl into the fridge for about 10 to 15 minutes. Let it firm up just a little bit, and then give it a quick re-whip with the mixer—it’s amazing how that quick chill firms everything up beautifully!
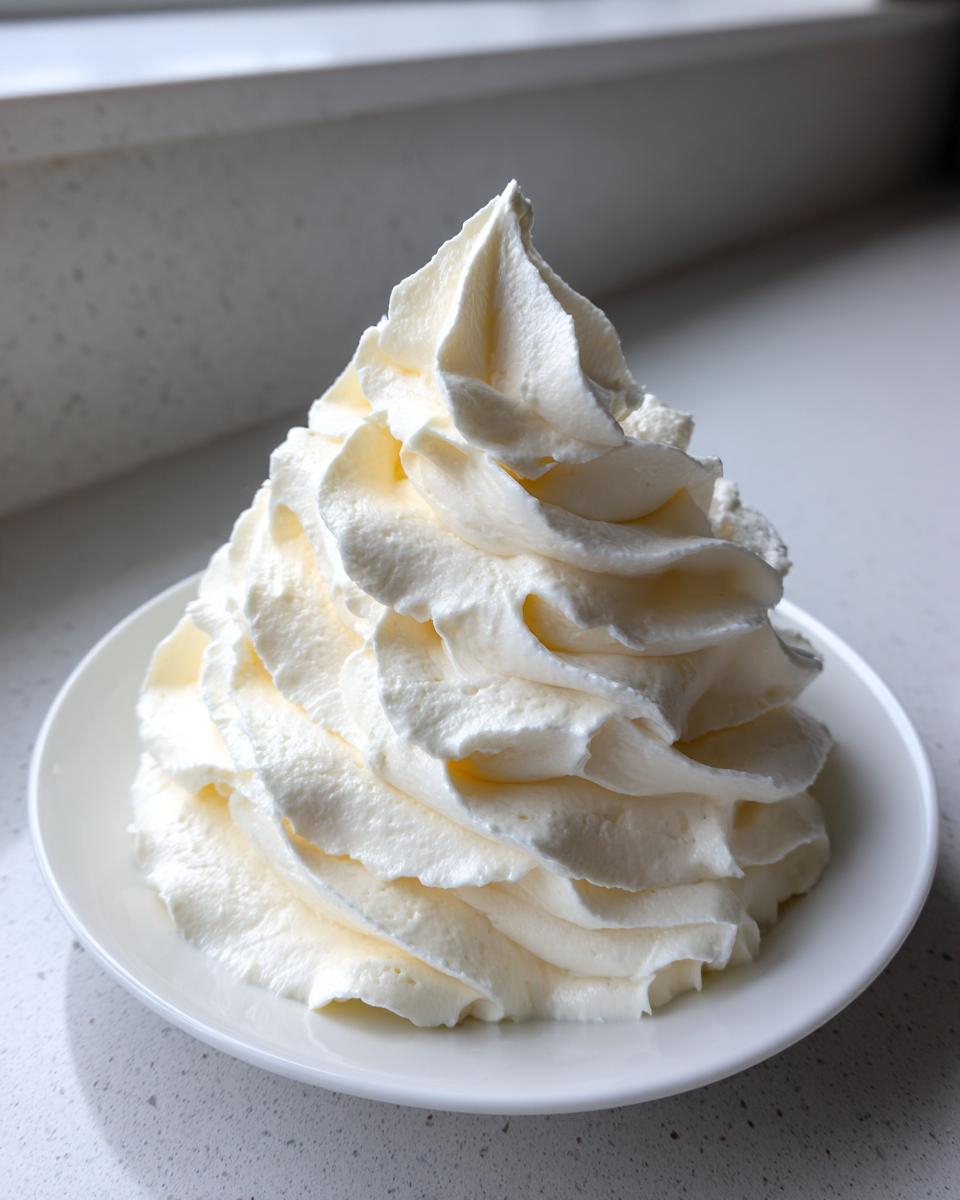
Making Your Vanilla Buttercream Frosting Perfect for Piping
So you want those gorgeous swirls on your cupcakes? That’s the moment I look forward to! This amazing vanilla buttercream frosting is already fantastic for spreading, but for that professional, crisp piping look, we need to focus on air incorporation, which is what Step 5 in the instructions is all about.
Once you’ve added your final splash of cream and everything looks smooth, turn the mixer up to medium speed and just let it run for one solid, extra minute. This process stabilizes the texture, making it stiff enough to hold sharp edges of a star tip without collapsing. If you find your mixture is gorgeous but just a hair too soft for your liking on a warm day—and this is critical for a sturdy buttercream recipe for cupcakes—don’t immediately panic and dump in more sugar.
Instead, use the chilling trick I mentioned earlier! Put the bowl in the fridge for maybe 10 minutes, just until the edges start to firm up slightly. Then, bring it straight back to the mixer and give it a quick 30-second whip. That simple step locks in the structure you need for perfect, detailed decorating work.
Storage and Reheating Instructions for Your Vanilla Cake Icing Recipe
One of the best things about making this vanilla buttercream frosting yourself is you can make a big batch and save some for later! I always tell my readers that making frosting in advance saves so much stress when you are already juggling cake layers. If you have any leftover, you need to store it correctly to maintain that perfect texture we worked so hard to achieve.
For short-term storage, say a day or two, storing the frosting at cool room temperature is usually fine—just make sure it’s tightly covered with plastic wrap pressed directly onto the surface so it doesn’t develop a hard skin. If you need to keep it longer, or if your kitchen is super warm, move it to the refrigerator. Again, press plastic wrap right onto the surface, and then seal the container. This helps keep that lovely vanilla scent locked in and protects it from absorbing any weird fridge smells!
Now, here’s the crucial part about bringing refrigerated frosting back to life. You absolutely cannot use it straight from the fridge—it will be rock hard and completely unusable for spreading or piping. You have to let it sit on the counter for a good hour or so until it softens up to resemble that perfect room temperature butter we started with.
Once it’s soft, you need to **re-whip** it. Seriously, don’t skip this! Just use your mixer on medium speed for about 2 to 3 minutes. That whipping action reincorporates the air that settled while it was chilling, instantly turning it back into that impossibly creamy, light, and gorgeous vanilla buttercream frosting that looks and tastes freshly made. Trust me; that quick re-whip is the secret to making your vanilla cake icing recipe last!
Frequently Asked Questions About Classic American Buttercream
I know sometimes you just need quick answers, especially when you’re in the middle of baking for a birthday party! Since I developed this recipe using my background in food science, I want to give you definitive answers so you always get that gorgeous texture. This is truly the easy vanilla frosting recipe you’ll rely on again and again.
Can I make this vanilla buttercream frosting ahead of time?
Absolutely, you can! This classic American buttercream is great for making ahead. Just seal it tightly in an airtight container—make sure the plastic wrap touches the surface of the frosting to prevent a skin from forming—and keep it in the fridge for up to a week. Remember what I stressed earlier? You *must* bring it back to room temp and re-whip it thoroughly to restore that fluffy texture before you use it on your cakes!
Why is my easy vanilla frosting recipe grainy?
Graininess almost always comes down to one of two things, and this is where baking science comes in handy! First, if you didn’t sift your powdered sugar, you’ll get lumps that don’t dissolve. Second, if you stopped mixing too soon, the sugar granules haven’t fully been suspended in the fat. You need that full beating time—especially after adding the liquid—to dissolve those little sugar crystals and achieve that unbelievably smooth buttercream method!
Estimated Nutritional Data for Your Vanilla Buttercream Frosting
I always get asked about the numbers, and I totally get it! Even though this is my favorite treat, knowing what’s inside is important for planning those big celebrations. Since this vanilla buttercream frosting uses simple, whole ingredients, we can estimate pretty closely.
Please remember that these figures are calculated based on standard ingredient databases for the recipe as written, so they are estimates only—not guarantees! This is for a serving size of about 1/4 cup, which is generous when you’re heavily frosting a large cupcake or cake slice.
Here is the breakdown:
- Calories: Approximately 350 per serving
- Fat: About 19 grams (including 12 grams of saturated fat)
- Sugar: Yikes! About 45 grams (that’s the powdered sugar, folks!)
- Carbohydrates: Around 47 grams
- Protein: Very minimal, about 1 gram
- Cholesterol: Around 50mg
It’s a treat, not a health food, and that’s why it tastes so incredibly dreamy against a plain vanilla cake! This information should help you when calculating servings for those big party spreads.
Share Your Success with This No-Fuss Frosting Recipe
I truly hope this guide to the vanilla buttercream frosting has given you the confidence to whip up something amazing! I’d absolutely love to hear what you used it on. Did you make a perfect birthday cake? Or perhaps you finally decorated those cupcakes just the way you imagined? Head over and leave a rating—five stars if it earned it! I read every comment and adore seeing your beautiful photos, like those over at my friend’s blog. Don’t forget to drop by Emma’s studio for more visual inspiration!
PrintClassic Vanilla Buttercream Frosting: Creamy and Fluffy Recipe
This is the best vanilla buttercream frosting recipe for achieving a smooth, creamy, and fluffy texture perfect for piping on cakes and cupcakes. It uses simple ingredients and requires no cooking.
- Prep Time: 10 min
- Cook Time: 0 min
- Total Time: 10 min
- Yield: About 5 cups 1x
- Category: Dessert Topping
- Method: Mixing
- Cuisine: American
- Diet: Vegetarian
Ingredients
- 1 cup unsalted butter, softened to room temperature
- 4 cups powdered sugar, sifted
- 1 teaspoon pure vanilla extract
- 2 to 3 tablespoons heavy cream or whole milk
- Pinch of salt
Instructions
- Place the softened butter in the bowl of a stand mixer fitted with the paddle attachment. Beat the butter on medium speed until it is light and creamy, about 2 minutes.
- Gradually add the sifted powdered sugar, one cup at a time, mixing on low speed until just combined after each addition. Scrape down the sides of the bowl as needed.
- Add the vanilla extract and salt. Increase the mixer speed to medium-high and beat for 3 minutes until the mixture is light and fluffy.
- Add 2 tablespoons of heavy cream or milk. Beat again on medium-high speed for another 2 to 3 minutes until the frosting reaches your desired consistency. If the frosting seems too stiff, add the remaining tablespoon of cream, one teaspoon at a time, until smooth and spreadable.
- If you plan to pipe the frosting, beat it for an additional minute on medium speed to incorporate more air for a stable consistency.
Notes
- For the smoothest texture, make sure your butter is truly softened, not melted.
- Sifting the powdered sugar prevents lumps in your final frosting.
- If the frosting seems too soft for piping, chill it in the refrigerator for 10 to 15 minutes, then briefly re-whip before using.
- This recipe makes enough frosting to generously cover one 8-inch two-layer cake or about 18 standard cupcakes.
Nutrition
- Serving Size: 1/4 cup
- Calories: 350
- Sugar: 45
- Sodium: 45
- Fat: 19
- Saturated Fat: 12
- Unsaturated Fat: 7
- Trans Fat: 0
- Carbohydrates: 47
- Fiber: 0
- Protein: 1
- Cholesterol: 50