
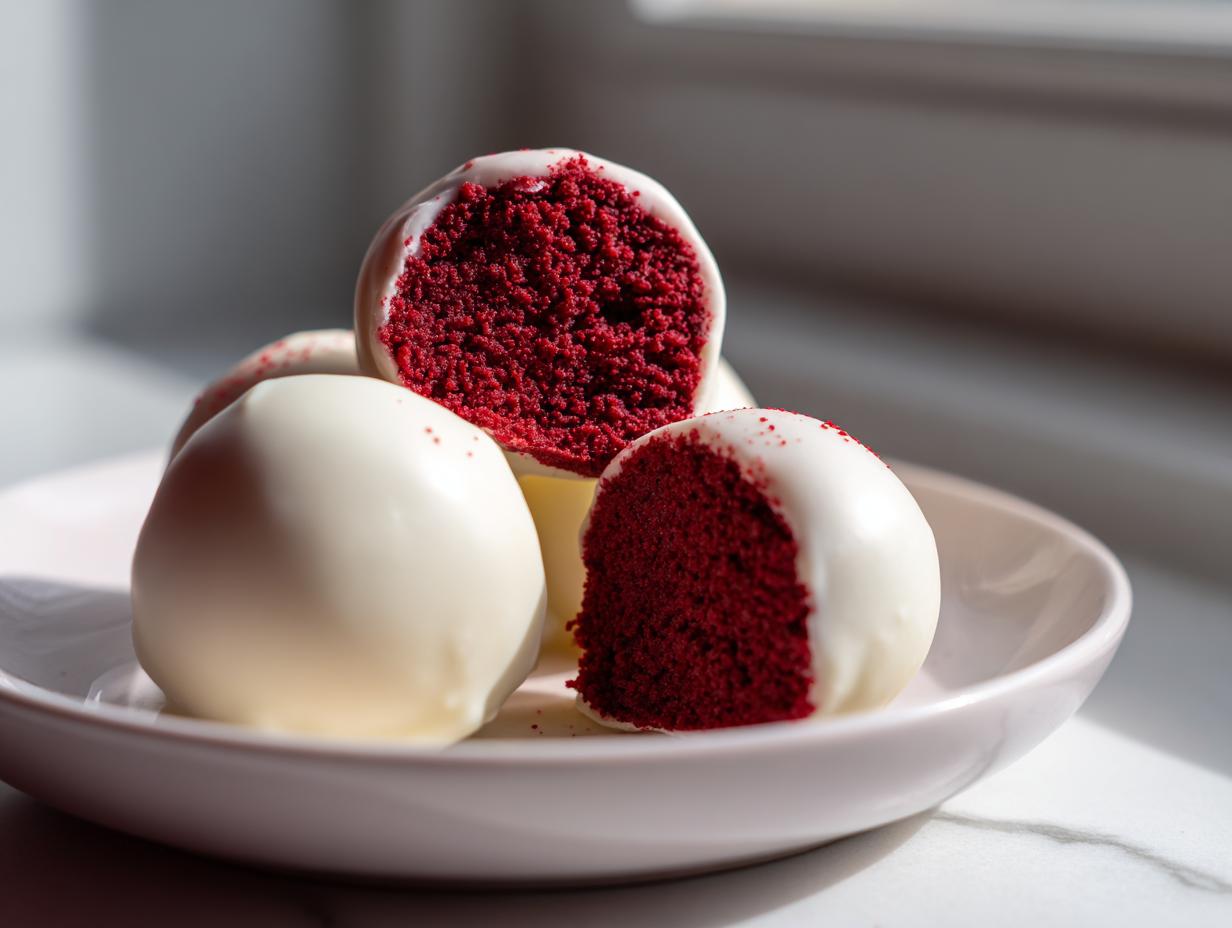
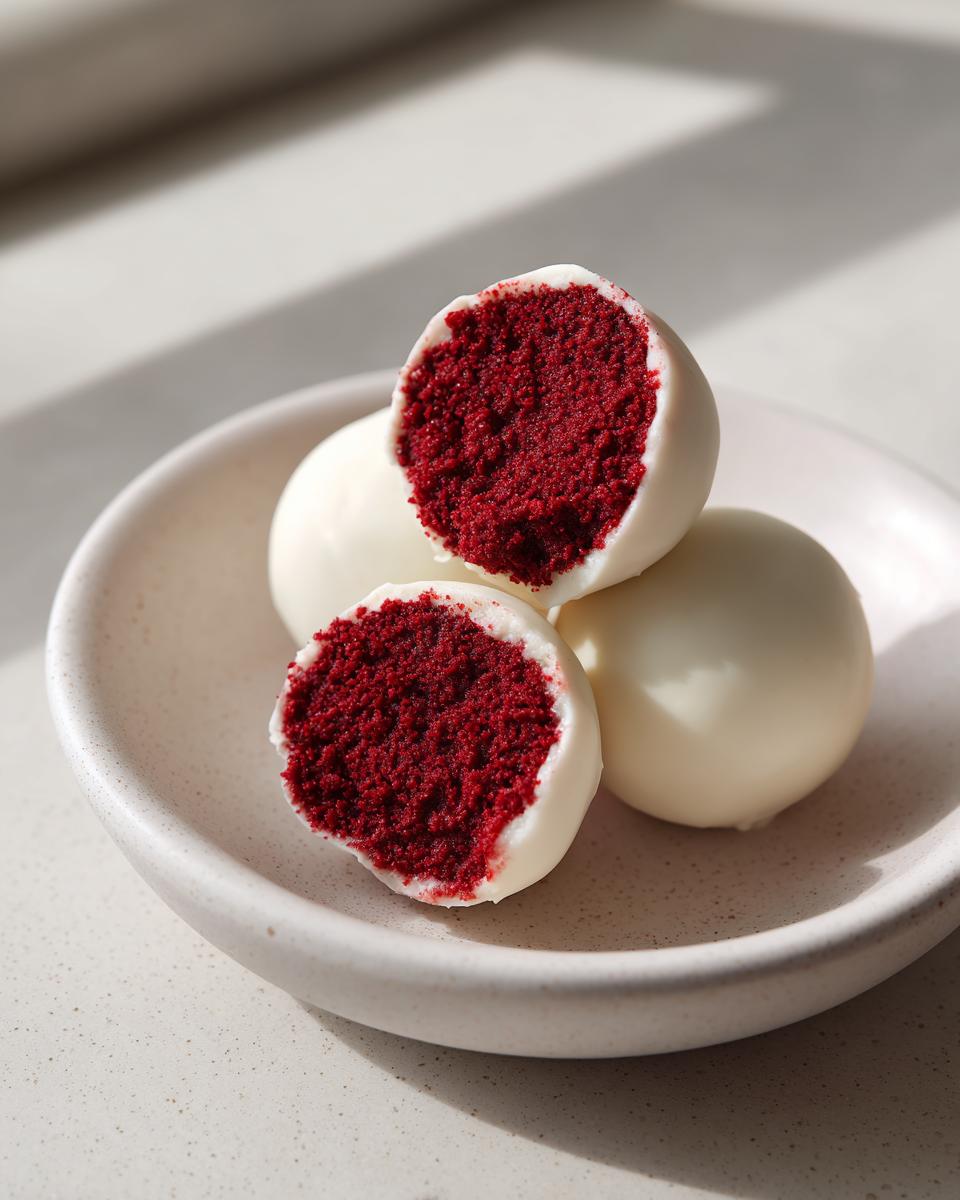
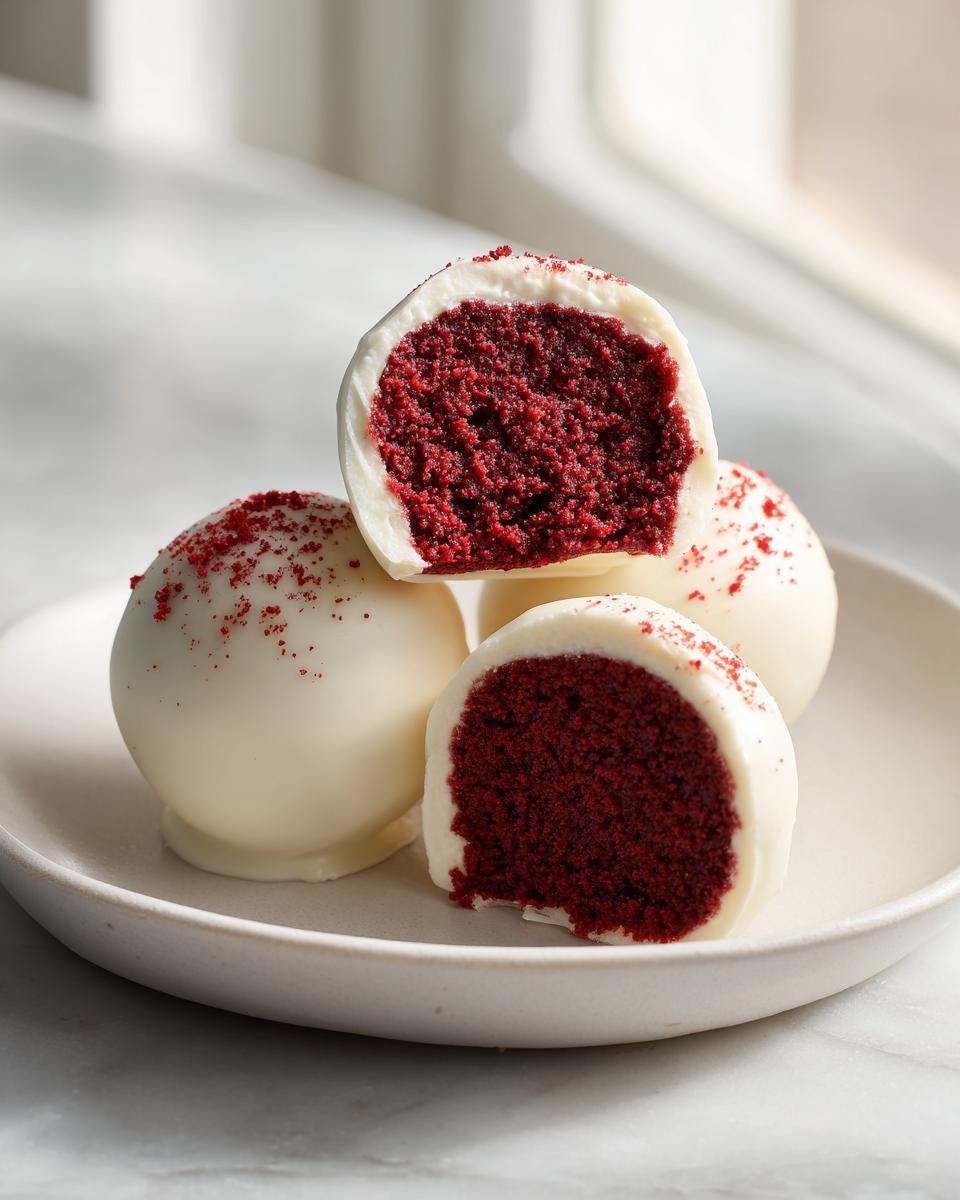
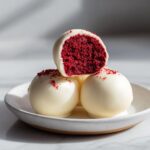
Hello there, and welcome back to Frosted Fancies! I’m Katie, and if you’re anything like me, you absolutely adore a dessert that looks fancy but comes together with practically no fuss. That’s why I’m thrilled to share my foolproof guide to making the most irresistible red velvet cake pops. We’re talking melt-in-your-mouth moist texture, that essential tang from the cream cheese filling, and a smooth, perfect white chocolate coating every single time.
As a Food Scientist, I’ve spent years breaking down exactly what makes a dessert successful, and these little gems are pure perfection. No stressful baking required, just simple assembly that looks like it took hours! These red velvet cake pops are quickly becoming my go-to for parties and gifting because they always get rave reviews. Trust me, you’re going to love how simple this recipe is!
- Why This is the Best Red Velvet Cake Pops Recipe You Will Make
- Gathering Ingredients for Your Red Velvet Cake Pops
- The Essential Equipment List for Perfect Dipping
- How to Prepare Moist Red Velvet Cake Pops Step-by-Step
- Tips for Success with Red Velvet Cake Pops
- Festive Occasions and Red Velvet Cake Pops Variations
- Storing and Serving Your Deliciously Easy Desserts
- Frequently Asked Questions About Red Velvet Cake Pops
- Sharing Your Red Velvet Cake Pops Creations
Why This is the Best Red Velvet Cake Pops Recipe You Will Make
I developed this recipe because I wanted red velvet cake pops that didn’t taste dry or too crumbly. Too often, cake pops are just stale cake mixed with too much frosting, but ours are different. I promise you’ll see why people keep saving this recipe!
- They are incredibly moist, thanks to a specific ratio of cake mix to cream cheese binder.
- The texture is perfect for dipping—no cracking or falling apart!
- It’s genuinely easy, even if you’ve never dipped a cake pop before. You can check out how I manage the dipping process over at another great guide for visual tips.
Achieving That Perfect Moist Red Velvet Cake Pops Texture
The secret to moistness in these red velvet cake pops isn’t just the cake mix base itself; it’s how we treat it! Combining the cake crumbs directly with the rich cream cheese frosting actually creates a truffle-like consistency. It’s moist, dense, and holds its shape perfectly after chilling. No dry crumbs here!
Simple Steps for Homemade Cake Pops for Parties
This is truly an easy cake pops tutorial start-to-finish. We aren’t baking delicate cakes from scratch here. We use a standard cake mix because it’s already formulated for a sturdy crumb, which is essential when you turn it into red velvet cake pops. It cuts down on time but keeps the flavor rich, making them perfect for whipping up before any big party.
Gathering Ingredients for Your Red Velvet Cake Pops
Okay, let’s talk ingredients! I always aim for delicious decadence that’s still easy, so we are absolutely leaning on a good quality red velvet cake mix here. Don’t worry, using that box base is what makes this one of the best red velvet cake pops recipe options out there! Remember my teaching? Science means we can use shortcuts when the math works out, and it totally does here.
You’ll notice the list is short because the magic happens in the assembly. For the full list, check out the recipe card, but keep an eye out for the specialized ingredients we use for dipping, like the moist red velvet cake pops base.
Ingredient Notes and Substitutions for Red Velvet Cake Pops
When it comes to the coating, please, please, please grab candy melting wafers instead of standard chocolate chips. Chips have stabilizers that make them super tricky to melt smoothly, and that’s how you end up with those awful cracked shells on your beautiful red velvet cake pops. Wafers melt like butter and give you that wonderful, crisp shell.
Also, if you’re making your own cream cheese frosting, just know that homemade can sometimes be thinner than store-bought. If your frosting is too runny, your cake balls might get a little messy. If you’re running low on cream cheese frosting, a few tablespoons of store-bought works wonders for keeping these red velvet cake pops easy!
The Essential Equipment List for Perfect Dipping
Before we get into the fun part—the dipping!—we need to grab our arsenal of tools. Having everything ready makes the whole process so much smoother, which is key when you’re trying to get that perfect dipped cake pop coating. Don’t skip setting up your chilling station!
You’ll need your mixing bowls, of course, but the lifesavers here are the surfaces. Grab a baking sheet to line with parchment paper for those initial chills. And for setting up the finished treats, you absolutely need something tall—I use a piece of styrofoam I keep tucked away just for this job. Remember you can see a great setup example at this helpful post!
How to Prepare Moist Red Velvet Cake Pops Step-by-Step
Alright, let’s get rolling! This is where the *magic* happens, turning that baked cake into gorgeous, bite-sized red velvet cake pops. The instructions look long, but honestly, you’re mostly waiting for things to chill, which is great because it means your active work time is super short. Follow these steps precisely, especially the chilling times, and you won’t have any issues! You can find some great troubleshooting tips for the coating over at this helpful site.
First, you need that cake crumbly. Bake your cake according to the box, let it cool completely—and I mean *completely*—then just smash it into fine crumbs in a big bowl. Don’t worry about any slightly browner edges; we are turning those into deliciousness!
Mixing the Cream Cheese Frosting Cake Pops Base
This is the critical binding step. Take your chilled cake crumbs and start adding that creamy cream cheese frosting. I like to use my hands here because you really need to feel when the mixture is right. You’re aiming for a consistency where if you grab a hunk and squeeze it, it holds its shape perfectly, like playdough. If it’s too dry, your red velvet cake pops will crumble when you roll them!
Once you get that perfect balling mixture, roll them out into small, consistent balls—I aim for about 1 to 1.5 inches. Pop those babies onto a parchment-lined tray and into the fridge for at least 30 minutes. Seriously, don’t rush this part! It firms them up so they don’t slide off the stick later.
Mastering the White Chocolate Coated Cake Balls Dipping Technique
Now for the art of the coating! Melt your white chocolate wafers gently—I mean short bursts in the microwave, stirring well every 30 seconds. If it gets too hot, it seizes up, and then you have a ruined batch of what should have been perfect white chocolate coated cake balls.
Before dipping the whole truffle, we need glue! Dip the very tip of your lollipop stick into the melted chocolate, and then stick it about halfway into a *chilled* cake ball. Back to the fridge for 10 minutes! This locks the stick in place, preventing disaster when you dip them large. Once they are set, dip the entire ball in the chocolate, letting the excess drip off. You can see some great close-ups on how to avoid pooling chocolate at this source. Immediately decorate, then stand them up in a styrofoam block or tall glass to dry completely. Keep practicing your technique, and your red velvet cake pops will look professionally dipped!
Tips for Success with Red Velvet Cake Pops
Even with an easy recipe like this, a few little tricks from my test kitchen can really take your red velvet cake pops from good to absolutely show-stopping! I’ve learned these the hard way so you don’t have to waste any chocolate!
First, that chilling step is non-negotiable, but if your balls seem slightly greasy after coming out of the fridge, just wipe them lightly with a paper towel before dipping. That slight film will fight the chocolate and cause cracking!
Here are my must-know tips for achieving that restaurant-quality finish on your red velvet cake pops:
- Use Coconut Oil or Shortening in Your Chocolate: If your melted white chocolate seems super thick—and it often does—stir in about a teaspoon of shortening or refined coconut oil. This thins the consistency just enough so that you can get those beautiful, thin coats. You want the chocolate to coat, not glob!
- Keep the Chocolate Warm, Not Hot: Overheated chocolate is the number one reason coatings seize up or crack when they cool down. If you feel like your bowl is getting too hot while you work, place it over a bigger bowl of warm water for just a minute to keep the temperature consistent without scorching it.
- Freezing for Extra Stability: If you are making a huge batch of red velvet cake pops and need them to be rock solid before dipping (especially if your kitchen is warm), try popping the rolled balls in the freezer for 15 minutes instead of the fridge for 30. They’ll be super firm going into that hot chocolate, which helps prevent crumbling. You can find more great assembly tips for your red velvet cake pops over at this resource.
Festive Occasions and Red Velvet Cake Pops Variations
Honestly, once you master making these red velvet cake pops, you’ll be looking for excuses to make them all year long! They are the perfect little presentation for any celebration. Of course, the color is absolutely screaming Valentine’s Day, and I have a whole board full of Valentine Cake Pop Ideas if you want to get super focused on hearts and romance.
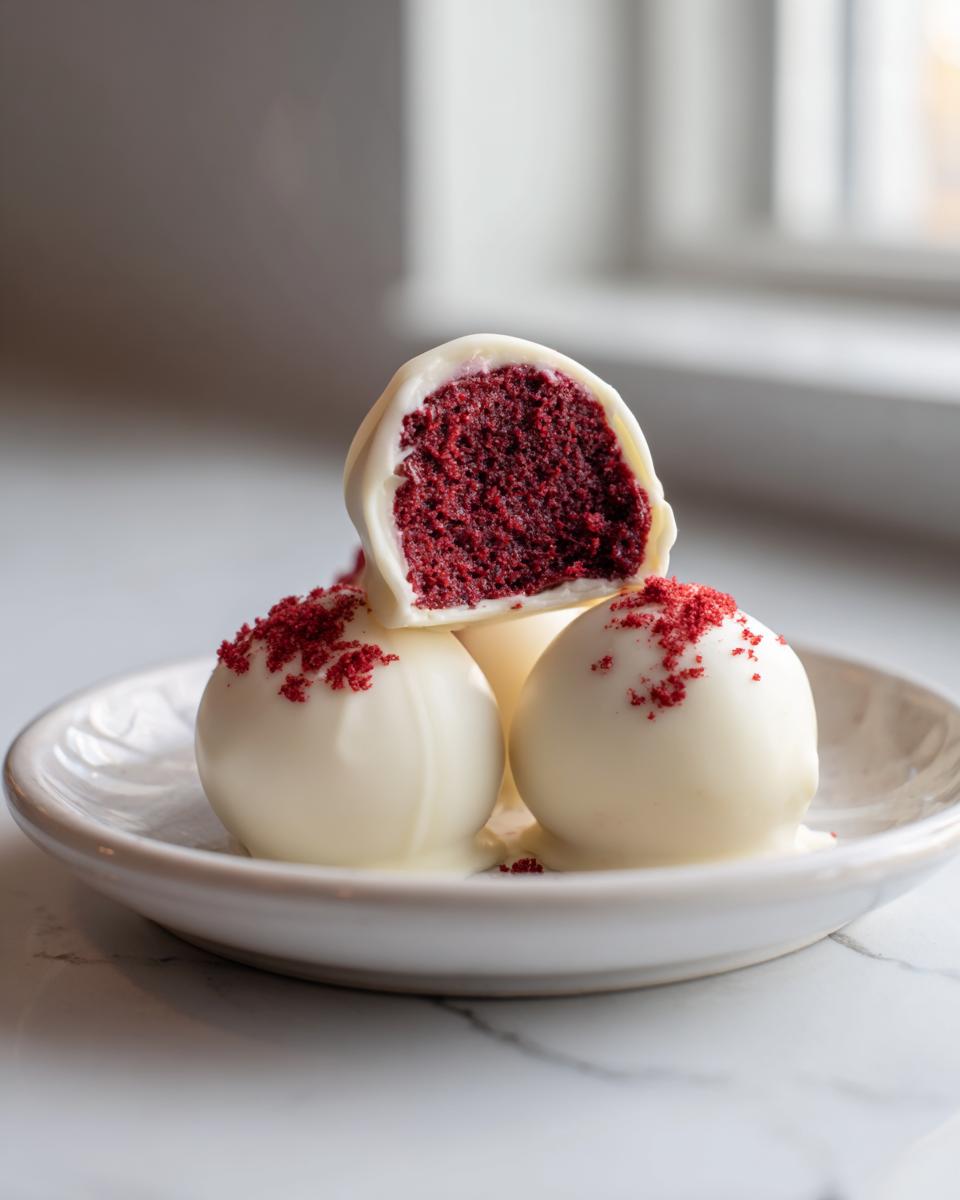
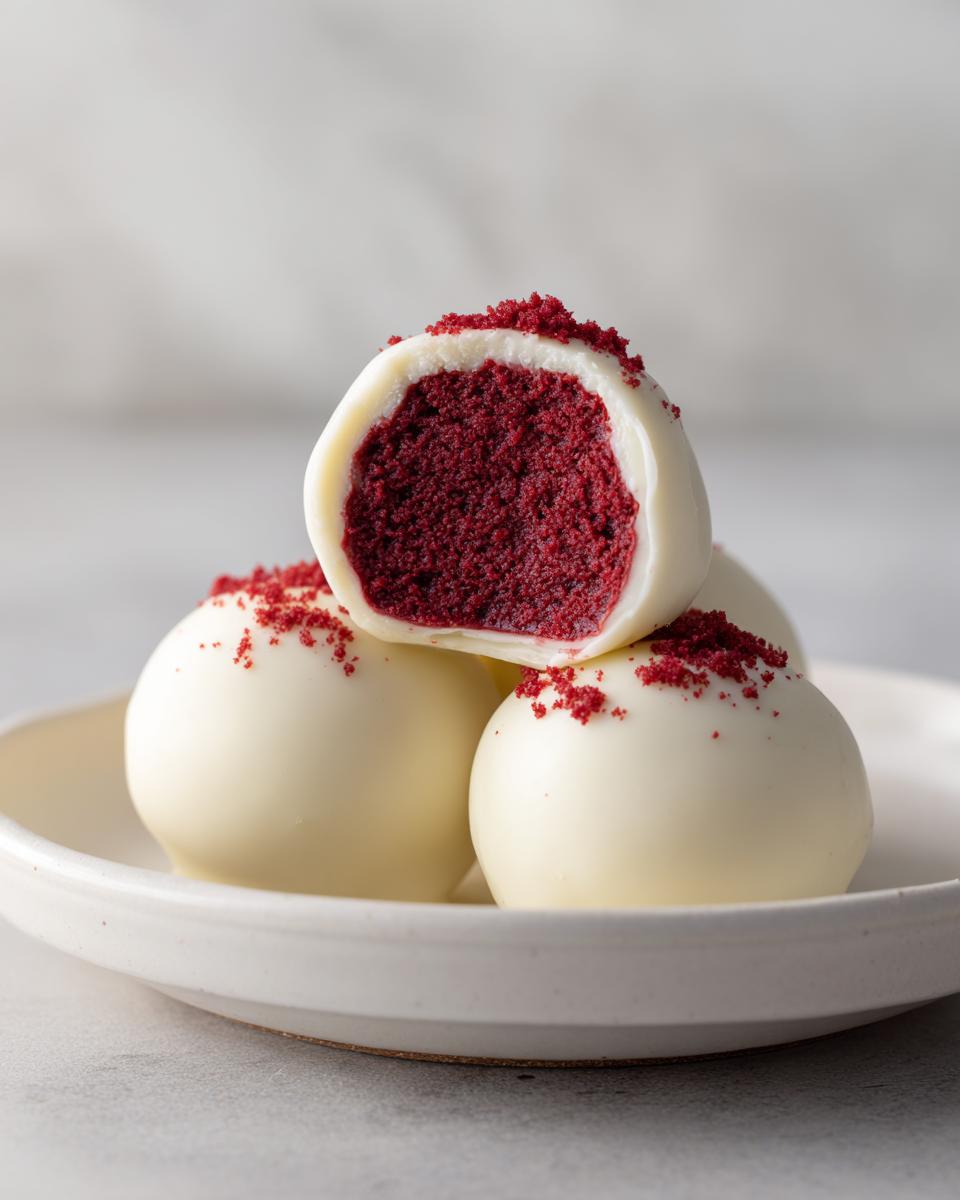
But don’t stop there! These treats shine at birthdays, showers, or just because you need a vibrant snack. For general parties, keeping it simple is best. Stick with the white chocolate coating and grab some festive sprinkles. Red glitter sprinkle dust or white nonpareils look fantastic against that deep red cake peeking through. We’ve all seen those gorgeous examples of professional-looking treats, like those mentioned here!
If you’re making these for Christmas, skip the red sprinkles and opt for green sugar crystals or little gold dragées. For birthdays, toss them in rainbow jimmies! If you want to get a little fancy, melt a tiny bit of extra dark chocolate and drizzle it across the white coating once it’s set. That contrasting color—dark brown over bright red and white—really elevates these red velvet cake pops. They are such versatile, adorable bite sized sweets!
Storing and Serving Your Deliciously Easy Desserts
Once you’ve mastered the dipping—which you totally will!—the next question is obviously how to keep these beauties fresh. Because we are using cream cheese frosting in the center, I always recommend storing these cake pops in an airtight container in the refrigerator. They stay fantastic for a full week that way!
When you want to serve them, pull them out about 20 or 30 minutes before your guests arrive. Letting them warm up just a bit softens the cake center beautifully—think of it like serving cold fudge versus letting it temper slightly. If you want to see my favorite trick for keeping them perfectly upright while they temper, check out how they handle setting up the finished product over at this handy guide. They’re always best when served just slightly cooler than room temperature!
Frequently Asked Questions About Red Velvet Cake Pops
I know you might still have a few lingering doubts about making these red velvet cake pops, especially if your past attempts at dipping went sideways! Don’t worry; I’ve been there. Here are the most common questions I get when folks try this recipe for the first time.
Why did my white chocolate coating crack after dipping my red velvet cake pops?
Oh, the dreaded crack! This is almost always temperature related when making white chocolate coated cake balls. It happens when the cake ball is too cold or the chocolate is too hot when you dip it. If the cake is freezing, the hot chocolate contracts too quickly as it cools, causing that sharp split. Remember my tip: make sure those cake balls are well-chilled, but let them sit for five minutes *before* dipping, or use that little bit of shortening to thin the chocolate so it cools down gently around the ball. You can dive deeper into texture fixes at this external resource.
What happens if I skip chilling the cake balls?
If you skip chilling, you’re asking for trouble! Think about it: you are rolling moist cake mixed with soft frosting into balls. If they aren’t firm, they will absolutely crumble or flatten out when you try to insert the stick, or worse, they might fall right off into your melted chocolate! So, for reliable homemade cake pops for parties, that chill time is mandatory. You can learn more about getting the base right in my detailed steps over at this guide.
Can I use a different frosting instead of cream cheese for my red velvet cake pops?
You certainly *can*, but you’ll lose some of that signature tang that balances the sweetness of the cake and the white chocolate coating! If you absolutely need a substitution, a simple vanilla buttercream will work as the binder, giving you great moist red velvet truffles. However, the cream cheese frosting is part of what makes this specific red velvet cake pops recipe shine, so I highly recommend sticking to it if you can!
Are these cake pops safe to leave out on a dessert table?
Because we use cream cheese frosting as the binder, my professional advice is to treat them like a dairy item. For short events (say, 2 to 3 hours indoors), they are probably fine, especially if they are dipped in chocolate. But if you are preparing a large spread for a party or using them for Valentine’s Day cake pop ideas, keep them refrigerated until just before you serve them. It’s always better to err on the side of caution with those dairy fillings!
Sharing Your Red Velvet Cake Pops Creations
Whew, you did it! Now that you have a tray full of those gorgeous red velvet cake pops, I absolutely need to know what you think! Please hop down to the comments below and give this recipe a star rating. If you took pictures of your amazingly smooth white chocolate coating, tag me on social media! I love seeing your take on these deliciously easy desserts. You can share your success stories on social media inspired by posts like this one, or show off that perfect coating inspired by this amazing example! Happy baking, everyone!
PrintEasy & Moist Red Velvet Cake Pops with Cream Cheese Filling
Welcome! We’re so glad you’re here. Create these delicious, bite-sized red velvet cake pops using a simple recipe featuring a moist red velvet cake base, a creamy cream cheese filling, and a smooth white chocolate coating. These treats are perfect for parties, gifting, or Valentine’s Day celebrations.
- Prep Time: 30 min
- Cook Time: 30 min
- Total Time: 1 hour 40 min
- Yield: 24 cake pops 1x
- Category: Dessert
- Method: No-Bake Assembly
- Cuisine: American
- Diet: Vegetarian
Ingredients
- 1 box (15.25 oz) red velvet cake mix
- Ingredients called for on cake mix box (usually eggs, oil, water)
- 1 cup cream cheese frosting (store-bought or homemade)
- 1 cup white chocolate melting wafers
- 1 tablespoon shortening or coconut oil (optional, for thinning coating)
- Lollipop sticks
- Optional decorations: Red sprinkles, white chocolate drizzle
Instructions
- Bake the red velvet cake according to the package directions using the ingredients listed on the box. Let the cake cool completely on a wire rack.
- Once cool, crumble the entire cake into fine crumbs into a large bowl. Discard any overly browned edges.
- Add the cream cheese frosting to the cake crumbs. Mix thoroughly with a fork or clean hands until the mixture is uniform and holds together when squeezed. This forms your cake truffle base.
- Roll the mixture into uniform balls, about 1 to 1.5 inches in diameter. Place the rolled balls on a parchment-lined baking sheet.
- Chill the cake balls in the refrigerator for at least 30 minutes. This step is important for preventing them from falling apart during dipping.
- Prepare your dipping station. Melt the white chocolate wafers according to package directions, usually in a microwave-safe bowl in 30-second intervals, stirring well between each interval. Stir in the shortening or coconut oil if the chocolate seems too thick for smooth dipping.
- Dip the tip of a lollipop stick about halfway into the melted white chocolate and insert it about halfway into a chilled cake ball. This acts as glue. Return the sheet to the refrigerator for another 10 minutes to set the sticks firmly.
- Hold the stick and dip the entire cake ball into the melted white chocolate, rotating to coat completely. Tap the stick gently against the side of the bowl to let excess chocolate drip off.
- Immediately apply any desired sprinkles or decorations before the coating sets.
- Place the finished red velvet cake pops upright in a styrofoam block or a tall glass to dry completely.
- Once the coating is hard, your easy red velvet cake pops are ready to serve.
Notes
- For the smoothest white chocolate coating, use high-quality melting wafers designed for candy making.
- If you want a slightly firmer center, freeze the rolled balls for 15 minutes instead of just chilling them.
- To achieve a perfect coating texture, keep your melted chocolate warm but not hot, as overheating causes seizing or cracking when cooled.
Nutrition
- Serving Size: 1 cake pop
- Calories: 250
- Sugar: 25g
- Sodium: 150mg
- Fat: 15g
- Saturated Fat: 8g
- Unsaturated Fat: 7g
- Trans Fat: 0g
- Carbohydrates: 28g
- Fiber: 1g
- Protein: 3g
- Cholesterol: 20mg