
If you’ve ever dreamt of mastering a show-stopping authentic Italian dessert but felt intimidated by the complexity, stop right there! I, Katherine Hayes, promise you that this amazing tiramisu recipe is your new best friend. It’s completely no-bake, unbelievably easy, and tastes exactly like the real deal you’d get in Rome. Having spent years in professional test kitchens learning the science behind what makes food work, I’ve perfected this method. You don’t need fancy skills—just a few good ingredients—to create this foolproof, luscious dessert. Get ready for the best homemade tiramisu recipe you’ll ever try!
- Why This Easy Tiramisu Recipe Works Every Time
- Gathering Ingredients for Your Classic Tiramisu Recipe
- Simple Tiramisu Instructions for Assembly
- Making Ahead Desserts: Chilling the Tiramisu Recipe
- Serving Your Homemade Tiramisu
- Tips for the Best Tiramisu Recipe Results
- Storage and Reheating Instructions for This Coffee Dessert Recipe
- Frequently Asked Questions About This Tiramisu Recipe
- Nutritional Estimates for This Tiramisu Recipe
- Share Your Experience with This Tiramisu Recipe
Why This Easy Tiramisu Recipe Works Every Time
I get it—you want that rich, creamy, coffee-infused flavor without turning on the oven or worrying about fussy steps. That’s why this tiramisu recipe is my go-to for company! We skip the baking and focus entirely on balancing those amazing Italian flavors. It’s truly built for home cooks who want minimum effort and maximum wow factor, especially when you need great make head desserts.
Here are the little secrets that make this version so reliable:
Achieving the Perfect Mascarpone Cream Recipe Texture
The secret here is temperature and timing! We use room-temperature mascarpone cheese, which blends like velvet with the yolks and sugar. More importantly, we fold the stiffly whipped heavy cream in by hand, gently! This keeps all those lovely air bubbles intact. Because we whip the cream separately and fold it in, the cream stays light; it’s an excellent way to make a safer, delicious mascarpone cream recipe without any raw egg worries.
The Secret to Espresso Soaked Ladyfingers
This is where most people mess up their no bake tiramisu! You absolutely cannot let the ladyfingers drown in the coffee. They are sponges, so if you soak them for too long, your whole dessert turns into soup once it chills. I just do a quick, one-second dip per side in the cooled espresso. That’s it! You want them mostly dry on the outside but just slightly softened inside. These perfectly espresso soaked ladyfingers are the structural key to a clean slice.
Gathering Ingredients for Your Classic Tiramisu Recipe
Okay, let’s talk about the supplies. When we’re making an easy tiramisu, quality really matters because there’s nowhere for sub-par ingredients to hide! Since this is a classic tiramisu recipe, we need the right combination of strong coffee and that glorious mascarpone. Don’t stress too much, though; these are easy items to find! Precision here is my secret weapon for getting that perfect, rich flavor without fuss. You’ll be so pleased with how simple this looks coming together!
Ingredients for the Coffee Soak and Ladyfingers
This is where our coffee magic happens. Remember what I said about not drowning those cookies? Well, we need the right liquid for that quick dip! You’ll need about 1 1/2 cups of very strong coffee—I mean, *espresso* strong, cooled down completely. If you want that sophisticated kick, grab your coffee liqueur or dark rum; it’s optional, but oh boy, does it deepen the flavor! Next up are the biscuits themselves. You’ll need one whole package of ladyfingers—usually about 24 to 30 cookies depending on the brand. Finally, keep the cocoa powder handy for dusting later!
Ingredients for the Creamy Mascarpone Layer
This cream needs structure and richness, so pay close attention to the temperatures here! You absolutely must soften your 8 ounces of mascarpone cheese to room temperature; if it’s cold, it won’t blend smoothly and you’ll get lumps! Then grab your 2 large egg yolks and 1/2 cup of regular granulated sugar for that pale yellow base. For the lightness, you need 1 1/2 cups of *cold* heavy whipping cream—keep that in the fridge until the very last second. A tiny splash of vanilla extract ties it all together. See? Nothing too crazy, just good things!
Simple Tiramisu Instructions for Assembly
Now that all our elements are ready—the coffee is cool, the mascarpone is soft, and the cream is stiff—it’s time for the fun part! This is where the magic happens, but remember, we’re building, not baking! These simple tiramisu instructions mean we are done with active work in about 20 minutes flat. The rest is just chilling time, which is honestly the easiest part of any tiramisu recipe.
Preparing the Coffee Soak and Mascarpone Base
First thing: take your cool espresso mixture (with that optional liqueur mixed in!) and put it in a shallow bowl. It needs to be ready for quick dips. Next, we tackle the base. In a separate, clean bowl, grab your egg yolks and sugar. You need to whisk this aggressively until it turns pale yellow and gets a bit thick. Trust me, that color change is your visual cue that the sugar has dissolved properly. Once you hit that pale stage, gently whisk in your room-temperature mascarpone and the vanilla. My personal tip? Make sure that mascarpone is truly soft—if it fights you, it’ll clump! Just whisk until it’s smooth enough to coat the back of a spoon.
Folding the Whipped Cream into the Mascarpone
This step is *critical* for achieving that ethereal texture that makes this dessert so famous. Remember that heavy cream you chilled really well? Whip it until you get stiff peaks—they should hold their shape proudly when you lift the beaters. Now, you have to be gentle! Take about a third of that whipped cream and fold it carefully into the mascarpone base just to lighten it up a bit. Then, add the remaining cream in two batches. You must fold—don’t stir! We’re incorporating air here to make that glorious, velvety filling for our creamy dessert recipe. Stop as soon as you see no white streaks.
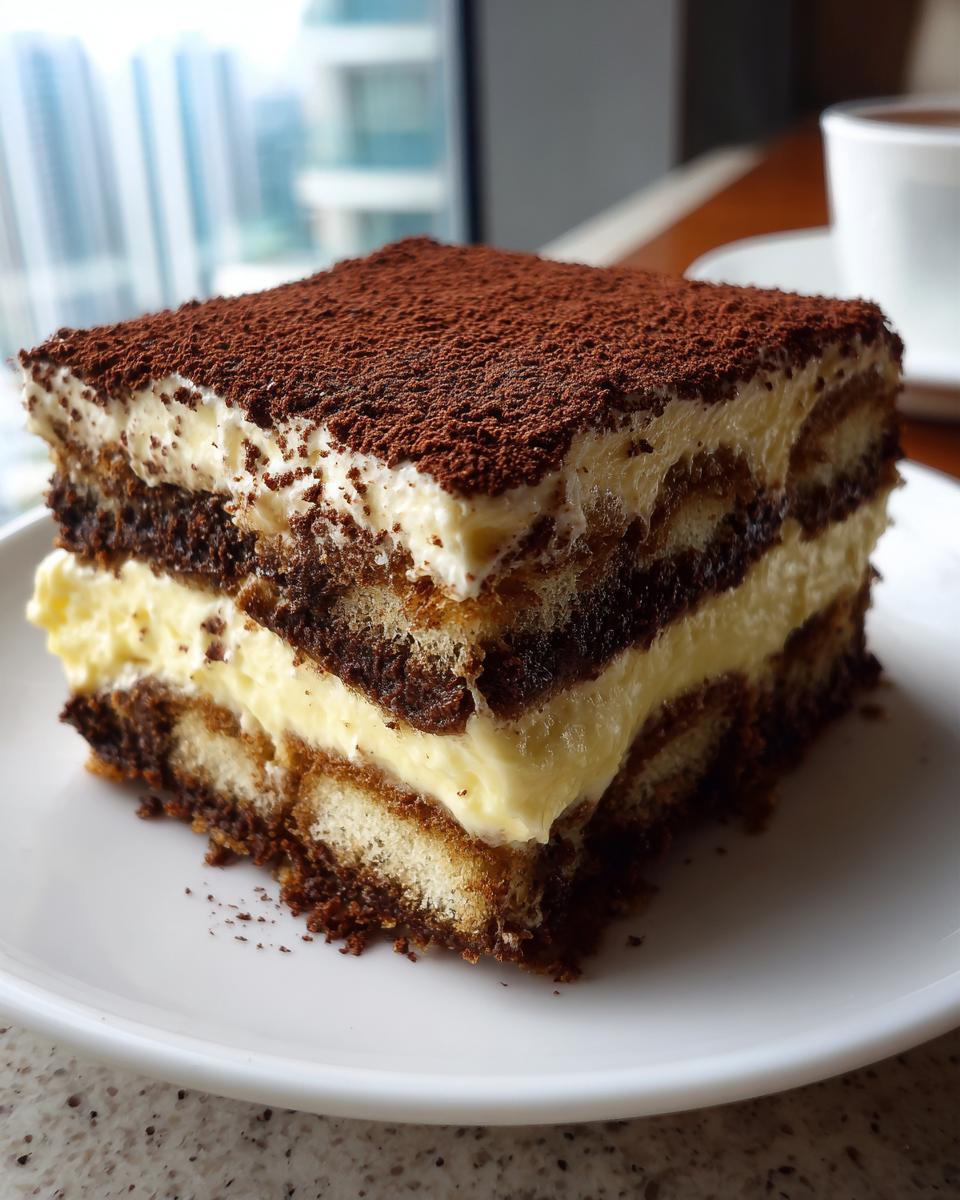
Assembling Your Layered Coffee Dessert
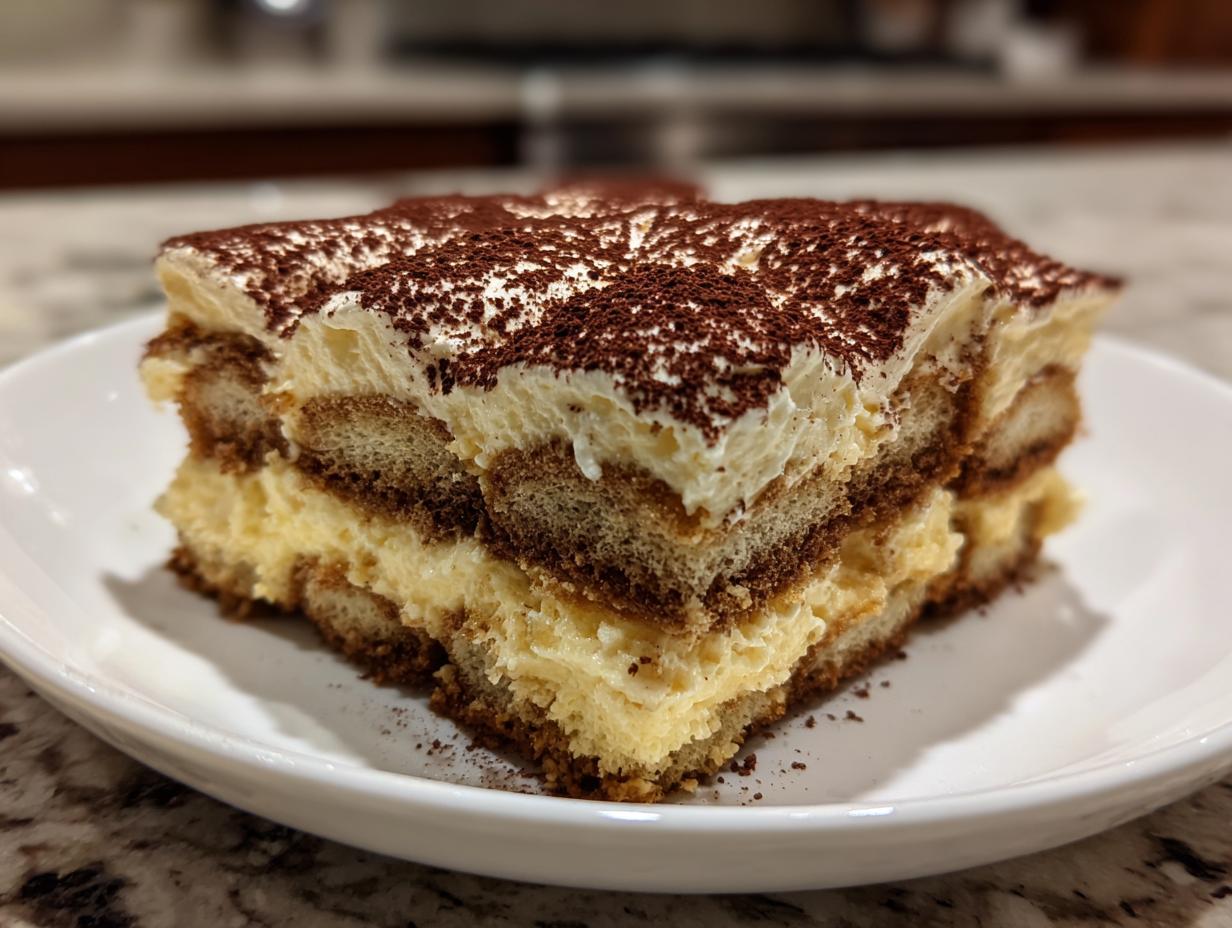
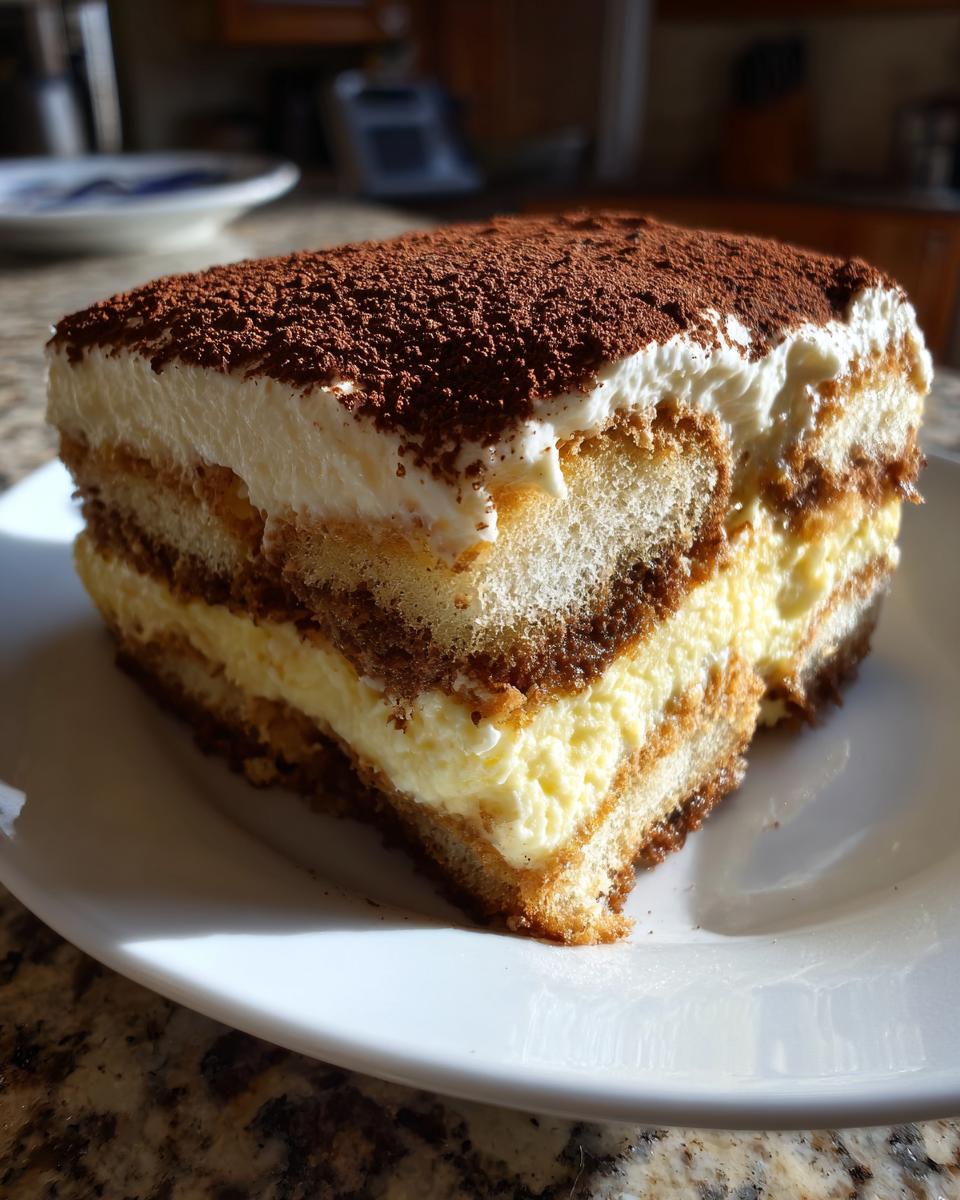
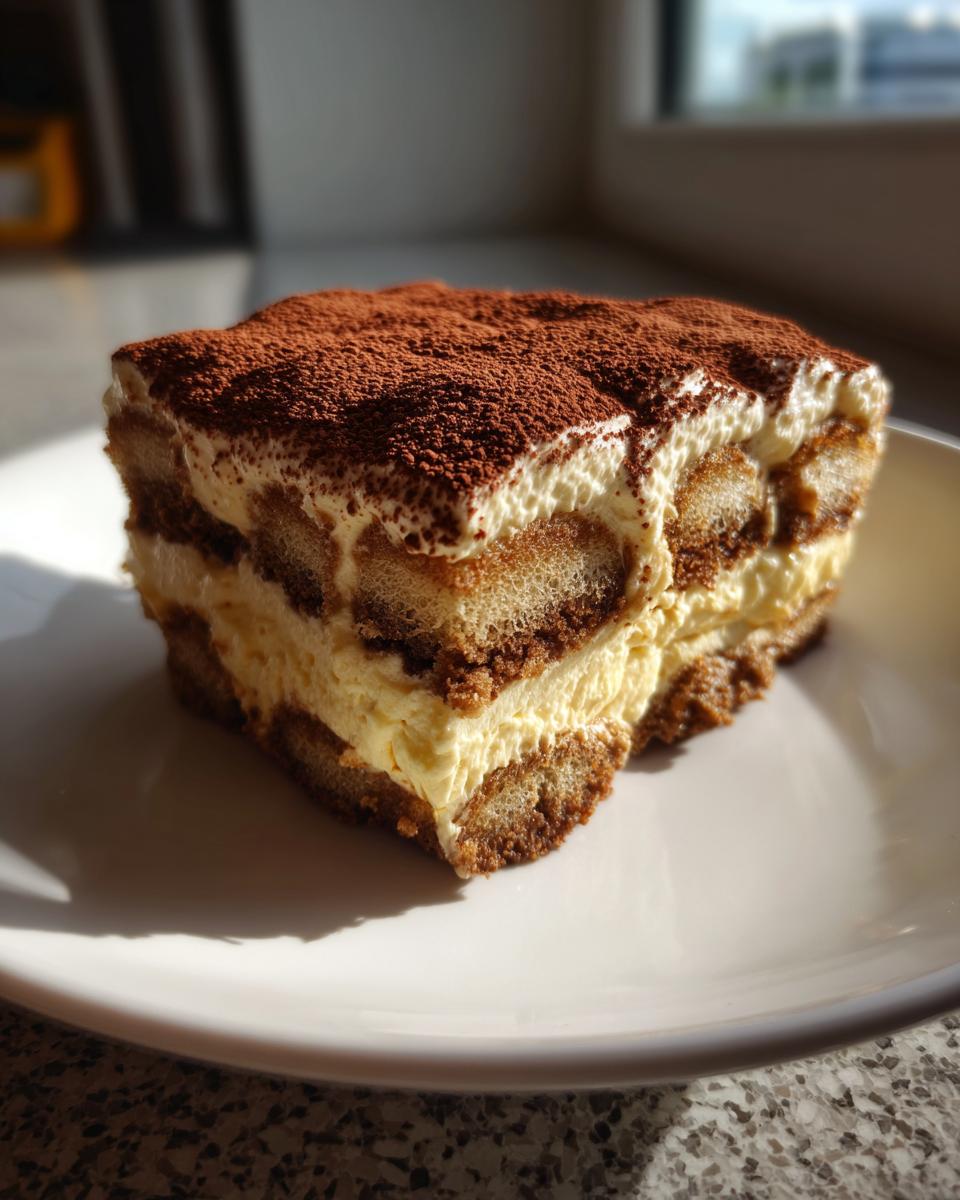
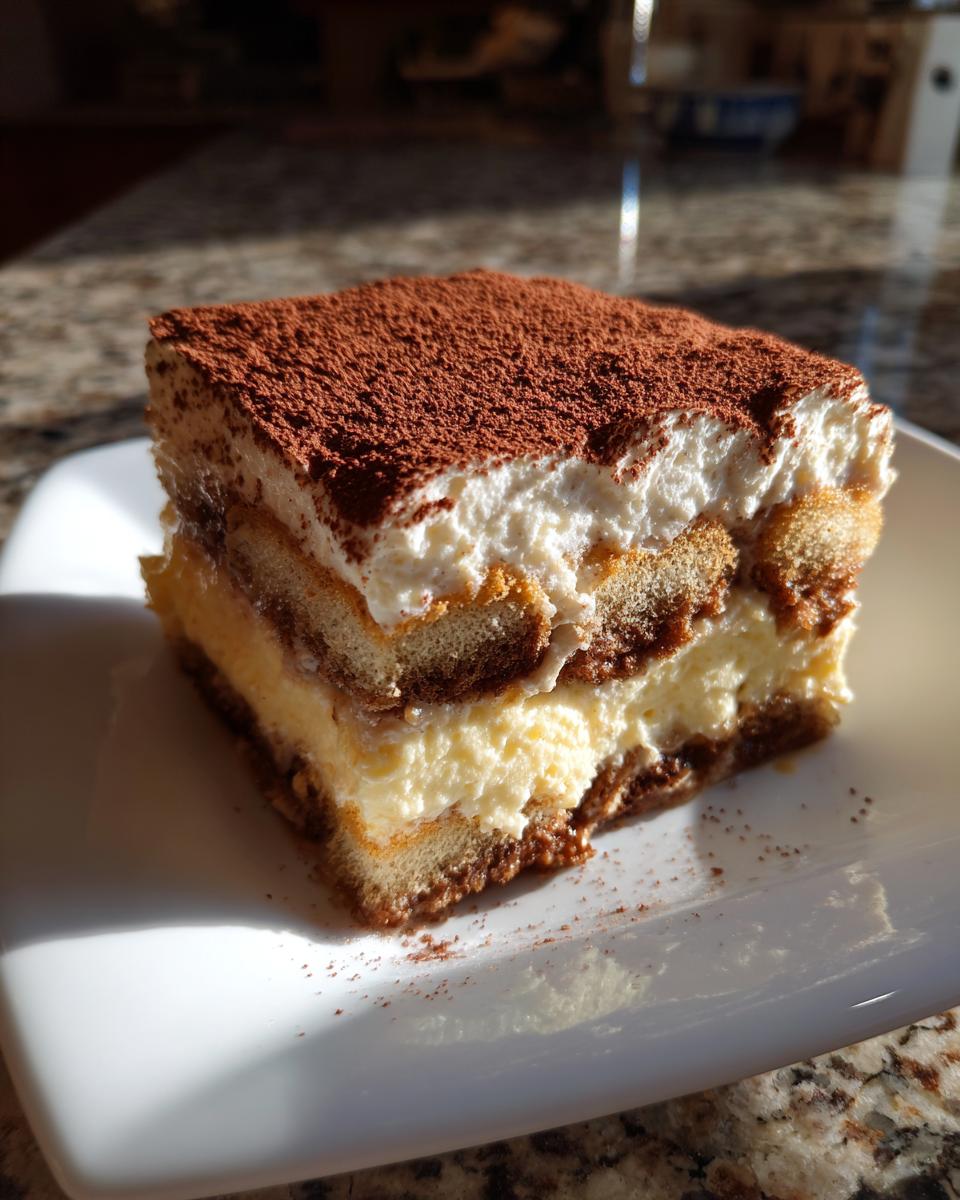
Time to build! Take your ladyfingers and dip them super quickly into the coffee bath—I mean just a quick one-two count and pull them out. They get soggy faster than you think! Lay a single layer of these barely-wet cookies neatly in the bottom of your 8×8 dish. Then, spread exactly half of your lightened mascarpone mixture right over the top. That’s the first level done! You repeat the whole process: quick dip, lay down the cookies, and seal it all up with the remaining cream. Smooth the top out beautifully, because this is what you’ll see right before serving your incredible layered coffee dessert.
Making Ahead Desserts: Chilling the Tiramisu Recipe
Okay, this is the hardest part—waiting! But trust me, this step is absolutely mandatory for any successful tiramisu recipe. Because this is one of the best make ahead desserts you can find, we need time for resting. Chilling for at least six hours, or ideally overnight, lets those espresso-soaked ladyfingers fully marry with the sweet, airy mascarpone cream. This process firms up the entire thing so when you go to slice it, you get clean, beautiful squares instead of a gorgeous disaster!
Serving Your Homemade Tiramisu
The chilling time is over! Before you cut into this beauty, we have one final, crucial step to take for your gorgeous homemade tiramisu. Grab your fine-mesh sieve and your darkest, best quality unsweetened cocoa powder. Here’s a pro tip: only dust the top right before you plan to serve it. If you dust it too early, the cocoa absorbs moisture from the cream and turns into a weird, dark, wet paste. A generous, even shower of cocoa powder gives that perfect, slightly bitter visual contrast to the sweet cream inside! Slice it now and watch people melt.
Tips for the Best Tiramisu Recipe Results
I’ve walked you through the steps, but as a recipe developer, I know the tiny details are what take a good dessert to an absolutely *legendary* dessert. Since this is my go-to tiramisu recipe, I want to make sure you get those perfect layers every single time. These little tricks are pulled straight from my notes after testing this creation dozens of times so you get the best possible result for your dinner party!
Here’s how to ensure your cake is truly special:
- Go Strong on the Coffee: Skip the watery drip brew! For the best depth of flavor in your classic tiramisu recipe, use a very strong espresso or French press coffee. If you’re skipping the optional liqueur, you can boost the flavor by adding a teaspoon of almond extract to the cooled coffee mixture. That little bit of nutty spice balances the rich cream wonderfully.
- The Make-Ahead Necessity: I know we touched on chilling, but let me stress this again: You *must* use this as a make ahead dessert. It tastes exponentially better on day two. Day one is good; day two is life-changing. The chilling time allows the mascarpone to completely stabilize and the coffee to infuse every single ladyfinger evenly.
- Check Your Mascarpone: If you find your cream is struggling to get stiff, double-check the temperature of your mascarpone. If it’s too cold, it won’t incorporate with the egg base smoothly, and that temperature differential can stop your heavy cream from whipping up stiff enough. Room temperature for the cheese, ice-cold for the cream—that’s the ticket for a stable mascarpone cream recipe!
Follow these guidelines, and I promise you’ll have the most amazing, luscious tiramisu recipe that feels incredibly authentic without any of the fuss!
Storage and Reheating Instructions for This Coffee Dessert Recipe
Since this is a glorious, creamy, no-bake wonder, we don’t reheat it—we cherish every bite straight from the fridge! This coffee dessert recipe actually gets better over the first 24 hours. Cover your dish tightly with plastic wrap or simply use a tight-fitting lid. You can safely store leftovers in the refrigerator for up to four days. After that, the ladyfingers might start getting a little too soft for my liking, but honestly, I doubt you’ll have any leftovers!
Frequently Asked Questions About This Tiramisu Recipe
I always get so many great questions after people try my version of this famous dessert! It’s totally natural—everyone wants their tiramisu recipe to turn out perfectly golden, especially when it’s the star of the show. Since I’ve tested this countless times, let me jump in now and answer a few things I hear most often about making this delicious no bake tiramisu.
Can I make this Easy Tiramisu without any alcohol?
Oh, absolutely! You certainly don’t need alcohol for this to be fantastic. If you are skipping the coffee liqueur or rum, don’t just leave the coffee plain, though! That’s where you can sneak in extra flavor. My recommendation is to add about one teaspoon of almond extract or maybe a teaspoon of good vanilla extract right into your cooled espresso. It gives the coffee soak this wonderful, cozy depth that really complements the richness of the cream. It’s a perfect solution for an easy tiramisu that everyone can enjoy!
What is the best way to serve this Authentic Italian Dessert for a party?
Serving it right out of the main dish is totally fine and makes for a beautiful presentation, but if you want to make it extra fancy for a party—and really show off that beautiful layering—try assembling the entire thing in individual glasses or nice small ramekins instead of one big 8×8 dish! It makes serving a breeze. Just remember my golden rule: wait until the absolute last minute to dust that cocoa powder on top. If you dust it too early, it gets absorbed, and you lose that dramatic contrast this authentic Italian dessert is famous for!
Why did my mascarpone cream turn runny in this No Bake Tiramisu?
This is almost always a temperature or technique issue, so don’t worry, it happens to the best of us! The huge culprit for runniness in any no bake tiramisu is usually folding the whipped cream in too vigorously. If you stir instead of gently folding, you knock all the air right out, and the cream collapses. Another common mistake is starting with cold mascarpone. If the cheese is cold, it won’t smooth out properly, and when you add the fluffy cream, the whole thing just can’t hold its structure. Make sure that cheese is soft, and fold like you’re treating the batter gently!
Nutritional Estimates for This Tiramisu Recipe
Now, I know some of you are watching those numbers, and I totally do, too! But when we’re talking about a classic tiramisu recipe, we’re dealing with rich ingredients like mascarpone and heavy cream, so we have to be realistic. Remember, these figures are just good estimates based on the ingredients listed here and standard sizing. They rely on making eight slices, which is my preferred serving size for this decadent coffee dessert recipe. Think of this as guidance, not gospel, especially if you’re using different brands of ladyfingers or heavy cream!
For ease of reference, here’s what you can generally expect in one slice:
- Calories: About 380
- Total Fat: Around 24 grams (A fair bit of that is the good stuff from the mascarpone!)
- Carbohydrates: Roughly 32 grams
- Protein: About 7 grams
This dessert is certainly rich, which is why enjoying just one slice of this amazing no bake tiramisu feels so satisfying. If you want to cut back on a few grams of sugar or fat, you could try using a lighter hand when dusting that final cocoa layer, although I rarely skip it because it finishes the flavor profile so perfectly!
Share Your Experience with This Tiramisu Recipe
Whew! We made it through the whole process for this incredible tiramisu recipe! I truly hope you loved how easy it was to whip up this classic dessert. Now that yours has chilled overnight and set up beautifully—I’m picturing those clean, perfect squares!
I want to hear all about it! Did you spike your coffee soak with rum or stick to just espresso? Did you have any leftovers, or did everyone devour it too fast? Please drop a rating below—those stars really help other home cooks know that this simple approach delivers big flavor.
If you made this creamy, no-bake treat, snap a picture! Tag me on social media; nothing makes me happier than seeing your success in the kitchen. Your feedback on this tiramisu recipe helps me keep creating simple, science-backed recipes just for you. Happy eating!
PrintEasy No-Bake Classic Tiramisu with Authentic Mascarpone Cream

You can make this classic Italian dessert easily at home. This no-bake tiramisu recipe uses rich espresso-soaked ladyfingers and a creamy mascarpone mixture. It is perfect for making ahead for parties.
- Prep Time: 25 min
- Cook Time: 0 min
- Total Time: 25 min
- Yield: 8 servings 1x
- Category: Dessert
- Method: No-Bake
- Cuisine: Italian
- Diet: Vegetarian
Ingredients
- 1 1/2 cups strong brewed espresso or coffee, cooled
- 1/4 cup coffee liqueur or dark rum (optional)
- 2 large egg yolks
- 1/2 cup granulated sugar
- 8 ounces mascarpone cheese, softened to room temperature
- 1 teaspoon vanilla extract
- 1 1/2 cups heavy whipping cream, cold
- 1 package (7 ounces) ladyfingers (about 24–30 cookies)
- Unsweetened cocoa powder, for dusting
Instructions
- Prepare the coffee soak: In a shallow bowl, combine the cooled espresso and the coffee liqueur or rum, if using. Set aside.
- Make the mascarpone cream base: In a medium bowl, whisk the egg yolks and granulated sugar together until the mixture is pale yellow and slightly thickened. This takes about 2 minutes.
- Gently whisk in the softened mascarpone cheese and vanilla extract until the mixture is smooth. Do not overmix.
- Whip the cream: In a separate, clean bowl, use an electric mixer to beat the cold heavy whipping cream until stiff peaks form.
- Fold the whipped cream into the mascarpone mixture in two additions until just combined. You want the cream to remain light and airy.
- Assemble the tiramisu: Quickly dip each ladyfinger, one at a time, into the coffee mixture. Do not let them soak too long, or they will become soggy.
- Arrange a single layer of the dipped ladyfingers in the bottom of an 8×8 inch baking dish or a similar sized serving dish.
- Spread half of the mascarpone cream mixture evenly over the layer of ladyfingers.
- Repeat the process: Dip the remaining ladyfingers and arrange them over the cream layer. Top with the remaining mascarpone cream.
- Cover the dish tightly with plastic wrap. Chill the tiramisu in the refrigerator for at least 6 hours, or preferably overnight, to allow the flavors to blend and the dessert to set.
- Before serving, dust the top generously with unsweetened cocoa powder using a fine-mesh sieve. Slice and serve this creamy dessert recipe.
Notes
- For a richer flavor, use freshly brewed, very strong coffee or espresso.
- If you skip the alcohol, add 1 teaspoon of almond extract to the coffee soak for depth.
- This dessert tastes best when made a day ahead, as the chilling time lets the ladyfingers fully absorb the coffee flavor.
Nutrition
- Serving Size: 1 slice
- Calories: 380
- Sugar: 25
- Sodium: 85
- Fat: 24
- Saturated Fat: 15
- Unsaturated Fat: 9
- Trans Fat: 0.5
- Carbohydrates: 32
- Fiber: 1
- Protein: 7
- Cholesterol: 130