
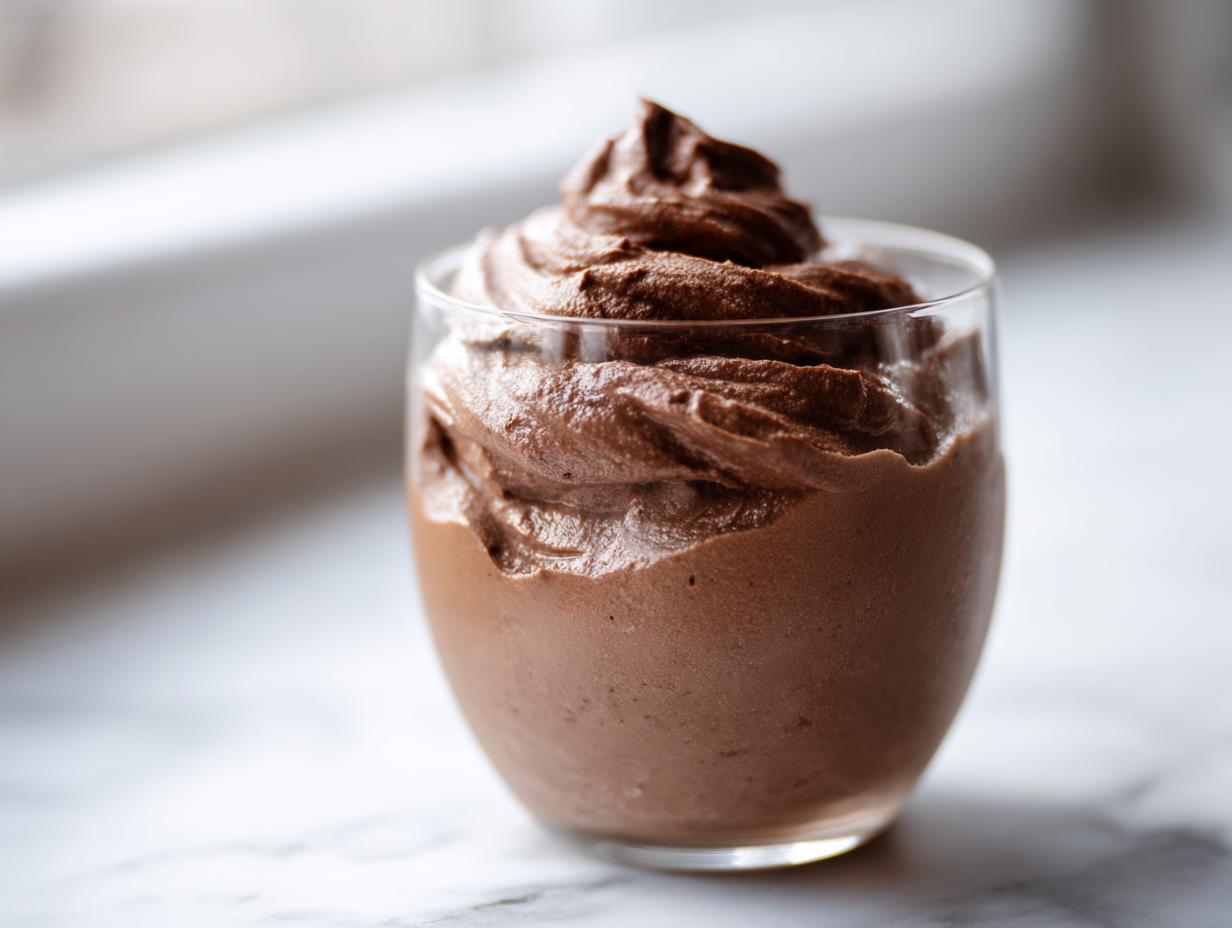
Hello, friends, and welcome back to Frosted Fancies! I know for a fact that everyone deserves a truly spectacular **chocolate mousse** in their life, and I’m not talking about that airy, barely-there stuff. I mean the real deal: incredibly rich creamy mousse that is unbelievably silky smooth and melts the second it hits your tongue. The absolute best part? You don’t need any complex techniques or tempering here! Because I spent years using food science to perfect recipes for big brands, I can promise you this no bake dessert is the easiest, most foolproof way to whip up that perfect, decadent treat right in your own kitchen. Forget the oven; tonight, we’re just getting fluffy!
- Why This Chocolate Mousse Recipe is Your New Go-To (Beginner Dessert Guide)
- Essential Ingredients for Your Rich Creamy Mousse
- Step-by-Step: Making the Easiest Chocolate Mousse
- Tips for Perfect Chocolate Mousse Every Time
- Serving Suggestions for Your Decadent Mousse Recipe
- Storage and Make-Ahead for Your Homemade Chocolate Dessert
- Frequently Asked Questions About Chocolate Mousse
- Estimated Nutritional Data for This Light Dessert Recipe
- Share Your Silky Smooth Chocolate Mousse Creations
- Estimated Nutritional Data for This Light Dessert Recipe
- Share Your Silky Smooth Chocolate Mousse Creations
Why This Chocolate Mousse Recipe is Your New Go-To (Beginner Dessert Guide)
I want you to feel totally confident stepping up to make this, so let me tell you why this easy chocolate mousse is officially topping my dessert list. Seriously, if you think mousse is too fancy or too fussy, you haven’t tried my method yet! It’s designed for real life, meaning it’s incredibly fast and requires zero baking whatsoever. It’s the perfect no bake dessert for when you need something impressive last minute. If you want to see how much other people love this easy approach, check out this great guide over at chocolate mousse recipes.
- It’s completely foolproof and needs only a few pantry staples.
- There are only 15 minutes of active prep time needed.
- Since there are no egg whites to worry about, cleanup is minimal, and you don’t have to stress about tempering or folding incorrectly.
- The result is always a beautifully light yet deeply satisfying dessert.
Achieving That Signature Silky Smooth Mousse Texture
The secret to that luxurious texture comes down to two steps that I learned over years of testing recipes. First, we make sure the chocolate is perfectly melted and cooled just enough so it doesn’t deflate the cream later. Second, we use gentle folding techniques. You’re not mixing everything together; you’re gently incorporating air. This is what locks in the feeling of that incredible silky smooth mousse you see in bakeries!
Essential Ingredients for Your Rich Creamy Mousse
When you are making something this simple, the quality of your ingredients really shines through! This recipe is designed to be a real showstopper without being fussy, but you need good components for that truly gourmet chocolate treat feel. I’ve listed exactly what I use below, but please pay attention to the little preparation notes—they make a huge difference in the final texture.
You’ll want to have the following ready to go. If you check out this classic chocolate mousse resource, you’ll see similar foundations are key!
- 6 ounces bittersweet chocolate, finely chopped – This is crucial! Chopping small helps it melt evenly.
- 1/4 cup hot water – Just warm enough to melt the chocolate smoothly.
- 1 teaspoon vanilla extract – For depth of flavor.
- 1/8 teaspoon salt – Don’t skip the salt; it balances all that richness!
- 1 1/2 cups heavy whipping cream, very cold – Seriously, C-O-L-D. This is vital for the volume we need later.
- 1/4 cup granulated sugar – Just enough to sweeten the cream slightly.
- 2 large egg yolks (Optional, but recommended for extra richness) – If you use them, make sure they are at room temperature before adding them to the slightly warm chocolate.
Step-by-Step: Making the Easiest Chocolate Mousse
Okay, deep breaths! This is where the magic happens, and honestly, it’s surprisingly simple. Just follow these steps precisely, and you’ll have a bowl of pure, fluffy joy. We’re moving fast, so make sure all your ingredients are ready to go because timing matters here, especially with the chocolate cooling down. If you need a visual guide for keeping things moving, I love looking at these beginner tips over at worlds easiest chocolate mousse.
Remember, the goal isn’t to rush, but to move efficiently so nothing gets cooked or deflated when it shouldn’t. A great resource for timing your initial mix is found at easy chocolate mousse guides.
- Get that chocolate ready! Put the chopped bittersweet chocolate in your heatproof bowl. Pour the hot water right over it. Don’t touch it for two full minutes! Let that heat do the initial work.
- After two minutes, just whisk it until it’s perfectly smooth—no little lumps allowed. Whisk in your vanilla and that pinch of salt. Then, set it somewhere cool. It needs to cool down before we mix in our whipped cream, trust me on this!
- If you decided to use the optional yolks, whisk them into the now slightly cooled chocolate base until everything is perfectly married together.
- In a separate, clean bowl, whip your super cold heavy cream and sugar until you get stiff peaks. This is essential for that light texture!
- Now for my favorite part: folding! Take about a third of your beautiful whipped cream and gently fold it into the chocolate base. This lightens the chocolate so it doesn’t immediately collapse the rest of the fluffy cream you add next.
- Gently fold in the rest of the whipped cream in two batches. Use a spatula and work from the bottom up, turning the bowl as you go. I look for just no white streaks remaining. Stop folding the second it looks uniform!
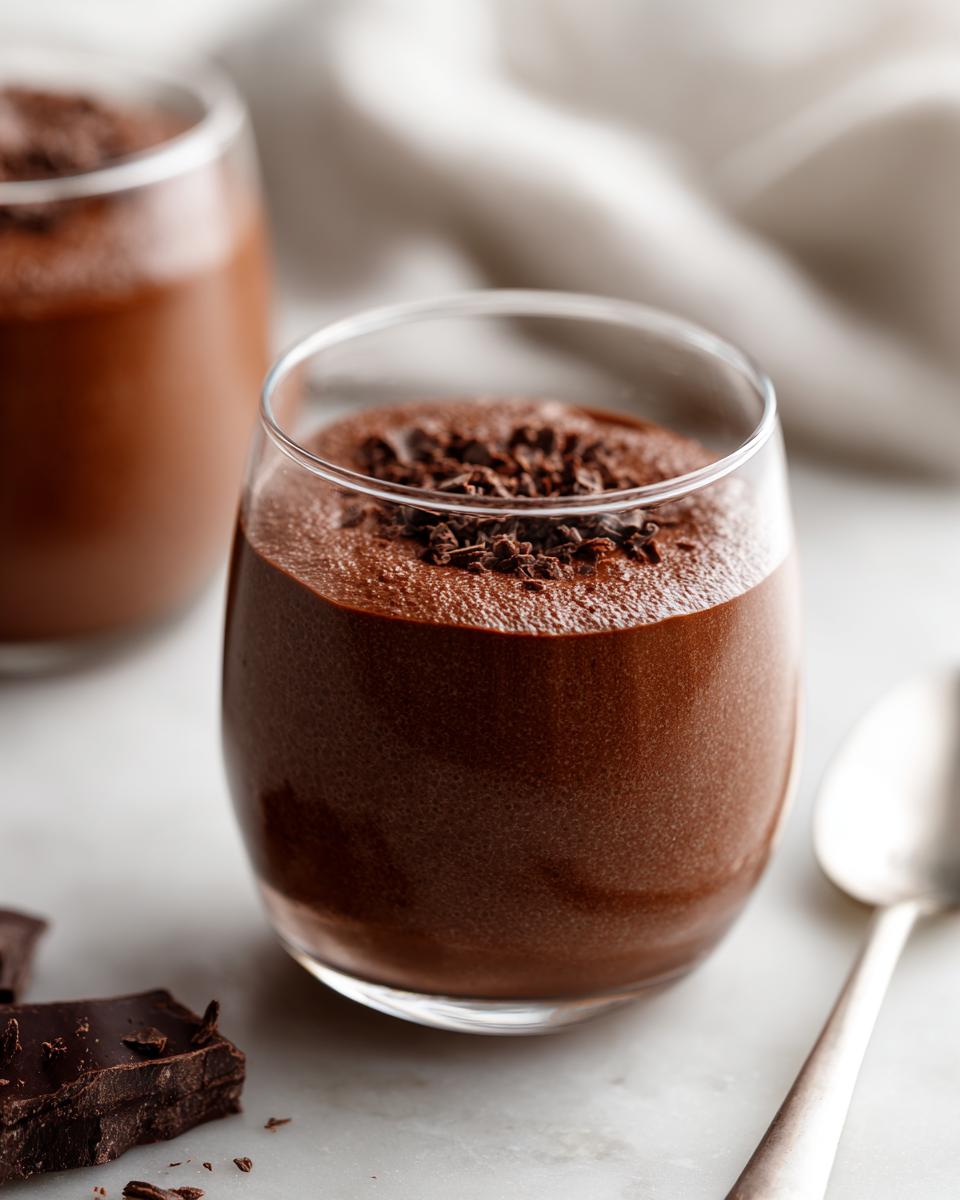
- Spoon or pipe this glorious mousse into your little glasses.
- Cover them up and chill them for at least four hours. Honestly, overnight gives you the best chocolate mousse result, making it truly silky smooth.
Melting the Chocolate Base Correctly
When melting the chocolate with the hot water, you’re essentially creating a ganache base, but milder. The biggest mistake people make is stirring too fast or using boiling water. Boiling water can scorch the chocolate or make it seize up. Just use hot tap water—we want smooth, glossy chocolate, not burnt, gritty chocolate!
Whipping Cream to Stiff Peaks for a Whipped Chocolate Dessert
If you want that gorgeous lift that makes this a true whipped chocolate dessert, you absolutely must chill your tools! Before I even take the cream out of the fridge, I stick my mixing bowl and the whisk attachments into the freezer for about 15 minutes. That cold shock helps the fat in the cream whip up faster and hold those stiff peaks beautifully, which is key for a perfect light dessert recipe.
Tips for Perfect Chocolate Mousse Every Time
I totally get it—sometimes you just need that guarantee that your dessert won’t turn into sad, flat chocolate soup! Since this recipe relies heavily on the air we whip into that cream, a few little guidelines from my professional kitchen days can make all the difference between a good mousse and the best chocolate mousse you’ve ever made.
Here are a few non-negotiables for foolproof results. If you struggle with texture, checking out some tips on creamy mousse making might help you out!
- Folding is Gentle Work: Once you start folding the chocolate into the whipped cream, switch to a slower hand than you think you need. Think of folding as turning the mixture over on itself, not stirring! We want to preserve every tiny air bubble we just worked so hard to create.
- Patience During Cooling: Always let that melted chocolate base cool significantly before adding the whipped cream. If the chocolate is even slightly warm, it will melt the cream instantly, and that’s when you lose all your volume.
- Don’t Rush the Chill: I know, waiting four hours feels like forever, especially when this is a quick chocolate dessert you wanted right now! But that chilling time is when the structure sets up perfectly. Don’t cut it short if you can help it.
Ingredient Notes and Substitutions for Dark Chocolate Mousse
If you want a deeper, more intense flavor—a proper dark chocolate mousse, if you will—opt for high-quality bittersweet chocolate that sits between 60% and 70% cacao content. Going higher than that can make the mousse taste bitter instead of rich.
Also, just a note on the yolks: I include them because they add an extra layer of luxurious mouthfeel, making it a true showpiece. If you skip them for speed, you still get a delightfully light mousse, but the yolks give it that slightly heavier, melt-in-your-mouth quality.
Serving Suggestions for Your Decadent Mousse Recipe
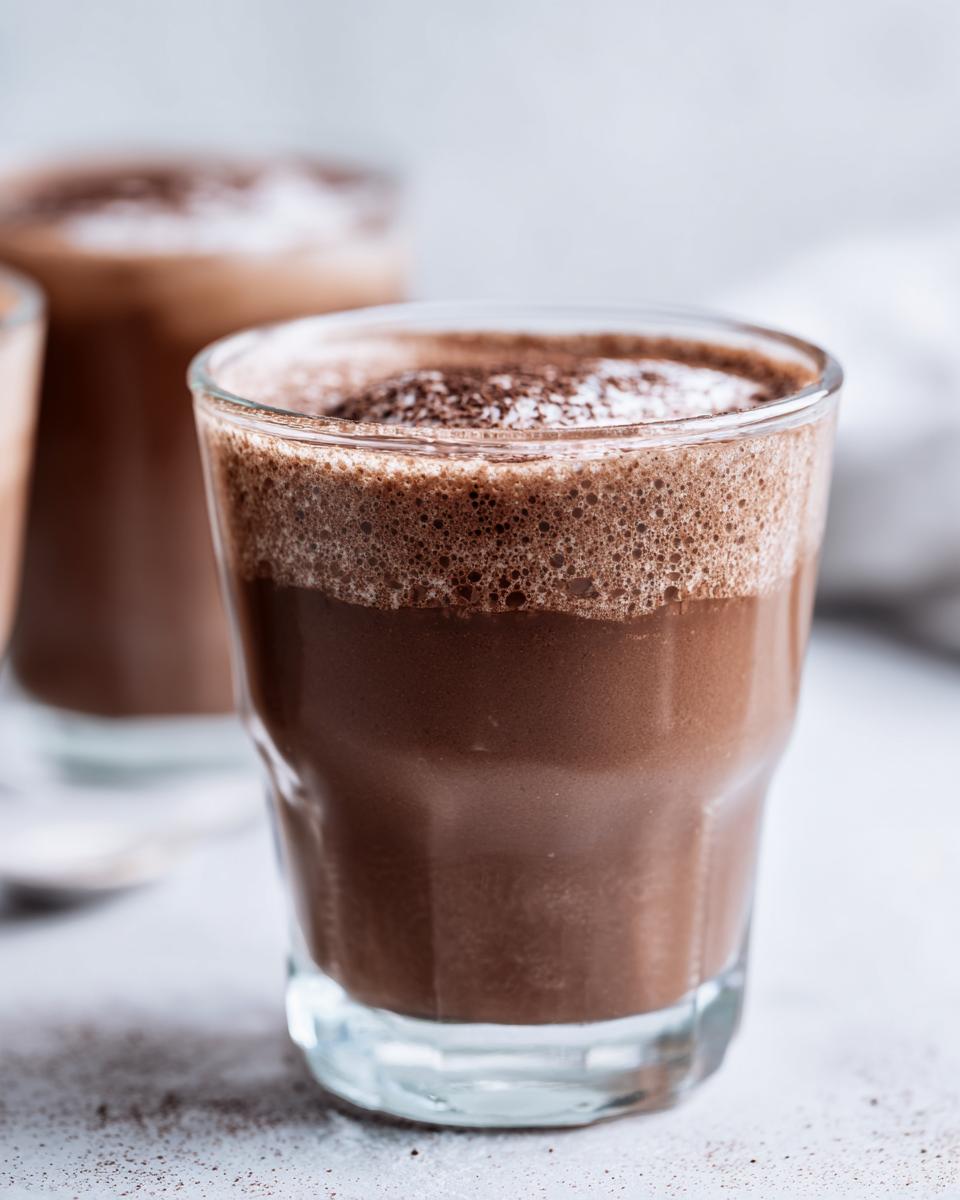
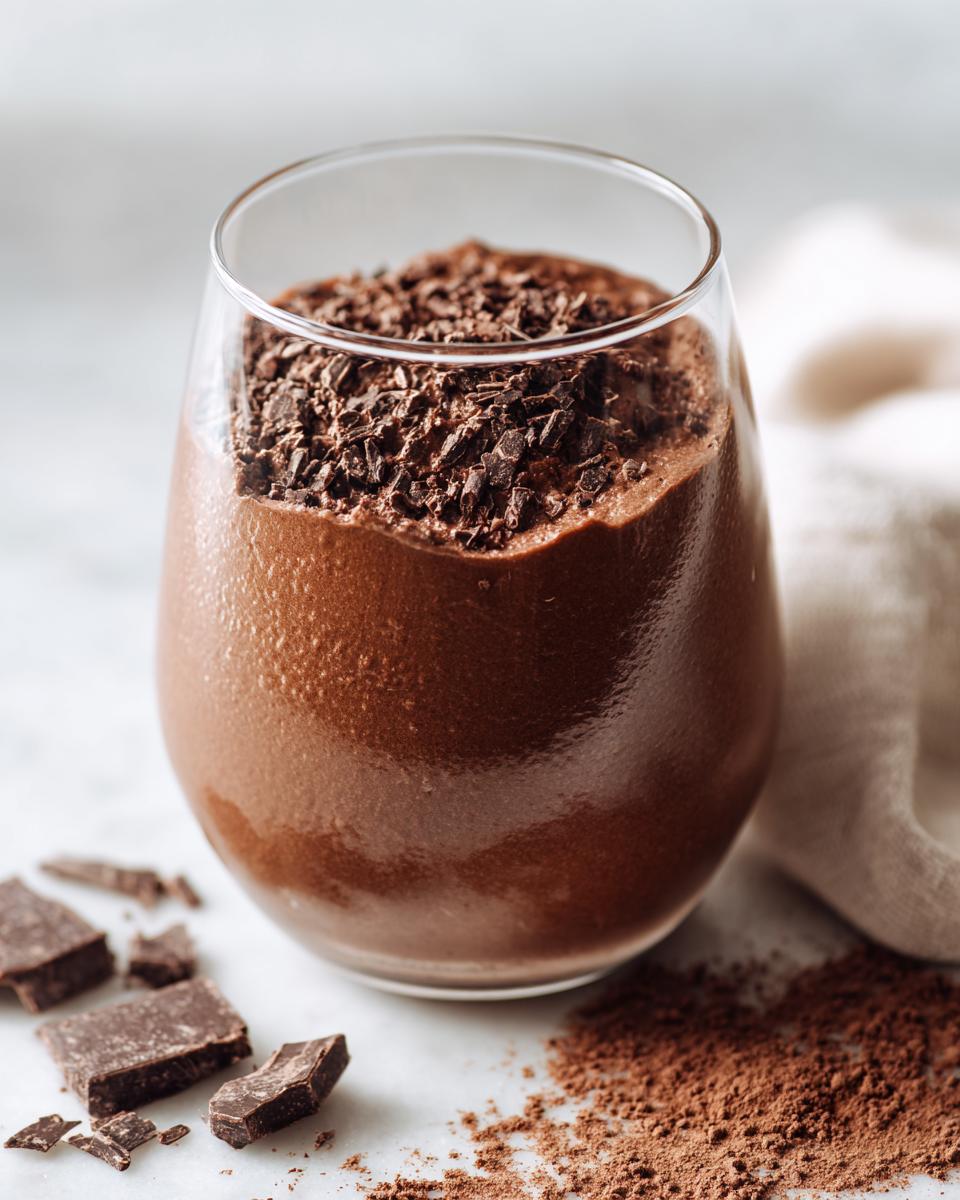
This mousse is already amazing as it is, right? But presentation is everything, especially when you’ve whipped up something so easy and *so* decadent! Think of this as your low-effort, high-reward quick chocolate dessert that looks like you slaved away for hours. A simple garnish makes all the difference here.
My absolute favorite way to finish it is with a few delicate curls of extra dark chocolate shaved right over the top. If you want a little color pop, fresh raspberries or a nice swirl of homemade whipped cream works wonders. Also, because I love a complex flavor, I sometimes serve mine alongside a tiny cup of strong espresso. It’s fantastic how that bitterness plays against the sweet creaminess. For some lovely ideas on pairing chocolate with coffee, you can check out these flavor profiles over at chocolate dessert with coffee mousse. And hey, for a truly elegant look, see how others are serving their treats over at Silky Smooth Chocolate Mousse for Any Occasion!

Storage and Make-Ahead for Your Homemade Chocolate Dessert
One of the beautiful things about this recipe being a homemade chocolate dessert is that it’s actually *better* when made ahead of time! Remember I said chilling for at least four hours is the minimum? That’s just enough time to get it firm enough to scoop. But truly, if you can let this set in the fridge overnight, the texture becomes unbelievably uniform and creamy.
I typically make a batch right after dinner and pop them in the fridge before cleaning up. They stay genuinely wonderful for about three days in the refrigerator. You want to keep them covered tightly, of course! I wouldn’t recommend freezing this style of mousse, though. Since it relies so heavily on the air incorporated into the whipped cream, freezing and thawing can cause the structure to break down a little, and you lose that signature lightness we worked so hard for. If you are planning ahead, definitely look at this great guide on making your easy homemade chocolate mousse!
Frequently Asked Questions About Chocolate Mousse
It’s totally normal to have questions when you’re relying on a recipe for something as delicate as mousse! I’ve gathered some of the most common things folks ask me after they follow this chocolate mousse recipe. If you really want to explore different styles, you can find some fantastic variations, including a three-ingredient option, over at Creations by Kara.
Here are the quick answers to help you feel totally confident making your rich creamy mousse.
Can I skip the chilling time entirely?
Oh, I wish you could, but no! That chilling time is non-negotiable if you want a spoonable dessert. It’s not just about making it cold; it’s about letting the fats in the chocolate and cream firm up so they can hold all that trapped air. If you skip it, you just get chocolate-flavored whipped cream, not a true silky smooth mousse!
What if I only have milk chocolate?
You absolutely can use milk chocolate, but it changes things quite a bit! Milk chocolate has more sugar and less cocoa solids, meaning it won’t taste as deep or decadent. Also, because it has a lower melting point, your mousse might be a little softer and definitely won’t be a dark chocolate mousse. If you use it, I seriously recommend cutting back the sugar in the whipped cream by half.
How do I know if my folded mousse is deflated?
If you see the mixture looking more liquidy after stirring, or if you suddenly have a large pool of chocolate sinking to the bottom of the bowl, you’ve probably pushed too hard while folding! That just means you lost some of that precious air. Don’t worry, though! You can often salvage it by chilling it longer, or just serve it as a lovely, very rich pot de crème. For excellent guidance on classic recipes, check out Ina Garten’s approach discussed on Ina Garten Chocolate Mousse Recipe.
Is this recipe similar to a traditional French Dessert?
Not exactly, and that’s what makes it so great for beginners! A truly traditional French dessert mousse usually relies heavily on tempering raw egg yolks over heat or folding in stiffly beaten egg whites to provide structure. My recipe uses heavy cream for that lift, making it an incredibly simple, no bake dessert alternative that achieves a comparable richness without a thermometer or worrying about raw eggs.
Estimated Nutritional Data for This Light Dessert Recipe
Since we’re dealing with bittersweet chocolate and heavy cream, this is certainly an indulgence, but it’s so worth it for a special treat! Here are the estimates per serving based on the recipe using the optional egg yolks. Please remember these numbers are just my best guess based on standard ingredient calculations, so they might vary slightly depending on the specific brand of chocolate you use.
- Serving Size: 1 serving
- Calories: 450
- Fat: 35g (mostly from the cream and chocolate)
- Carbohydrates: 30g
- Protein: 7g
Share Your Silky Smooth Chocolate Mousse Creations
Now that you’ve made your first—or maybe your tenth—batch of this amazing mousse, I’d absolutely love to hear about it! Did you try garnishing with berries or maybe some crushed cookies? Please take a picture and tag me!
Don’t forget to head back here and leave me a rating and a comment below telling me how your first taste of this unbelievably easy chocolate mousse went. Happy scooping, everyone! I hope you enjoy this as much as my family does. For more delicious inspiration, take a peek at Chloe Cooking’s Mousse!
Estimated Nutritional Data for This Light Dessert Recipe
Since we’re dealing with bittersweet chocolate and heavy cream, this is certainly an indulgence, but it’s so worth it for a special treat! Here are the estimates per serving based on the recipe using the optional egg yolks. Please remember these numbers are just my best guess based on standard ingredient calculations, so they might vary slightly depending on the specific brand of chocolate you use.
- Serving Size: 1 serving
- Calories: 450
- Fat: 35g (mostly from the cream and chocolate)
- Carbohydrates: 30g
- Protein: 7g
I always make sure my recipes are reliable first, which is why I put so much testing into them, like this gorgeous chocolate mousse cake recipe I keep finding pop up. But just treat these numbers as a helpful ballpark when you’re planning your amazing dessert!
Share Your Silky Smooth Chocolate Mousse Creations
Now that you’ve made your first—or maybe your tenth—batch of this amazing mousse, I’d absolutely love to hear about it! Did you try garnishing with berries or maybe some crushed cookies? Please take a picture and tag me!
Don’t forget to head back here and leave me a rating and a comment below telling me how your first taste of this unbelievably easy chocolate mousse went. Happy scooping, everyone! I hope you enjoy this as much as my family does. For more delicious inspiration, take a peek at Chloe Cooking’s Mousse! I’d love to see what you made, and I’m always refining my recipes based on your feedback, so check out that classic chocolate mousse link if you need another idea!
PrintThe Easiest Silky Smooth No-Bake Chocolate Mousse Recipe (Perfect for Beginners)
Create a rich, creamy, and light chocolate mousse without turning on your oven. This foolproof recipe uses simple ingredients to achieve a velvety, decadent dessert texture that impresses every time.
- Prep Time: 15 min
- Cook Time: 0 min
- Total Time: 4 hr 15 min
- Yield: 4 servings 1x
- Category: Dessert
- Method: No-Bake
- Cuisine: American
- Diet: Vegetarian
Ingredients
- 6 ounces bittersweet chocolate, chopped
- 1/4 cup hot water
- 1 teaspoon vanilla extract
- 1/8 teaspoon salt
- 1 1/2 cups heavy whipping cream, cold
- 1/4 cup granulated sugar
- 2 large egg yolks (optional, for extra richness)
Instructions
- Place the chopped chocolate in a medium, heatproof bowl. Pour the hot water over the chocolate and let it sit for 2 minutes. Whisk until the chocolate is completely melted and smooth. Whisk in the vanilla extract and salt. Set aside to cool slightly.
- If using egg yolks, whisk them into the slightly cooled chocolate mixture until fully incorporated.
- In a separate large bowl, use an electric mixer to beat the cold heavy whipping cream and granulated sugar on medium-high speed until stiff peaks form. This takes about 3 to 5 minutes. Do not overbeat.
- Gently fold about one-third of the whipped cream into the cooled chocolate mixture using a spatula. Fold until just combined to lighten the chocolate base.
- Carefully fold the remaining whipped cream into the chocolate mixture in two additions. Work gently to keep the air in the mixture, folding until no white streaks remain. The goal is a uniform, light, and airy texture.
- Spoon or pipe the mousse into individual serving dishes or small glasses.
- Chill the chocolate mousse in the refrigerator for at least 4 hours, or until firm. For the best silky smooth texture, chill overnight.
- Serve cold, garnished with chocolate shavings or fresh berries if desired.
Notes
- For a richer, more traditional French dessert texture, ensure your chocolate is high quality, using 60% to 70% cacao content.
- If you skip the egg yolks, you get a lighter, quicker mousse that is still incredibly decadent.
- To achieve the best stiff peaks when whipping cream, make sure your bowl and whisk attachments are very cold before starting.
- This is a fantastic no bake dessert option for last-minute dinner parties.
Nutrition
- Serving Size: 1 serving
- Calories: 450
- Sugar: 25g
- Sodium: 50mg
- Fat: 35g
- Saturated Fat: 20g
- Unsaturated Fat: 15g
- Trans Fat: 0g
- Carbohydrates: 30g
- Fiber: 3g
- Protein: 7g
- Cholesterol: 110mg