
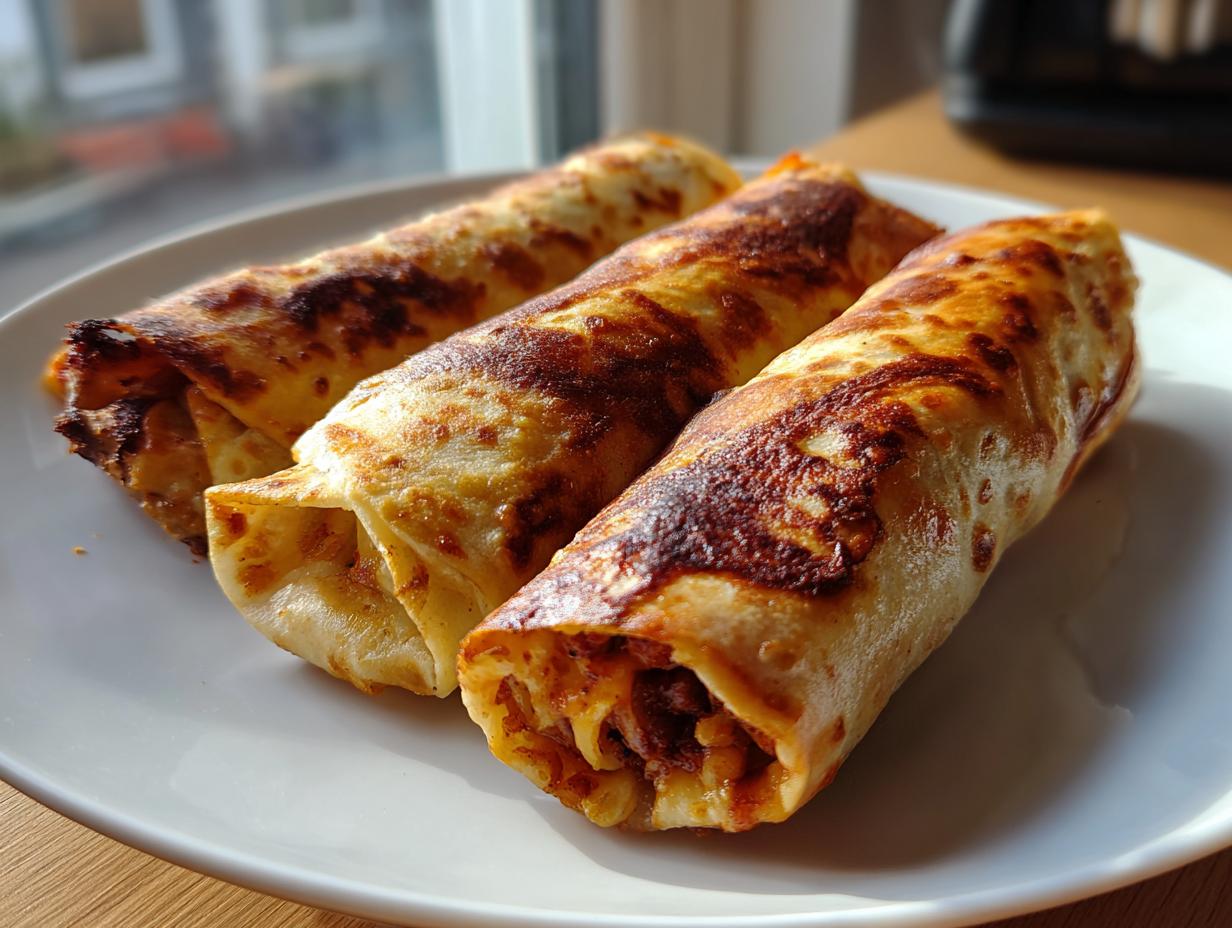
Hello and welcome back to my kitchen! I am so thrilled you stopped by today because we are tackling something legitimately fun: Tex-Mex Comfort Food that tastes exactly like takeaway but takes half the time and delivers a fantastic crunch. We’re making my absolute favorite weeknight winner: Crispy Air Fryer Beef Chimichangas! Seriously, if you think making homemade Chimichangas is too hard or too messy, I’m here to change your mind. As a former recipe developer, I’ve spent years perfecting foolproof methods, and trust me, using the air fryer gives you that satisfying, fried texture without the grease headache. This recipe is incredibly easy, deliciously cheesy, and perfect for getting dinner on the table fast!
- Why You Will Love These Crispy Chimichangas
- Essential Ingredients for Perfect Homemade Chimichangas
- Equipment Needed for Making Air Fryer Chimichangas
- Step-by-Step Instructions: How to Make Chimichangas
- Tips for Success When Making Chimichangas at Home
- Variations: Chicken Chimichanga and Cheesy Chimichangas Ideas
- Serving Suggestions for Your Delicious Chimichangas
- Storing and Reheating Leftover Chimichangas
- Frequently Asked Questions About Making Chimichangas
- Estimated Nutritional Data for These Chimichangas
- Share Your Homemade Chimichangas Experience
Why You Will Love These Crispy Chimichangas
When I perfect a recipe, I make sure it screams flavor while whispering, “I took no time at all.” These Crispy Chimichangas check every box for a perfect weeknight meal. They’re Tex-Mex comfort food made simple!
- Air Fryer Magic for Max Crunch: You get that deep-fried exterior texture without heating up a giant pot of oil. It’s the secret to truly Crispy Chimichangas!
- Speedy Setup: The entire time from cracking an egg (if you were making tacos!) to serving is just about 30 minutes. Hello, life savers!
- Perfectly Seasoned Filling: We use store-bought taco seasoning for ease, but my notes below show you how to whip up a great homemade blend if you want to skip the packet.
- Family Friendly Mexican Dinner Favorite: Who doesn’t love a handheld meal packed with seasoned meat and melty cheese? They disappear fast.
- Less Mess, More Flavor: Cleaning up is a breeze since we skip the deep fryer entirely. This is my go-to for an Easy Mexican Dinner night.
Essential Ingredients for Perfect Homemade Chimichangas
I always tell people that the secret to great Homemade Chimichangas isn’t fancy technique; it’s starting with the right building blocks! Since this recipe is so simple, the quality of what goes in really sings through. You won’t need a ton of specialized stuff, which is great news for a quick dinner!
Here is exactly what you need stocked up before you start cooking that savory filling:
- 1 tablespoon olive oil (Good quality makes a difference in the flavor base!)
- 1 pound ground beef (I use 85/15—you want some fat for flavor, but we drain the excess!)
- 1 small onion, diced (Make sure those pieces are small so they melt into the meat.)
- 2 cloves garlic, minced (Never substitute the real stuff here, trust me on this!)
- 1 packet (1 ounce) taco seasoning (If you love intense flavor, use a little more, or check out my homemade blend below!)
- 1/2 cup water
- 1/2 cup shredded Monterey Jack cheese (It melts beautifully without getting greasy.)
- 8 medium flour tortillas (Burrito size is crucial—they need room for rolling!)
- Cooking spray (This is your magic ingredient for the air fryer crisp!)
- Optional toppings: salsa, sour cream, guacamole
Make sure your tortillas are fresh and soft before you start assembling! That slight bit of moisture keeps them from tearing when you roll them up tight.
Equipment Needed for Making Air Fryer Chimichangas
Getting ready to cook is half the battle won! Since we are skipping the deep fryer, our equipment list is surprisingly short, which I love for a quick weeknight meal. Knowing what you need beforehand makes the assembly process smooth like butter.
You’re going to need just a few things for this Beef and Cheese Chimichangas recipe to come together perfectly:
- A good, large skillet for building that amazing beef filling. Medium size usually does the trick.
- A spoon or spatula for breaking up the ground beef while it cooks.
- Your trusty air fryer! Make sure the basket is clean and ready to go.
- Cooking spray—you absolutely need this to get the outside golden and crispy in the air fryer.
- A microwave (just for a quick 15 seconds to soften those tortillas—don’t skip that pliability step!).
- Small toothpicks. These are essential for holding your rolls shut while they cook so none of that cheesy filling sneaks out.
That’s it! No heavy pots or fancy mixers required for this Tex-Mex delight. Being prepared means you can focus on just enjoying the process!
Step-by-Step Instructions: How to Make Chimichangas
Alright, here is where the real fun begins! Follow these steps exactly, especially around the rolling part, and you’ll have perfectly sealed, crispy Chimichangas that don’t fall apart on you. Cooking these up is truly rewarding—just watch that ground beef transform into something amazing!
Preparing the Savory Beef Chimichanga Filling
This initial cooking step is all about building that deep, savory base flavor. Grab your large skillet and get that tablespoon of olive oil heating over medium heat. Toss in your diced onion and let them sweat until they’re soft and translucent—that usually takes about four minutes.
Next, bring in the pound of ground beef. You need to cook this thoroughly, breaking it up with your spoon as you go, until it’s totally browned. Now, here is my professional tip for maximum crunch later: drain off absolutely every bit of excess grease! If you leave grease behind, it steams the tortilla instead of letting it crisp up, and we want crunch!
Once drained, stir in your two minced garlic cloves and the entire packet of taco seasoning. Cook this mixture for just one minute until you can really smell those spices waking up—it smells like a fiesta already! Finally, pour in the half-cup of water and bring the whole thing to a simmer. Let it bubble gently until most of that liquid has evaporated, about five minutes. Kill the heat and stir in that shredded Monterey Jack cheese until it’s gooey and melted throughout the beef. Set this beautiful filling aside to cool slightly.
Rolling and Sealing Your Chimichangas Tightly
This part needs your full attention because a loose roll means a messy air fryer basket! First, take your eight flour tortillas and warm them up—I usually microwave them for about 15 seconds total. They need to be warm and super pliable so they don’t crack when you roll them. They should bend easily without fighting you.
Spoon about a third of a cup of that gorgeous beef filling right onto the center of each warm tortilla. Don’t overfill them, or they just won’t seal right! Fold those sides inward first, just like you’re wrapping a tight present. Then, start rolling from the bottom up, making sure it’s snug the whole way. If you need extra security, use a toothpick to gently secure the seam. Keep those sealed Chimichangas ready for the air fryer stage!
Achieving Crispy Chimichangas in the Air Fryer
We are so close to that satisfying crunch! First thing: preheat your air fryer to 375°F (190°C). This step is non-negotiable for getting a true crispy texture right away.
Place those rolled beauties into the air fryer basket. And this is super important: lay them in a single layer, making absolutely sure they don’t touch one another. If they overlap, they just steam instead of crisping up. You will need to work in batches, trust me, it’s worth the extra step!
Lightly spray the tops of the Chimichangas all over with your cooking spray. Pop them in and air fry for 8 to 10 minutes total. You must flip them halfway through! Around the 4 or 5-minute mark, grab your tongs, carefully turn them over, and spray the other side. When they come out, they should be gorgeously golden brown and shatteringly crisp. Remove those toothpicks right before you serve!
Tips for Success When Making Chimichangas at Home
Even though this is an easy Mexican dinner recipe, nailing that perfect texture takes just a couple of insider moves. Since I’ve made hundreds of these now, I want to share the tricks that guarantee your homemade Chimichanga Recipe comes out restaurant-quality every single time.
The best advice I can give you centers around crispiness—that’s what separates a good rolled burrito from a truly great chimichanga! Trust me when I say moisture is the enemy of a good crunch.
- Go Heavy on the Spray (Or Butter!): While the cooking spray is helpful, if you really want that deep golden color and extra shatter, try brushing the outside of the rolled chimichangas with a light coat of melted butter before they go into the air fryer. Butter adds richness and helps the tortilla brown beautifully.
- Don’t Overstuff, Don’t Under-Seal: I know it’s tempting to cram in more of that delicious beef filling, but resist! Overstuffing makes sealing impossible, and you’ll end up with a filling explosion, which just steams the tortilla instead of crisping it. Make sure those edges are folded in tightly before you roll.
- Size Matters for Tortillas: You need those medium or burrito-sized 10-inch tortillas. Smaller taco-sized tortillas just won’t wrap properly around the amount of filling we use. If they feel stiff, microwave them longer—pliability is key to preventing cracks.
- Single Layer is the Law: I can’t stress this enough when using an air fryer. If your Chimichanga pieces are touching, they won’t crisp up evenly. You must work in batches. Think of it as spaced-out cooking rather than crowding the basket!
- The Baking Alternative: If you don’t have an air fryer or just need to feed a huge crowd, baking is a solid backup plan. Preheat your regular oven to 400°F (200°C). Place the sprayed or brushed chimichangas on a baking sheet and bake for about 15 to 20 minutes, remembering to flip them halfway through so they brown evenly on both sides. They are great, though they don’t quite achieve the same intense texture as the air-fried version.
Follow these steps, and you’ll conquer making perfect Homemade Chimichangas right in your own kitchen!
Variations: Chicken Chimichanga and Cheesy Chimichangas Ideas
One of the biggest reasons I love this foundational recipe for making Chimichangas is how incredibly versatile it is! While the ground beef version is my go-to for a quick weeknight meal, you can easily pivot to other fantastic fillings. You asked about Chicken Chimichanga options, and yes, absolutely! We can do those too.
Swapping out the beef is super simple, especially if you’re short on time. This is where that professional recipe developer brain comes in—we incorporate speed without sacrificing flavor!
- For the Chicken Chimichanga: Skip steps 1 through 4 completely! You need about 2 cups of cooked, shredded chicken. Rotisserie chicken is your best friend here for ultimate speed. Gently mix that shredded chicken with half the seasoning packet (since you aren’t sweating onions or garlic) and about a quarter cup of water or stock to keep it moist. Stir in your cheese, and you’re ready to roll. This makes a fantastic Crispy Chicken Chimichanga!
- Making it Extra Cheesy: If you see the cheese amount in the original recipe and think, “Not enough!”—you’re speaking my language. When you add the final half-cup of Monterey Jack cheese at the end of the beef cooking process, just bump that up to a full cup! Or, even better, add a layer of shredded Colby Jack or a little cheddar when you are wrapping the tortilla. That melty, gooey interior is just heavenly.
- Adding Beans for Bulk: This is a common request, turning them into more of a hearty meal. If you want to add beans to either the beef or chicken filling, you must use canned beans that have been thoroughly rinsed and drained. I recommend pinto or black beans. Stir in about half a cup of rinsed beans during the last two minutes of cooking the filling, allowing the excess moisture to cook off before you roll. This creates wonderful Cheesy Chimichangas with extra substance.
No matter which filling you choose, remember to keep the rolling technique tight, and always use that cooking spray before air frying for the best homemade Chimichanga Recipe experience!
Serving Suggestions for Your Delicious Chimichangas
Okay, your crispy, golden beauties are out of the air fryer, smelling incredible, and you’re ready to eat! But a plate of amazing Fried Burritos Recipe deserves the perfect entourage. Half the fun of eating Tex-Mex comfort food at home is loading up all the cold, fresh toppings to contrast that hot, crunchy wrap.
Don’t just stop at the salsa! While the filling is savory and cheesy, we want layers of texture and temperature contrasts. Think cool, creamy, and spicy.
- The Holy Trinity of Toppings: You absolutely must have a dollop of cool sour cream, some chunky salsa (or pico de gallo, if you’re feeling fancy), and fresh guacamole. If you need a simple guac recipe, it’s just smashed avocado with salt, lime juice, and maybe a tiny shake of cumin—that’s it!
- Spice It Up Further: I love a drizzle of Cholula or El Yucateco hot sauce right over the top, especially if you’re eating the beef version of these Chimichangas.
- Make it a Full Meal with Sides: If you need something to round out the plate for the hungriest members of the family, keep the sides simple so the chimichangas remain the star. A quick side of microwave Mexican rice or even just a can of seasoned black beans heated up works perfectly and keeps this firmly in the realm of a quick dinner idea.
- The Fresh Crunch Element: A little sprinkle of finely shredded iceberg lettuce over the top adds a lovely, cold crunch that feels so satisfying against the hot, crispy tortilla.
Seriously, piling a whole plate high with toppings makes eating these even funnier and more enjoyable. Don’t be shy with the sour cream when you’re enjoying your homemade Mexican dinner!
Storing and Reheating Leftover Chimichangas
Now, let’s talk about the reality of having leftovers from making Crispy Beef Chimichangas—sometimes you just can’t finish all eight, even when they are this good! The good news is that these hold up really well, provided you store them correctly. We want to maintain that beautiful browned texture we worked so hard to achieve, so storage really matters.
If you have any uneaten Chimichangas, let them cool down completely to room temperature first. If you put warm food into the fridge, you create condensation, and that moisture is the number one enemy of crispiness!
Once completely cool, wrap them tightly. I recommend wrapping each chimichanga individually in plastic wrap first, and then placing the wrapped items into an airtight container or a heavy-duty zip-top bag. Stored this way, they should be good in the refrigerator for up to three to four days. They are often still delicious on day four, though maybe a little softer.
Reheating for Maximum Crispiness
Okay, this is the crucial part! If you try to reheat these in the microwave, you will end up with a soggy, doughy mess, and that’s just tragic for a chimichanga. We need to fight that sogginess with heat!
The best way, hands down, is taking advantage of that wonderful air fryer again. It’s the key to recapturing that perfect texture! Preheat your air fryer again to 360°F (180°C). Place the cooled chimichangas back in the basket, making sure they don’t overlap at all. You’ll only need about 4 to 6 minutes. Keep a sharp eye on them, as they will crisp up much faster this time since they are already cooked.
If you don’t have an air fryer, the oven works fine, just be patient. Set your oven to 375°F (190°C) and lay them on a baking sheet. Bake for about 8 to 10 minutes, flipping halfway through, until the outside is golden and firm again. You might lose just a tiny bit of that intense crunch compared to the air fryer, but it’s still totally worth reheating!
Can I freeze these Chimichangas for later?
You absolutely can! This recipe is perfect for easy batch cooking which is great for those times you need a Quick Dinner Idea on a random Tuesday. After you have cooked and cooled the chimichangas completely (this prevents ice crystals!), you can freeze them.
My preferred method is flash-freezing: place the cooled chimichangas on a parchment-lined baking sheet and freeze them uncovered for about an hour until they are solid. Once they are frozen solid, transfer them all into one heavy-duty freezer bag. This keeps them from sticking together in a giant clump, which is so frustrating later!
When you are ready to eat those frozen Chimichangas, skip the thawing step entirely. Just spray them lightly with cooking spray and pop them straight into the 375°F air fryer. You’ll need a little longer—maybe 10 to 12 minutes—flipping them halfway through until they are piping hot all the way to the center and crispy on the outside. Easy weeknight Tex-Mex bliss, ready from the freezer!
Frequently Asked Questions About Making Chimichangas
I know you might have a few lingering questions, especially if you’re making Chimichangas for the first time. That’s totally normal! When I was starting out, I had a million queries myself. Here are the most common things people ask me about getting the perfect texture and flavor for these!
Can I deep fry these Chimichangas instead of air frying?
Oh, you certainly can! If you want that ultimate, classic, restaurant-style crunch, deep frying is the way to go. That said, it’s messier, and frankly, I try to make things easy for you all. If you choose to fry them, heat about two inches of neutral oil (like canola or vegetable oil) in a heavy-bottomed pot to 375°F (190°C). You only need to fry them for about 2 to 3 minutes per side until they are beautifully golden brown. Make sure you drain them really well on a wire rack lined with paper towels so they don’t soak up too much oil. If you’re looking for a healthier option, check out this ww skinny chimichangas recipe for comparison!
What is the best size tortilla to use for Chimichangas?
This is huge—don’t use those small taco-sized ones! For a decent-sized filling and a good wrap, you need medium or burrito-sized flour tortillas. I usually opt for the 10-inch diameter ones. If you try to cram too much filling into a smaller tortilla, it just won’t seal properly, and you risk leakage, which ruins that gorgeous air fryer crisp we are aiming for. Warm them up until they are completely pliable before you start rolling.
Can I prepare these ahead of time, or do I need to make them fresh?
You absolutely do not need to make these “from scratch” right when you want to eat them; they are a fantastic make-ahead meal! You can follow all the rolling instructions (Steps 1 through 6) and assemble them completely, securing them with toothpicks. Once they are rolled, you can cook them right away, or you can follow my freezing/storage instructions in the previous section. Assembled chimichangas can also last covered tightly in the fridge for about 24 hours before cooking. Just remember to bring them to room temperature for about 30 minutes before they hit the air fryer if they were refrigerated!
Do I have to use ground beef for this recipe?
Not at all! While this recipe focuses on the classic Beef Chimichanga flavor, they are just as wonderful with chicken. If you want to make a Chicken Chimichanga, the easiest way is to use pre-cooked or rotisserie chicken that you shred yourself. Mix the shredded chicken with seasoning and cheese as directed, and proceed to wrap and air fry exactly the same way. It’s so quick it barely adds any cooking time!
Estimated Nutritional Data for These Chimichangas
As a food scientist, I always tell folks that numbers are important, but they should never stop you from enjoying food! The nutrition data here is based on using the exact ingredients and quantities listed in the recipe above, prepared using the air fryer method we discussed. Keep in mind that toppings like sour cream, guacamole, and salsa will add calories, fat, and sodium, so those are calculated separately!
Please view these figures as a helpful guideline rather than a strict guarantee. Your sodium might be higher if you use a saltier taco seasoning blend, for instance. But overall, this gives you a great snapshot of what makes these Chimichangas a solid option for a satisfying home-cooked meal.
- Serving Size: 1 chimichanga
- Calories: 350
- Fat: 18g
- Saturated Fat: 7g
- Trans Fat: 0g
- Cholesterol: 60mg
- Sodium: 550mg
- Carbohydrates: 30g
- Fiber: 2g
- Sugar: 2g
- Protein: 18g
Remember, because we air-fried these instead of deep-frying, we cut down significantly on the overall fat content, which is a win for a Tex Mex Comfort Food night!
Share Your Homemade Chimichangas Experience
Wow, we made it! You’ve gone from craving a simple Easy Mexican Dinner to mastering crispy, cheesy, air-fried perfection. I am seriously so proud of you for trying this recipe. Creating food that brings comfort and joy is exactly what the kitchen is for, and I hope these flavorful Chimichangas bring smiles to your table!
Now that you’ve got your perfect batch ready to eat, or maybe you experimented with chicken or baked them, I want to hear all about it! Getting your feedback helps me fine-tune recipes, and honestly, it just makes my day to see the amazing food you all create.
Did you try brushing them with butter for that extra crispiness? Did you load them up with extra toppings? Tell me everything!
- Rate Your Success: If you loved how quick and crispy these turned out, please consider leaving a star rating on the recipe card! Five stars means I get to keep sharing these satisfying family favorites with you.
- Drop a Comment Below: I read every single comment and question, so if you want to share a quick success story or ask a follow-up question about rolling or reheating, just drop it in the comment box below. I’m here to help if you hit any snags next time.
- Show Me Your Tray! If you snapped a photo of your golden, perfect air fryer Chimichangas fresh out of the basket, please tag me on social media! I absolutely love seeing them in your kitchens. There’s nothing better than seeing my favorite Tex Mex Comfort Food land successfully on your dinner plates.
Thank you again so much for cooking with me today. Happy eating, and I’ll see you in the next recipe!
PrintCrispy Air Fryer Beef Chimichangas Recipe

Make delicious, crispy Beef Chimichangas using your air fryer. This easy Mexican dinner recipe delivers a crunchy exterior and savory filling quickly, perfect for weeknight meals.
- Prep Time: 15 min
- Cook Time: 15 min
- Total Time: 30 min
- Yield: 8 servings 1x
- Category: Dinner
- Method: Air Frying
- Cuisine: Tex-Mex
- Diet: Vegetarian
Ingredients
- 1 tablespoon olive oil
- 1 pound ground beef
- 1 small onion, diced
- 2 cloves garlic, minced
- 1 packet (1 ounce) taco seasoning
- 1/2 cup water
- 1/2 cup shredded Monterey Jack cheese
- 8 medium flour tortillas (burrito size)
- Cooking spray (for air fryer)
- Optional toppings: salsa, sour cream, guacamole
Instructions
- Heat olive oil in a large skillet over medium heat. Add diced onion and cook until softened, about 4 minutes.
- Add ground beef to the skillet. Cook, breaking it apart with a spoon, until browned. Drain off any excess grease.
- Stir in minced garlic and taco seasoning. Cook for 1 minute until fragrant.
- Pour in water and bring the mixture to a simmer. Cook until the liquid mostly evaporates, about 5 minutes. Remove from heat and stir in the shredded cheese until melted. This is your beef filling.
- Warm the flour tortillas briefly in the microwave (about 15 seconds) to make them pliable.
- Spoon about 1/3 cup of the beef filling onto the center of each tortilla. Fold in the sides, then tightly roll up the tortilla like a burrito. Secure with a toothpick if necessary.
- Preheat your air fryer to 375°F (190°C). Lightly spray the rolled chimichangas with cooking spray.
- Place the chimichangas in the air fryer basket in a single layer, ensuring they do not touch. Work in batches if needed.
- Air fry for 8 to 10 minutes, flipping halfway through, until the tortillas are golden brown and crispy.
- Remove toothpicks before serving. Serve your crispy chimichangas immediately with your favorite toppings.
Notes
- For extra crispiness, lightly brush the outside of the rolled chimichangas with melted butter before air frying.
- If you do not have taco seasoning, combine 1 teaspoon chili powder, 1/2 teaspoon cumin, 1/4 teaspoon oregano, and a pinch of salt and pepper.
- If you prefer baking, place them on a baking sheet, spray with oil, and bake at 400°F (200°C) for 15-20 minutes, flipping halfway.
Nutrition
- Serving Size: 1 chimichanga
- Calories: 350
- Sugar: 2
- Sodium: 550
- Fat: 18
- Saturated Fat: 7
- Unsaturated Fat: 11
- Trans Fat: 0
- Carbohydrates: 30
- Fiber: 2
- Protein: 18
- Cholesterol: 60