
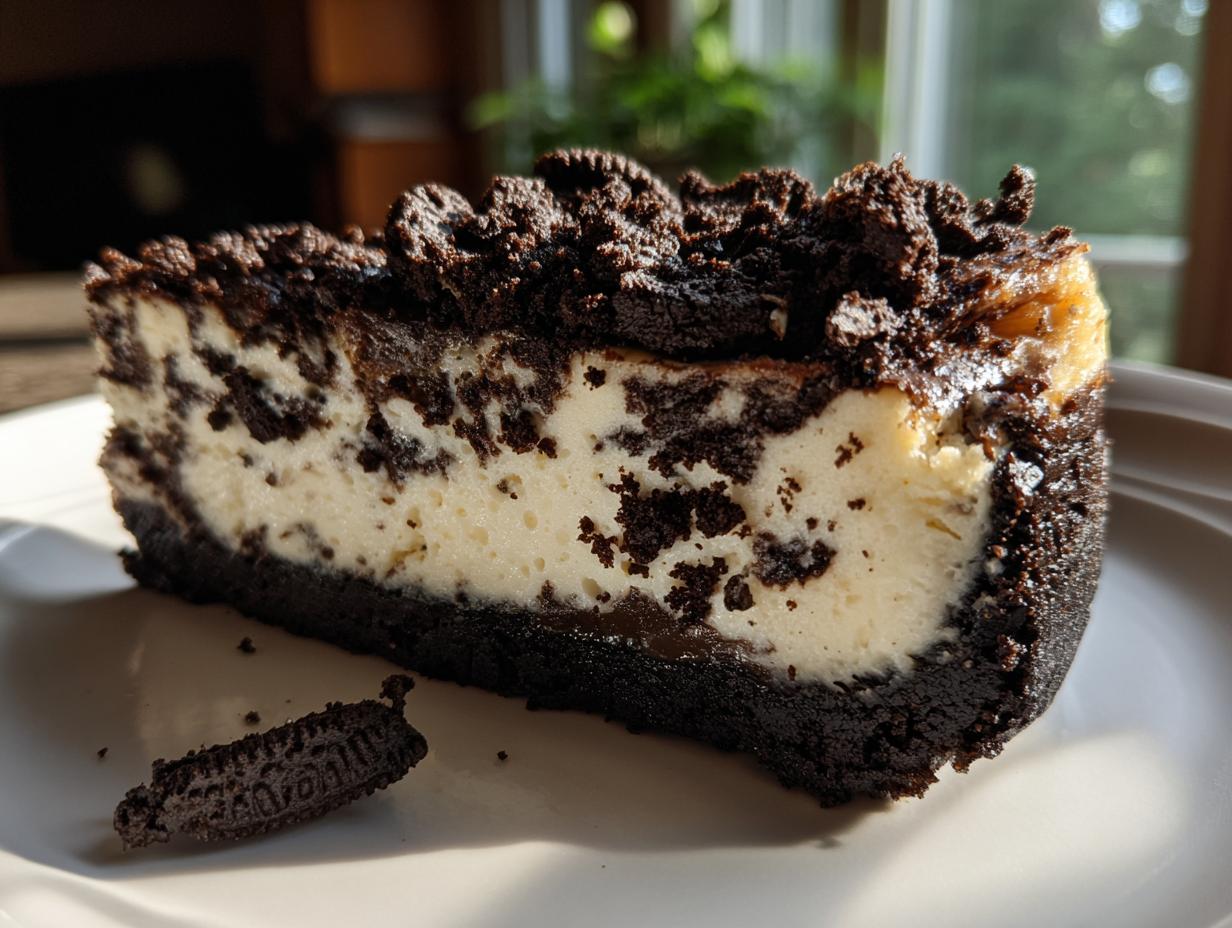
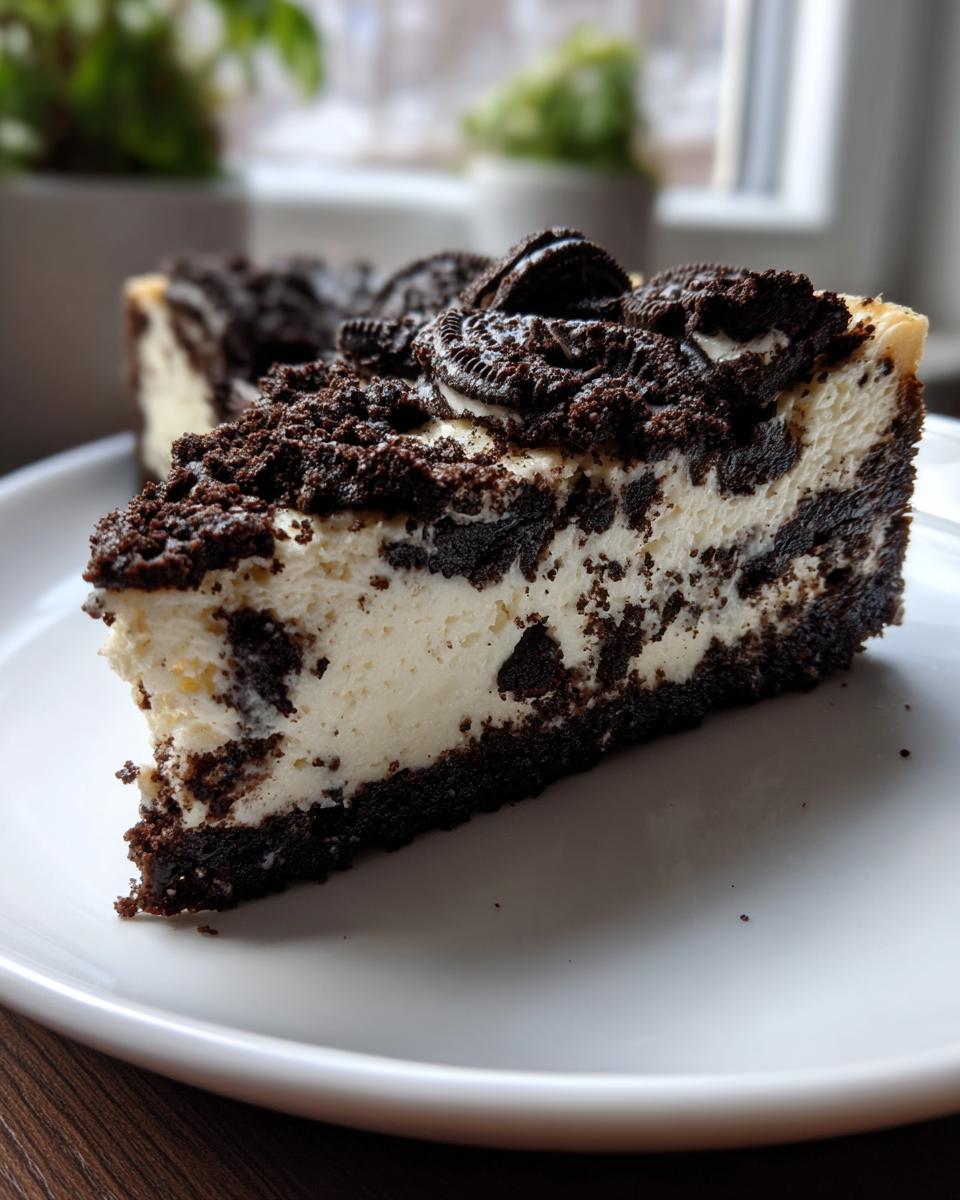
Hello there! Welcome to Frosted Fancies. I am just thrilled you stopped by today because we are ditching the ordinary and diving headfirst into pure chocolate-cookie decadence. Forget those crumbly, cracked disasters you sometimes see—we are making the Best Oreo Cheesecake you have ever tasted. Thanks to my background in food science and years working in professional test kitchens, I’ve cracked the code (pun intended!) for an unbelievably rich, silky, and absolutely crack-free oreo cheesecake. Seriously, this recipe is a showstopper, and I promise you can nail this on your very first try!
- Why This is the Ultimate oreo cheesecake Recipe (E-E-A-T Focus)
- Ingredients for the Best oreo cheesecake
- How to Prepare the Ultimate Baked oreo cheesecake
- Tips for Success with Homemade oreo cheesecake
- Storage and Reheating Instructions for oreo cheesecake
- Alternative: Easy No Bake Oreo Cheesecake
- Serving Suggestions for Your Decadent Dessert Ideas
- Frequently Asked Questions About oreo cheesecake
- Nutritional Estimates for This oreo cheesecake
- Share Your Homemade oreo cheesecake Success
- Serving Suggestions for Your Decadent Dessert Ideas
- Frequently Asked Questions About oreo cheesecake
- Nutritional Estimates for This oreo cheesecake
- Share Your Homemade oreo cheesecake Success
Why This is the Ultimate oreo cheesecake Recipe (E-E-A-T Focus)
So, why should you trust *my* oreo cheesecake recipe when there are a million out there? Well, because I’m Katie, and I spent over a decade working in professional food development. I understand the science behind that perfect, luscious texture! This isn’t just a cookbook recipe; it’s scientifically optimized for home ovens.
What sets this Baked Oreo Cheesecake apart? It’s all about precision to get you incredible results every time. Here’s what you get:
- Unbelievably creamy cheesecake recipe texture—no graininess allowed!
- Guaranteed results that resist messy cracking, especially when you follow my cooling steps.
- A deep, satisfying chocolate cookie cheesecake flavor that rivals any restaurant.
If you want a deep dive into texture science later, make sure to check out my general guide on a Creamy Cheesecake Recipe. But today, let’s focus on the Oreos!
Achieving Silky Smooth Texture in Your oreo cheesecake
The single biggest mistake people make when whipping up their Homemade Oreo Cheesecake is rushing the base ingredients. Remember those food science lessons? Smoothness starts before you even turn on the mixer!
You absolutely must use room temperature cream cheese and room temperature eggs. Cold ingredients simply won’t incorporate properly, leading to tiny, hard lumps. Then, when you mix everything, you need to beat the cream cheese until it’s perfectly smooth *before* adding sugar or eggs. Once you add the eggs, mix only until the streaks disappear—and seriously, *do not overmix*! Overmixing incorporates too much air, and that excess air causes sinkholes and cracks when it cools down. Less mixing equals a denser, silkier final product. It’s chemistry, folks!
Ingredients for the Best oreo cheesecake
Okay, let’s gather the goods for this Rich Dessert! Having everything measured out will keep you focused when the magic starts happening in the mixer. Trust me, grabbing that room temperature cream cheese ahead of time is non-negotiable for the smoothest result possible.
Ingredients for the Buttery Oreo Crust
- 1 3/4 cups Oreo cookie crumbs (that’s about 30 cookies, don’t skimp!)
- 1/4 cup unsalted butter, melted
Ingredients for the Rich oreo cheesecake Filling
- 3 (8 ounce) packages cream cheese, softened (Make sure these are soft!)
- 1 1/2 cups granulated sugar
- 1 teaspoon vanilla extract
- 1/4 teaspoon salt
- 4 large eggs, room temperature (Yes, room temp eggs again!)
- 1 cup sour cream, room temperature
- 1 cup crushed Oreo cookies (for texture inside the filling)
Optional Chocolate Ganache Topping Ingredients
- 1/2 cup heavy cream
- 1/4 cup powdered sugar
- 1 teaspoon vanilla extract
How to Prepare the Ultimate Baked oreo cheesecake
Getting this Baked Oreo Cheesecake just right is all about managing moisture and temperature, which is where my testing really comes in handy! We aren’t just throwing things in a pan; we’re executing a precise plan to get you that perfect, sliceable, creamy center. Make sure you have your springform pan ready to go before you start mixing. If you want to practice your base skills first, check out this guide on general Crust Recipes!
Step 1: Preparing the Oreo Crust and Oven Setup
First thing, get your oven heating up to 325°F (160°C). Now, wrap that 9-inch springform pan really well! I mean tightly with heavy-duty foil—we need to keep that water bath moisture out of our crust. Mix up your Oreo crumbs and melted butter until it looks like wet sand. Press that down into the bottom of the pan super firmly. Don’t be shy! Bake this crust for just 10 minutes, then let it cool off a bit while you move on to the creamy part.
Step 2: Mixing the Creamy oreo cheesecake Filling
This is the critical mixing stage. Start by beating your softened cream cheese aggressively until it is completely smooth—no lumps! Then, slowly add your sugar, vanilla, and salt. Once that’s incorporated, add the eggs, one at a time, mixing on *low* speed after each addition. Seriously, low speed! As soon as the last egg disappears, stop! Gently fold in your cup of crushed Oreos. Remember: overmixing is the enemy of creamy texture here.
Step 3: Baking the oreo cheesecake with a Water Bath
Place your foil-wrapped pan inside a big roasting pan. Pour the filling right over that cooled crust. Now, carefully pour hot water into the roasting pan until it comes about halfway up the sides of the springform. This water bath is your secret weapon against cracking! Bake for about 60 to 75 minutes. You’ll know it’s done when the edges are set, but the very center (like a generous two inches) still has a little wobble if you nudge the pan gently. That’s perfect!
Step 4: Slow Cooling for the Perfect oreo cheesecake Finish
Do NOT pull this beautiful oreo cheesecake out of the oven immediately! This is the most important part of avoiding cracks. Turn the oven off completely, crack the door open just an inch or two, and let the cheesecake sit in that slightly warm environment for a full hour. Then, take it out of the water bath, remove the foil, and let it cool completely on the counter. Only once it’s totally room temperature do you cover it and pop it into the fridge overnight. Patience pays off!
Tips for Success with Homemade oreo cheesecake
Listen, I know waiting is hard, especially when that amazing oreo cheesecake is sitting on the counter almost ready. But trust me, the extra steps I’ve mentioned are the difference between standard and spectacular. Since I’ve tested this hundreds of times in a professional setting, I can assure you these measures matter!
If you want every slice to look like it came from a fancy bakery—maybe even that famous Cheesecake Factory copycat version people obsess over—just follow these non-negotiables for a beautiful presentation.
Preventing Cracks in Your oreo cheesecake
The fight against cracks is real, but we win it with temperature control! First, always use room temperature ingredients for your filling; it mixes up beautifully smooth that way. Second, never skip the water bath—it keeps the heat gentle and even. Finally, the most important part: the slow cooling inside the turned-off oven. Three steps, zero cracks. It’s that simple when you use the right technique for your creamy cheesecake recipe.
Storage and Reheating Instructions for oreo cheesecake
Now that you’ve made the most perfect, decadent oreo cheesecake imaginable, the hardest part is waiting for it to chill! I know, I know, it smells amazing right now, but trust me when I say chilling is essential. This isn’t just about making it firm; the flavors of the Oreos, the cream cheese, and vanilla really need that cold time—at least six hours, but overnight is truly the gold standard around here.
When you store your leftovers, you want to treat this rich dessert gently. Make sure it’s completely cooled, then cover the springform pan loosely with plastic wrap or foil. If you can’t use the springform ring, transfer slices to an airtight container. This keeps out any lingering fridge odors, which nobody wants near their sugary treats!
A quick note on reheating this yummy Oreo Dessert: you generally don’t reheat cheesecake! It’s meant to be served cold or barely chilled. If, for some reason, you absolutely have to serve a slice that’s stone cold when everyone else wants room temperature, just set your slice out on the counter for about 20 to 30 minutes before you plan to eat it. That tiny bit of tempering brings out the best flavor without making it runny. Enjoy every bite of your stunning Homemade Oreo Cheesecake!
Alternative: Easy No Bake Oreo Cheesecake
Okay, full transparency here: sometimes you want the epic, decadent, just-out-of-the-oven vibe, but other times, you just *need* that creamy goodness fast, and maybe you don’t want to wrestle with a water bath. I totally get it! If you’re looking for an Easy Oreo Cheesecake that skips the oven entirely, I have you covered.
The main difference with the No Bake Oreo Cheesecake version is the texture. Since we skip the baking process, we rely on heavy cream whipped into stiff peaks to give us that glorious lift. It sets up beautifully firm in the fridge, delivering a fluffier, mousse-like texture compared to the dense, rich feel of our baked version above. It’s incredibly simple! For my detailed guide on making this fast version, check out the instructions here—it’s my favorite Easy Oreo Cheesecake walkthrough.
If you want to jump straight into that quicker method, you can find another great resource for that recipe walkthrough right here: No Bake Oreo Cheesecake. It’s the perfect solution for last-minute Party Desserts when you need something amazing fast!
Serving Suggestions for Your Decadent Dessert Ideas
This oreo cheesecake is just so rich and satisfying on its own, isn’t it? It truly stands up as a star when you serve it, but sometimes a little something extra just elevates a decadent dessert idea from great to unforgettable. I always try to balance that deep chocolate flavor we get from the cookies!
I rarely bother with heavy sauces with this one because the filling is already perfect, but if you’re taking it to a potluck or gathering, here are a few ways I dress mine up just before serving:
- Fresh Berries: A handful of beautiful, slightly tart raspberries or strawberries on top cuts through the richness perfectly. Just a small bowl of fresh fruit next to the slices works wonders!
- Dusting Duty: A light, airy dusting of unsweetened cocoa powder over the top adds a wonderful visual contrast and deepens the chocolate flavor just a touch.
- A Sip of Coffee: This might sound odd, but serving a small slice alongside a strong cup of black coffee or an espresso really makes the sweetness pop. It’s my favorite way to finish a rich dessert.
These pairings are super simple, which keeps the focus right where it belongs: on that velvety, crunchy, amazing Homemade Oreo Cheesecake!
Frequently Asked Questions About oreo cheesecake
I get so many messages from bakers tackling their first oreo cheesecake, and that’s fantastic! Most questions usually circle back to texture and how to make sure the presentation is flawless. Having tested hundreds of batches, I’ve gathered the most common hang-ups so you don’t have to worry. Remember, achieving the ultra-creamy cheesecake recipe look is totally doable!
Can I make mini oreo cheesecakes instead of a full one?
Yes, absolutely! Mini cheesecakes are actually brilliant for parties, and they bake much faster. You’ll want to use standard muffin tins lined with paper liners or perhaps silicone cups. You’ll only need about 20 to 25 minutes to bake them at 325°F, but honestly, rely on sight more than time—check when they look set. They are an amazing alternative if you want perfect portion control!
What is the best way to crush Oreos for the crust?
If you have an older food processor, use that! It gives you the most consistent, fine crumb, which is ideal for a sturdy crust. If you don’t have one, my backup method is the old-school technique: pop like 15 cookies into a sturdy Ziploc bag, seal it tight, and just whack away at it with a rolling pin! Shake it up until you’re happy. Consistency matters for a solid Crust Recipe!
Do I have to use a water bath for this oreo cheesecake?
For this specific Baked Oreo Cheesecake recipe, I really, truly recommend it. I know it seems like an extra hassle, but the water bath—that’s what we call the moist heat environment—is what regulates the temperature around the edges and the center evenly. That gentle heat transfer is the main reason why you skip those ugly cracks! If you want true silkiness in your Chocolate Cookie Cheesecake, don’t skip that step!
Nutritional Estimates for This oreo cheesecake
As a food scientist, I always want to give you the full picture, even if rich desserts aren’t exactly light fare! Please remember that these numbers are just estimates based on the exact ingredient list above, assuming you use standard Oreos, and are calculated per slice based on the recipe yielding 12 servings.
Here is a quick breakdown of what you can expect from one slice of this Rich Dessert:
- Serving Size: 1 slice
- Calories: 450
- Sugar: 35g
- Fat: 30g (Saturated Fat: 18g)
- Carbohydrates: 40g
- Protein: 7g
Enjoying something this delicious is all about moderation, so a single slice of this amazing oreo cheesecake is always perfect!
Share Your Homemade oreo cheesecake Success
I am so excited for you to bake this ultimate oreo cheesecake! Once you’ve managed that tricky water bath and pulled that perfect, crack-free beauty out of the oven, I absolutely want to hear all about it. Did the slow cooling work for you? Did you go for the simple powdered sugar dusting or the full chocolate topping?
Please leave a quick rating at the bottom of this post. It helps other home cooks know this recipe is reliable, which is so important in building trust, right? And if you snapped a picture of your stunning creation—maybe one next to that famous Oreo Cheesecake Recipe you’ve always admired—tag me on social media! I love seeing your kitchen successes. Happy baking, and thank you for trusting Frosted Fancies!
Serving Suggestions for Your Decadent Dessert Ideas
This oreo cheesecake is just so rich and satisfying on its own, isn’t it? It truly stands up as a star when you serve it, but sometimes a little something extra just elevates a decadent dessert idea from great to unforgettable. I always try to balance that deep chocolate flavor we get from the cookies!
I rarely bother with heavy sauces with this one because the filling is already perfect, but if you’re taking it to a potluck or gathering, here are a few ways I dress mine up just before serving:
- Fresh Berries: A handful of beautiful, slightly tart raspberries or strawberries on top cuts through the richness perfectly. Just a small bowl of fresh fruit next to the slices works wonders!
- Dusting Duty: A light, airy dusting of unsweetened cocoa powder over the top adds a wonderful visual contrast and deepens the chocolate flavor just a touch.
- A Sip of Coffee: This might sound odd, but serving a small slice alongside a strong cup of black coffee or an espresso really makes the sweetness pop. It’s my favorite way to finish a rich dessert.
These pairings are super simple, which keeps the focus right where it belongs: on that velvety, crunchy, amazing Homemade Oreo Cheesecake!
Frequently Asked Questions About oreo cheesecake
I get so many messages from bakers tackling their first oreo cheesecake, and that’s fantastic! Most questions usually circle back to texture and how to make sure the presentation is flawless. Having tested hundreds of batches, I’ve gathered the most common hang-ups so you don’t have to worry. Remember, achieving the ultra-creamy cheesecake recipe look is totally doable!
Can I make mini oreo cheesecakes instead of a full one?
Yes, absolutely! Mini cheesecakes are actually brilliant for parties, and they bake much faster. You’ll want to use standard muffin tins lined with paper liners or perhaps silicone cups. You’ll only need about 20 to 25 minutes to bake them at 325°F, but honestly, rely on sight more than time—check when they look set. They are an amazing alternative if you want perfect portion control!
What is the best way to crush Oreos for the crust?
If you have an older food processor, use that! It gives you the most consistent, fine crumb, which is ideal for a sturdy crust. If you don’t have one, my backup method is the old-school technique: pop like 15 cookies into a sturdy Ziploc bag, seal it tight, and just whack away at it with a rolling pin! Shake it up until you’re happy. Consistency matters for a solid Crust Recipes!
Do I have to use a water bath for this oreo cheesecake?
For this specific Baked Oreo Cheesecake recipe, I really, truly recommend it. I know it seems like an extra hassle, but the water bath—that’s what we call the moist heat environment—is what regulates the temperature around the edges and the center evenly. That gentle heat transfer is the main reason why you skip those ugly cracks! If you want true silkiness in your Chocolate Cookie Cheesecake, don’t skip that step!
Nutritional Estimates for This oreo cheesecake
As a food scientist, I always want to give you the full picture, even if rich desserts aren’t exactly light fare! Please remember that these numbers are just estimates based on the exact ingredient list above, assuming you use standard Oreos, and are calculated per slice based on the recipe yielding 12 servings.
Here is a quick breakdown of what you can expect from one slice of this Rich Dessert:
- Serving Size: 1 slice
- Calories: 450
- Sugar: 35g
- Fat: 30g (Saturated Fat: 18g)
- Carbohydrates: 40g
- Protein: 7g
Enjoying something this delicious is all about moderation, so a single slice of this amazing oreo cheesecake is always perfect!
Share Your Homemade oreo cheesecake Success
I am so excited for you to bake this ultimate oreo cheesecake! Once you’ve managed that tricky water bath and pulled that perfect, crack-free beauty out of the oven, I absolutely want to hear all about it. Did the slow cooling work for you? Did you go for the simple powdered sugar dusting or the full chocolate topping?
Please leave a quick rating at the bottom of this post. It helps other home cooks know this recipe is reliable, which is so important in building trust, right? And if you snapped a picture of your stunning creation—maybe one next to that famous Oreo Cheesecake Recipe you’ve always admired—tag me on social media! I love seeing your kitchen successes. Happy baking, and thank you for trusting Frosted Fancies!
PrintThe Ultimate Baked Oreo Cheesecake Recipe
Make the best Oreo cheesecake with a rich, creamy texture and a buttery Oreo crust. This recipe provides clear steps for a decadent dessert that avoids common cracking issues.
- Prep Time: 25 min
- Cook Time: 75 min
- Total Time: 9 hours 40 min
- Yield: 12 servings 1x
- Category: Dessert
- Method: Baking
- Cuisine: American
- Diet: Vegetarian
Ingredients
- 1 3/4 cups Oreo cookie crumbs (about 30 cookies)
- 1/4 cup unsalted butter, melted
- 3 (8 ounce) packages cream cheese, softened
- 1 1/2 cups granulated sugar
- 1 teaspoon vanilla extract
- 1/4 teaspoon salt
- 4 large eggs, room temperature
- 1 cup sour cream, room temperature
- 1 cup crushed Oreo cookies (for filling)
- 1/2 cup heavy cream (optional, for topping)
- 1/4 cup powdered sugar (optional, for topping)
- 1 teaspoon vanilla extract (optional, for topping)
Instructions
- Preheat your oven to 325°F (160°C). Wrap the outside of a 9-inch springform pan tightly with heavy-duty aluminum foil to prepare for a water bath.
- Prepare the crust: Mix the Oreo cookie crumbs and melted butter until fully combined. Press the mixture firmly and evenly into the bottom of the prepared springform pan. Bake the crust for 10 minutes. Remove from the oven and let it cool slightly.
- Prepare the water bath: Place the foil-wrapped springform pan inside a larger roasting pan. Set aside.
- Make the filling: In a large bowl, beat the softened cream cheese with an electric mixer until smooth. Gradually add the granulated sugar, vanilla extract, and salt. Beat until just combined. Do not overmix.
- Add the eggs one at a time, mixing on low speed after each addition until just incorporated. Mix in the sour cream until the batter is smooth.
- Gently fold in the 1 cup of crushed Oreo cookies.
- Pour the filling over the cooled crust in the springform pan.
- Carefully pour hot water into the roasting pan until the water reaches about halfway up the sides of the springform pan. This water bath helps prevent cracks.
- Bake for 60 to 75 minutes. The edges should look set, but the center 2 inches should still have a slight jiggle when gently nudged.
- Turn off the oven, crack the oven door open slightly, and let the cheesecake cool inside the oven for 1 hour. This slow cooling prevents cracking.
- Remove the cheesecake from the water bath and foil. Let it cool completely on a wire rack at room temperature.
- Once cool, cover the cheesecake and refrigerate for at least 6 hours, or preferably overnight, before serving.
- Prepare the topping (optional): Beat the heavy cream, powdered sugar, and vanilla extract until stiff peaks form. Spread over the chilled cheesecake before slicing.
Notes
- Use room temperature ingredients for the cream cheese and eggs; this prevents lumps and ensures a silky texture.
- For the best results and to avoid cracks, do not skip the slow cooling process inside the turned-off oven.
- If you want a Cheesecake Factory copycat look, press extra crushed Oreos around the edge of the chilled cheesecake before serving.
Nutrition
- Serving Size: 1 slice
- Calories: 450
- Sugar: 35g
- Sodium: 350mg
- Fat: 30g
- Saturated Fat: 18g
- Unsaturated Fat: 12g
- Trans Fat: 0.5g
- Carbohydrates: 40g
- Fiber: 1g
- Protein: 7g
- Cholesterol: 100mg