
Hello everyone, and welcome! I’m Katherine Hayes, and I’m so happy you stopped by Frosted Fancies today. We are diving headfirst into Tex-Mex comfort food, but we’re leaving the deep fryer in the cupboard where it belongs! If you’ve been dreaming of that satisfying crunch—that perfect snap you get from restaurants—but want a dish that’s easy enough for Tuesday night, you are in the right place.
We’re making the absolute best Baked Chicken Chimichangas. I promise you; these are crispy, packed with savory shredded chicken, and delightfully guilt-free. After years developing recipes professionally, I’ve figured out the exact balance needed so these turn out golden brown and perfectly crunchy in the oven every single time. Get ready for your new favorite quick chicken weeknight dinner!
- Why Our Easy Baked Chicken Chimichangas Recipe Works (EEAT Focus)
- Gathering Ingredients for Perfect Baked Chicken Chimichangas
- The Simple Steps to Make Crispy Baked Chicken Chimichangas
- Tips for Perfect Golden Brown Baked Chicken Chimichangas
- Making Ahead and Storing Your Baked Chicken Chimichangas
- Serving Suggestions for Your Healthier Chimichanga Recipe
- Frequently Asked Questions About Baked Chicken Chimichangas
- Nutritional Estimate for Baked Chicken Chimichangas
- Share Your Crispy Baked Chicken Chimichangas Experience
Why Our Easy Baked Chicken Chimichangas Recipe Works (EEAT Focus)
When people hear “baked chimichangas,” they often worry about sogginess. That’s totally fair! Deep frying gives instant crunch because the heat surrounds the tortilla completely. But trust me, after developing so many recipes, I cracked the code for achieving that incredible texture using far less oil.
The secret behind these crispy baked chimichangas is all about surface contact and a light, perfectly applied fat barrier. We use a brushing technique—not just a quick spray—which mimics the frying process by sealing the flour tortilla quickly when it hits that hot oven.
This method transforms what could be a soft wrap into one of the best low oil mexican recipes out there. You get all the flavor without the heavy mouthfeel. It’s the best of both worlds, truly!
Gathering Ingredients for Perfect Baked Chicken Chimichangas
Okay, gathering your supplies is half the battle, and I’ve made sure this list is super straightforward. We are using simple items that build huge flavor without requiring you to spend hours in the kitchen! You’ll need two cups of cooked, shredded chicken breast—feel free to use a rotisserie chicken here, it’s my secret shortcut for making this a true quick chicken weeknight dinner.
Next up are those essential seasonings: chili powder, cumin, garlic powder, oregano, salt, and pepper. These spices are what punch up that classic Tex-Mex flavor in your homemade chimichanga filling. Don’t forget the mild green salsa for moisture, your favorite cheese blend, and those sturdy flour tortillas.
- 2 cups cooked, shredded chicken breast
- 1 teaspoon chili powder
- 1/2 teaspoon cumin
- 1/2 teaspoon garlic powder
- 1/4 teaspoon dried oregano
- 1/4 teaspoon salt
- 1/8 teaspoon black pepper
- 1/4 cup mild green salsa
- 1 cup shredded Monterey Jack or cheddar cheese blend
- 8 medium flour tortillas (burrito size)
- 2 tablespoons olive oil or cooking spray
- Cooking spray for baking
Ingredient Notes and Substitutions for Baked Chicken Chimichangas
Let’s talk cheese! I love the combination of Monterey Jack and Cheddar because it melts beautifully and gives you that gorgeous stretch, but feel free to use Pepper Jack if you want a little kick. Also, a word on the salsa: the better your green salsa tastes on its own, the richer your finished chimichanga filling will be. Don’t use anything watery; we want it thick!
If you don’t have burrito-sized tortillas, you can use smaller ones, but you’ll need to reduce the amount of filling to keep them tight. We want them snug, not spilling out everywhere! This recipe is designed around that 8-count, aiming for four servings of two chimichangas each.
The Simple Steps to Make Crispy Baked Chicken Chimichangas
Here is where the magic happens! Because we’re aiming for a speedy 30 minute chicken dinner, preparation is key. First things first: crank that oven up to 400°F (200°C). Get a baking sheet ready; I like to line mine with parchment paper because it makes cleanup a breeze, but a light grease works too.
Take that perfectly seasoned chicken mixture we mixed up and drop about a third of a cup right down the center of your tortilla. Sprinkle your cheese evenly over the top. Now, the roll! You want to fold in the sides first, covering the filling completely, and then roll tightly from the bottom up. Make sure they are snug packages!
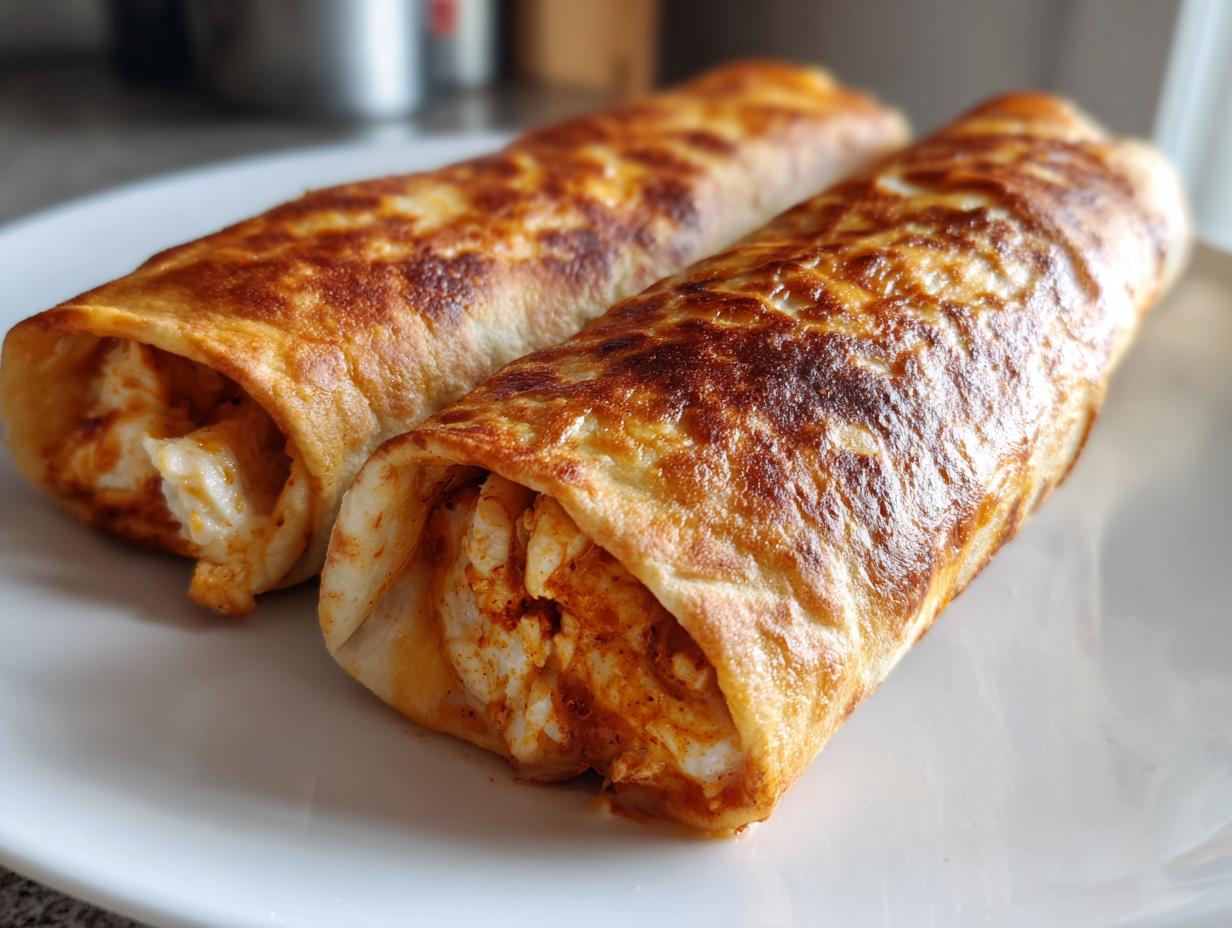
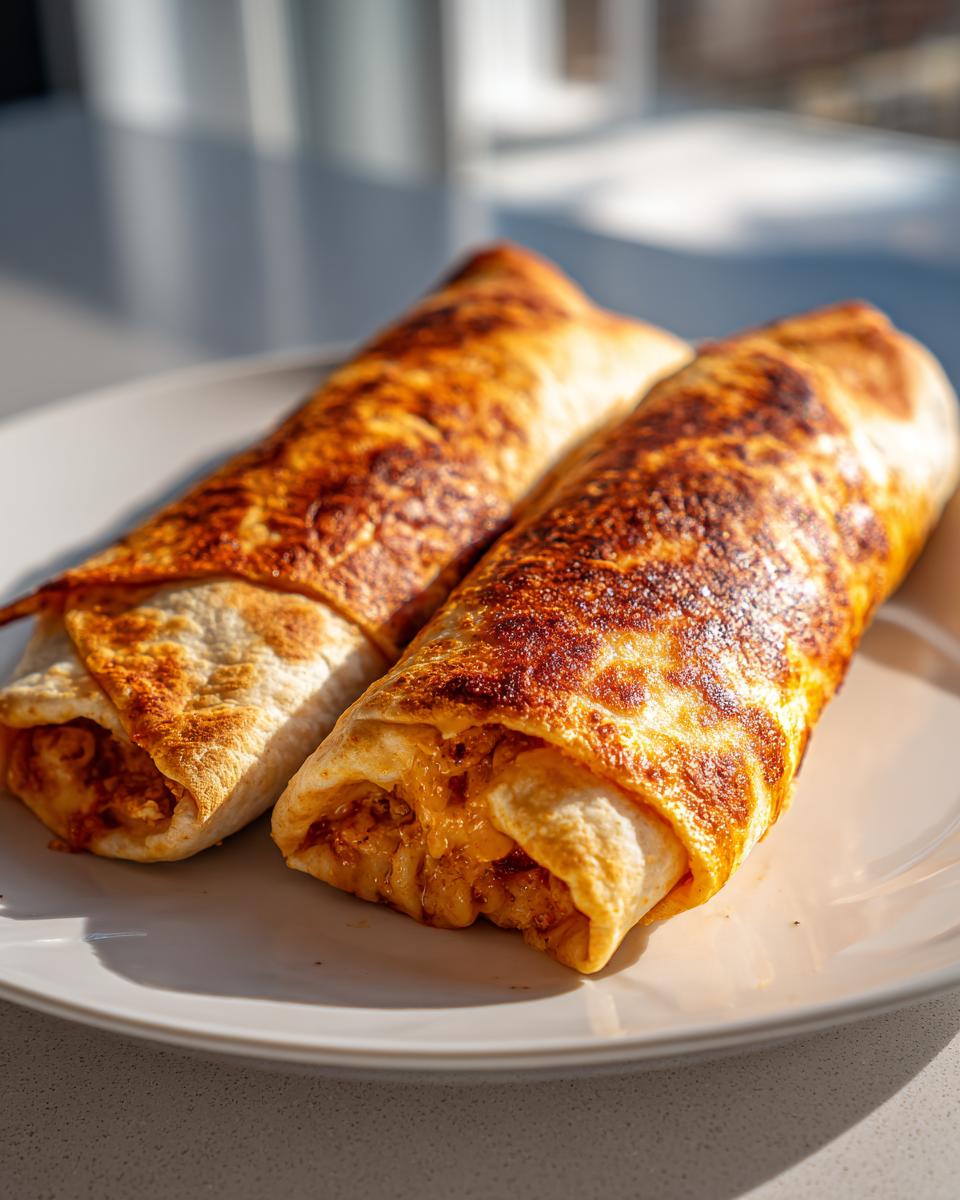
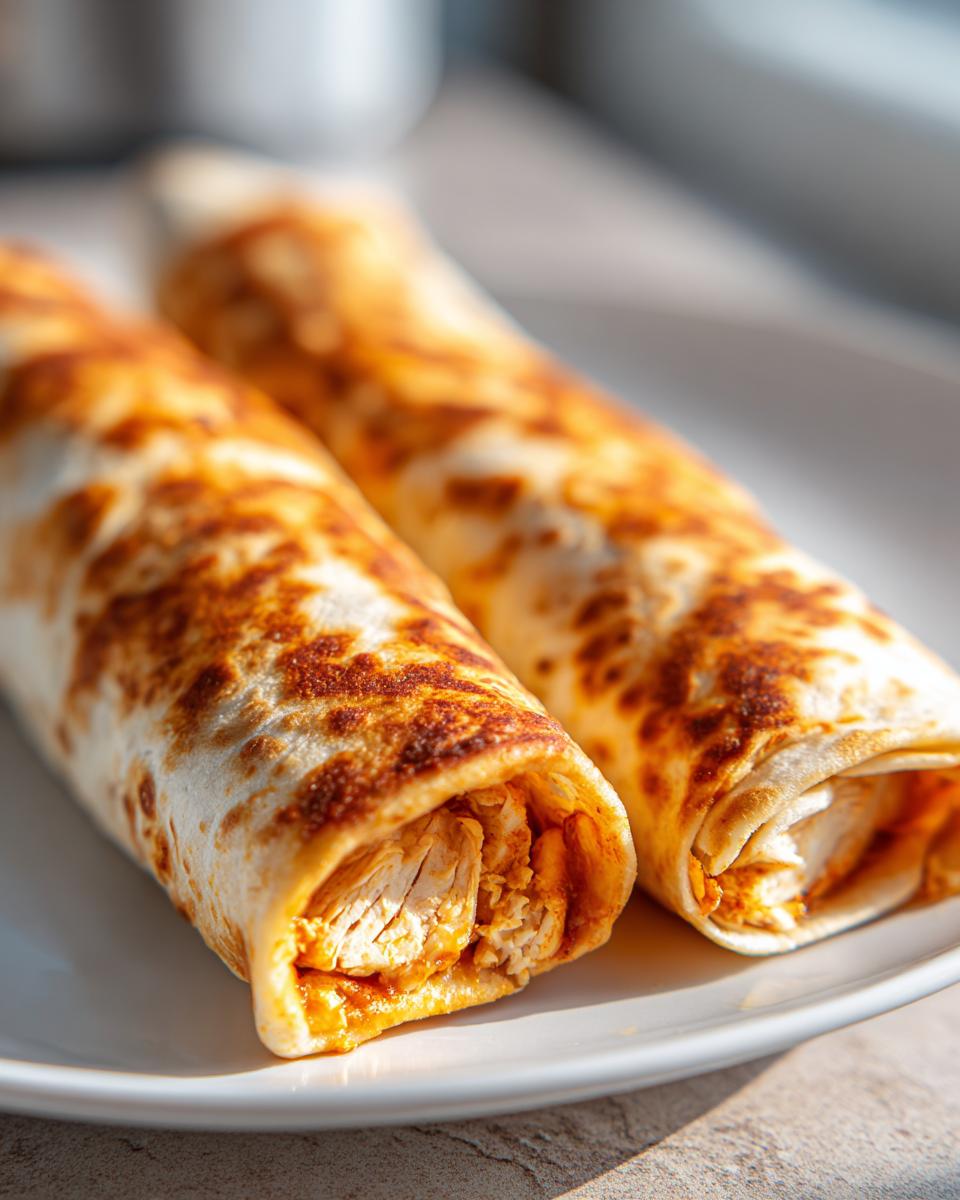
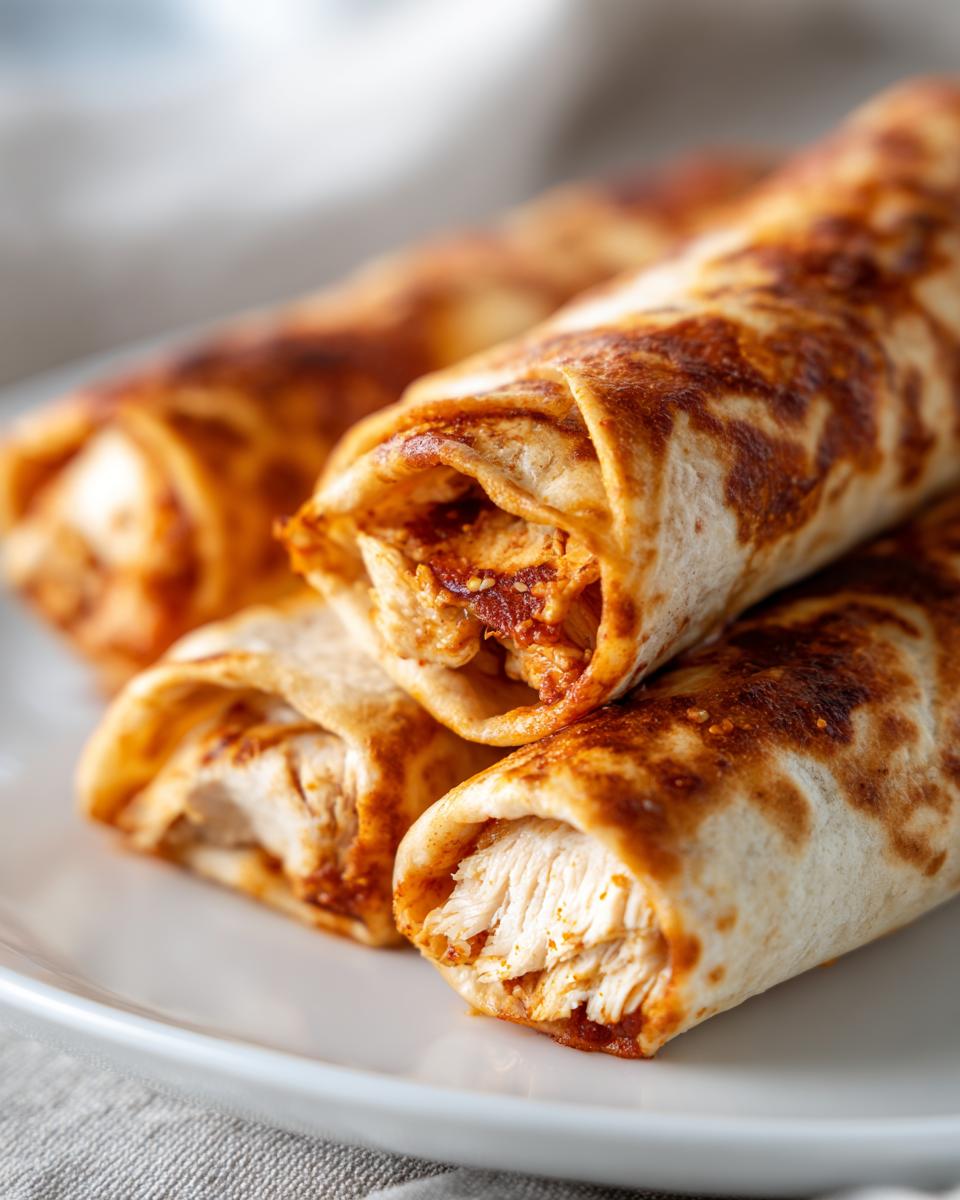
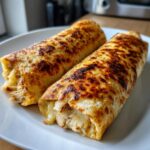
This next step is non-negotiable if you want that gorgeous texture. Brush the tops and sides of every rolled wrap generously with olive oil, or give them a really good coating of cooking spray. This is what delivers those perfect golden brown chimichangas.
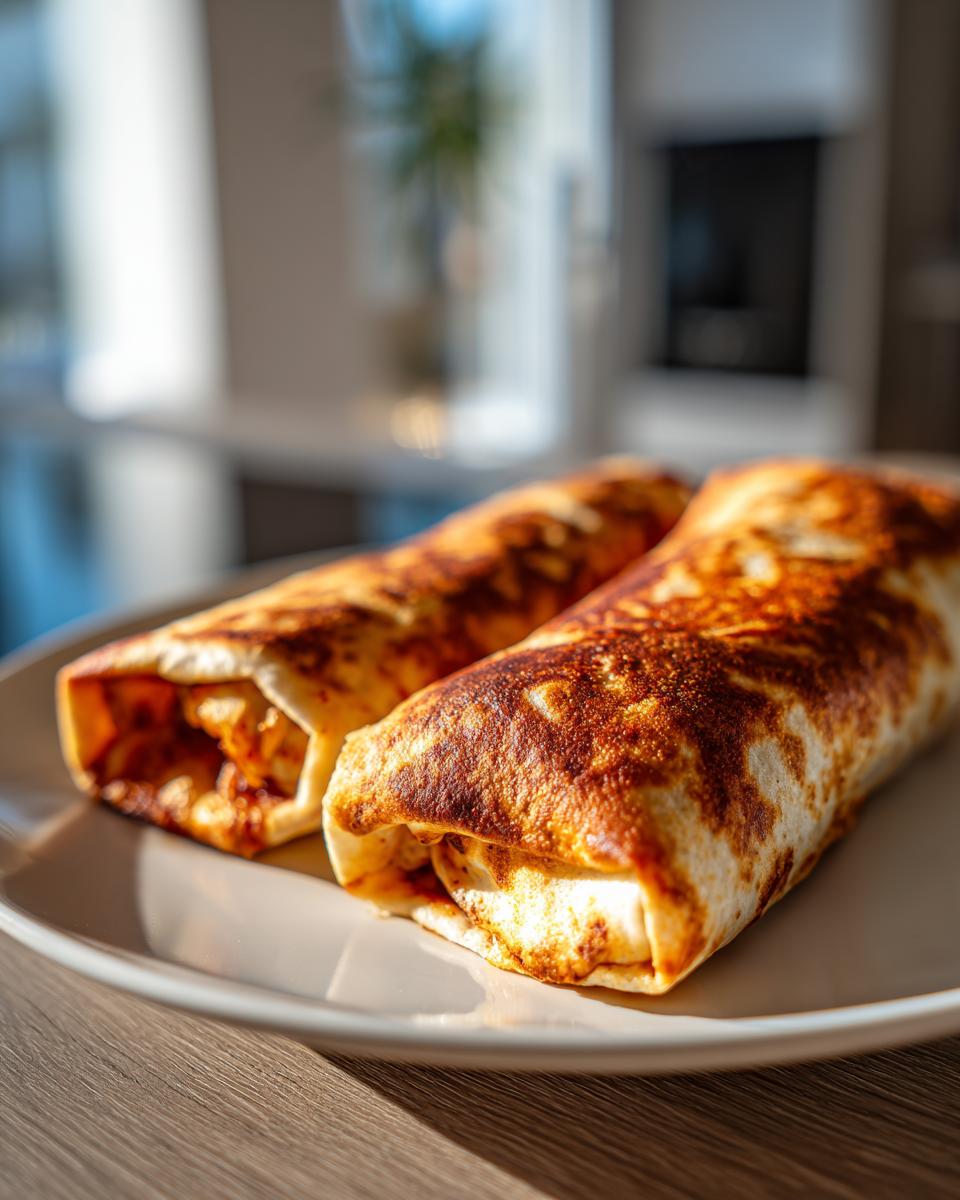
Pop them in the oven for about 12 to 15 minutes. Once the bottoms look ready, use tongs to carefully flip them over. Give them another 10 to 12 minutes. The whole process takes us right around 42 minutes total, and you get the most satisfying crunch!
Achieving Restaurant Style Baked Chicken Chimichangas at Home
To really nail that restaurant-quality snap, the flipping part is crucial. You need both sides exposed to that dry heat equally. When you place them on the sheet pan for the first bake, make sure every single one goes seam-side down. Trust me on this part! If the seam is up, the pressure builds, and you risk a blowout explosion right there in the oven, and nobody wants that messy situation.
When you flip them, make sure that oiled side hits the pan first for that second round of baking. That direct heat contact on the oiled side is what hardens and crisps up the tortilla shell beautifully, giving you that authentic crunch without needing a vat of hot oil.
Tips for Perfect Golden Brown Baked Chicken Chimichangas
Now that you have the main steps down, let me share a few little tricks I learned in the test kitchen that elevate these from good to absolutely amazing. These tips ensure you get those beautiful, **golden brown chimichangas** every time you make this healthier chimichanga recipe.
First, don’t skimp on the oiling step! If you are worried about them tasting oily, you’re not! The small amount of oil we use, especially if you’re aiming for that satisfying, almost **oven fried chicken chimichangas** texture, evaporates quickly in the high heat, leaving behind only crispiness. Brush it on right up to the very edges.
Also, make sure your oven is fully preheated. If you put them in too early, the tortilla soaks up the oil before the heat can set the crust, and then you’re stuck with a slightly greasy wrap instead of a crunchy one. We need that immediate blast of 400 degrees!
One last thing: If you notice one side is browning much faster than the other about halfway through the process, don’t be afraid to rotate the pan! It happens sometimes depending on where your oven hot spots are, and rotating ensures even cooking for every single delicious package.
Making Ahead and Storing Your Baked Chicken Chimichangas
I get it—sometimes you just can’t get dinner on the table in 42 minutes flat when life gets busy! The great news is that these make ahead baked chimichangas are fantastic for meal prep. You can assemble the entire thing—fill, fold, and roll—and keep them tightly wrapped in plastic wrap in the refrigerator for up to two days.
If you want to go further, freezing them is easy! Place the assembled chimichangas on a baking sheet and freeze them until solid. Then, transfer them to an airtight, freezer-safe bag or container. They are perfect for those nights when you desperately need an easy mexican comfort food fix!
Now, for reheating to keep that crunch: Skip the microwave! That’s the enemy of crispiness. Instead, reheat them straight from frozen (or thawed) right back into your 400°F oven. It might take about 20-25 minutes from frozen, but they will crisp right back up. A quick spray of olive oil before reheating helps bring that golden texture back to life!
Serving Suggestions for Your Healthier Chimichanga Recipe
Now that you have perfectly crunchy, delicious morsels, we need to talk toppings! Since we worked so hard to keep these baked chicken chimichangas light and guilt free mexican food, let’s keep the sides fresh! Ditch the heavy sour cream and grab some plain Greek yogurt instead; it provides the exact same creamy coolness with way more protein.
Fresh pico de gallo is an absolute must—that acidity cuts right through the richness of the cheese. If you’re looking for something heartier, a simple side of black beans seasoned with cumin and onion is always a winner. They are so easy and make this a wonderfully complete family friendly mexican meal!
Frequently Asked Questions About Baked Chicken Chimichangas
How do I prevent the tortillas from tearing when rolling these baked chicken chimichangas?
This is a super common issue when trying to fit a whole lot of filling into a soft tortilla! The best trick is to briefly warm your tortillas—just 10 to 15 seconds in the microwave—before you start assembling. This makes them incredibly flexible so they fold neatly without cracking. Also, make sure you aren’t overstuffing them; aim for that 1/3 cup measurement I put in the recipe. Overstuffing is the number one cause of blowouts!
Are these the same as deep-fried chimichangas, or will they be soft?
Nope, these are definitely not soft! The whole point of this restaurant style chimichangas at home recipe is to get that crunch without the deep fry mess. The crucial step here is brushing on that oil or cooking spray before baking. That fat, combined with that 400-degree heat, results in genuinely crispy, golden-brown exteriors. If you flip them halfway through, you maximize that amazing texture!
Can I use ground chicken instead of shredded in this healthier chimichanga recipe?
Oh, you totally can use ground chicken! If you go that route, you’ll need to cook it thoroughly first, draining off any excess fat. Since ground chicken doesn’t have the same structure as shredded breast, you might need to slightly reduce the amount of salsa you add to the filling so it doesn’t get too loose. You still want the filling to hold together when you roll it tight.
What kind of cheese is best for the homemade chimichanga filling?
I stick to Monterey Jack or a Mexican blend because they melt so smoothly and have a great flavor profile that complements the spices. Avoid pre-shredded cheeses if possible, though, because they often contain anti-caking agents that sometimes prevent the smoothest melt. Freshly shredded cheese melts into the filling beautifully, making it extra creamy before the tortilla gets crisp!
Nutritional Estimate for Baked Chicken Chimichangas
Now, because we are making these Baked Chicken Chimichangas at home using less oil than deep-fried versions, they are certainly lighter, but remember these estimations are just guidelines. I always use the data provided by my recipe software, which is based on standard ingredient measurements, so results can vary a little based on your exact cheese and tortilla sizes.
For two chimichangas (one serving), here is the general estimate:
- Serving Size: 2 chimichangas
- Calories: 410
- Fat: 16g (7g Saturated)
- Carbohydrates: 40g
- Protein: 28g
It’s a really balanced meal, honestly! It gives you a great amount of protein for such a quick meal, which I love.
Share Your Crispy Baked Chicken Chimichangas Experience
I poured my heart into this recipe so that you could have an incredibly delicious, yet relatively light, Tex-Mex night without the fuss! Now that you’ve made these crunchy beauties, I truly want to hear all about them. Did they turn out super crisp? Did your family devour the whole batch?
Please, don’t be shy! Head down to the comments section and let me know how you liked these Baked Chicken Chimichangas. A rating helps other cooks know that this recipe—one of my favorite easy mexican comfort food options—is absolutely reliable. It makes all the testing worth it!
Also, if you took a picture of your perfectly golden-brown spread, tag me on social media! Seeing your success with this simple Tex Mex dinner idea truly makes my day. Happy cooking, friends, and I can’t wait to see what you make next!
PrintEasy Crispy Baked Chicken Chimichangas (Guilt-Free Weeknight Dinner)
Welcome! You can make restaurant-quality, crispy Baked Chicken Chimichangas at home without deep frying. This easy recipe uses seasoned shredded chicken and minimal oil for a satisfying, guilt-free Tex-Mex dinner ready fast.
- Prep Time: 15 min
- Cook Time: 27 min
- Total Time: 42 min
- Yield: 4 servings 1x
- Category: Dinner
- Method: Baking
- Cuisine: Tex-Mex
- Diet: Vegetarian
Ingredients
- 2 cups cooked, shredded chicken breast
- 1 teaspoon chili powder
- 1/2 teaspoon cumin
- 1/2 teaspoon garlic powder
- 1/4 teaspoon dried oregano
- 1/4 teaspoon salt
- 1/8 teaspoon black pepper
- 1/4 cup mild green salsa
- 1 cup shredded Monterey Jack or cheddar cheese blend
- 8 medium flour tortillas (burrito size)
- 2 tablespoons olive oil or cooking spray
- Cooking spray for baking
Instructions
- Preheat your oven to 400°F (200°C). Lightly grease a baking sheet or line it with parchment paper.
- In a medium bowl, combine the shredded chicken, chili powder, cumin, garlic powder, oregano, salt, and pepper. Mix well to coat the chicken evenly with the seasonings.
- Stir in the green salsa until the chicken mixture is moist but not wet.
- Place about 1/3 cup of the chicken mixture and 2 tablespoons of cheese down the center of one tortilla.
- Fold the sides of the tortilla inward over the filling, then tightly roll the bottom edge up and over the filling to seal it, creating a neat package. Repeat with the remaining tortillas and filling.
- Lightly brush the tops and sides of each rolled chimichanga with olive oil or spray generously with cooking spray. This step is key for achieving a golden, crispy exterior.
- Place the chimichangas seam-side down on the prepared baking sheet.
- Bake for 12 to 15 minutes, then carefully flip each chimichanga over. Bake for another 10 to 12 minutes, or until the tortillas are golden brown and crispy.
- Serve immediately with your favorite toppings like sour cream, guacamole, or fresh salsa.
Notes
- For extra crispiness, you can lightly spray the chimichangas again halfway through the second baking time.
- You can prepare the filling ahead of time and store it in the refrigerator for up to two days.
- Use pre-cooked rotisserie chicken to cut down on prep time for this quick chicken weeknight dinner.
Nutrition
- Serving Size: 2 chimichangas
- Calories: 410
- Sugar: 3
- Sodium: 650
- Fat: 16
- Saturated Fat: 7
- Unsaturated Fat: 9
- Trans Fat: 0
- Carbohydrates: 40
- Fiber: 3
- Protein: 28
- Cholesterol: 85