
Welcome! I’m Katherine Hayes, and I truly love that you’re joining me here at Frosted Fancies today. If you’re looking for the ultimate summer sweet—something incredibly refreshing, perfectly chewy, and bursting with real fruit flavor—you’ve landed in the right spot! We’re diving into making the best **watermelon mochi** you’ve ever tasted. Trust me, this recipe is designed to work perfectly for you. After spending years understanding the science behind texture development in my food science background and developing thousands of recipes professionally, I’ve cut out all the fuss. This easy, naturally flavored recipe guarantees that jiggly, delightful texture you crave without any artificial dyes or complicated techniques.
- Why You Will Love This Easy Watermelon Mochi Recipe
- Essential Ingredients for Perfect Watermelon Mochi
- How to Make Chewy Watermelon Mochi Treats Step-by-Step
- Tips for Perfecting Your Watermelon Mochi Recipe
- Ingredient Notes and Substitutions for Fruity Mochi Bites
- Storage and Reheating Instructions for Homemade Mochi Treats
- Frequently Asked Questions About Watermelon Mochi
- Serving Suggestions for This Refreshing Asian Dessert
- Nutritional Estimates for Watermelon Mochi Bites
Why You Will Love This Easy Watermelon Mochi Recipe
This isn’t just any dessert; it’s your new summer obsession! We keep things straightforward so you get that amazing result every single time you try this **Watermelon Mochi Recipe**. Forget complicated steps; we focus on making your kitchen work for you.
- Achieves that incredible, pillowy, soft chewy texture that defines great mochi.
- It uses natural, vibrant watermelon flavor—no fake stuff here!
- This is an incredibly easy mochi recipe, perfect for first-timers looking for a refreshing Asian dessert.
- It makes fantastic, bite sized watermelon sweets ideal for parties.
You can see why so many people are saving it! Check out this popular recipe out there—but ours is easier!
Essential Ingredients for Perfect Watermelon Mochi
When making **watermelon mochi**, the quality of your ingredients really shines through, especially since we are skipping the dyes for that beautifully natural look. Because we want that intense, sweet fruit taste, we rely on just a few key items. My goal in writing this **Watermelon Mochi Recipe** was to keep it approachable, but that means prepping the watermelon juice just right. You want real fruit flavor, not weak sweetness!
Here is what you need to grab before you start mixing:
- 1 cup Watermelon Juice (Make sure this is strained and concentrated—I often simmer mine down a bit to get rid of excess water!)
- 1 cup Glutinous Rice Flour (This is crucial! You must use mochiko or glutinous rice flour for that chewy texture.)
- 1/4 cup Granulated Sugar (This balances the fruit perfectly.)
- 1/4 cup Water (You might need a tiny splash more, depending on your juice.)
- 1 tablespoon Cornstarch (This is your best friend for dusting later on.)
If you’re looking for other ways to keep things super clean, you should definitely see this dye-free approach—it focuses on using only natural coloring methods!
How to Make Chewy Watermelon Mochi Treats Step-by-Step
Okay, this is where the magic happens, but don’t panic! It might seem like one big lump of dough, but if you follow these steps exactly, you’ll get that wonderfully soft chewy texture dessert everyone raves about. The whole process moves pretty quickly once you get going. Pay close attention to the temperature—that’s my secret to success for any **Watermelon Mochi Recipe**.
Preparing the Watermelon Base for Your Watermelon Mochi
First things first: your watermelon juice needs to be concentrated. If you use juice straight from the melon, your mochi dough ends up watery and floppy, and we definitely don’t want that! Take a larger amount of juice (like 1.5 cups) and gently simmer it on low heat until you’ve reduced it down to exactly 1 cup. This concentrates that bright, fresh flavor so much better than any dye could! Once it’s reduced, you absolutely must let it cool completely before you even think about mixing it. Warm juice speeds up the cooking process too fast, and we need control!
Cooking the Mochi Dough for a Soft Chewy Texture Dessert
In a microwave-safe bowl, whisk your glutinous rice flour and sugar together first. Then, slowly pour in that cooled juice, mixing until it’s smooth, followed by your small amount of extra water. Now, covering is key! Cover the bowl tight with plastic wrap, but leave a tiny little vent so steam can escape. Microwave on high for 1 minute, stir vigorously (careful, it’s hot!), re-cover, and repeat, stirring every minute until the dough is thick and looks translucent, meaning it’s cooked through—usually about 4 to 6 minutes total. If you prefer steaming, cover the dish well and steam for about 15 to 20 minutes. Either way, you are looking for that opaque, sticky look to be replaced by a shiny, cooked surface. I’ve seen people use both methods, and both give you a fantastic texture, which you can explore in great detail over here.
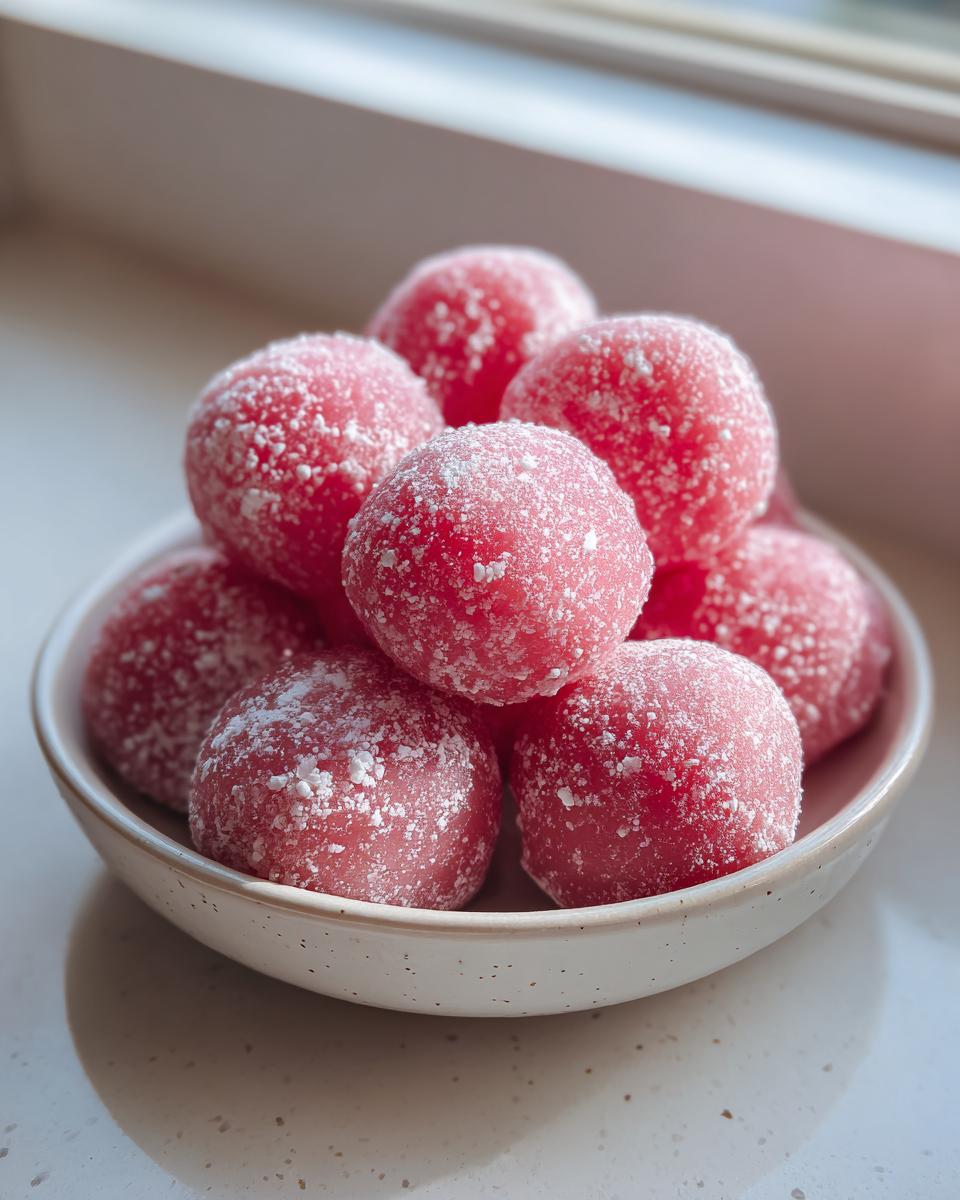
Shaping Your Bite Sized Watermelon Sweets
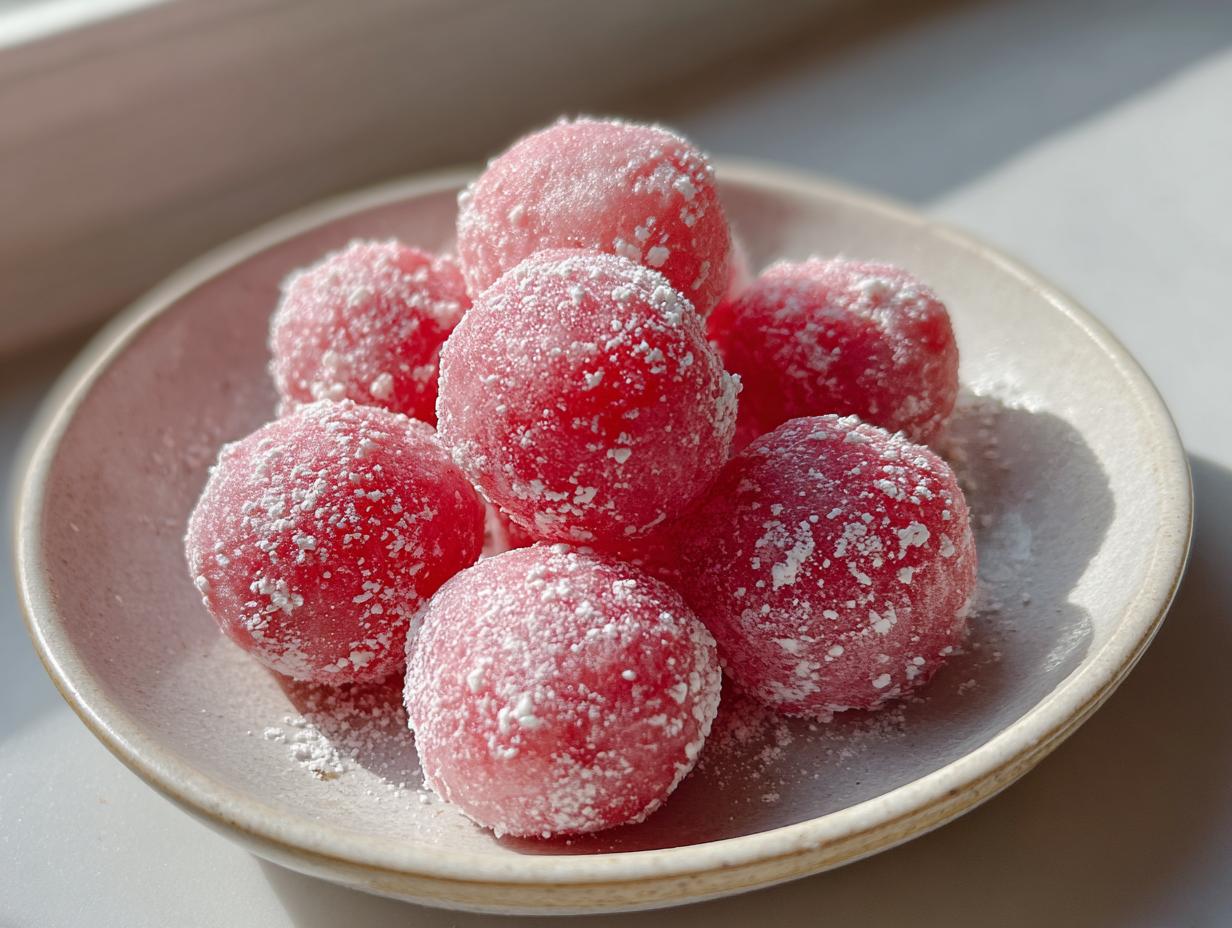
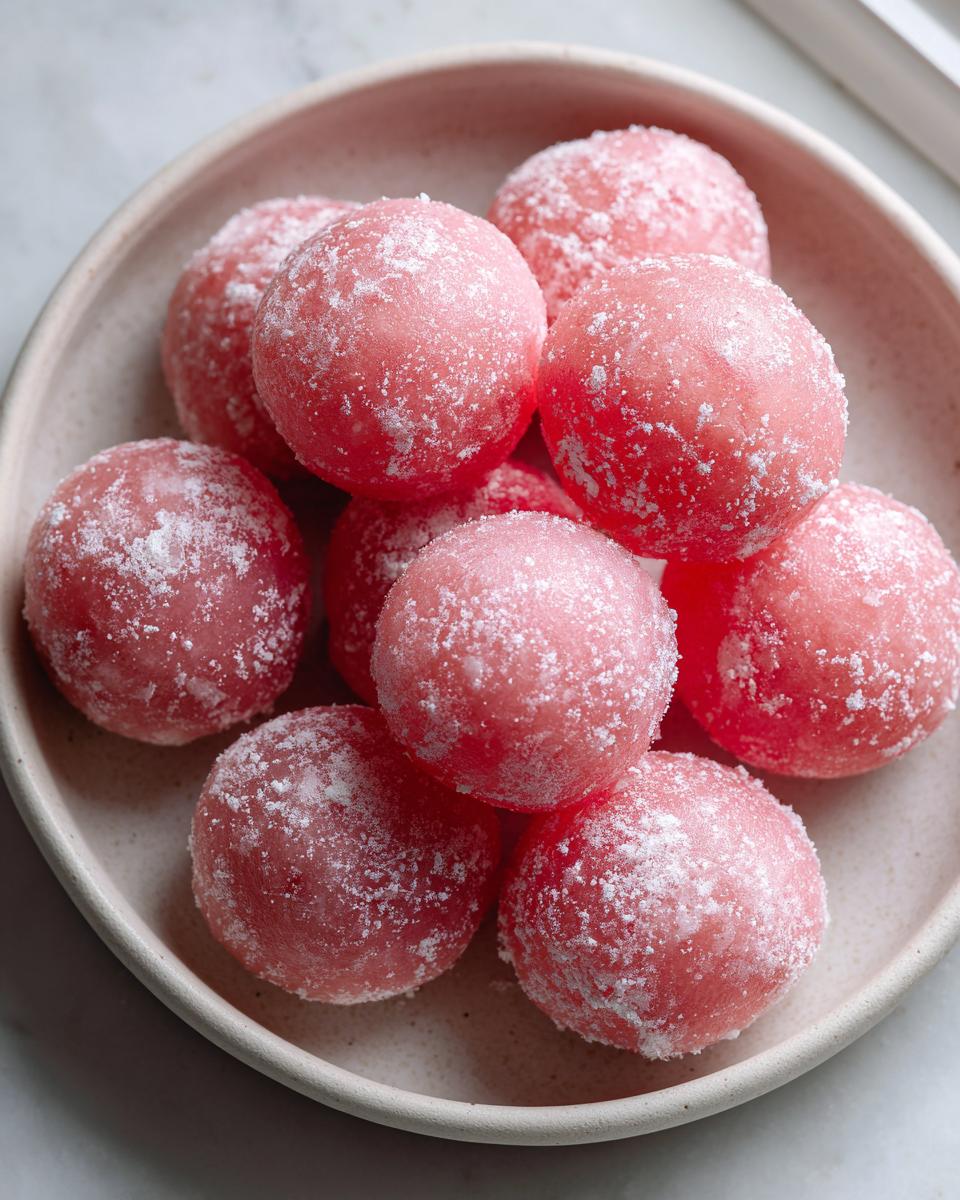
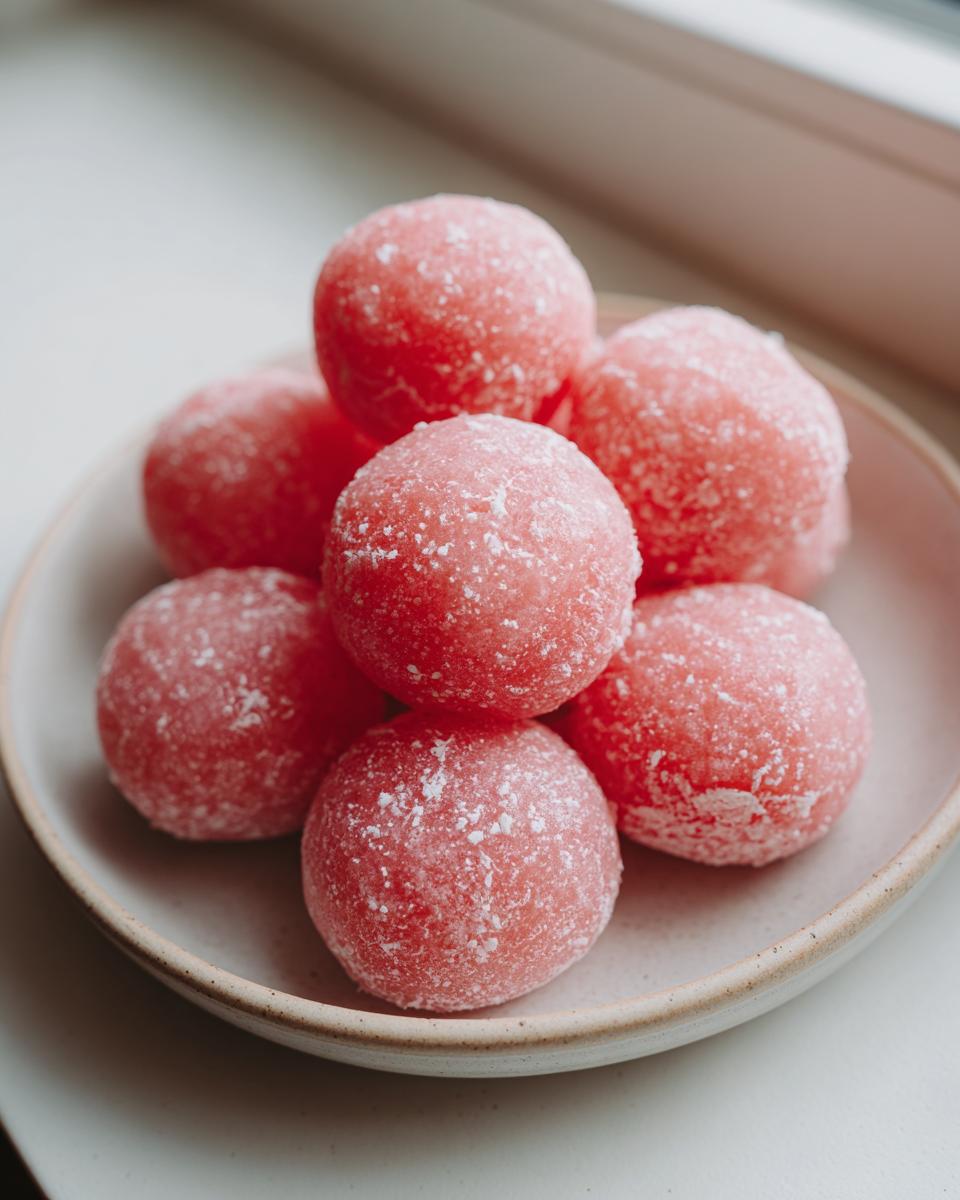
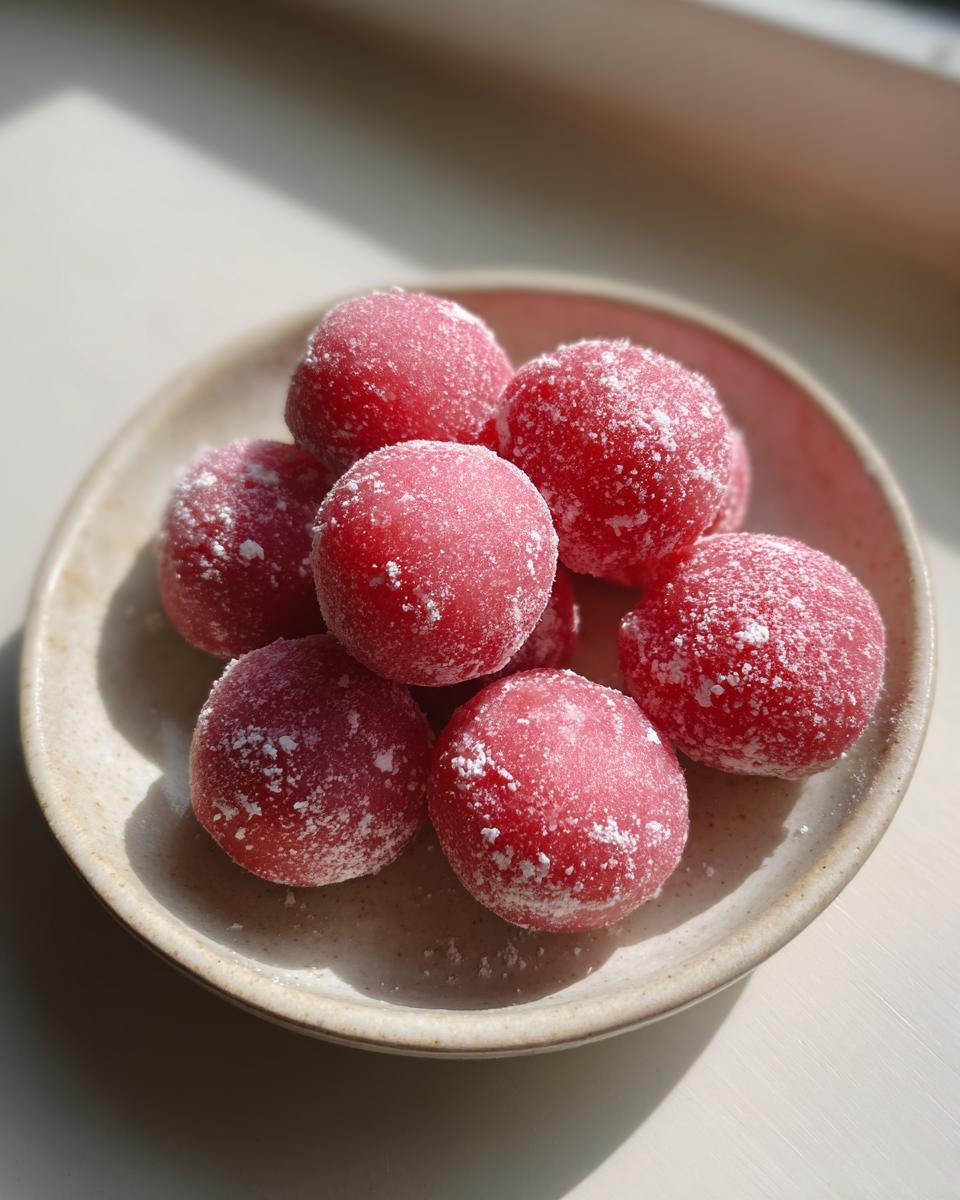
Once the dough is warm enough to touch, it’s time to get messy! Dust your entire surface generously with cornstarch—this prevents the dough from gluing itself to everything. Dust your hands too! Transfer the dough out and gently knead it just a few times to incorporate that starch and make it smooth and easy to work with. We aren’t developing gluten here, just making it handled! Roll that soft dough into a long log, like a thick rope, and slice it into small, even pieces. Roll each piece between your palms until you have a perfect little ball. Dust them one last time to make sure they don’t stick together in a big pile. Take a look at these cute shapes for inspiration!
Don’t forget to check out this other great method for cooking inspiration!
Tips for Perfecting Your Watermelon Mochi Recipe
Getting that incredible, soft chewy texture dessert consistency takes just a little insider knowledge, which I’m happy to share! The absolute number one issue people run into with **watermelon mochi** is stickiness. I remember the first time I tried to microwave it without enough cornstarch powder on my surface; my dough turned into a pink, gooey abstract sculpture that was absolutely impossible to shape! Don’t let that happen to you!
If your dough seems a little too stiff after cooking, don’t stress! Just wet your hands slightly with water and slowly knead in a tiny bit more water until the dough relaxes back into that beautiful, pliable texture. Conversely, if it is just too floppy and won’t hold its shape, you guessed it—more cornstarch! Work it in gently. Remember, the goal is melt-in-your-mouth softness, not rubber. For a visual guide on how perfectly cooked mochi behaves, you can reference the tips found here. It’s all about that jiggly wobble!
Ingredient Notes and Substitutions for Fruity Mochi Bites
I know home cooks love flexibility, especially when trying to make a recipe work with what’s on hand! The most critical component here, which you really shouldn’t swap out if you want that classic **watermelon mochi** chew, is the flour. You simply must use glutinous rice flour, often labeled as Mochiko. Regular rice flour just won’t give you that springy, satisfying texture! If you look online, some folks try using tapioca starch, but that tends to result in something chewier, maybe a bit too gummy.
Now, let’s talk about that watermelon juice concentration we discussed earlier. If you used store-bought juice that’s already intensely flavored, you might skip the simmering step! That saves you time right there. But if you’re using super fresh, watery melon, you need that reduction step to concentrate the flavor so we don’t end up with pale, bland treats.
For those wanting the absolute easiest version—the legendary **3 Ingredient Mochi**—you can omit the added sugar entirely *if* your watermelon is unbelievably sweet, or if you are planning to add a sweet filling later on. For this specific recipe, though, the sugar helps the dough cook evenly and keeps the texture unbelievably smooth. If you’re interested in seeing how others approach these lighter recipes, check out the ideas over at this site. They often have great takes on minimizing ingredients for **Fruity Mochi Bites**!
Storage and Reheating Instructions for Homemade Mochi Treats
You’ve made beautiful, wonderful **watermelon mochi**! Now, how do we keep these **bite sized watermelon sweets** tasting perfect? This is where you need to listen to my advice, because mochi texture is fickle! If you’re planning on eating these within a few hours, leaving them out on the counter in an airtight container at room temperature is the best way to go. They stay at their absolute softest and most wonderfully chewy that way.
However, if you need to save them for a few days—maybe you made them for a party later in the week—you’ll need to refrigerate them. Just pop them into an airtight container, making sure to dust them generously with cornstarch before sealing the lid. I always tell folks, do NOT skip that cornstarch dusting!
Here’s the tradeoff: chilling always makes mochi firm up a bit, and that soft, pillowy quality you worked so hard for will lessen. That’s just the nature of the glutinous rice flour! When you pull them out after refrigeration, let them sit on the counter for about 20 to 30 minutes before serving them. This little bit of warming time helps them regain much of that soft texture. Reheating mochi isn’t usually recommended unless you’re freezing them, so I always suggest enjoying them fresh or slightly warmed after chilling. For the best storage tips from another great source, take a peek over here; they cover keeping these **refreshing Asian dessert** treats perfectly.
Frequently Asked Questions About Watermelon Mochi
I get so many great questions after people try making this **watermelon mochi** the first time! It’s normal to have questions when you’re working with glutinous rice flour because the texture can be a little tricky at first. Don’t worry, we can absolutely address the texture, coloring, and how this fits into a **gluten free mochi** lifestyle right here!
Can I use fresh watermelon chunks instead of juice for this Watermelon Mochi Recipe?
You certainly *could* try tossing in chunks, but honestly, I wouldn’t recommend it for this recipe if you want smooth **Fruity Mochi Bites**. The problem with chunks is that they don’t mix uniformly into the dough like liquid does. You end up with pockets of flavorless, cooked melon pulp instead of that beautiful, even chewiness. We need the liquid juice to properly hydrate the rice flour so it cooks into that smooth, pliable dough. If you want to use chunks, you’d need to blend them into a puree first, then strain it really well, which basically brings you right back to using juice!
How do I ensure my watermelon mochi has that perfect soft chewy texture?
This is my favorite question! Achieving that perfect **soft chewy texture dessert** quality comes down to two things, which I’ve focused on heavily in our **Easy Mochi Recipe**. First, you *must* use the correct flour—glutinous rice flour (Mochiko) is non-negotiable for that tell-tale texture. Second, you need to cook it completely! Whether you microwave or steam, keep going until the dough transforms from a paste into something smooth, shiny, and fully translucent. If you stop early because it looks *almost* done, it will be gummy and dense later. I promise you, pushing through that final minute of cooking makes all the difference in producing a truly **refreshing summer dessert**!
If you’re curious about how others handle their cooking times, feel free to look at some user photos here or see general tips at this site!
Serving Suggestions for This Refreshing Asian Dessert
These **watermelon mochi** morsels are fantastic all on their own, but they truly shine when paired with something simple. Since they are so light and **cooling snacks recipe** perfect, they don’t need heavy accompaniments. I love serving them slightly chilled alongside a cup of chilled green tea—the mild bitterness of the tea cuts through the sweetness beautifully. They are also absolutely perfect as **Summer Party Desserts** on a platter mixed with plain vanilla or coconut mochi if you want to introduce variety! When you look at how others serve them, like over at this site, you see they keep the focus light and bright. They’re just lovely little **unique dessert ideas**!
Nutritional Estimates for Watermelon Mochi Bites
Now, I know some of you health-conscious bakers out there want the lowdown on what you’re whipping up! As a food science enthusiast, I always stress that these figures are just estimates for our **Watermelon Mochi Bites**. We calculate these totals based on the standard ingredients listed in the recipe, so please keep in mind commercial products or slight variations in your fruit concentration might change these numbers slightly.
For a single serving of three pieces of this **refreshing Asian dessert**, here’s what you’re generally looking at. It’s truly a light treat, perfect for enjoying guilt-free during the summer!
- Serving Size: 3 pieces
- Calories: Around 95
- Sugar: About 7g
- Fat: Very low, around 0.2g (mostly unsaturated!)
- Carbohydrates: Approximately 22g
- Protein: About 1.5g
It’s wonderful to see such low fat content, making this a guilt-free alternative to heavier **Cooling Snacks Recipe** options. Remember, these mochi are wonderfully light! Do you have any other questions about the components of our **Easy Fruit Filled Mochi**? You can find some other fun breakdowns and ideas over at this site!
PrintEasy, Chewy Watermelon Mochi Recipe (Natural Flavor)

Make soft, chewy Watermelon Mochi at home. This easy recipe delivers refreshing, bite-sized summer sweets using natural fruit flavor for a delightful gluten-free Asian dessert.
- Prep Time: 15 min
- Cook Time: 10 min
- Total Time: 25 min
- Yield: 18 servings 1x
- Category: Dessert
- Method: Microwave/Steaming
- Cuisine: Japanese
- Diet: Vegetarian
Ingredients
- 1 cup Watermelon Juice (strained and concentrated)
- 1 cup Glutinous Rice Flour (Mochiko)
- 1/4 cup Granulated Sugar
- 1/4 cup Water (or more, for consistency)
- 1 tablespoon Cornstarch (for dusting)
Instructions
- Prepare the Watermelon Juice: Strain 1.5 cups of fresh watermelon juice down to 1 cup of concentrated liquid. You can gently simmer it on low heat to reduce the water content slightly, which deepens the flavor. Let it cool completely.
- Mix Dry Ingredients: In a microwave-safe bowl, whisk together the glutinous rice flour and sugar until fully combined.
- Combine Wet and Dry: Slowly pour the cooled watermelon juice into the flour mixture while whisking constantly to prevent lumps. Add the 1/4 cup of water, mixing until you have a smooth, pourable batter.
- Steam or Microwave the Dough: Cover the bowl with plastic wrap, leaving a small vent. Microwave on high for 1 minute, stir well, and repeat this process (1 minute intervals, stirring in between) until the dough is thick, translucent, and no longer sticky or wet (usually 4-6 minutes total). Alternatively, steam the batter in a covered dish over boiling water for 15-20 minutes until cooked through.
- Cool the Dough: Once cooked, let the mochi dough cool slightly until it is warm enough to handle.
- Prepare Work Surface: Dust a clean surface or cutting board generously with cornstarch.
- Knead and Shape: Transfer the warm dough onto the cornstarch. Dust your hands with more cornstarch and gently knead the dough a few times to incorporate the starch and make it pliable.
- Portion the Mochi: Roll the dough into a long log. Cut the log into small, equal pieces. Roll each piece into a small ball to create your bite-sized watermelon mochi treats.
- Dust and Serve: Dust the finished mochi lightly with cornstarch to prevent sticking. Serve immediately or chill briefly for a firmer texture.
Notes
- For a stronger watermelon color without artificial dye, use a small amount of concentrated watermelon puree instead of juice, or add a drop of natural red food coloring if desired.
- Store leftover mochi in an airtight container at room temperature for up to one day, or refrigerate for up to three days. They taste best the day they are made.
- If the dough feels too stiff during kneading, wet your hands slightly and work in a tiny bit more water until you achieve a soft, chewy texture.
Nutrition
- Serving Size: 3 pieces
- Calories: 95
- Sugar: 7
- Sodium: 1
- Fat: 0.2
- Saturated Fat: 0.1
- Unsaturated Fat: 0.1
- Trans Fat: 0
- Carbohydrates: 22
- Fiber: 0.5
- Protein: 1.5
- Cholesterol: 0