
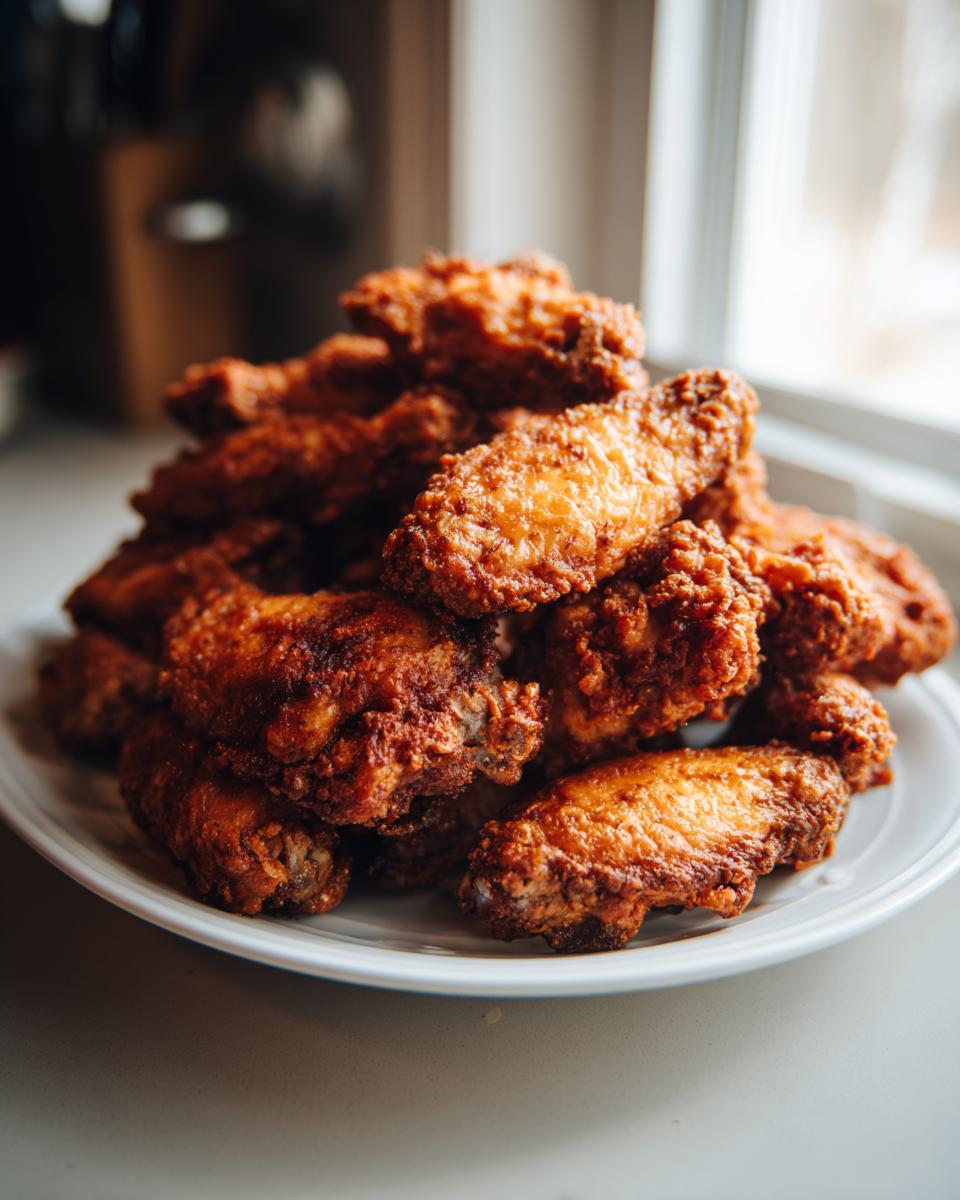
Hello there! Welcome back to the kitchen—I’m Katie, and I am so happy you stopped by today. If you’re like me, you absolutely adore chicken wings, but the idea of deep-frying them just seems messy, complicated, and frankly, a little greasy for a weeknight or even a big game day.
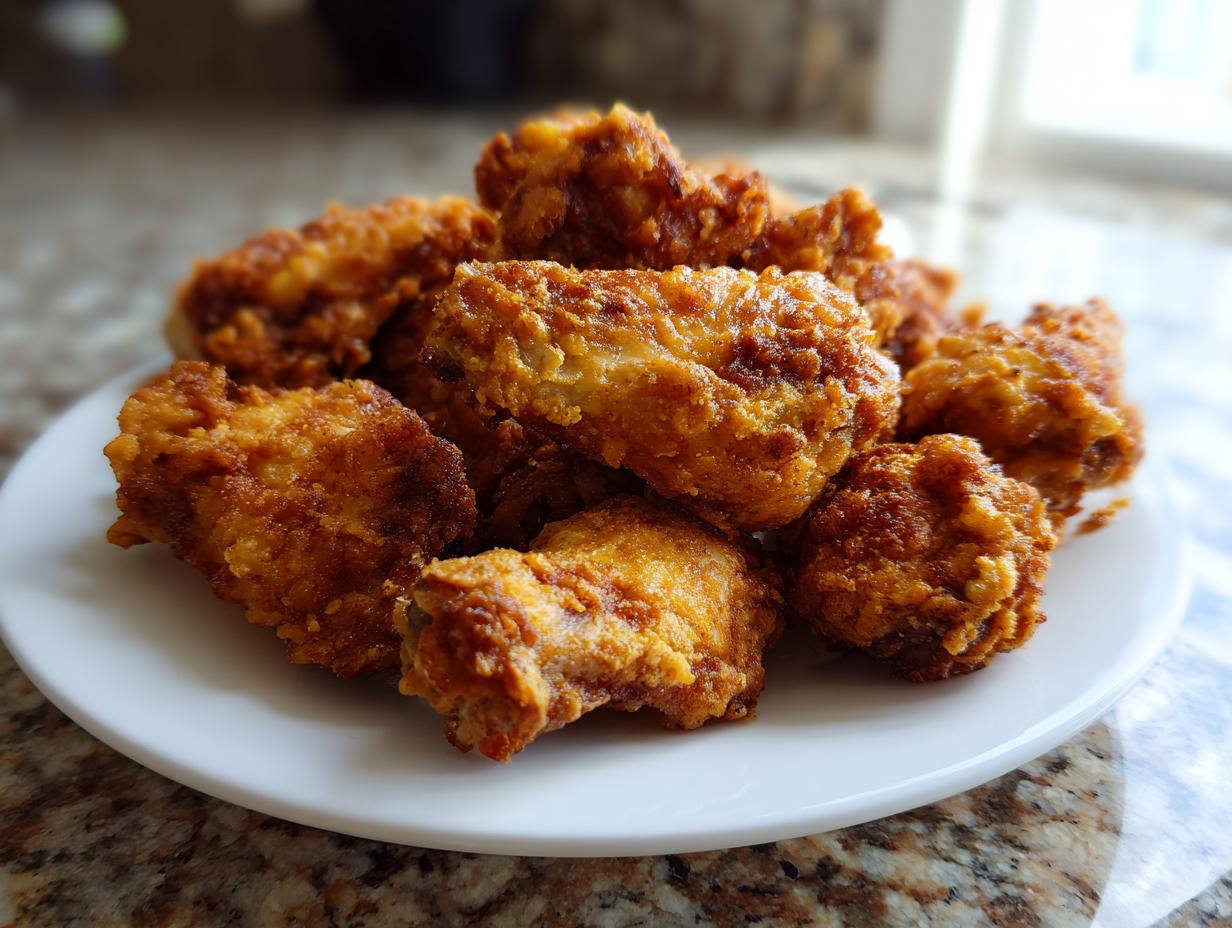
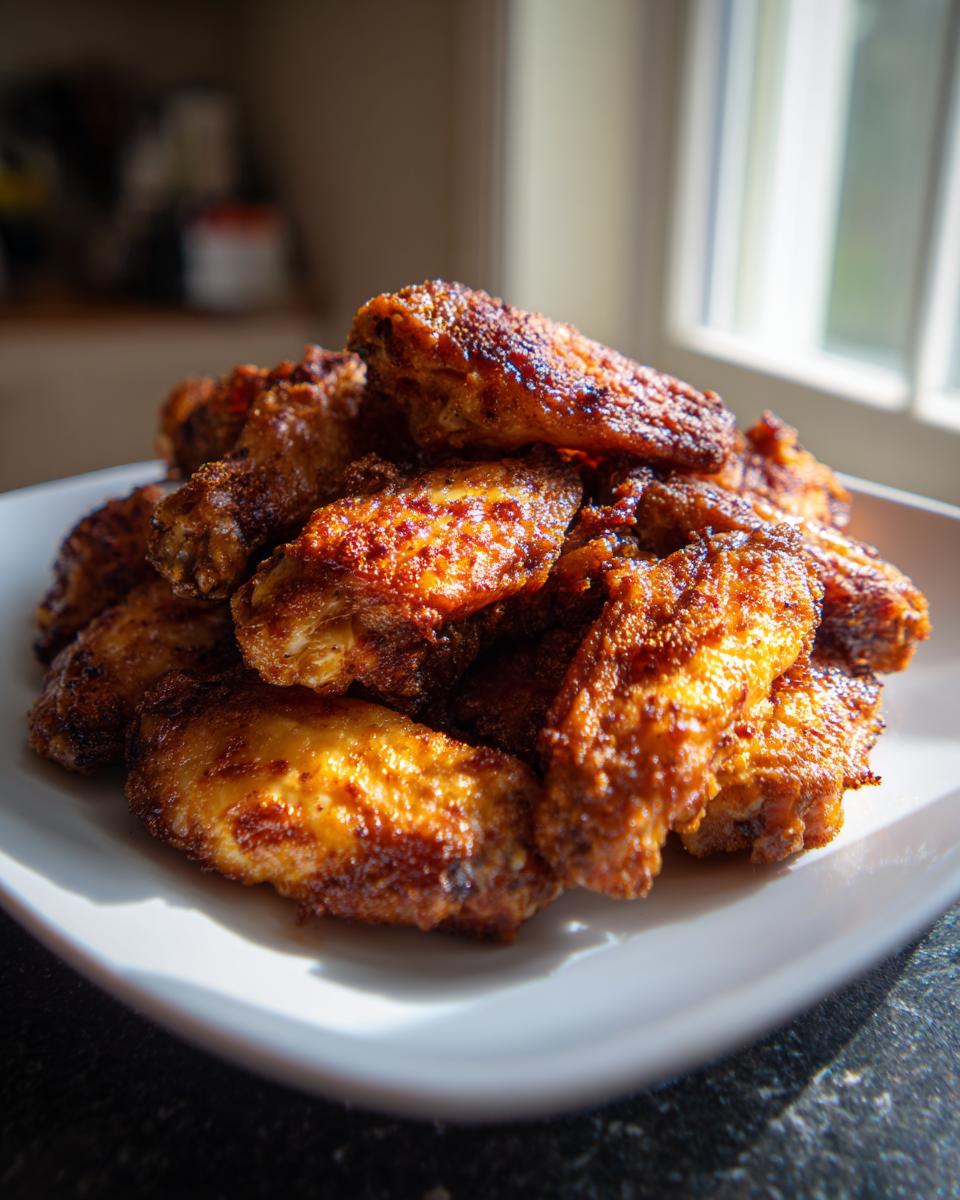
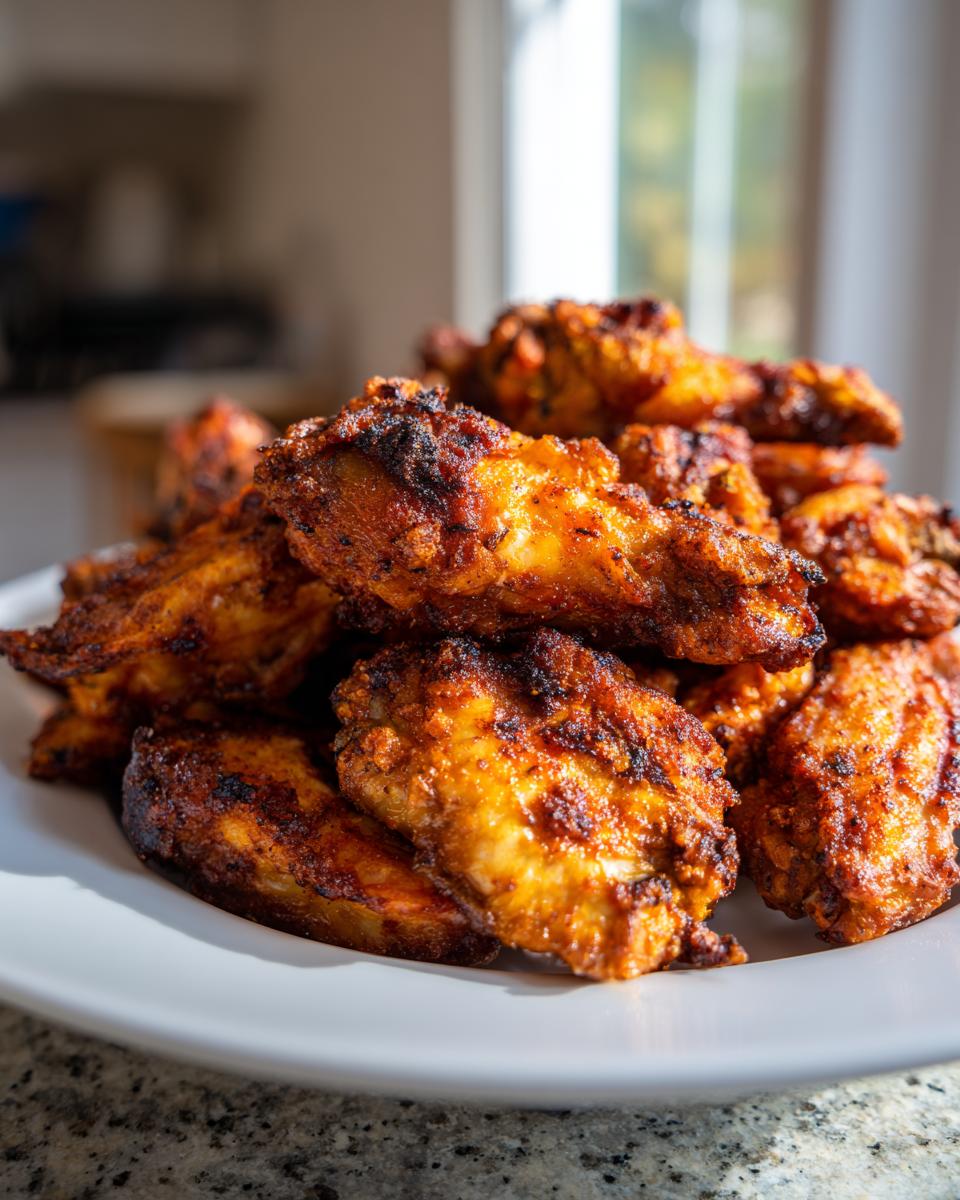
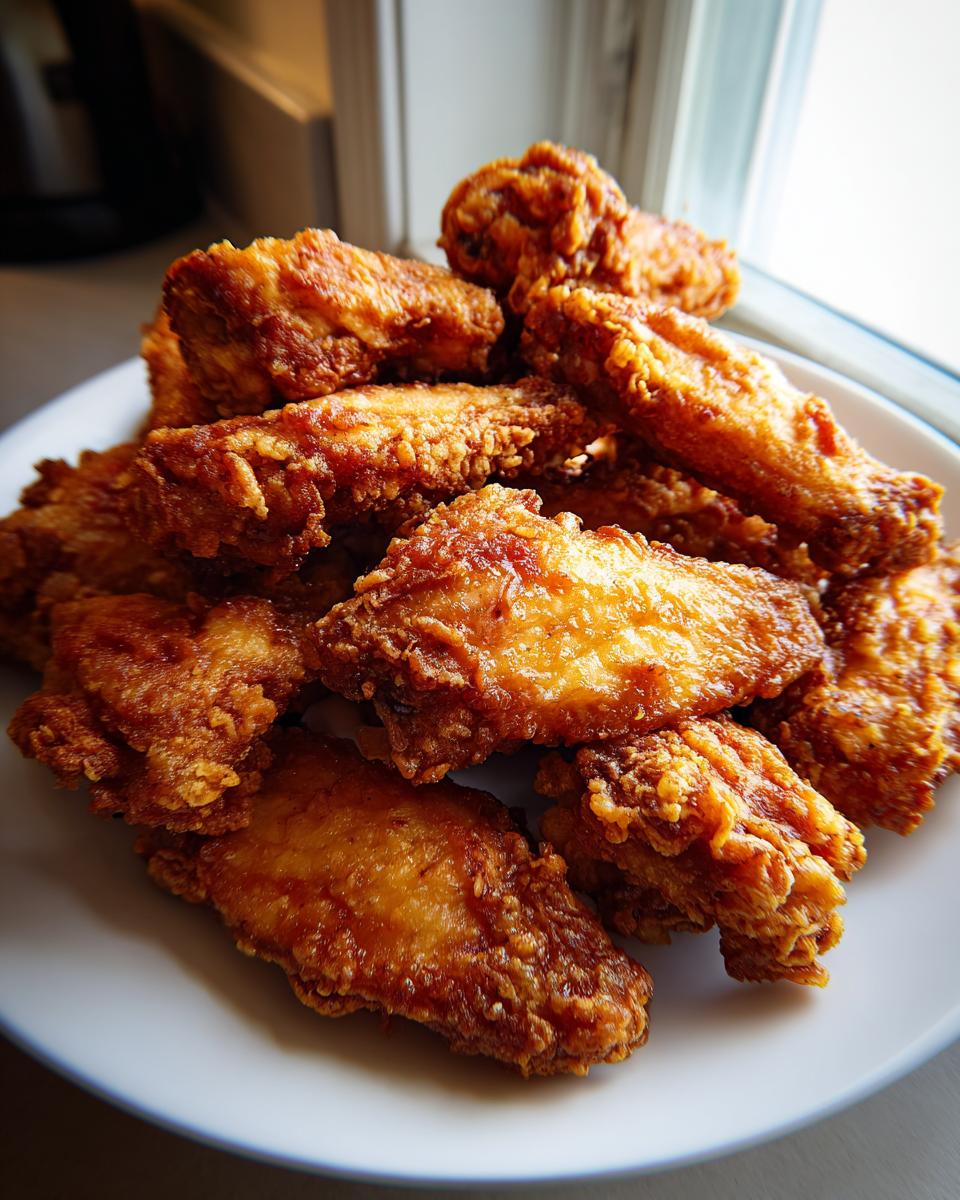
That used to be my problem too, until I put my Food Science background to work! I wanted the crunch of the deep fryer without the actual fryer. Trust me when I say that this formula for Crispy Baked Chicken Wings is the breakthrough you’ve been looking for. We are talking ultra-crispy skin and meat that stays incredibly juicy inside, all from your regular oven. Forget everything you thought you knew about oven wings; these taste undeniably fried!
- Why These Are the Best Crispy Chicken Wings Recipe You Will Ever Make
- Essential Ingredients for Perfect Crispy Baked Chicken Wings
- Simple Chicken Wings Preparation: Step-by-Step Instructions
- Tips for Success: Mastering Game Day Chicken Wings
- Flavor Variations: Making Crowd Pleasing Chicken Wings
- Storage and Reheating Instructions for Leftover Chicken Wings
- Frequently Asked Questions About Healthy Chicken Wings Baking
- Estimated Nutritional Data for These Chicken Wings
- Share Your Crispy Chicken Wings Success
Why These Are the Best Crispy Chicken Wings Recipe You Will Ever Make
I know there are a million ways online promising you the best crunchy wings, but I really need you to hear me out on this one. My goal here at Frosted Fancies isn’t just to post recipes; it’s to give you foolproof ones that work thanks to science. That’s why these chicken wings deliver the Best Baked Wings Texture—it’s the real deal, folks! People often overcomplicate the baking time, but once you nail this base technique, you’ll know exactly how long to bake chicken wings for perfection.
When you see recipes calling for weird equipment or hours of prep, pass on them! These are quick Party Wing Recipes disguised as simple comfort food. We are skipping the fryer entirely, which means fewer dishes and a healthier result, but we aren’t skipping crunch. I’ve cracked the code on the Juicy Wings Secrets right here in your standard oven.
Achieving the Ultimate Oven Baked Wings No Fry Texture
It all comes down to chemistry, which I studied hard! The key to that glorious, crackling skin without frying is aluminum-free baking powder mixed with perfectly dry skin. The baking powder slightly raises the skin’s pH level. Sounds complicated, but all it really does is help the skin brown faster and shed moisture during that high-heat bake. Seriously, patting them bone-dry is half the battle, but that baking powder blend is the total game-changer for texture.
Essential Ingredients for Perfect Crispy Baked Chicken Wings
Okay, you can have the best technique in the world, but if your ingredients aren’t right, your chicken wings won’t reach their full crispy potential. Luckily, the list is short, and most of it is probably already in your pantry! What matters most here is the coating blend we create before they ever see the oven. If you want amazing results, skip the generic stuff and look for aluminum-free baking powder—it truly makes a difference in how golden and dry that skin gets. You can see more great tips for easy preparation on this easy baked chicken wings recipe.
For the Chicken Wings Coating and Seasoning
- 3 lbs chicken wings (flats and drumettes mixed is perfect)
- 2 tablespoons baking powder (aluminum-free is my top recommendation!)
- 1 teaspoon salt
- 1 teaspoon black pepper
- 1 teaspoon garlic powder
- 1 teaspoon onion powder
- 1/2 teaspoon paprika
Simple Homemade Buffalo Wing Sauce (Optional)
If you’re turning these into classic Buffalo flavor right when they come out of the oven, you’ll need this little mix here:
- 1/2 cup butter, melted
- 1/2 cup your favorite hot sauce
- 1 teaspoon vinegar (just a splash for tang!)
Simple Chicken Wings Preparation: Step-by-Step Instructions
This amazing recipe for chicken wings is pretty streamlined thanks to that fantastic baking powder coating, but you have to respect the setup if you want that classic crunch. The whole process is quick enough that you can whip these up for a last-minute gathering. Don’t rush anything, especially the drying step—that’s what separates a decent wing from a truly crispy one. You can find a great overview of the baking process on this crispy baked chicken wings recipe page for reference! I also think you’ll find the tips over at Run Lift Eat Repeat really helpful for timing.
Preparing the Oven and Wings for Maximum Crispiness
First things first, we need heat! Preheat your oven way up high to 425 degrees Fahrenheit. While that’s warming up, grab a large baking sheet and line it really well with aluminum foil—this saves cleanup time later, trust me. The most essential piece of equipment next is a wire rack placed right over that foil. That rack lifts the wings so air can circulate underneath. Now, grab your paper towels and pat every single one of those chicken wings completely dry. I mean it, soak up every bit of moisture! This is the secret foundation for any great Oven Baked Wings No Fry experience.
Coating and Initial Baking of the Chicken Wings
Time for the magic dust! In a separate bowl, mix up your dry rub: baking powder, salt, pepper, garlic powder, onion powder, and paprika. Toss those bone-dry wings right into the spice mix. Make sure every little nook and cranny is coated evenly. Then, spread them out on that rack in a single layer; overcrowding will steam them, which is the enemy of crispiness! Pop the tray in the hot oven and bake them for 20 minutes flat.
Flipping and Final Bake for Tender, Juicy Wings Secrets
After 20 minutes, carefully remove the tray. Use tongs to flip every single wing individually. Now, bring that temperature down to 400 degrees Fahrenheit. Lowering the heat slightly allows the inside to finish cooking through perfectly while the outside keeps crisping up. Bake them for another 20 to 25 minutes. When they look golden brown and feel super crispy to the touch, pull them out. This two-stage cooking is one of the main Juicy Wings Secrets to success! If you’re tossing them in sauce, do it right now while they are screaming hot.
Tips for Success: Mastering Game Day Chicken Wings
Honestly, mastering these Game Day Chicken Wings requires just a few insider tricks beyond the main recipe steps. Since I spent years in test kitchens perfecting textures, I want to share the details that take these from great to absolutely unbeatable. We’re always looking for that healthier alternative that tastes like the real deal, right? A big part of what keeps these chicken wings impressive is ensuring every single piece cooks evenly with great airflow. If you want an extra look at the process, this delicious oven recipe for crispy baked chicken wings has some great visuals.
The Importance of Air Circulation for Chicken Wings
I cannot stress this enough: the wire rack is non-negotiable! If you try to bake your wings directly on the foil, the bottom side just steams in its own juices—and steamed wings are floppy wings. We need air to flow completely around the entire surface of the wing to dry out the skin for optimum crispness. Make sure you leave space between each piece, too; don’t pile them up hoping they’ll cook faster. They won’t; they’ll just steam!
Finishing Touches: Broiling for Extra Crunch
Here’s a little secret for those times you want them extra crunchy, maybe for a really special watching party: you can finish them under the broiler! Once your wings are golden brown and cooked through, switch the oven setting to broil. But listen closely: you must stand right there and watch them like a hawk. A minute or two is all it takes to get that beautiful, bubbly, almost-fried texture. They can go from perfect to burnt in about fifteen seconds, so please don’t walk away!
Flavor Variations: Making Crowd Pleasing Chicken Wings
You’ve mastered the base recipe for unbelievably crispy chicken wings—now it’s time to make them truly your own! The beauty of our dry rub foundation is how easily it adapts to match whatever flavor you need for your next party. Whether you’re looking for something savory, spicy, or sweet and sticky, these Easy Chicken Wings Ideas will make your batch disappear fast. People go wild for variations, so have a couple of different sauce options ready to go!
We need to be smart about when we apply wet ingredients, though. A sticky coating applied too early will just burn onto the pan before the wing is cooked. That’s why we only sauce the wings *after* they come out of the oven and reach maximum crunch. You can read about the amazing depth of flavor in Cowboy Butter Wings Flavor to get some inspiration for your next batch!
Quick Honey BBQ Wings Sticky Coating Method
If you’re dreaming of those super sticky, glossy Honey BBQ wings, you have to wait until the last second. Once your wings are done—golden brown and perfectly crisp—toss them immediately into a bowl with your favorite BBQ sauce mixed with a little honey. The residual heat will warm that sauce up and make it spread perfectly across the skin. If you bake the honey on, it just turns into bitter little burnt spots, and we certainly don’t want that for our chicken wings!
Creating Garlic Parmesan Wings Flavor Profile
For making savory Garlic Parmesan Wings, the method is very similar to the sticky sauce application. You want the parmesan cheese to melt just slightly and stick to the hot wing without burning into ash. As soon as they come off the rack, toss them with softened butter (or melted) and a generous amount of grated Parmesan cheese. If you’d like to check out a delicious recipe, this one for Savory Garlic Parmesan Baked Chicken Wings is excellent inspiration, and I love the idea found over on MIA Recipe for that rich cowboy flavor!
Storage and Reheating Instructions for Leftover Chicken Wings
So, you made a huge batch of chicken wings—good job! They are absolutely the best part of any party, but who wants sad, floppy leftovers? If you have any left over (which I highly doubt!), storing them properly is key if you plan on enjoying them later for Quick Chicken Wing Dinners. Don’t just throw them in a sealed plastic container; that traps all the steam and guarantees a soggy wing experience!
For storage, let the wings cool down completely first, maybe lay them out on a plate for 15 minutes. Then, place them in a shallow container lined with a paper towel, covered loosely. When it’s time to reheat, skip the microwave entirely—it’s the enemy of crispiness! Instead, pop them onto a wire rack set over a baking sheet (just like we used for baking them!) and heat them at 375 degrees Fahrenheit until they’re hot and crunchy again. If you’re looking for a great guide on serving different wing sizes, check out this crispy baked chicken wings recipe for reference.
Frequently Asked Questions About Healthy Chicken Wings Baking
I know you might have a few last-minute questions before you dive in and make these amazing oven-baked wings! It’s totally normal, and because I love helping you succeed with healthier chicken wings baking, I pulled together the most common things people ask me. Getting the science behind the crunch right makes all the difference!
Can I use baking soda instead of baking powder for these chicken wings?
That’s a great question that gets right into the chemistry! You technically *can* substitute them, but I really advise against it for this particular recipe. Baking powder is a complete leavening system—it has both an acid and a base, which creates that lift and helps break down the skin proteins we want to crisp up. Baking soda is just the base. If you use too much baking soda, you run a real risk of getting a distinct, slightly soapy or metallic taste in your final batch of chicken wings. For the ultimate crunch, please stick to the baking powder!
What is the best way to convert this recipe for an Air Fryer Chicken Wings Recipe?
Oh, I get asked about the air fryer all the time! It’s a great tool, and you can absolutely convert this recipe. Because the air fryer cooks with very intense circulating heat, you can actually drop the temperature a little compared to the oven. Try preheating your air fryer to 380 degrees Fahrenheit. Toss your coated wings in the basket (don’t overcrowd it, please!), and cook for about 20 minutes. Give them a shake halfway through, and then check on them. You might need another 3 to 5 minutes until they are perfectly crispy. This is a fantastic alternative if you are short on time. You can find the full guide on how I adapt things for my air fryer over on my post about air fryer salt and pepper wings!
Estimated Nutritional Data for These Chicken Wings
When we talk about making healthy chicken wings baking our preferred method, it’s because we are skipping the frying oil, which cuts down on a lot of unnecessary fat. I want you to have all the information you need to enjoy these crowd-pleasers responsibly! Remember, because this recipe is so adaptable—you might toss them in that incredible Cowboy Butter Wings Flavor or keep them plain with the dry rub—the final numbers will change slightly depending on what sauce you choose.
The estimates below are calculated based on eating approximately 4 wings without any added sauce tossed on afterwards—so think of this as the baseline for our crisp, dry-rubbed chicken wings. This is just an estimate, of course, based on the exact ingredients and preparation listed in the recipe, cooking down the flavor science into simple numbers!
- Serving Size: 4 wings
- Calories: 280
- Fat: 18g (with 5g of that being saturated fat)
- Carbohydrates: 2g
- Protein: 26g
- Sodium: 350mg
See? That’s a great bang for your buck, especially for a satisfying Game Day Chicken Wings snack! The best part is that since we aren’t using heavy batters, the protein content stays high. I always feel better serving food that tastes amazing but doesn’t leave everyone feeling heavy afterwards!
Share Your Crispy Chicken Wings Success
Now that you’ve got the best, crispiest chicken wings recipe under your belt—no fryer required!—I really want to know how they turned out. Seriously, seeing your success in the kitchen is why I pour all this time and food science knowledge into Frosted Fancies!
Did you try them plain with just our dry rub? Or maybe you went all out and made those incredible Honey Garlic Chicken Wings I mentioned? I’d be thrilled if you even experimented with the Cowboy Butter Wings Flavor and let me know what you thought! Every time you make these, you are getting one step closer to mastering the perfect snack food.
Please leave a comment down below telling me how the texture was—was it truly crispy? Did your family devour them? Ratings and reviews help other home cooks feel confident trying my favorite oven-baked recipes too. If you want to see more ideas on sweet and sticky options, check out this Honey Garlic Chicken Wings post for inspiration on achieving that perfect glaze!
Happy cooking, everyone. I can’t wait to hear all about your batch of perfectly crispy chicken wings!
PrintExtra Crispy Baked Chicken Wings: The No-Fry Game Day Favorite

You want chicken wings that taste fried but are baked perfectly every time. This recipe uses a simple technique to achieve ultra-crispy skin and juicy meat without needing to fry them. These oven baked chicken wings are ideal for parties or quick weeknight dinners.
- Prep Time: 15 min
- Cook Time: 45 min
- Total Time: 60 min
- Yield: 4 servings 1x
- Category: Appetizer
- Method: Baking
- Cuisine: American
- Diet: Low Fat
Ingredients
- 3 lbs chicken wings (flats and drumettes)
- 2 tablespoons baking powder (aluminum-free recommended)
- 1 teaspoon salt
- 1 teaspoon black pepper
- 1 teaspoon garlic powder
- 1 teaspoon onion powder
- 1/2 teaspoon paprika
- For Sauce (Optional): 1/2 cup butter, 1/2 cup hot sauce, 1 teaspoon vinegar
Instructions
- Preheat your oven to 425 degrees Fahrenheit. Line a large baking sheet with aluminum foil and place a wire rack on top of the foil. This setup allows air to circulate around the wings for maximum crispiness.
- Pat the chicken wings completely dry using paper towels. This step is crucial for crispy baked chicken wings.
- In a large bowl, combine the baking powder, salt, pepper, garlic powder, onion powder, and paprika. This dry rub creates the crispy coating.
- Add the dried chicken wings to the bowl and toss thoroughly until every wing is evenly coated with the seasoning mixture.
- Arrange the seasoned wings in a single layer on the wire rack, ensuring there is space between each wing. Do not overcrowd the rack.
- Bake the chicken wings for 20 minutes.
- Flip each wing over. Reduce the oven temperature to 400 degrees Fahrenheit and bake for another 20 to 25 minutes, or until the skin is golden brown and very crispy.
- If you are using a sauce, whisk together the melted butter, hot sauce, and vinegar in a bowl.
- Remove the wings from the oven and immediately toss them in the sauce (if desired) or serve them plain with your favorite dipping sauce.
Notes
- For the best texture, use aluminum-free baking powder. It helps raise the pH of the skin, leading to better browning and crispiness.
- Do not skip drying the wings; excess moisture prevents the skin from crisping up.
- If you want extra sticky honey BBQ wings or garlic parmesan wings, toss the crispy wings in the appropriate sauce immediately after they come out of the oven.
- For a final crisp, you can broil the wings for the last 1-2 minutes, watching them closely to prevent burning.
Nutrition
- Serving Size: 4 wings
- Calories: 280
- Sugar: 1
- Sodium: 350
- Fat: 18
- Saturated Fat: 5
- Unsaturated Fat: 13
- Trans Fat: 0
- Carbohydrates: 2
- Fiber: 0
- Protein: 26
- Cholesterol: 90