

Oh, the frustration! You’ve spent hours cutting out perfect shapes, baking them flawlessly, and then you ice them, only to find hours later they are still tacky to the touch. Don’t even get me started on trying to stack those cookies for gifting—it’s a decorating disaster waiting to happen. Well, friends, stop the madness right now! I’m Katherine Hayes, and thanks to my background in Food Science, I know exactly why that happens and how to fix it.
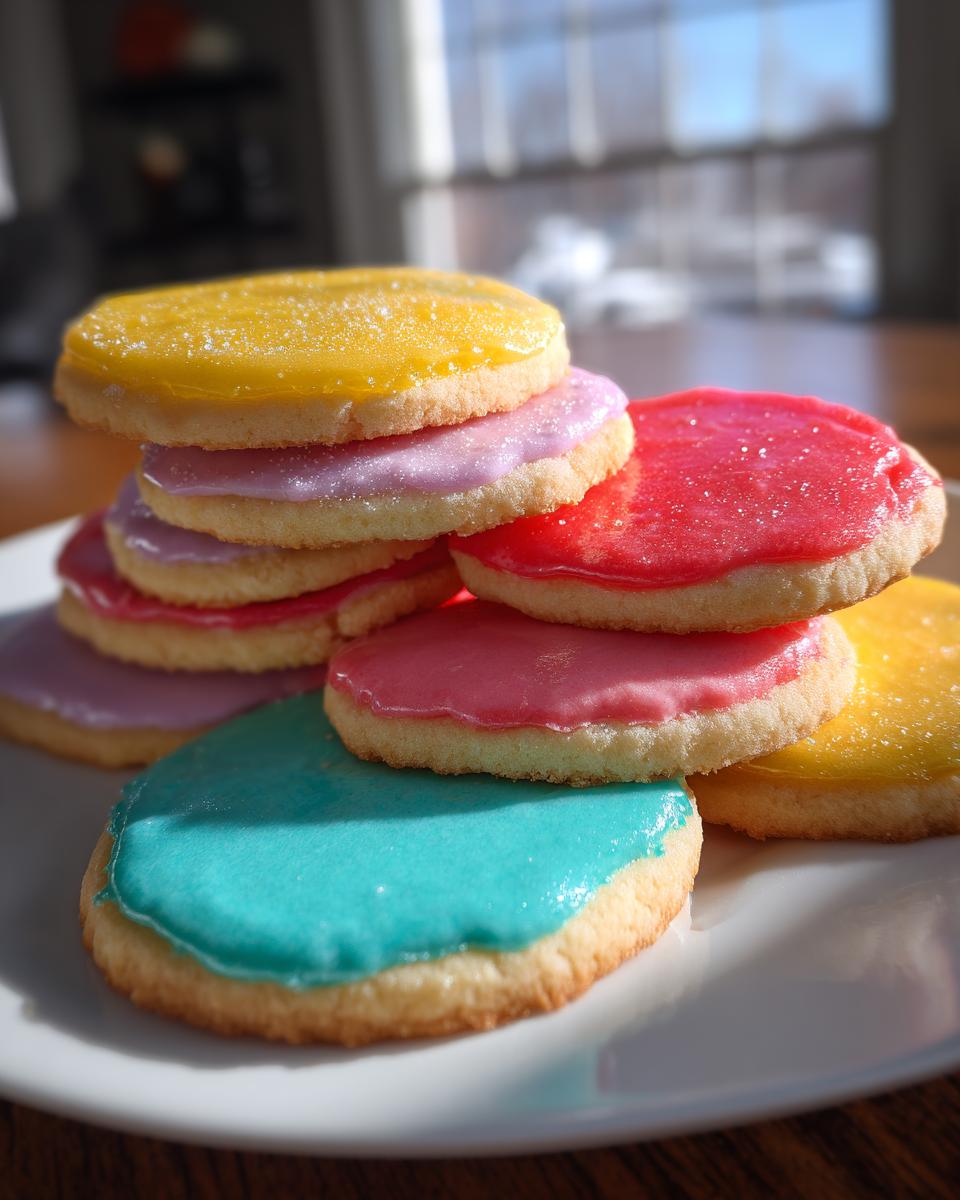
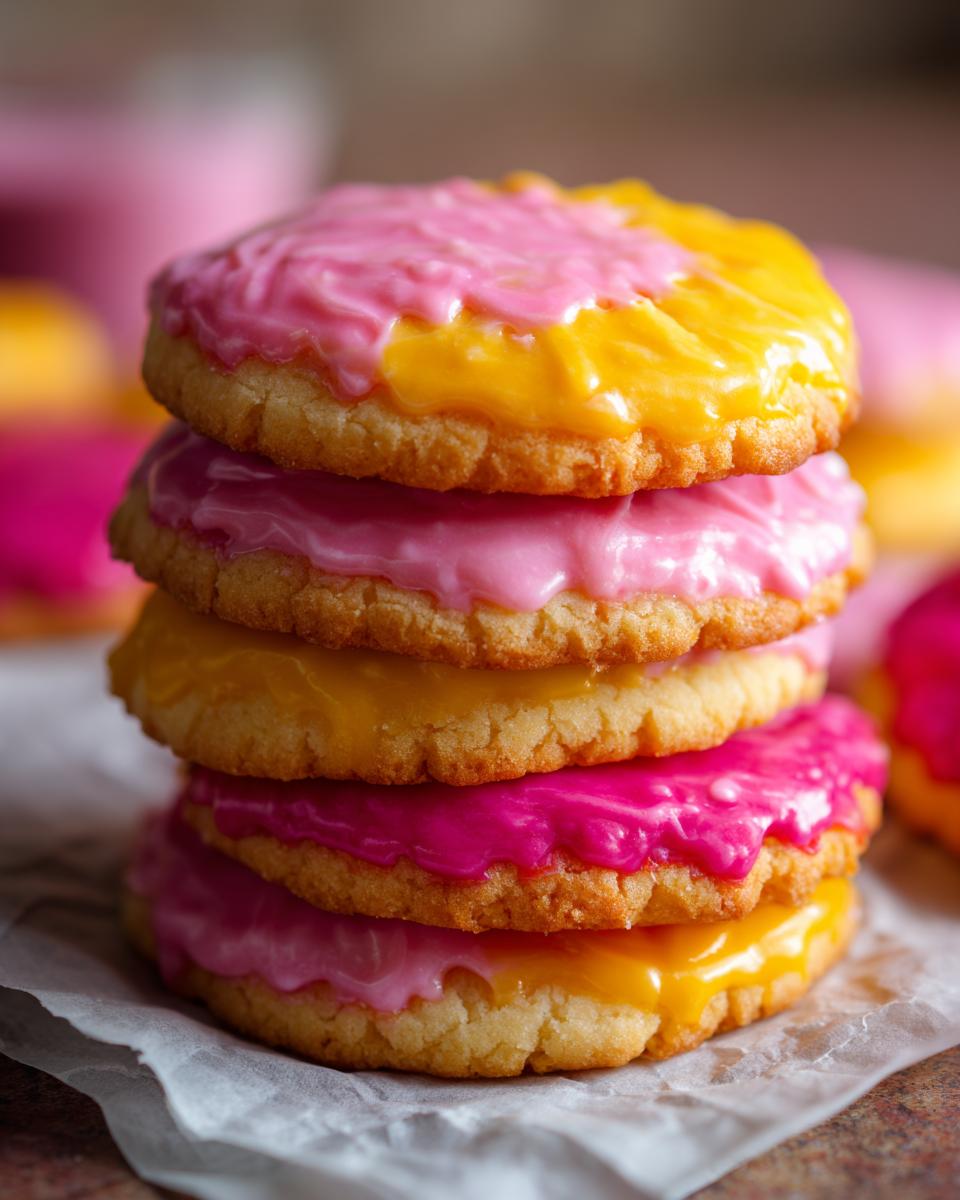
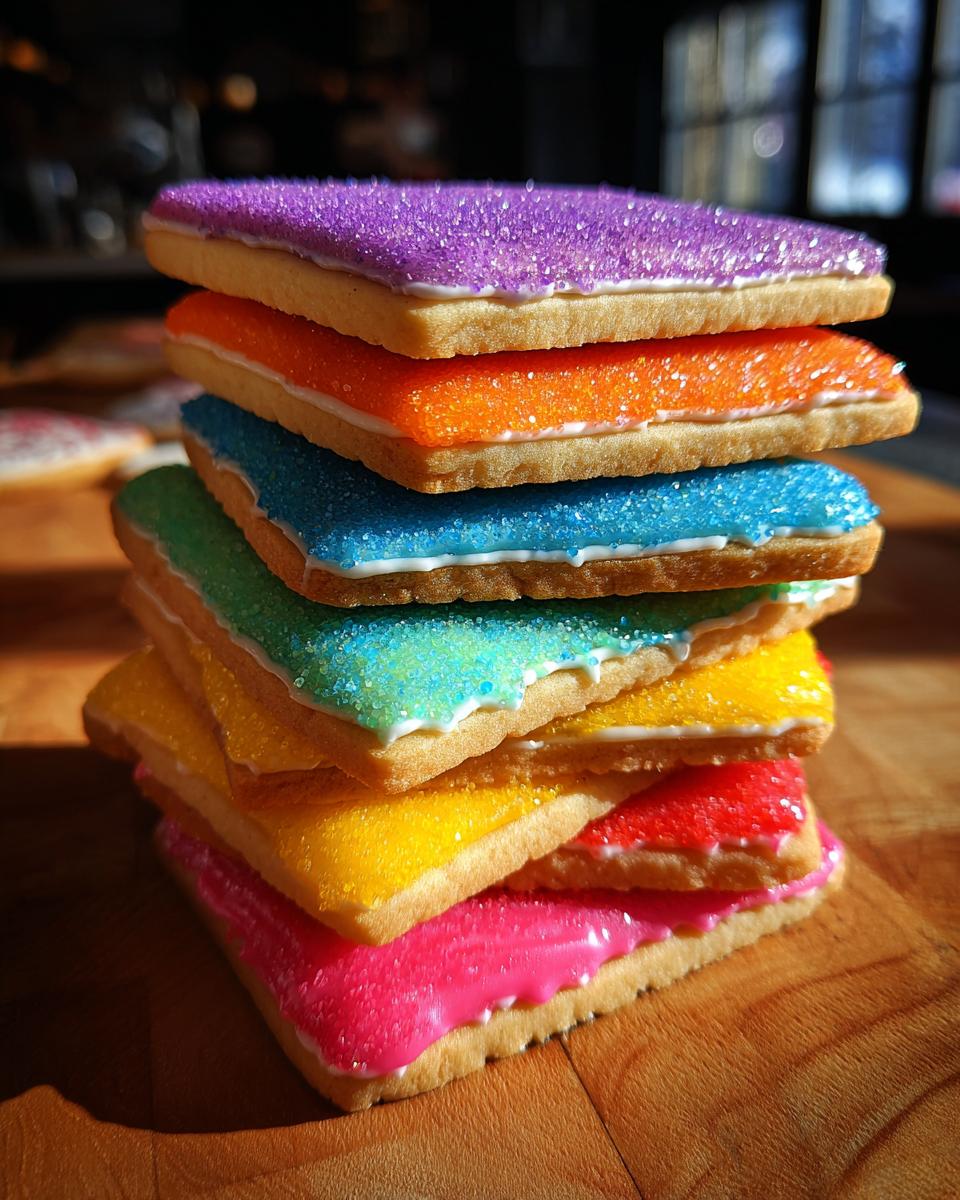
What you need isn’t just any glaze; you need the ultimate sugar cookie icing that hardens completely, giving you that smooth, professional, glossy finish you see in bakeries. This isn’t just pretty icing—this royal icing sets rock solid, making your decorated cookies stackable and durable. Trust me, once you try this reliable method, you’ll never go back!
- Why This is the Best Sugar Cookie Icing That Hardens
- Ingredients for Sugar Cookie Icing That Hardens Perfectly
- Step-by-Step Instructions for Sugar Cookie Icing That Hardens
- Expert Tips for a Glossy Sugar Cookie Glaze Recipe That Sets Firm
- Ingredient Spotlight: Meringue Powder and Why It Makes Sugar Cookie Icing That Hardens
- Troubleshooting Common Issues with Royal Icing Recipe for Beginners
- Storage and Reheating Instructions for Iced Cookies
- Frequently Asked Questions About Cookie Icing For Gifting
- Nutritional Information Estimate
- Share Your Perfectly Hardened Cookie Creations
Why This is the Best Sugar Cookie Icing That Hardens
If your current go-to frosting ends up sticky or cracks the moment you look at it wrong, you are missing the strength that Royal Icing brings to the table. Simple powdered sugar and liquid glazes just can’t give you the longevity or the smooth hard finish frosting that bakers demand. That’s why I developed this streamlined version of Royal Icing—it’s the no fail cookie icing that sets firm, every single time.
The secret sauce here is the meringue powder; it acts as a binder and stabilizing protein unlike anything else. This combination ensures that once your cookies are dry, they are truly dry, protected, and ready for stacking! If you want the science breakdown on why this process works so well, check out my deep dive into baking science for more details!
Ingredients for Sugar Cookie Icing That Hardens Perfectly
When we are making sugar cookie icing that hardens, ingredient quality really matters, even though the list is super short! Clarity here builds trust, so make sure you follow my notes exactly. The meringue powder, by the way, is absolutely non-negotiable; it’s the workhorse that makes this powdered sugar icing that sets firm.
- 2 cups powdered sugar, sifted very well
- 3 tablespoons meringue powder (This is the magic setter!)
- 6 tablespoons warm water
- 1 teaspoon clear vanilla extract (for that bright white look!)
- Gel food coloring (if you are planning on coloring some of it)
I know, it looks simple, right? But remember, we need that warm water for better mixing, and the clear vanilla avoids that slight tan color brown vanilla extract can sometimes give you. Keep everything measured precisely!
Step-by-Step Instructions for Sugar Cookie Icing That Hardens
Okay, now for the fun part! Seriously, watching this icing come together in the mixer is the most satisfying part of making any durable cookie decorating icing. Remember, time is your friend here, especially during the whipping phase. If you rush it, you won’t get that perfect, rock-hard finish we are aiming for!
Mixing the Hard Icing for Sugar Cookies Base
First, make sure your powdered sugar is sifted—don’t skip that, or you’ll get lumps! Whisk the sifted sugar right into the bowl with the meringue powder until they are buddies. Then, pour in your warm water and the clear vanilla. I start mine slow on the mixer so it doesn’t blow powdered sugar everywhere. Oops!
Achieving Piping and Flooding Consistency for Sugar Cookie Icing That Hardens
This is where you customize! For outlining, you want the icing to fall from the mixer slowly, like thick honey, holding a little peak. For flooding the middle, you’re adding water drop by drop until it smoothly sinks back into itself within about 10 seconds. If you are coloring, add your gel color now—those vibrant hues look amazing when they dry glossy! Check out my guide on gel colors if you want true-to-bottle shades.
The Critical Drying Process for Stackable Cookie Icing Recipe Results
Once outlined and flooded, tap those cookies gently on the counter—that gets rid of those ugly air bubbles! Then, they need space. Let them dry uncovered at room temperature for a good 6 to 12 hours. Do NOT put these in the fridge while drying; cold air and trapped moisture will make them tacky. Patience means you get that perfect stackable cookie icing recipe finish!
Expert Tips for a Glossy Sugar Cookie Glaze Recipe That Sets Firm
Now that you have your base recipe for the hard icing for sugar cookies, let’s talk about making it look bakery-perfect and keeping it that way. The biggest enemy of a sugar cookie icing that hardens beautifully isn’t usually the ingredients, but the air in your kitchen! Humidity is a huge factor in how quickly your icing dries into that smooth hard finish frosting we love.
If you are in a super humid area, you might need to let the icing sit longer or add just a tiny bit more meringue powder (like half a teaspoon) during the initial mixing. This helps create a more durable cookie decorating icing structure that battles the moisture in the air. I always try to decorate during drier months or in the coolest, driest room of the house when I can. For more on how moisture affects your baking projects, you can read up over on this great article about humidity and baking structure.
Remember that clear vanilla extract I told you about? That’s key for getting a beautiful, bright white, glossy sugar cookie glaze recipe. If it’s slightly tacky the next day, it usually means the surface moisture hasn’t evaporated. Don’t panic! Just give your cookies a few more hours uncovered at room temperature. This powdered sugar icing that sets firm really needs time to cure!
Ingredient Spotlight: Meringue Powder and Why It Makes Sugar Cookie Icing That Hardens
I went to school to figure out the science behind the best baking, and this icing is truly where that knowledge shines! People always ask if they can just use regular egg whites, and honestly, if you want the best experience with sugar cookie icing that hardens beautifully, stick to the meringue powder.
See, regular egg whites can sometimes carry bacteria, and their protein structure isn’t always uniform once you start whipping them. Meringue powder, on the other hand, is essentially dried, pasteurized egg white solids mixed with a stabilizer. When you whip it with the sugar and water, those proteins create a tight, stable matrix—think of it like microscopic scaffolding holding everything together.
As that water evaporates during drying, the protein network locks in place, making the icing incredibly durable and completely firm. It’s exactly what we need for that flawless, non-tacky finish. If you want to dive deeper into how proteins behave in baking, I cover that in my post on baking chemistry basics!
Troubleshooting Common Issues with Royal Icing Recipe for Beginners
Even with a foolproof recipe, sometimes things go a little sideways, especially when you’re perfecting that royal icing recipe for beginners. Don’t stress if you hit a snag; we can usually fix it right at the bowl!
If your icing ends up way too runny after mixing, don’t pour it out! Slowly mix in one tablespoon of sifted powdered sugar at a time until you get that thick, slow-moving texture we discussed. If it happens to be too thick for piping, just stir in a few drops of warm water until it loosens up—that’s the beauty of water being the only liquid!
Now, if it’s not drying hard, you probably need more whipping time or maybe just a drier environment. That whipping time I mentioned? It’s critical because it incorporates the air that helps the protein structure set hard. If you suspect cracking, that often means you flooded too thick or the air temperature dropped too fast overnight. Let everything cure at room temperature, and your cookies will look professional!
Storage and Reheating Instructions for Iced Cookies
Once you’ve successfully made your sugar cookie icing that hardens, you want those beautiful creations to last! The key here is humidity control. Always store your decorated cookies in a single layer inside a truly airtight container. You don’t want air getting to them, or they might start feeling soft after a day or two.

Avoid extreme changes in temperature. If you put them straight into the fridge, the condensation when you bring them out could make the hard icing slightly weep or soften. I typically keep them on the counter, away from direct sunlight or heat sources. Because this icing sets so firmly, your cookies are perfect for holiday gifting right on the kitchen table!
Frequently Asked Questions About Cookie Icing For Gifting
I know you probably have a few last-minute questions buzzing around, especially when you need that perfect cookie icing for gifting that won’t smudge in transit. Here are the things I hear most often from home bakers trying to master this royal icing!
Can I use regular egg whites instead of meringue powder?
Honestly, while you technically *can*, I really advise against it if your goal is a reliable sugar cookie icing that hardens completely. Regular, raw egg whites carry a risk of foodborne illness, and their texture can be really inconsistent batch-to-batch. Meringue powder is pasteurized and stabilized—it guarantees that smooth, firm result we are looking for in a durable cookie decorating icing. Stick to the powder for the best results!
How long does this sugar cookie icing that hardens take to dry in high humidity?
This is my biggest challenge during the summer months! In ideal, low-humidity conditions, you might get a hard shell in 6 hours. But here’s the deal: if it’s humid, that 6 to 12-hour window can easily stretch to 18 or even 24 hours. If you need them faster, run a dehumidifier in the room where they are drying. That slight adjustment speeds up the curing process beautifully.
Can I make this icing ahead of time?
Yes, and I heavily recommend it for big batches! You can mix up a big bowl of this no fail cookie icing that sets firm and keep it airtight. Store it in an airtight container with the surface covered by plastic wrap pressed directly onto the icing to prevent a skin from forming. It stays perfect at room temperature for 2 to 3 days. If you want to prepare even further ahead, peep my tips on make-ahead baking strategies!
Nutritional Information Estimate
Okay, I know sometimes we’re just focused on getting that perfect, shiny, hard shell on our cookies, but it’s good practice to know what roughly goes into our treats! Since this is a decorative icing, we usually don’t consume huge amounts, but here’s the estimate based on the recipe yields provided.
Keep in mind, this is just a general guide! The exact nutritional breakdown can change depending on the brand of powdered sugar you use or if you add a heavy dose of food coloring. I always say, baking for joy is the most nutritious part, but estimates are helpful!
- Serving Size: 1/4 cup icing
- Calories: 180
- Sugar: 45g
- Sodium: 15mg
- Fat: 0g
- Carbohydrates: 45g
- Protein: 1g
See? Mostly sugar and pure energy—the perfect complement to a delicious, buttery sugar cookie! This icing is naturally fat-free and cholesterol-free. But remember, this is only an estimate for the icing volume itself, not the cookie underneath!
Share Your Perfectly Hardened Cookie Creations
Now that you have mastered the art of making sugar cookie icing that hardens so beautifully, I absolutely need to see what you’ve been up to! Honestly, seeing your beautiful, smudge-free decorated cookies is the best part of my job here at Frosted Fancies.
If this recipe saved your holiday decorating session or finally gave you that stackable finish you were dreaming of, please take a moment to leave me a super quick 5-star rating down below. It helps other home cooks find this foolproof recipe!
Take a picture of your perfectly glossy, firm-iced cookies and tag me over on social media! Use the hashtag #FrostedFanciesHardIcing so I can find your amazing work and give you a big cheer. I especially love hearing what shapes you chose to decorate—tell me in the comments: what was your favorite cookie cutter shape this year?
PrintFoolproof Royal Icing That Hardens: The Best Sugar Cookie Icing That Dries Firm

Learn how to make sugar cookie icing that hardens completely, giving your decorated cookies a smooth, glossy, and stackable finish. This reliable royal icing recipe is perfect for beginners and holiday decorating.
- Prep Time: 15 min
- Cook Time: 0 min
- Total Time: 15 min
- Yield: Coats about 2 dozen 3-inch cookies 1x
- Category: Dessert
- Method: Mixing/Drying
- Cuisine: American
- Diet: Vegetarian
Ingredients
- 2 cups powdered sugar, sifted
- 3 tablespoons meringue powder
- 6 tablespoons warm water
- 1 teaspoon clear vanilla extract
- Gel food coloring (optional)
Instructions
- In a medium bowl, whisk together the sifted powdered sugar and meringue powder until fully combined.
- Add the warm water and clear vanilla extract to the dry ingredients.
- Beat the mixture with an electric mixer on low speed until the ingredients are incorporated, about 1 minute.
- Increase the mixer speed to medium-high and beat for 5 to 7 minutes until the icing is very thick, glossy, and holds stiff peaks. This whipping process incorporates air, which helps the icing dry hard.
- To achieve a piping consistency for outlining, add water one teaspoon at a time until the icing flows slowly from the mixer. For flooding consistency, add more water, one half teaspoon at a time, until the icing flows easily off a spoon and smooths into itself within 10 seconds.
- Separate the icing into bowls if you plan to color it. Add gel food coloring sparingly and mix until the color is uniform.
- Use the icing immediately to outline your sugar cookies. Let the outline dry for at least 30 minutes before flooding the center.
- Flood the center of the cookies with the thinner consistency icing. Gently tap the cookie on the counter to release air bubbles and help the icing settle flat.
- Allow the cookies to dry uncovered at room temperature for 6 to 12 hours, or until the icing is completely hard to the touch. Do not refrigerate while drying.
Notes
- The meringue powder is the key ingredient that makes this sugar cookie icing that hardens. Do not substitute it with cream of tartar or baking powder.
- For a bright white, glossy sugar cookie glaze recipe, use clear vanilla extract instead of standard brown vanilla extract.
- If your icing feels too thick after sitting, stir in a few drops of water. If it is too thin, mix in a tablespoon of powdered sugar.
- For stackable cookie icing recipe results, allow the cookies to dry fully in a low-humidity environment.
Nutrition
- Serving Size: 1/4 cup icing
- Calories: 180
- Sugar: 45
- Sodium: 15
- Fat: 0
- Saturated Fat: 0
- Unsaturated Fat: 0
- Trans Fat: 0
- Carbohydrates: 45
- Fiber: 0
- Protein: 1
- Cholesterol: 0