
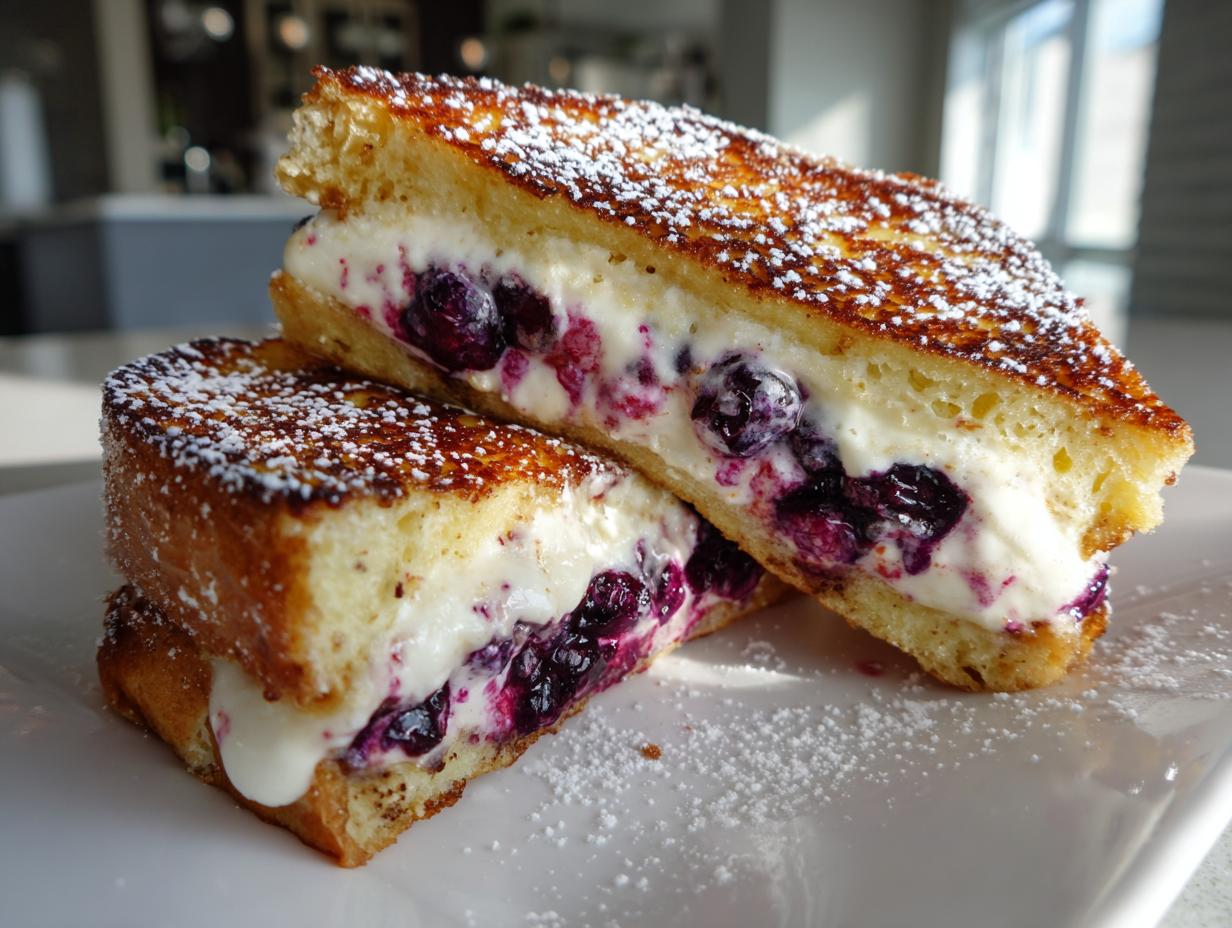
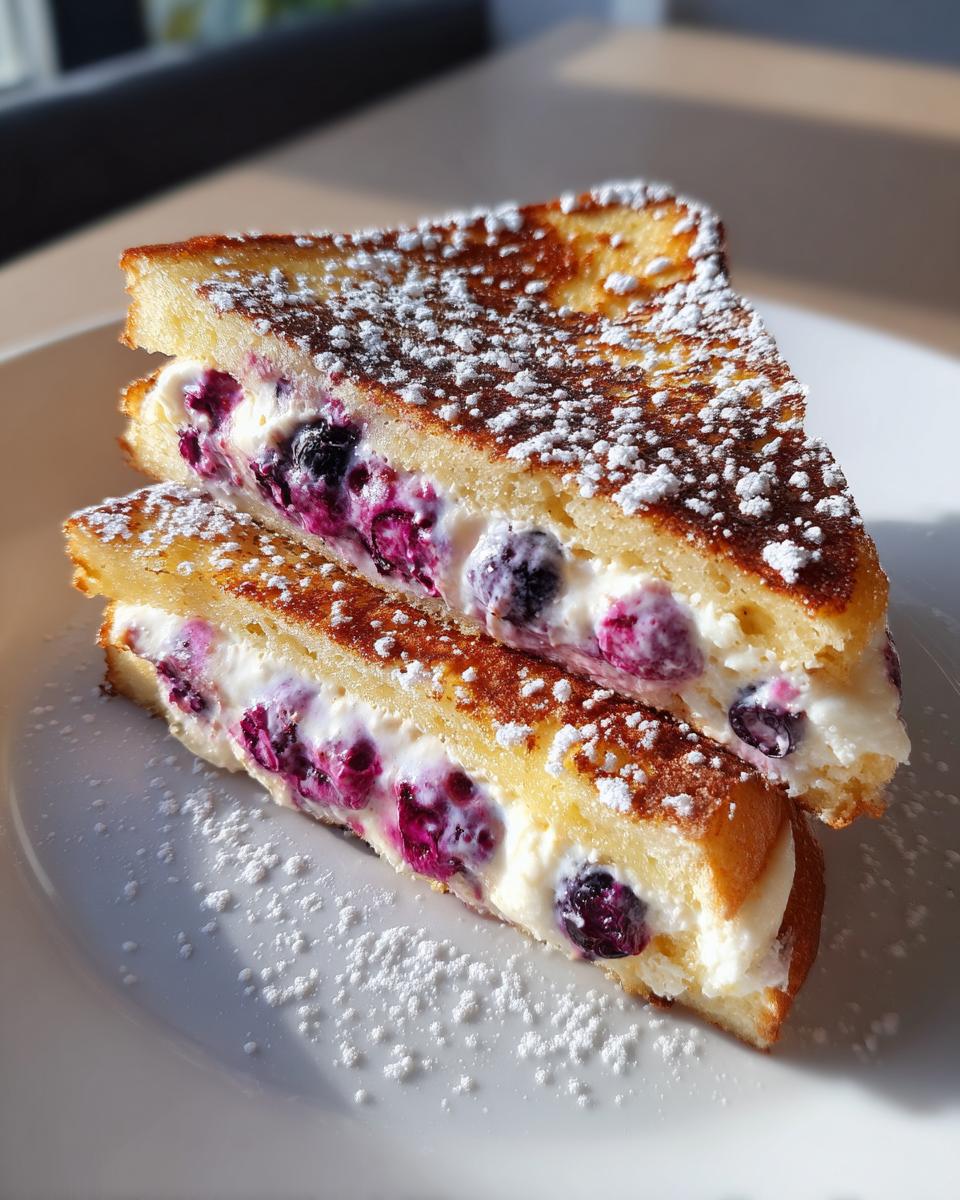
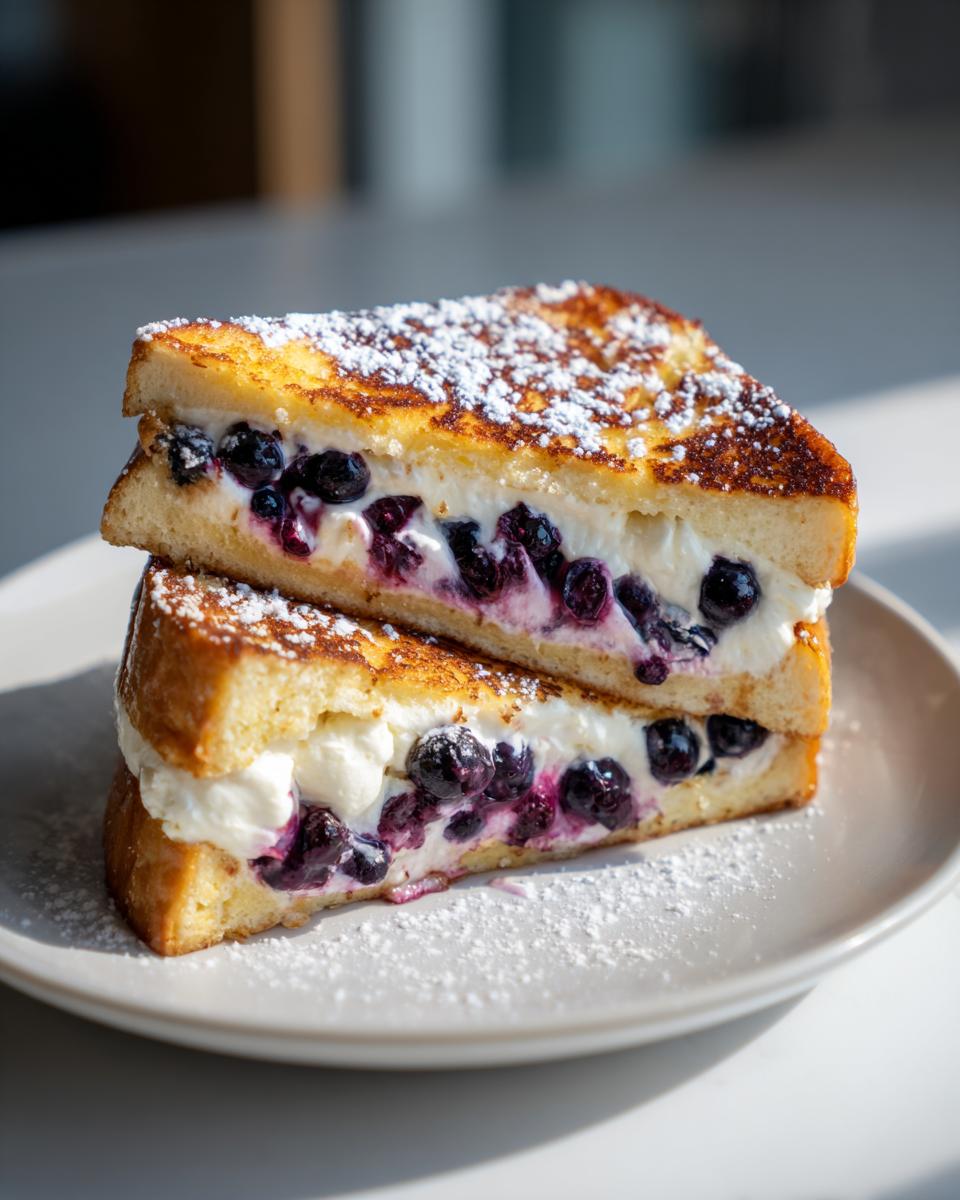
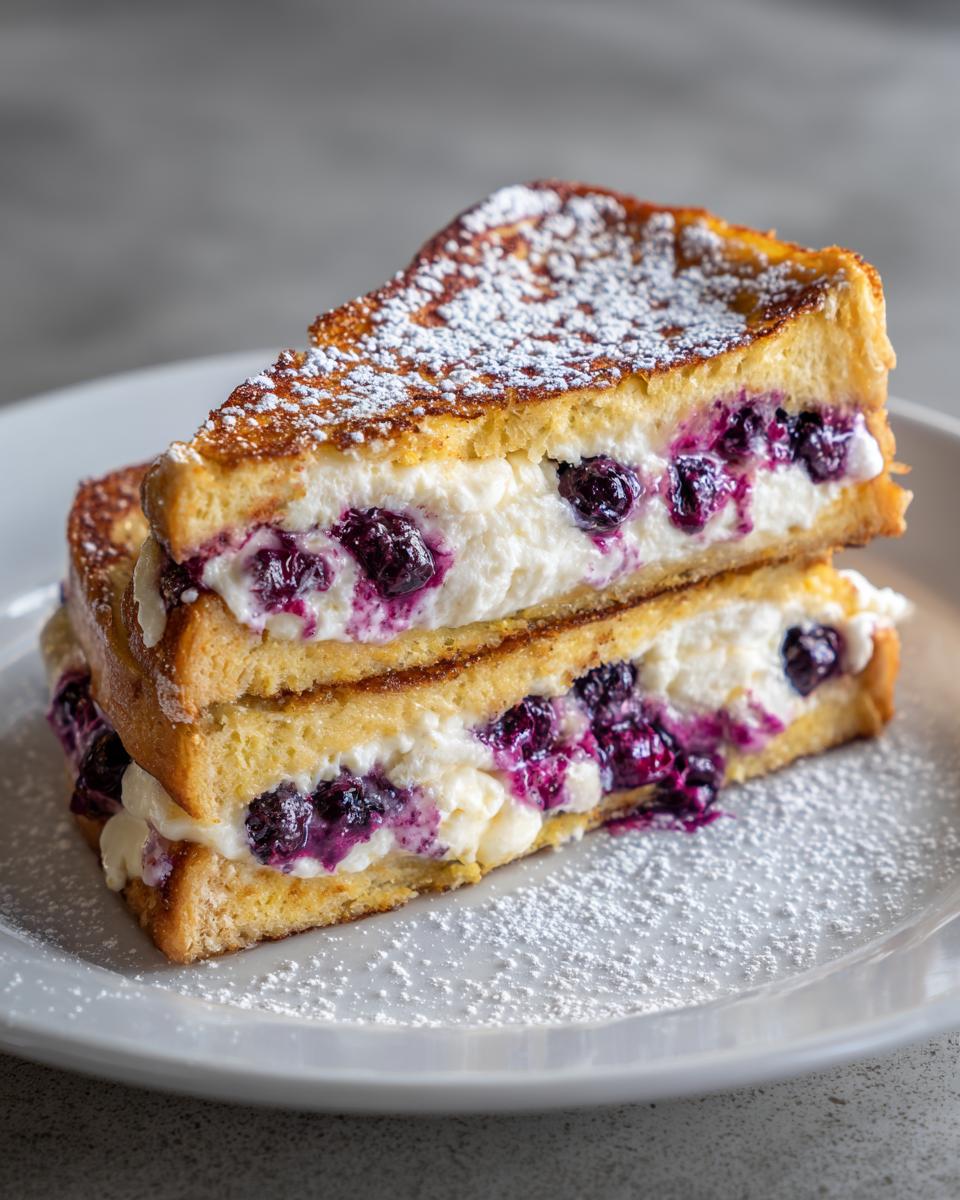
Weekends are meant for slowing down, right? And what says ‘slow down and enjoy life’ better than a truly decadent breakfast? Forget those flimsy, flat slices of ordinary toast; we’re kicking things up a serious notch with this Blueberry Cheesecake Stuffed French Toast. Making perfect **stuffed french toast** isn’t just about luck; with my background in food science and professional recipe development, I designed this so it works flawlessly every single time you try it. This recipe gives you that perfect mix of crispy golden exterior and a warm, creamy, fruity center. Trust me, this is the **Decadent Breakfast Idea** that’ll earn you legendary status at brunch!
- Why This Blueberry Cheesecake Stuffed French Toast Recipe Works (Weekend Breakfast Treats)
- Ingredients for the Perfect Stuffed French Toast Recipe
- Expert Steps: How to Make Stuffed French Toast
- Tips for Success with Stuffed French Toast
- French Toast Filling Ideas to Vary Your Stuffed French Toast
- Make Ahead French Toast and Storage Instructions
- Serving Suggestions for Your Indulgent Breakfast
- Frequently Asked Questions About Stuffed French Toast
- Nutritional Estimates for This Stuffed French Toast
- Share Your Weekend Breakfast Treats!
Why This Blueberry Cheesecake Stuffed French Toast Recipe Works (Weekend Breakfast Treats)
I want you to think about the classic failures: the filling leaks out, the inside is still raw, or the bread gets totally soggy. Not happening here! This recipe is built on the science of stability, making it one of the best **Weekend Breakfast Treats** you can make. Because I spent years perfecting recipes for busy families, I focused on making sure this **Cream Cheese Stuffed French Toast** holds up beautifully.
Here’s what makes this version a showstopper, perfect for that gorgeous photo you’re planning to Pin:
- Stable Filling: We include an egg yolk in the cream cheese mix. That little addition helps that creamy center set up just enough so it doesn’t ooze out everywhere while you cook.
- The Bread Rule: We insist on thick-cut! Using something substantial like brioche gives you a sturdy pocket for filling and ensures you get that wonderfully **Fluffy French Toast** result, not a puddle.
- Golden Exterior: The batter is lightly seasoned, letting the butter and the bread shine through, resulting in that perfect, crispy, golden crust you see in all the best **Decadent Breakfast Ideas**.
I’ll never forget the first time I served these at a little Saturday brunch for some friends; they were staring at the plate like they’d never seen food before! It was unbelievably easy, but looking so rich, they thought I’d spent all morning slaving away. You can check out other excellent cream cheese variations right here, but I truly think the blueberry combo is the winner!
Ingredients for the Perfect Stuffed French Toast Recipe
When you’re making something this good, you can’t skimp on the quality! Trust me, the ingredients listed below are exactly what I use every single time this hits my griddle. These proportions are perfectly balanced to make sure our Blueberry Cheesecake **Stuffed French Toast** is rich without being overly heavy. If you want to see another amazing fruit-filled option, check out this excellent strawberry version for inspiration!
For the Creamy Filling, you’ll need:
- 8 ounces cream cheese, softened (This must be soft, remember!)
- 1/4 cup granulated sugar
- 1 teaspoon vanilla extract
- 1 large egg yolk (This is our secret stabilizer!)
- 1 cup fresh or frozen blueberries
And for the Dipping Batter and Toast:
- 8 slices thick-cut brioche or challah bread (Do not use standard sandwich bread, it’ll fall apart!)
- 1/2 cup milk (whole or 2%)
- 2 large eggs
- 1 teaspoon ground cinnamon
- 1/4 teaspoon ground nutmeg
- 2 tablespoons butter, for cooking
- Powdered sugar and maple syrup, for serving (The grand finale!)
Expert Steps: How to Make Stuffed French Toast
Okay, this is where the magic happens! We have to move with a little intention here, especially when we’re dealing with that gorgeous cream cheese filling. You want everything sealed tight so that when you cook this amazing **stuffed french toast**, it stays perfectly intact. We’re breaking this down into three non-negotiable phases. Ready? Let’s dive into the instructions—getting this right is what separates an okay breakfast from a show-stopping brunch. You can find a great guide on general assembly techniques right here!
Creating the Creamy Blueberry Cheesecake Filling
First things first: the filling! Grab your softened cream cheese—it has to be soft, don’t even try to rush cold cream cheese, or you’ll end up with lumps! Beat it vigorously with the sugar, vanilla, and that hero egg yolk until it’s completely smooth and looks like whipped frosting. Now, for the berries: gently fold those blueberries right in. I mean gently. We want whole berries, not sad, crushed purple smears all over the bowl. Set that aside for just a moment.
Assembling Your Homemade Stuffed Toast
Next, let’s build our sandwiches. Take one slice of that beautiful, **Thick Cut French Toast** bread and generously spread half the filling over one surface. Don’t spread it all the way to the very edge; give it a little border! Top it with the second slice to form a sandwich. Now, this is critical for preventing leaks, so listen up: gently press the edges of the bread together with your fingers. You’re trying to create a seal around that creamy center. Repeat this until you have four perfect stuffed pockets.
Achieving Golden Brown French Toast on the Griddle
Time to batter up! Whisk your milk, eggs, cinnamon, and nutmeg in a shallow dish. Dip each assembled sandwich into the batter, coating completely, and let the excess drip off for just a second. Heat your skillet or griddle over medium heat, making sure you’ve melted enough butter to coat the surface. Cook these beauties for about 3 to 4 minutes per side. Medium heat is key—we want that beautiful **Golden Brown French Toast** color without burning the outside before the filling gets warm. Once done, slice them diagonally for that impressive look. For more amazing cheesy breakfast ideas, check out this link for inspiration!
Tips for Success with Stuffed French Toast
I know you’re going to make these incredible, but I want you to succeed without a single leak! Since I’ve developed hundreds of recipes for publication, I always bake the lessons learned into the directions. The biggest thing moving forward with any **stuffed french toast** recipe is always the bread selection. Please, please, please use a thick-cut bread, like the Brioche French Toast or challah I called for. Thin bread gets over-saturated instantly in the batter and just won’t hold the weight of that delicious filling.
Another pro tip from my test kitchen days: don’t skip the little rest time after dipping. That moment allows the batter to soak in a bit without dissolving the structural integrity of the bread, which helps keep things fluffy but not soggy. If you want to guarantee that unbelievably **Fluffy French Toast** texture, make sure your eggs in the batter are nice and fully incorporated!
Finally, if you’re worried about sogginess, this is an easy fix: lighten up on the amount of batter on the outside. Dip quickly! We want the outside golden and crisp, not tasting like soggy, stale batter. These little adjustments are key to making this an easy brunch classic!
French Toast Filling Ideas to Vary Your Stuffed French Toast
While I honestly think the Blueberry Cheesecake version is my favorite—it’s just so indulgent—part of the fun of mastering **stuffed french toast** is playing with the fillings! If you’ve mastered the technique, you’ve unlocked a whole new world of possibilities for your weekend spread. This is where Pinterest inspiration really pays off, because presentation matters when you’re making **brunch recipes**!
Once you’ve got the bread and assembly down, you can start experimenting with fantastic **French Toast Filling Ideas**. Don’t feel like you have to stick to berries next time; here are a few other concepts that I’ve loved testing out over the years:
- Classic Cream Cheese & Cinnamon: Sometimes simple is best! Just whip the cream cheese with a little powdered sugar and lots of cinnamon. It’s pure comfort food.
- Lemon Raspberry Dream: If you want something bright and tangy to cut through the richness, swap out the blueberries for fresh raspberries and add a teaspoon of lemon zest and a little lemon juice to your cream cheese mix. It’s so elegant! You can see a wonderful example of tangy fillings over here that might inspire you.
- Nut Butter Swirl: For a slightly heartier version, try layering peanut butter or almond butter thinly on one slice before you add the cream cheese mixture to the other. It adds great texture and keeps things from getting too sweet.
The takeaway here is that the shell—the bread and the batter—stays the same, but swapping that inner core keeps your **stuffed breakfast bake** exciting week after week. What filling should I try next? Let me know in the comments!
Make Ahead French Toast and Storage Instructions
This is honestly the section I love most for busy weekends, especially when I know I want to sleep in past 8 AM! Making **stuffed french toast** ahead of time is completely achievable, and it turns a stressful morning into a relaxed *special occasion breakfast*. Some of the best brunch recipes are the ones you can assemble the night before, and this recipe is perfect for that!
I know you’re wondering about prepping these big sandwiches ahead of time. Good news! You can totally tackle the assembly phase the night before. Follow the instructions up to Step 3, where you’ve made all your creamy, delicious sandwiches. Cover them tightly with plastic wrap—tightly!—and pop them into the refrigerator. They hold up wonderfully for about 4 hours that way, just like I noted in the official recipe details. This makes morning prep a breeze; you’re just dipping and cooking!
Freezing Your Stuffed Breakfast Bake
If you’re planning for a true **make ahead French toast** scenario, freezing is your friend. After assembling the sandwiches (Step 3), you need to flash freeze them first. Lay them on a baking sheet lined with parchment paper—don’t let them touch each other—and freeze until they are solid blocks, usually about an hour. Once frozen solid, wrap each individual sandwich tightly in plastic wrap, and then put them all into a large zip-top freezer bag. You can find a fantastic guide on freezing and reheating techniques over here.
To cook them from frozen, just toss them straight onto a buttered, medium-hot skillet. They take a little longer, usually 5 to 7 minutes per side, but you still want that low-and-slow approach so the filling heats through without burning the outside. They come out just as golden and amazing as if you made them fresh!
Storing Leftover Cooked Stuffed French Toast
Got leftovers? Lucky you! Cooked **stuffed french toast** stores well, too. Let any leftover pieces cool completely on a wire rack. Once cool, place them in an airtight container, separating layers with wax paper so they don’t stick together. They stay good in the fridge for up to three days. When you reheat them, skip the microwave if you value that crispy exterior; use a toaster oven or a dry skillet over medium-low heat. A quick toast revives that golden crunch beautifully.
Serving Suggestions for Your Indulgent Breakfast
We have spent time creating the most beautiful, decadent **stuffed french toast**, so we absolutely cannot let it down on presentation! Since we are aiming for that show-stopping, special occasion breakfast vibe—the kind that gets saved a million times on Pinterest—we need to load up those toppings. Think of the plating as the final, exciting step in the process.
Of course, a generous dusting of powdered sugar is mandatory; that gives it that lovely, soft look. And yes, maple syrup is required, but why stop there when you could make it a truly memorable centerpiece?
Here are a few ways I love to dress up this treat for a proper weekend feast. If you’ve already made our blueberry cheesecake version, adding a little brightness really balances the richness. You can see how they style their fruit toppings beautifully over here!
- Toasted Crunch: Right after you dust with powdered sugar, sprinkle on some finely chopped, toasted pecans or walnuts. That nutty crunch against the soft bread and creamy filling is just divine. Plus, toasting nuts brings out their aroma, making the whole plate smell richer!
- A Bit of Zest: Since our recipe uses that lovely vanilla and cinnamon, a small grating of fresh orange or lemon zest over the top adds the most beautiful, fragrant lift. It cuts through the sweetness and just makes the whole **stuffed french toast** feel lighter and brighter.
- Syrup Variations: Honestly, regular maple syrup is great, but try warming up a thicker syrup! A warm blueberry compote spooned over the top (if you didn’t use blueberries inside), or even just a drizzle of high-quality dark maple syrup, really elevates the experience.
- Fresh Berry Crown: If you didn’t use berries in the filling, pile fresh strawberries or whole raspberries right on top. The color contrast against the golden toast and white sugar is exactly what you need for that perfect photo op.
When you put it all together—a diagonal cut showing the filling, rich toppings, and maybe some fresh whipped cream on the side—you have transformed a simple breakfast into a proper, **Special Occasion Breakfast** that your family will talk about all week long. Don’t underestimate the power of beautiful presentation!

Frequently Asked Questions About Stuffed French Toast
I totally get it; sometimes you just need a quick answer before you commit to building something this decadent! Since you’re aiming for that picture-perfect, **Cream Cheese Stuffed French Toast**, I want to make sure you have all the cheat codes ready to go. Here are the things folks ask me most often when they’re trying to master this recipe for their next **Easy Brunch Recipes** day.
What is the absolute best bread to use for stuffed French toast?
Don’t even bother with standard supermarket sandwich bread—it’s far too flimsy and will disintegrate when you dip it! You absolutely need something thick and sturdy that can handle a dense filling. I swear by **brioche** or challah (like in this recipe). They are rich, slice thick (at least 3/4 inch!), and they hold their shape beautifully during the dipping and cooking phases. It’s the key to success!
How do I stop the cream cheese filling from leaking out while cooking?
This is the number one anxiety point! The main defense is making sure you don’t overfill and that you seal the edges really well. After closing the sandwich, gently but firmly press down around the perimeter to essentially weld the bread together. Also, make sure your filling isn’t too runny; adding that small egg yolk in the mix, as we did in this recipe, helps it set up slightly before it hits the heat. This link has a great video showing the sealing technique if you prefer a visual!
Can I bake this instead of pan-frying it?
Yes, you absolutely can! If you’re making a huge batch, switching to a bake is smart. After assembling the sandwiches, you dip them just like normal, but instead of pan-frying, you place them in a buttered baking dish. I usually recommend baking at 375°F (190°C) for about 15 to 20 minutes, flipping halfway, until they are golden brown on top and heated through. It’s a fantastic alternative for large groups!
What fat should I use for cooking the toast? Butter or oil?
Oh, this is a tough one because you want flavor, but you also want high heat stability! I always start by melting a teaspoon or two of real butter in the pan for flavor, but because butter burns easily at the temperature we need, I always add a tiny splash of neutral oil (like canola or vegetable oil) to the butter. This raises the smoke point of the fat and helps you achieve that perfectly even, **Golden Brown French Toast** without turning your kitchen into a smoke signal!
Nutritional Estimates for This Stuffed French Toast
Now, I know when we are making something this ridiculously delicious—truly an **Indulgent Breakfast**—we aren’t expecting it to be a low-calorie affair! But because I have that food science background, I always make sure we have a general idea of what we’re tucking into. Remember, these figures are just estimates based on the ingredients listed in the recipe for one serving (one sandwich slice cut in half, assuming standard usage of syrup/toppings)
While this is undeniably a treat, it’s balanced out with good protein from the eggs and cream cheese, which keeps you full long enough to enjoy your relaxed weekend!
Here are the ballpark figures for one serving of our Blueberry Cheesecake Stuffed French Toast:
- Calories: Approximately 450
- Protein: Around 15g
- Total Fat: About 22g (with 12g being Saturated Fat—hello, butter and cream cheese!)
- Carbohydrates: Roughly 50g
- Sugar: About 25g (This includes the sugar in the filling and any syrup you add!)
- Sodium: Near 350mg
Please keep in mind that these are just estimates! If you use less maple syrup or skip the powdered sugar dusting, those numbers change significantly. But honestly, when you’re making **stuffed french toast** of this caliber, you might as well go all the way, right? Enjoy every single bite!
Share Your Weekend Breakfast Treats!
I genuinely hope you enjoyed making this Blueberry Cheesecake **Stuffed French Toast** as much as I enjoyed developing it for you. This recipe is one of those “family favorites” that deserves to be shared!
When you pull those gorgeous, golden squares off the griddle, I want to see them! Seriously, snap a picture and tag me on social media—I absolutely love seeing your creations and hearing what you decided to use for your final touches. Did you go fully decadent with whipped cream, or did you keep it classic with just syrup?
If this recipe made your morning brighter, please take a quick moment to leave a star rating right down below. Positive reviews truly help more home cooks like you find reliable, delicious **Brunch Recipes** on Frosted Fancies. I always check the comments to see what other **Stuffed French Toast Filling Ideas** folks are trying out next—I’m already thinking about a pumpkin spice version for fall!
If you want to check out another fantastic holiday-worthy version, see what they are doing with the strawberries over at this site! And don’t forget to bookmark this page so you can always come back for your next indulgent start to the day. Happy cooking, and I can’t wait to see what you bake next!
If you enjoyed this, maybe try exploring this delicious cream cheese alternative for your next sweet start!
PrintDecadent Blueberry Cheesecake Stuffed French Toast

Create an indulgent weekend brunch with this Blueberry Cheesecake Stuffed French Toast. This recipe features thick slices of bread filled with a sweet, creamy cheesecake mixture and fresh blueberries, cooked until golden brown.
- Prep Time: 15 min
- Cook Time: 15 min
- Total Time: 30 min
- Yield: 4 servings 1x
- Category: Breakfast
- Method: Pan Frying
- Cuisine: American
- Diet: Vegetarian
Ingredients
- 8 slices thick-cut brioche or challah bread
- 8 ounces cream cheese, softened
- 1/4 cup granulated sugar
- 1 teaspoon vanilla extract
- 1 large egg yolk
- 1 cup fresh or frozen blueberries
- 1/2 cup milk (whole or 2%)
- 2 large eggs
- 1 teaspoon ground cinnamon
- 1/4 teaspoon ground nutmeg
- 2 tablespoons butter, for cooking
- Powdered sugar and maple syrup, for serving
Instructions
- Prepare the filling: In a medium bowl, beat the softened cream cheese, granulated sugar, vanilla extract, and egg yolk until the mixture is smooth and creamy. Gently fold in the blueberries.
- Prepare the batter: In a shallow dish, whisk together the milk, 2 large eggs, cinnamon, and nutmeg until well combined.
- Assemble the toast: Take one slice of bread and spread half of the cream cheese filling evenly over one side. Top with a second slice of bread to create a sandwich. Repeat with the remaining bread and filling to make four sandwiches.
- Seal the edges: Gently press the edges of each sandwich together to help seal the filling inside.
- Dip the toast: Dip each stuffed sandwich into the egg batter, turning to coat both sides completely. Allow excess batter to drip off.
- Cook the toast: Melt butter in a large skillet or griddle over medium heat. Cook the stuffed French toast for 3 to 4 minutes per side, until golden brown and heated through. Adjust heat as needed to prevent burning.
- Serve immediately: Slice the toast in half diagonally, dust generously with powdered sugar, and serve warm with maple syrup.
Notes
- Use thick-cut bread, like brioche or challah, to prevent the filling from leaking out during cooking.
- For an extra crispy exterior, lightly coat the dipped bread in a thin layer of cinnamon sugar before placing it on the griddle.
- You can prepare the stuffed sandwiches (steps 1-3) up to 4 hours ahead of time and keep them covered in the refrigerator.
Nutrition
- Serving Size: 1 sandwich
- Calories: 450
- Sugar: 25g
- Sodium: 350mg
- Fat: 22g
- Saturated Fat: 12g
- Unsaturated Fat: 10g
- Trans Fat: 0.5g
- Carbohydrates: 50g
- Fiber: 2g
- Protein: 15g
- Cholesterol: 150mg