
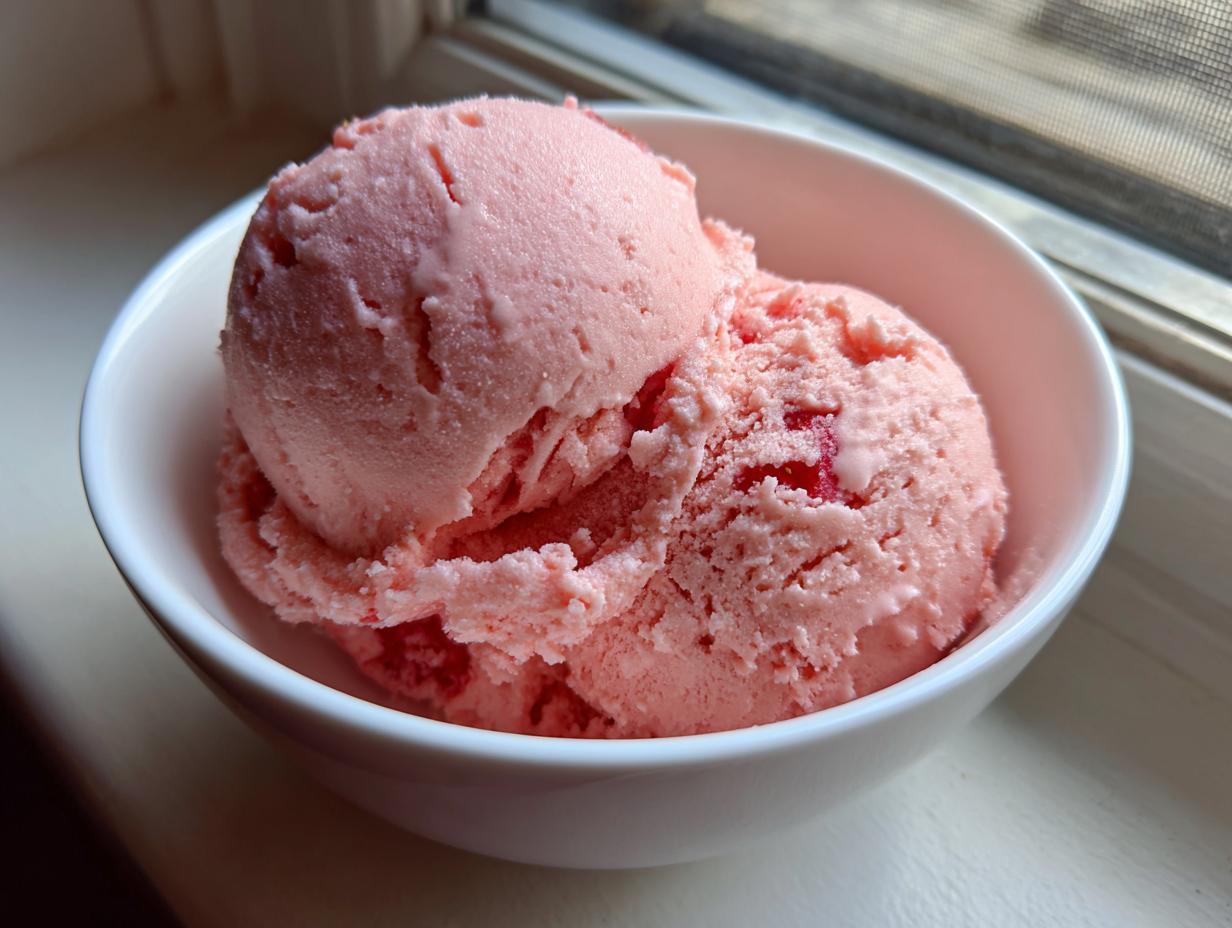
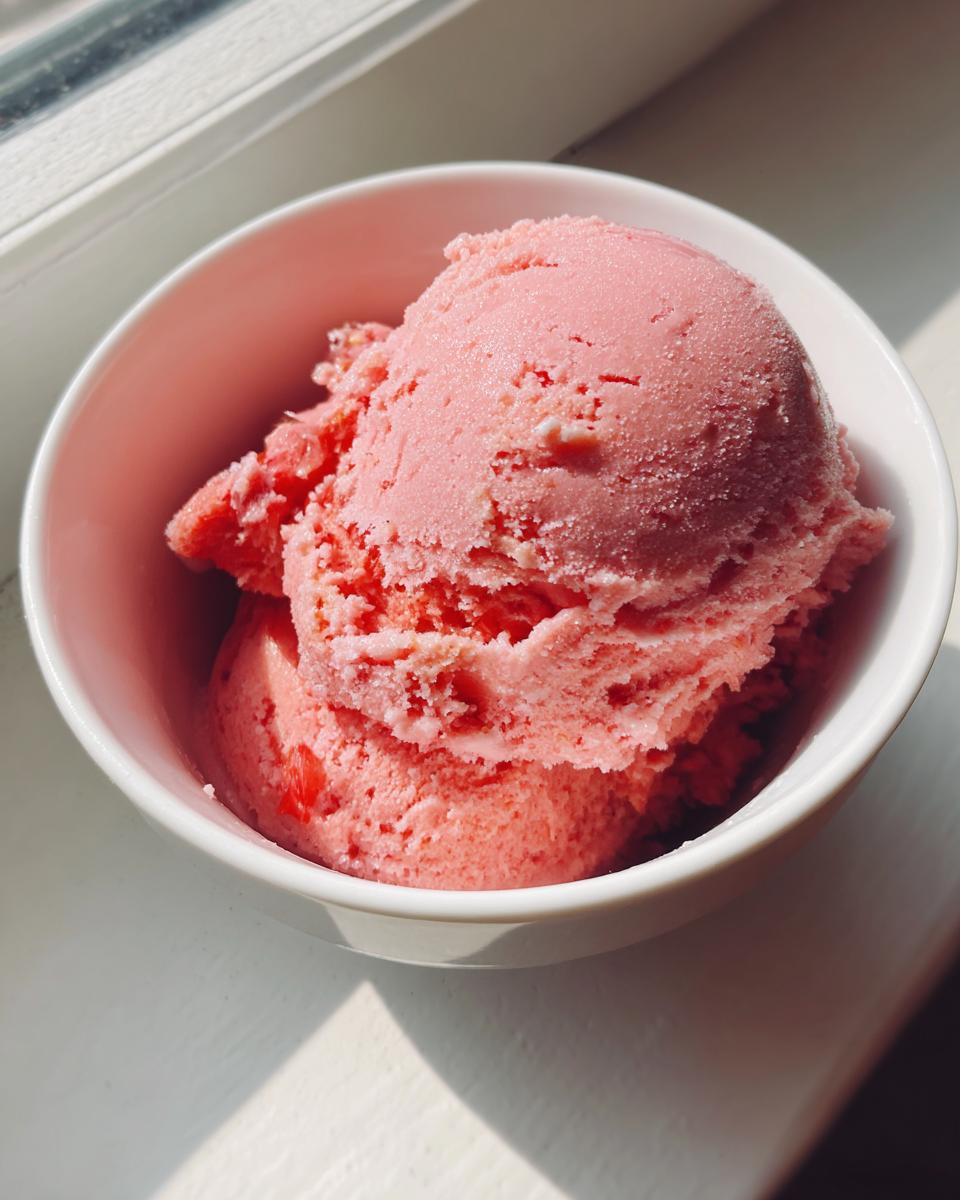
Hello and welcome! I’m Katie, and honestly, there is nothing summer demands more than a truly spectacular bowl of homemade frozen dessert. Forget everything you think you know about making ice cream; if you think you need a dedicated, clunky machine, think again! This **strawberry ice cream** recipe is my absolute favorite because it skips the churn entirely and still delivers that rich, velvet-smooth texture everyone chases. As a recipe developer with a background in food science, I built this recipe on the *why*—understanding how heavy cream and condensed milk interact to create something magical without churning. Trust me, this is the easiest, creamiest, best **strawberry ice cream** you’ll ever scoop!
- Why This No-Churn Strawberry Ice Cream is Your New Summer Staple
- Gathering Ingredients for Homemade Strawberry Ice Cream
- Step-by-Step Guide to Making No Churn Strawberry Ice Cream
- Freezing and Storing Your Strawberry Frozen Treat
- Tips for the Best Strawberry Ice Cream Recipe
- Serving Suggestions for this Rich Strawberry Dessert
- Frequently Asked Questions About Strawberry Ice Cream
- Estimated Nutritional Data for Your Strawberry Ice Cream
- Share Your Strawberry Frozen Treat Creations
Why This No-Churn Strawberry Ice Cream is Your New Summer Staple
I know, I know—you want that classic, rich mouthfeel that only the best machines seem to offer. Well, I’m here to tell you that this **homemade strawberry ice cream** delivers all the decadence with zero fuss. It’s fantastic because we rely on the science of the ingredients rather than mechanical stirring!
- It’s one of the most **easy strawberry ice cream** recipes you’ll ever try. No cooking, no tempering, and absolutely no ice cream maker required.
- The texture is honestly shocking for a no-churn recipe; it rivals anything I developed in the professional test kitchens. You can find more ways to make great frozen desserts here: Classic Strawberry Ice Cream.
Achieving Ultra Creamy Strawberry Ice Cream Texture
The trick to the unparalleled texture comes down to two things we use: heavy whipping cream, beaten expertly to trap air, and sweetened condensed milk. The high fat and sugar content in the condensed milk actually works against large ice crystal formation while freezing. It keeps everything smooth and soft, giving you that wonderfully **creamy strawberry ice cream** result every single time.
The Appeal of an Easy Strawberry Ice Cream Recipe
If you’re looking for a quick summer treat, this fits the bill perfectly. Your active prep time is seriously under 20 minutes! You get all the amazing flavor of **fresh strawberry ice cream** in the time it takes to whip some cream. It’s ready to pop in the freezer, and honestly, that hands-off time is what I look forward to the most.
Gathering Ingredients for Homemade Strawberry Ice Cream
Alright, let’s talk about what you need to pull off this flavor explosion. Because we aren’t cooking anything, the quality of your ingredients really sings through! We only need six things to make the best **strawberry ice cream**, and they all need to be cold or ready to go before we start mixing. If you want the super **creamy strawberry ice cream** everyone raves about, make sure you have everything measured out right!
Here is what you’ll need for about six generous servings:
- 2 cups fresh strawberries, hulled and chopped
- 1/4 cup granulated sugar (this is just for waking up the berries!)
- 1 teaspoon lemon juice
- 2 cups heavy whipping cream, very cold
- 1 (14 ounce) can sweetened condensed milk, cold
- 1 teaspoon vanilla extract
You can check out some other great tips for using **homemade strawberry ice cream** in different ways here: Homemade Strawberry Ice Cream.
Ingredient Notes and Substitutions for Strawberry Ice Cream
The strawberries are the star here! I always insist on using the ripest **fresh strawberry ice cream** berries you can find. If you happen to use frozen ones, make sure they are completely thawed out, and maybe drain off most of that extra liquid so it doesn’t water down our base. And listen up: your heavy whipping cream MUST be really cold. I mean, keep it in the coldest part of the fridge! That chill is what helps us get those sturdy stiff peaks we need for volume.
Now for a fun little secret from my notes: if you’re feeling fancy and want that tangy, rich flavor, you can absolutely fold in softened cream cheese into the condensed milk mixture. That little swap turns this into a fantastic **strawberry cheesecake ice cream**! Just be sure it’s fully incorporated before you add the whipped cream.
Step-by-Step Guide to Making No Churn Strawberry Ice Cream
This is where the magic happens, but pay close attention because technique is everything when you aren’t churning! We are moving from simple fruit prep right into building that airy, incredible base for our **creamy strawberry ice cream**. I always tell folks that the maceration step is non-negotiable—it’s what gives the whole batch that vibrant, **fresh strawberry ice cream** punch.
Macerating the Fresh Strawberry Ice Cream Base
First things first, we set the flavor stage. Take your chopped strawberries, that 1/4 cup of sugar, and the lemon juice, and mix them gently in a bowl. Now, here is the crucial part: you need to let this mixture sit on the counter for at least 30 minutes. This process, called maceration, pulls out all those gorgeous, sweet juices that make the flavor so intense. After the half-hour wait, mash them slightly with a fork—I like leaving a few small chunks for texture, but you do you!
Whipping Cream and Folding the Strawberry Ice Cream
Next, grab your very cold heavy whipping cream and beat it until you hit stiff peaks. I mean stiff! You should be able to flip the whisk upside down and nothing moves. That takes care and speed, usually about 3 to 5 minutes depending on your mixer. While that’s happening, whisk your cold condensed milk and vanilla together. Now for the most important moment for volume: Take a big dollop of that whipped cream and fold it into the condensed milk mixture first. This lightens the dense milk! Then, add the rest of the whipped cream. When folding, always use a rubber spatula and cut down the middle and sweep around the edge—don’t stir! Over-mixing at this stage will deflate all the air you just worked so hard to create, and you won’t get that lovely texture you want for your **strawberry ice cream**. Finally, fold in your macerated berries and juices until they are just combined. Check out some great tips for making this no-churn dessert extra special here: No-Churn Strawberry Ice Cream.
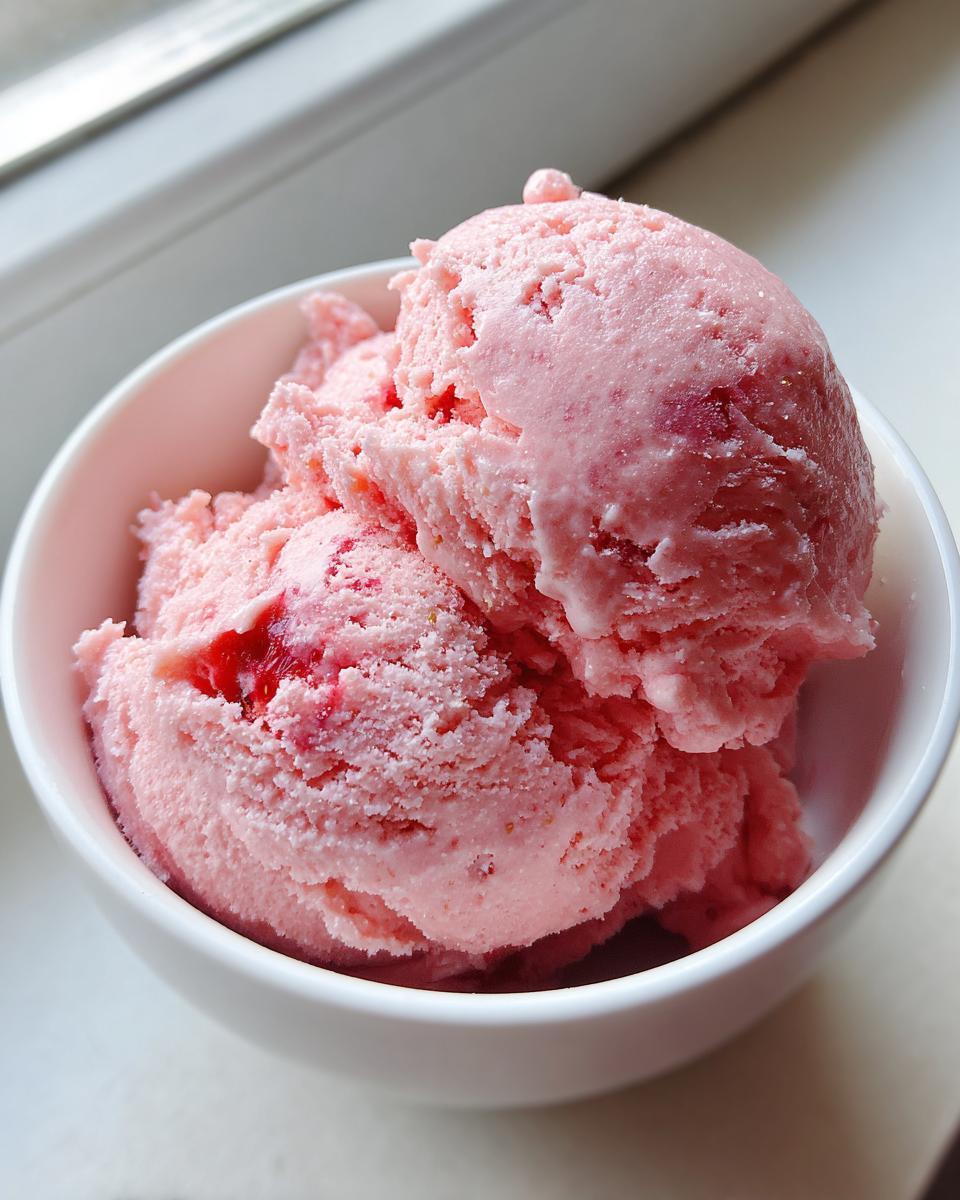
Freezing and Storing Your Strawberry Frozen Treat
Once all that beautiful, airy **strawberry ice cream** base is mixed, you need a great home for it! Pour the entire mixture into a loaf pan or whatever freezer-safe container you’re using. Now, listen closely to this, because this step is key to keeping your dessert smooth and crystal-free: lay a sheet of plastic wrap *directly* onto the surface of the ice cream before you seal the lid. This stops those annoying freezer burns from forming.
Pop that covered container into the freezer for a minimum of 6 hours, but honestly, overnight is way better for the best texture. When it’s time to dig in, remember to pull your **strawberry frozen treat** out about 5 to 10 minutes before you plan to scoop. That little bit of counter time makes all the difference in getting those perfect, easy scoops!
Tips for the Best Strawberry Ice Cream Recipe
Even though this is an incredibly forgiving **easy strawberry ice cream recipe**, a few pro tips I picked up from my food science days will push it straight into legendary status. Honestly, a few small tweaks make all the difference between *good* and *wow*!
Rule number one, as mentioned before: keep your heavy cream and condensed milk straight out of the coldest reaches of the fridge. If your ingredients are sluggishly warm, you’ll never get those stiff peaks required for volume, and that means a denser, harder result. You’re aiming for airy deliciousness here!
Secondly, always taste your macerated strawberries before folding them in. This is your last chance to adjust the sweetness level before it gets locked into the frozen structure. You can find some other ways home cooks ensure a great texture here: The Creamiest Homemade Strawberry Ice Cream (Worth The Time.). Always remember, the quality of your **strawberry ice cream** depends on the quality of those sweet summer berries!
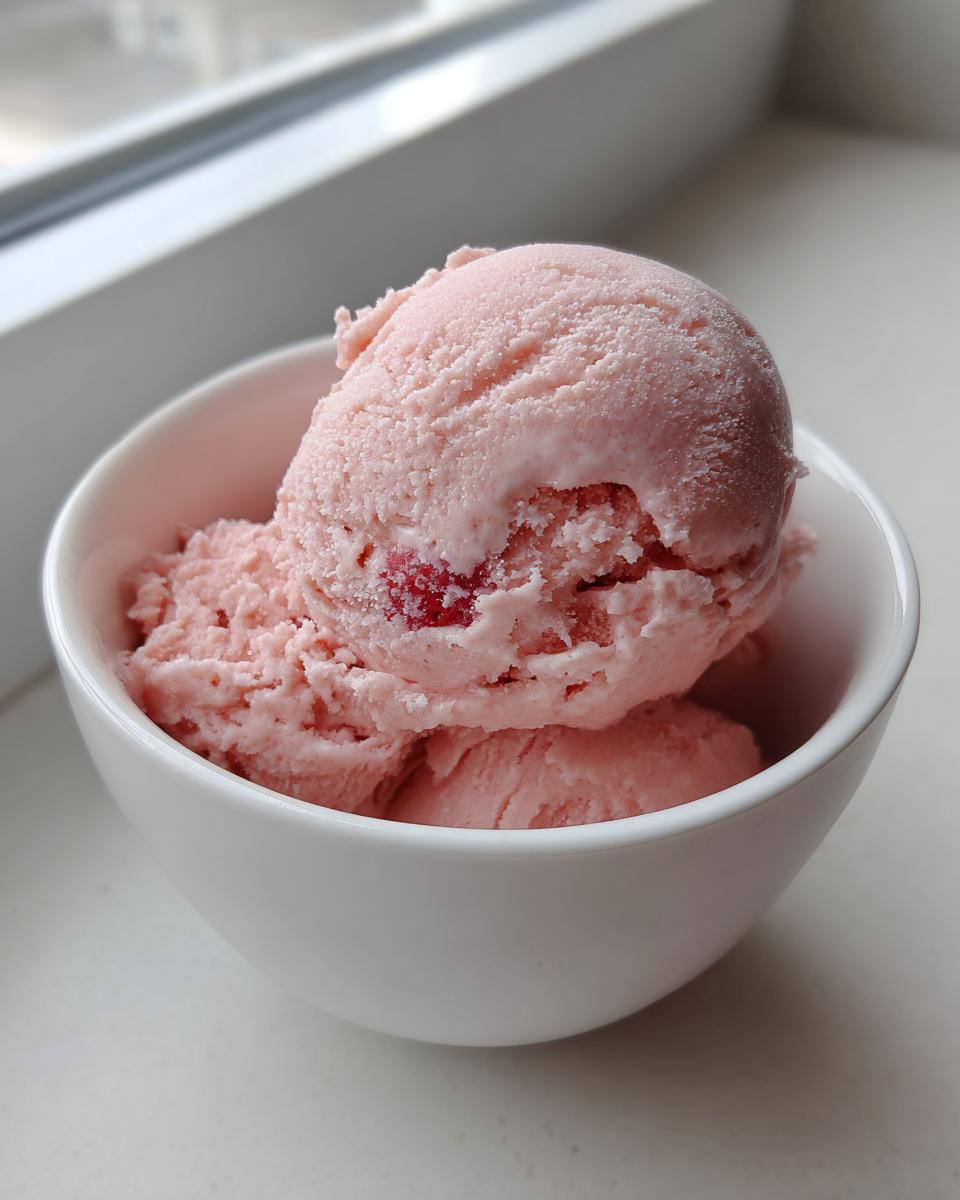
Making a Classic Strawberry Ice Cream Puree
When I first developed this recipe, I loved the bite of the fresh strawberry chunks, but I know not everyone feels the same way. If you prefer a totally smooth experience, this is your secret weapon! After those strawberries macerate for 30 minutes, instead of just mashing them gently, toss them right into a small blender or food processor. Blitz them until they are totally smooth—a perfect ruby red puree for your base. Fold this puree in at the very end, just like you would the chunks. It gives you that intense flavor throughout, making it a beautifully smooth **classic strawberry ice cream**!
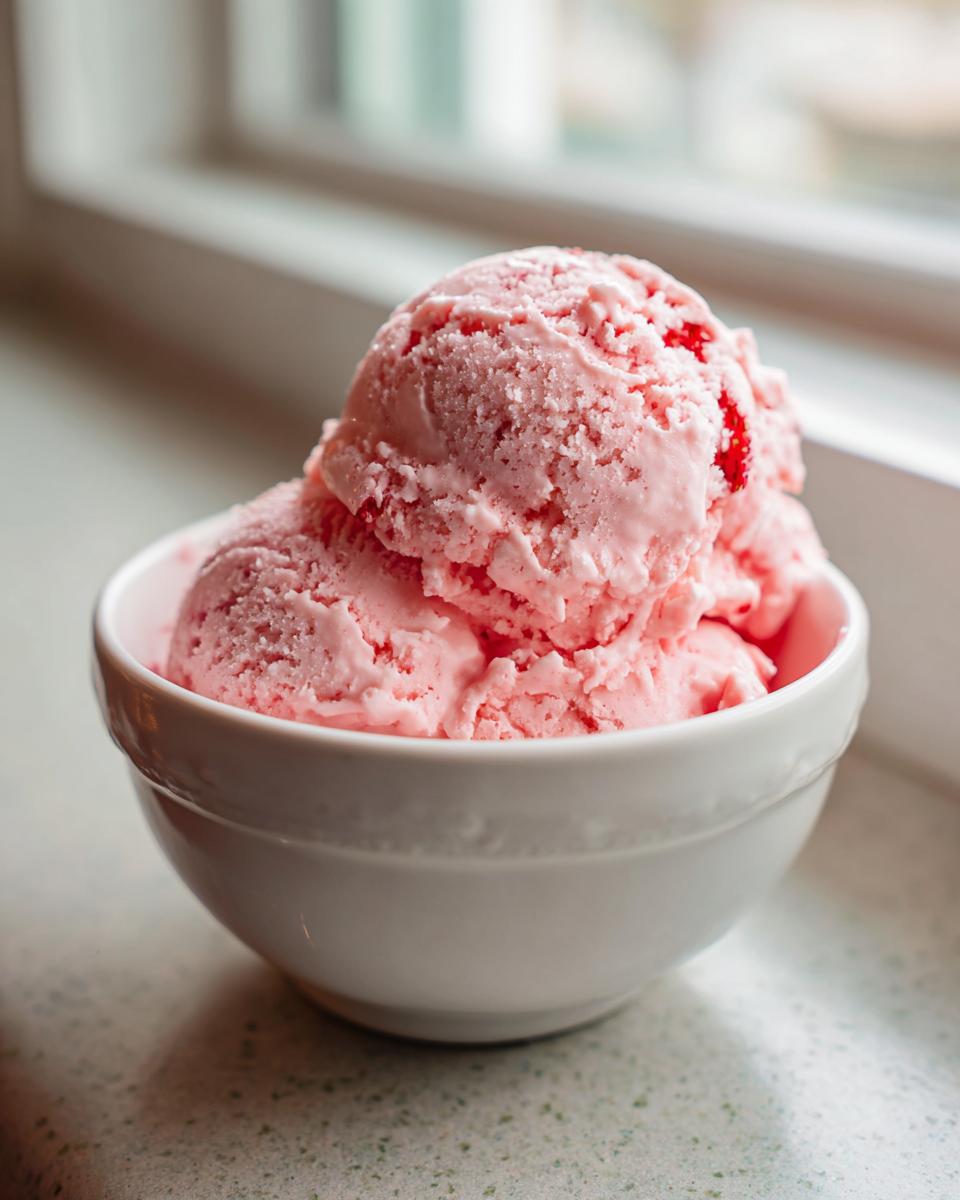
Serving Suggestions for this Rich Strawberry Dessert
Okay, once your **strawberry ice cream** is perfectly firm and scooped out, you need something worthy to hold all that goodness! Honestly, this **rich strawberry dessert** is amazing all on its own, but a little something extra never hurts, right?
I love keeping things simple. Grab a classic waffle cone—the crunch plays against the creaminess so well. For something a little more sophisticated, serve a scoop next to a buttery shortbread cookie. And the final touch? A tiny sprig of fresh mint on top seriously brightens up the whole presentation. You can find some other wonderful ways people enjoy their frozen treats here: Homemade Strawberry Ice Cream. Enjoy every bite!
Frequently Asked Questions About Strawberry Ice Cream
I get so many questions about this recipe, especially since it boasts amazing results without needing a dedicated machine! People are always wondering about texture and how to adapt the base for their favorite gadgets. Here are the most common things I hear from home cooks looking for the **best strawberry ice cream recipe**.
Can I make this strawberry ice cream in an ice cream maker?
Absolutely! Because this base is so rich and flavorful, it works great in standard **ice cream maker recipes** too. You just skip the part where you whip the heavy cream to stiff peaks. Instead, chill the condensed milk mixture and the strawberry puree separately, then pour both—along with the liquid heavy cream—into your machine according to its instructions. You’ll have to churn it, which usually takes about 20 to 30 minutes, and then freeze it, but the texture is guaranteed to be stunning!
How do I make Ninja Creami Strawberry Ice Cream using this base?
Oh, the Ninja Creami is a game-changer! For a **Ninja Creami strawberry ice cream** version, you’ll want slightly less liquid than we use here because the machine is so powerful. I suggest blending the strawberries and the condensed milk/vanilla with only about 1.5 cups of cold heavy cream. Freeze that mixture solid overnight. When you process it in the Creami, run it on ‘Lite Ice Cream.’ If it comes out crumbly, don’t panic! Just add a splash of milk—maybe a tablespoon at a time—and run the ‘Re-spin’ cycle until it gets perfectly smooth and creamy.
If you want even more ideas for perfecting your **homemade strawberry ice cream**, you can always browse recipes like this one: Homemade Strawberry Ice Cream. Happy scooping!
Estimated Nutritional Data for Your Strawberry Ice Cream
I always like to give you folks a rough idea of what you’re diving into when you make one of my recipes. This **strawberry ice cream** is definitely a rich treat, so here is the nutritional breakdown based on the ingredients listed above. Remember, because we aren’t using stabilizers or artificial ingredients, these numbers are just guidelines!
Here are the estimates per 2/3 cup serving:
- Calories: 350
- Sugar: 35g
- Fat: 19g (with 11g being saturated fat)
- Protein: 5g
- Cholesterol: 65mg
Keep in mind that using low-fat cream or swapping the condensed milk for a lighter option would certainly change these figures, but I promise you, this full-fat version is what gives you that amazing, signature texture! Enjoy!
Share Your Strawberry Frozen Treat Creations
Now that you have a freezer full of the creamiest, freshest **strawberry ice cream**, the best part is sharing it! I truly hope this **strawberry frozen treat** brightens up your summer days and brings a smile to your table. If you made this recipe and followed those steps—especially that gentle folding—please hop down to the comments and let me know! A five-star rating really helps other home cooks find this recipe, and I always love hearing how folks enjoyed their scoop!
Did you try that **homemade strawberry ice cream** alongside some homemade shortbread? Or maybe you tried the puree method instead of the chunks? Tell me everything! For even more inspiration on fantastic desserts, take a peek at what other home cooks are achieving: Homemade Strawberry Ice Cream: The Lazy- Girl Method For Creamy Perfection. If you put your amazing creation on social media, please tag me—I love seeing your successes! And if you want to see how others are using their favorite summer scoops, check out some quick inspiration here: Instagram Reel Inspiration. Happy eating!
PrintEasy No-Churn Creamy Strawberry Ice Cream
You can make rich, creamy strawberry ice cream at home without an ice cream maker using just a few simple ingredients. This recipe delivers fresh flavor perfect for summer.
- Prep Time: 20 min
- Cook Time: 0 min
- Total Time: 6 hr 20 min
- Yield: 6 servings 1x
- Category: Dessert
- Method: No-Churn
- Cuisine: American
- Diet: Vegetarian
Ingredients
- 2 cups fresh strawberries, hulled and chopped
- 1/4 cup granulated sugar (for macerating)
- 1 teaspoon lemon juice
- 2 cups heavy whipping cream, cold
- 1 (14 ounce) can sweetened condensed milk, cold
- 1 teaspoon vanilla extract
Instructions
- Place the chopped strawberries, 1/4 cup sugar, and lemon juice in a bowl. Gently mix them together. Let the strawberries sit at room temperature for at least 30 minutes to macerate, releasing their juices.
- After 30 minutes, mash the strawberries slightly with a fork to break them down further, leaving some texture. Set aside.
- In a large mixing bowl, pour the cold heavy whipping cream. Use an electric mixer to beat the cream on medium-high speed until stiff peaks form. This takes about 3 to 5 minutes. Do not overbeat.
- In a separate bowl, whisk together the cold sweetened condensed milk and vanilla extract until just combined.
- Gently fold about one-third of the whipped cream into the condensed milk mixture to lighten it.
- Add the remaining whipped cream to the lightened mixture. Fold carefully until no white streaks remain. You want to keep the mixture airy.
- Gently fold in the macerated strawberries and their juices until they are distributed throughout the base.
- Pour the mixture into a freezer-safe container, such as a loaf pan or an airtight container. Cover the surface directly with plastic wrap to prevent ice crystals.
- Freeze for at least 6 hours, or preferably overnight, until firm.
- When ready to serve your homemade strawberry ice cream, let it sit on the counter for 5 to 10 minutes before scooping.
Notes
- For the best strawberry flavor, use ripe, fresh strawberries. If using frozen, thaw them completely first.
- To achieve a very smooth texture, you can blend the macerated strawberries into a puree before folding them into the base.
- If you want a richer dessert, consider adding 1/2 cup of cream cheese (softened) to the condensed milk mixture for a strawberry cheesecake ice cream variation.
Nutrition
- Serving Size: 2/3 cup
- Calories: 350
- Sugar: 35
- Sodium: 75
- Fat: 19
- Saturated Fat: 11
- Unsaturated Fat: 8
- Trans Fat: 0
- Carbohydrates: 40
- Fiber: 1
- Protein: 5
- Cholesterol: 65