
Oh gosh, doesn’t everyone get that specific craving sometimes? You’re sitting down to eat a hearty bowl of marinara, and what absolutely *must* be on the table? Those ridiculously soft, warm, golden-brown restaurant-style breadsticks. Forget thin and crunchy; we want that pull-apart, chewy magic!
Well, I’ve got you covered. My goal here at Frosted Fancies is to make sure you never have to rely on a takeout order again when you want that perfect dinner side dish. Because I spent years developing reliable recipes in professional test kitchens, I’ve perfected this one: these are the ultimate soft & chewy Olive Garden Copycat breadsticks you’ve been dreaming about.
I promise you, this recipe is foolproof. You put the work in, and I guarantee the results will bring smiles to everyone’s faces. Let’s get baking!
- Why Our Olive Garden Copycat Breadsticks Recipe Works (Expert Tips)
- Gathering Ingredients for Your Homemade Breadsticks Recipe
- How to Prepare Easy Breadsticks Step-by-Step
- Tips for Perfect Chewy Breadsticks Every Time
- Variations: From Cheesy Breadsticks to Appetizer Bread Sticks
- Serving Suggestions for Your Dinner Side Dish Bread
- Storage and Reheating Instructions for Leftover Breadsticks
- Frequently Asked Questions About Our Breadsticks
- Estimated Nutritional Data for These Breadsticks
- Share Your Homemade Breadsticks Success
Why Our Olive Garden Copycat Breadsticks Recipe Works (Expert Tips)
I know there are a million recipes out there, but what makes these breadsticks truly stand out? It’s all about hitting that perfect texture—that incredible balance between soft interior and the slightest golden chewiness on the outside. I’ve baked batches using every method, and the key is really respecting the dough during that first rise. We need enough gluten development so they stretch nicely without tearing into little dry wisps later on. For extra guidance on creating great homemade versions, you can check out tips like what they share over at Kristine’s Kitchen Blog!
When you use the right water temperature, the yeast really wakes up properly, giving us that beautiful, fast lift we need for a quick recipe. And trust me, getting that garlic butter just right is half the battle!
Achieving Restaurant Style Breadsticks Texture
To nail that unbelievably soft breadsticks texture, you have to knead until your dough feels like soft velvet. We aren’t aiming for stiff at all! That five to seven minutes of kneading is crucial because it develops the structure that holds the air bubbles created by the yeast. Too little kneading means your dough collapses, and you end up with dense hockey pucks instead of those signature Chewy Breadsticks.
The Secret to Buttery Breadsticks Garlic Parmesan Breadsticks Topping
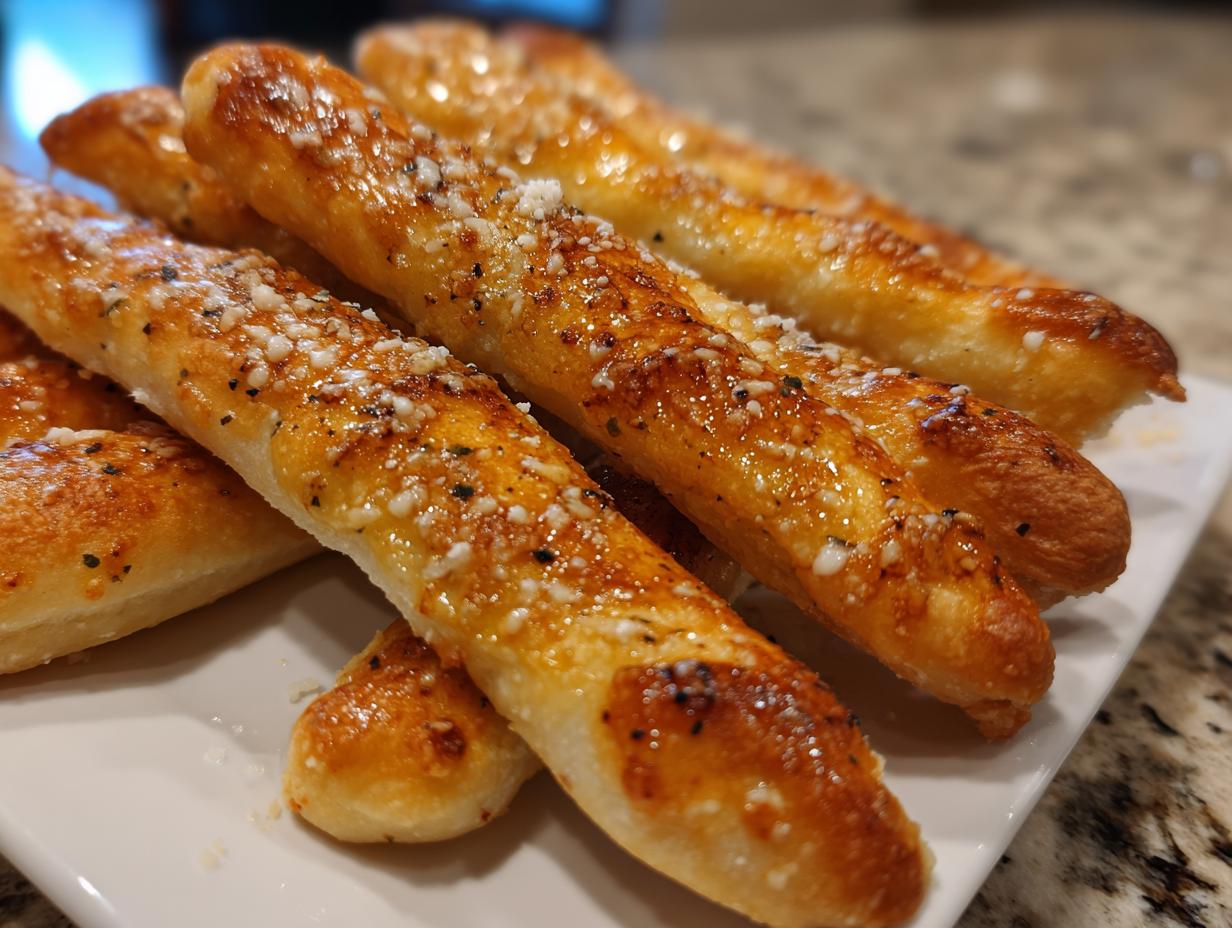
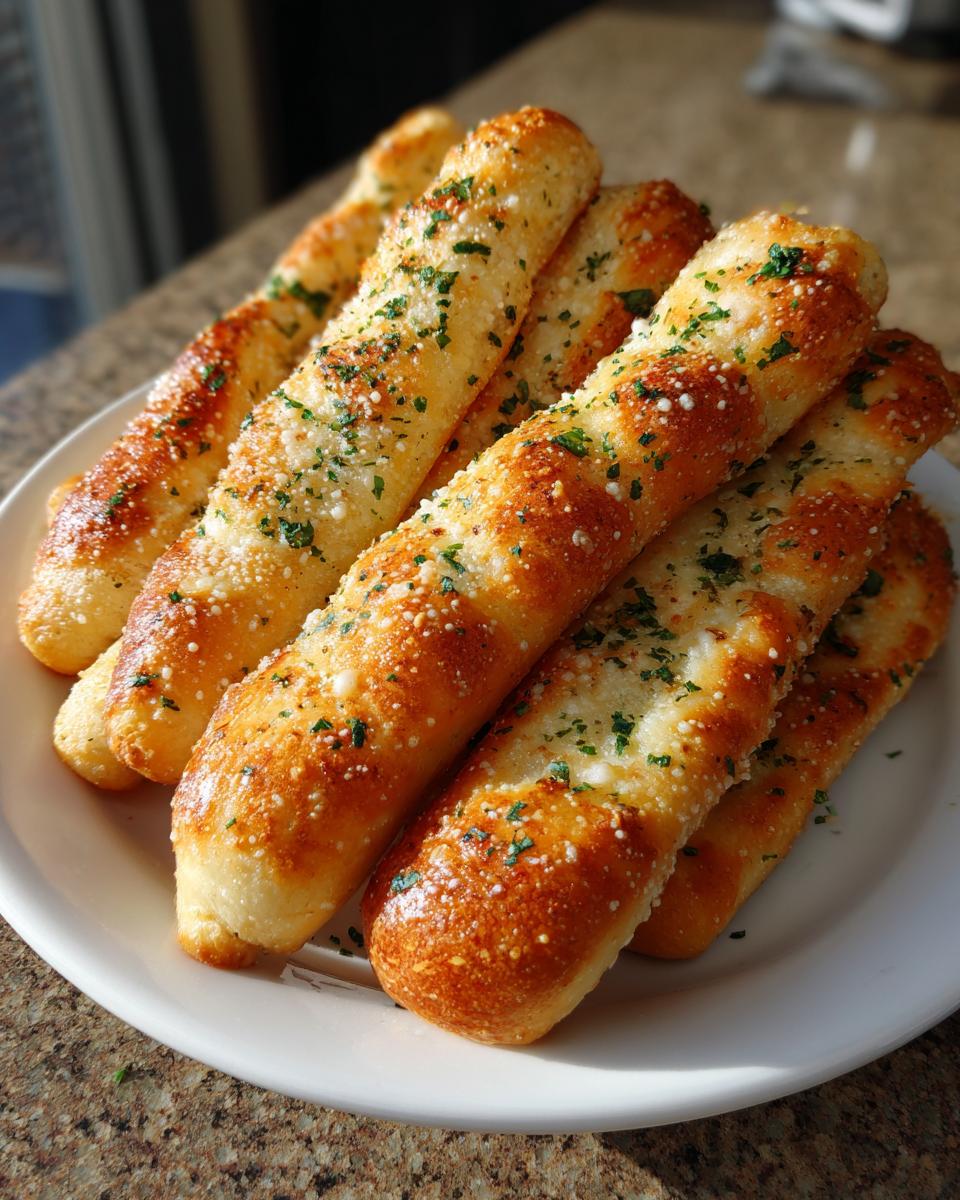
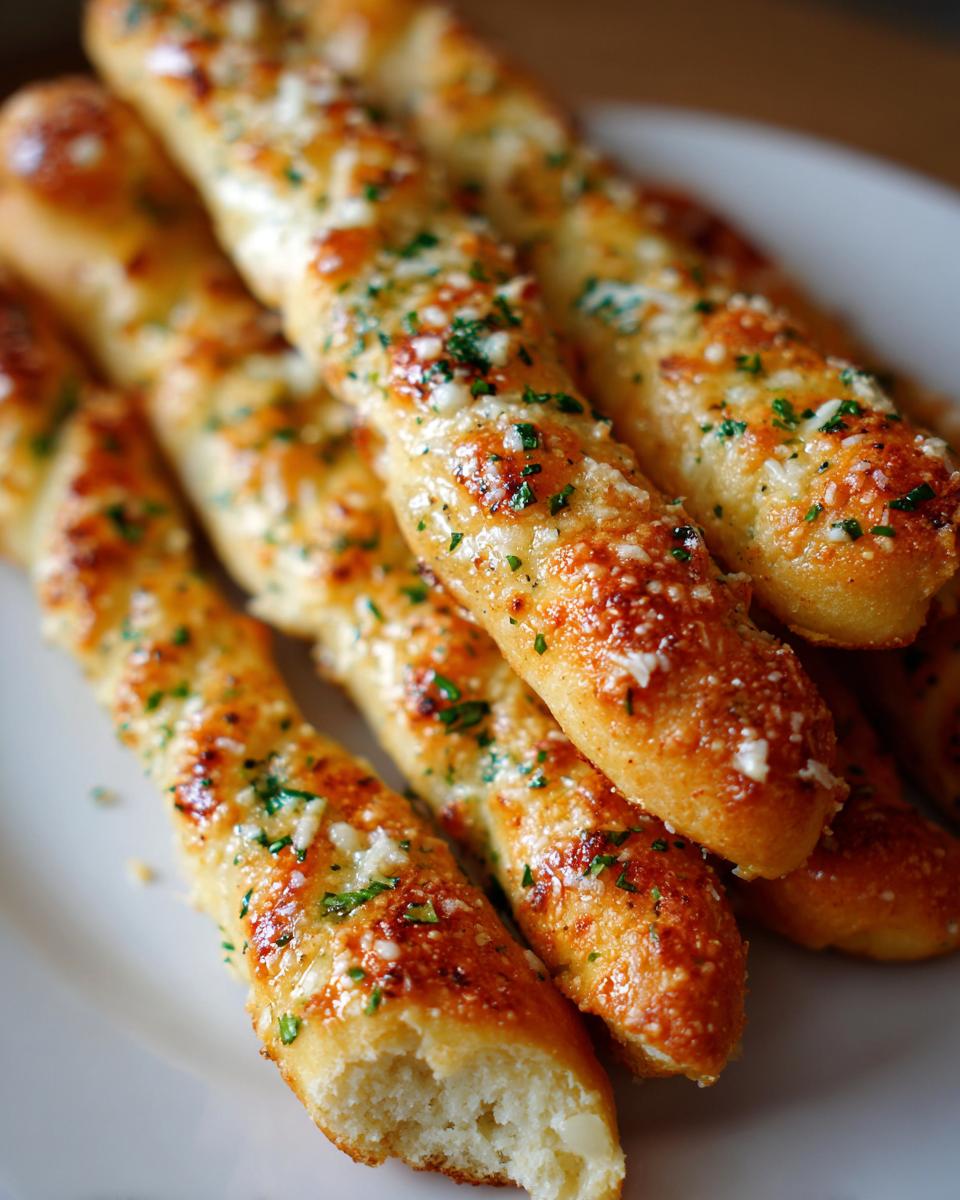
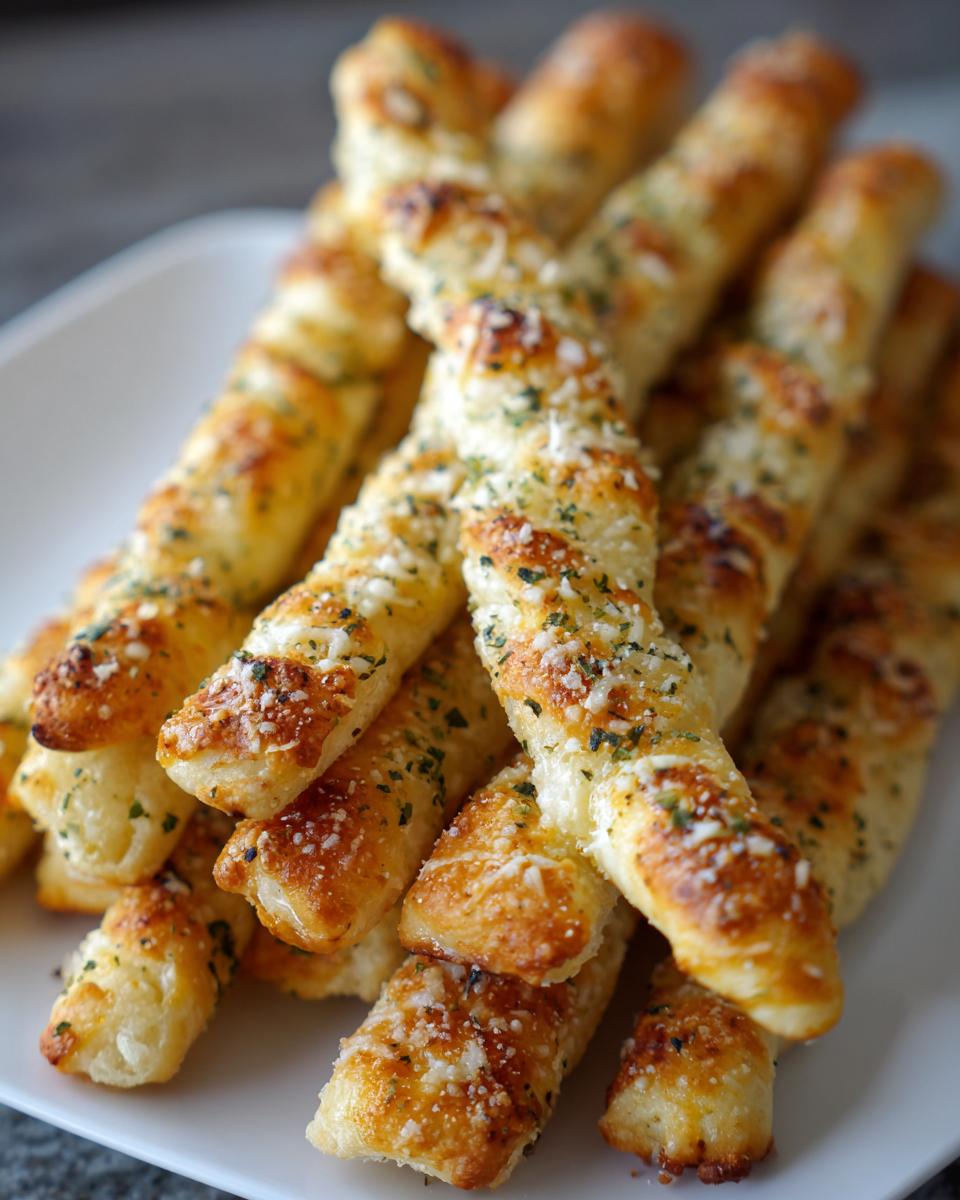
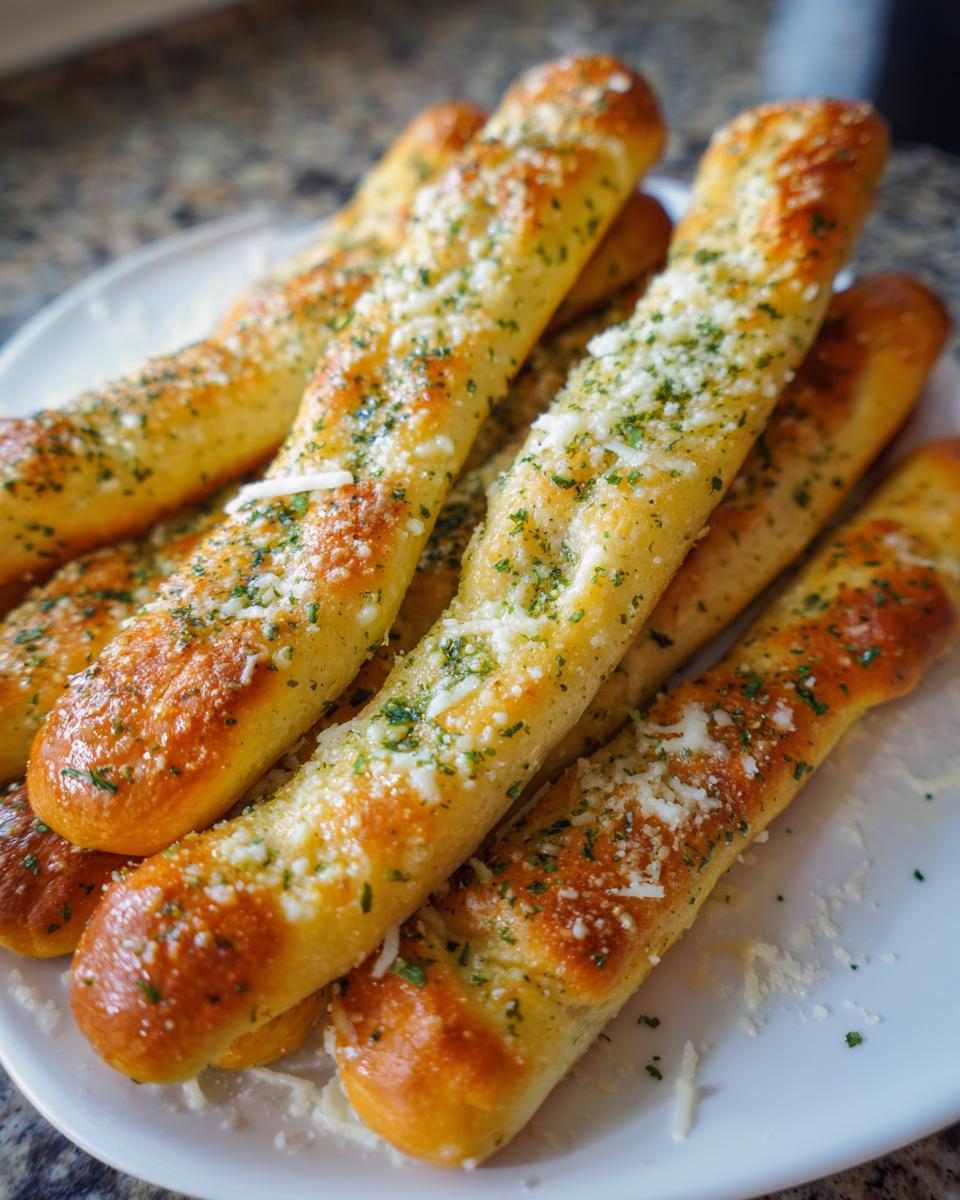
Here is where the magic happens, folks! You absolutely cannot wait to apply the topping. As soon as those hot, golden strips come out of the oven, they need to be immediately drowned in that Garlic Parmesan Breadsticks mixture. The residual heat melts the butter right into every nook and cranny, seasoning the entire surface. This generous coating is what gives you those famous Buttery Breadsticks flavor that keeps people reaching for more!
Gathering Ingredients for Your Homemade Breadsticks Recipe
Okay, success starts right here with the quality of what you bring to the counter. Since we are aiming for those perfect restaurant-style breadsticks, precision matters, especially with the yeast activation water. I always use the temperature range I noted below—don’t eyeball it!
We need a few specific things for the dough itself, and then the glorious, fragrant topping ingredients. Don’t skip the egg wash either; it helps us get that specific sheen!
For the Homemade Dough Recipe
- 1 1/2 cups warm water (105-115°F)
- 2 1/4 teaspoons active dry yeast
- 2 tablespoons granulated sugar
- 4 cups all-purpose flour, plus more for dusting
- 1 teaspoon salt
- 2 tablespoons olive oil
- 1 large egg, lightly beaten (for egg wash)
For the Garlic Butter Topping
This is the flavor powerhouse that ties everything together. Seriously, you want to smell this mixture before you even start baking! Check out how Lily at Savory by Lily handles her garlic layers for inspiration, too! That recipe makes great breadsticks.
- 1/2 cup unsalted butter, melted
- 4 cloves garlic, minced
- 1 teaspoon dried Italian seasoning
- 1/2 cup grated Parmesan cheese
How to Prepare Easy Breadsticks Step-by-Step
Alright, deep breaths! This sounds like a lot of steps for quick bread, but trust me, the hands-on time is minimal once you see how smoothly this dough comes together. If you follow along, you’ll have those amazing restaurant-style breadsticks on your table quicker than you think. I’ve broken down the process into manageable chunks so nothing gets missed!
Activating Yeast and Mixing the Soft Breadsticks Dough
First things first: wake up that yeast! In your big bowl, mix the warm water, sugar, and the yeast. Let this sit for a good 5 to 10 minutes. You simply *must* see that foamy layer on top. If it doesn’t foam, your water was too hot or too cold, and we need to start again because the yeast is sleeping in! Once it’s foamy, go ahead and mix in the flour and salt until it looks a little shaggy. Then drizzle in the olive oil. Now, put that bowl onto a clean, floured surface and start working that dough. You need to knead for a solid 5 to 7 minutes until it feels really smooth and elastic. This is what creates those incredible Soft Breadsticks!
Rising and Shaping the Italian Breadsticks
Time for a nap for the dough! Lightly oil your bowl, tuck the dough ball in, cover it up tight, and let it magically double in size. This usually takes about 45 to 60 minutes in a warm spot. While it’s doing its thing, you should absolutely preheat your oven to 400°F (200°C) and get your baking sheets ready with parchment paper. Once doubled, gently punch the air out. Divide the dough into two halves and roll each out into a flat rectangle, about 1/4 inch thick. Now, use a knife or bench scraper to cut these rectangles into strips, about 1 inch wide and 8 inches long. If you want tips on speeding up this whole process, check out what they do over at Bethany’s Recipes!
Baking and Applying the Garlic Butter Topping
Before they go in, brush those strips quickly with the egg wash—it helps with that golden color. Let them rest for 10 minutes while the oven finishes heating up. Bake them for only 10 to 12 minutes until they look perfectly golden brown. This is the crucial moment! Mix up your melted butter, minced garlic, and Italian seasoning right away. As soon as you pull the hot strips out, brush them generously with the butter. Don’t be shy! Then, right away, sprinkle that grated Parmesan cheese over everything while the butter helps it stick. Serve these beautiful Italian Breadsticks immediately for the best experience.
Tips for Perfect Chewy Breadsticks Every Time
When I was developing this recipe, I took notes on every little thing that changed the final outcome of these wonderful breadsticks. If you want them to come out consistently perfect, you have to treat these tips not as suggestions, but as rules of the kitchen! They aren’t complicated, I promise, but they really separate the good breadsticks from the *amazing* ones.
You can always find extra little bits of wisdom about making quick breads, too. Honestly, for reliable, fast results, I always refer to trusted sources like the method they use over at Quick and Cozy Meals for general baking insight.
Flour Choice for Texture
If you are serious about getting that super soft dinner rolls texture, next time you shop, skip the all-purpose flour and pick up some bread flour instead. Bread flour has a higher protein content, which scientifically helps build slightly stronger gluten networks. This is what gives you that satisfying, resilient chewiness without making the bread tough. It’s my expert-level tweak for truly restaurant-style results!
Making Ahead Breadsticks
Life gets busy, I totally get it! The good news is you can absolutely make the dough ahead of time, which makes getting these on the table for a weeknight dinner so much easier. Make the dough, let it do its initial rise, punch it down gently, wrap it up tightly in plastic wrap, and tuck it into the fridge for a day or two. Just remember this crucial detail: if you bake straight from the fridge, you have to add about 30 extra minutes to that second resting period before baking. That gives the yeast time to warm back up!
Variations: From Cheesy Breadsticks to Appetizer Bread Sticks
Okay, this base recipe is perfection, but sometimes you need to crank it up a notch for dipping into soup or just for sheer indulgence! I love making these breadsticks versatile so they fit whatever you’re craving. If you’re looking for a truly decadent appetizer, skipping the plain Parmesan for mozzarella is the way to go. You can find some inspiration for super tasty cheese toppings over at Ambers Bridal!
There are so many ways to turn these into the star of the show!
Creating Cheesy Breadsticks
If you want those incredible, gooey, cheesy breadsticks that stretch for days, this is how you do it! Wait until your breadsticks have been baking for about 7 or 8 minutes, meaning they only have about 3 minutes left on their timer. Pull the sheet pan out—carefully!—and sprinkle mozzarella generously over the tops. Put them right back in until the cheese is melted and bubbly. Once you pull them out, hit them with the garlic butter topping, and you’ll have the best Cheesy Breadsticks you’ve ever made!
Spice and Herb Adjustments for Italian Breadsticks
If you prefer something a little bolder than our standard Italian seasoning, you can easily customize the flavor profile of these Italian Breadsticks. For a little kick that pairs wonderfully with spicy pasta sauces, toss a pinch of red pepper flakes right into the melted butter mixture. Or, if you’re aiming for that fresh rosemary scent, finely chop about a teaspoon of fresh rosemary and mix it right in with the garlic instead of the dried seasoning. Delicious!
Serving Suggestions for Your Dinner Side Dish Bread
These buttery, flavorful strips are just phenomenal as a hearty Dinner Side Dish Bread. Honestly, what doesn’t benefit from them? They are perfect for soaking up every last bit of rich sauce left on your plate after spaghetti or lasagna. If you’ve made a big pot of slow-cooked minestrone or chili, having these on hand makes the meal feel instantly more special.
But let’s not forget their appetizer potential! Placed in a basket with a side of warm marinara for dipping, they disappear fast. If you’re planning a party, you can see some wonderful dipping ideas over at Taste With Amy. They make any casual gathering instantly better!
Storage and Reheating Instructions for Leftover Breadsticks
They rarely last long, but if you happen to have any of these glorious breadsticks left over, don’t just let them go stale on the counter! You need to store them properly to keep that fantastic soft texture. Pop any cooled breadsticks into a truly airtight container. Don’t use plastic wrap alone; they need a solid seal!
To bring them back to life? Oh, it’s super easy. Pop them in a low oven—maybe 300 degrees F—for just five minutes. This warms them gently right back up so they are soft and wonderfully buttery again!
Frequently Asked Questions About Our Breadsticks
I love hearing from you all about how your breadsticks turned out! Since this recipe aims for that specific restaurant-style texture, I get a lot of great questions. I’ve pulled together some of the most common ones I hear about making this dough right at home. For more general guidance on using different trays, you might find some helpful ideas over at The Cooking Duo!
Can I use store-bought dough to make these breadsticks faster?
You certainly can if you are in a real pinch! If you grab refrigerated pizza dough, you absolutely cut down on your prep time, leaning toward that ‘Quick Bread Recipe’ appeal. However, I have to level with you: the texture won’t be quite the same as the incredible soft texture we get from making our perfected Homemade Dough Recipe from scratch. The rise and the final chew just aren’t identical, but they’ll still be very tasty!
How long do these breadsticks stay soft?
Okay, this is a tough one since they are best right out of the oven! If they are stored correctly in an airtight container—and not left sitting exposed on the counter like they want to do—you can expect them to stay nicely soft for about 24 hours. After that, they start transitioning to a slightly firmer chew, which is why reheating is so important.
Can I freeze the breadstick dough?
Yes, you absolutely can, and this is a lifesaver for busy weeks! This dough freezes beautifully. Once you complete the first rise and gently punch the air out, wrap that dough tightly in plastic wrap, maybe even throw it in a zip-top bag, and freeze it for up to a month. Just bake in mind that when you pull it out to use later, you need to let it thaw in the fridge overnight, and then remember to add that extra 30 minutes to the second proofing time before baking up your next batch of buttery goodness! For a great reference on the original recipe, feel free to check out the amazing work done over at Forecipes!
Estimated Nutritional Data for These Breadsticks
Since we have all the ingredients laid out, I wanted to give you a quick snapshot of what you’re looking at, nutritionally speaking, for this incredible batch of breadsticks. Now, please remember, I’m a recipe developer, not a registered dietitian, so treat these numbers as a useful estimate based on the ingredients listed and our yield of 16 breadsticks total!
When you’re whipping up a batch of these yummy dinner sides, you can generally expect them to fall into the following ballpark for one single breadstick:
- Calories: About 180 per serving.
- Fat: Roughly 8 grams. That lovely butter has to come from somewhere!
- Carbohydrates: About 24 grams.
- Protein: Around 4 grams.
It’s important to remember that these figures change quite a bit if you opt for the Cheesy Breadsticks variation, as that adds extra mozzarella and Parmesan! For the base recipe, though, it’s a solid, satisfying count for a delicious appetizer or side dish anytime.
Share Your Homemade Breadsticks Success
I truly hope you loved making these! If you did, please come back and give the recipe a full five stars because that helps other home cooks trust the method. If you made the Cheesy Breadsticks version, tell me how gooey it got in the comments below! I absolutely love seeing everyone’s photos. For more inspiration on that classic look, you can always check out the beautiful results shared over at Moribyan.
Don’t forget, you can always find more inspiration by checking out recipes like the ones Moribyan posts, or if you’re looking for unique ways to use the topping, take a peek at the digital recipes over at Zaval Store. Happy baking with your amazing homemade breadsticks!
PrintThe Ultimate Soft & Chewy Olive Garden Copycat Breadsticks with Garlic Parmesan Butter
Recreate the famous soft, chewy, and buttery breadsticks from your favorite Italian restaurant right in your home kitchen. This easy recipe delivers restaurant-style breadsticks perfect for any dinner side dish.
- Prep Time: 20 min
- Cook Time: 15 min
- Total Time: 1 hour 35 min
- Yield: 16 breadsticks 1x
- Category: Appetizer
- Method: Baking
- Cuisine: Italian
- Diet: Vegetarian
Ingredients
- 1 1/2 cups warm water (105-115°F)
- 2 1/4 teaspoons active dry yeast
- 2 tablespoons granulated sugar
- 4 cups all-purpose flour, plus more for dusting
- 1 teaspoon salt
- 2 tablespoons olive oil
- 1 large egg, lightly beaten (for egg wash)
- 1/2 cup unsalted butter, melted (for topping)
- 4 cloves garlic, minced
- 1 teaspoon dried Italian seasoning
- 1/2 cup grated Parmesan cheese
Instructions
- Activate the yeast: In a large bowl, combine the warm water, sugar, and yeast. Let this mixture sit for 5 to 10 minutes until it becomes foamy.
- Mix the dough: Add the flour and salt to the yeast mixture. Mix until a shaggy dough forms. Add the olive oil and knead the dough on a lightly floured surface for about 5 to 7 minutes until it is smooth and elastic.
- First rise: Place the dough in a lightly oiled bowl, turning to coat. Cover the bowl with plastic wrap or a clean towel and let it rise in a warm spot for 45 to 60 minutes, or until doubled in size.
- Shape the breadsticks: Preheat your oven to 400°F (200°C). Line two baking sheets with parchment paper. Gently punch down the dough and divide it into two equal pieces. Roll each piece into a rectangle about 1/4 inch thick. Cut the dough into strips about 1 inch wide and 8 inches long.
- Second rise and bake: Place the breadstick strips onto the prepared baking sheets, leaving a little space between them. Brush lightly with the beaten egg wash. Let them rest for 10 minutes while the oven finishes preheating. Bake for 10 to 12 minutes, or until lightly golden brown.
- Prepare the garlic butter: While the breadsticks bake, combine the melted butter, minced garlic, and Italian seasoning in a small bowl.
- Finish and serve: Immediately after removing the hot breadsticks from the oven, brush them generously with the garlic butter mixture. Sprinkle evenly with grated Parmesan cheese. Serve warm as an appetizer or dinner side dish.
Notes
- For extra soft dinner rolls texture, use bread flour instead of all-purpose flour.
- If you want cheesy breadsticks, sprinkle mozzarella cheese over the tops during the last 3 minutes of baking before applying the garlic butter.
- You can make the dough ahead of time; let it rise, punch it down, wrap it tightly, and refrigerate for up to 2 days. Add 30 minutes to the second rise time if baking directly from the refrigerator.
Nutrition
- Serving Size: 1 breadstick
- Calories: 180
- Sugar: 1
- Sodium: 280
- Fat: 8
- Saturated Fat: 4
- Unsaturated Fat: 4
- Trans Fat: 0
- Carbohydrates: 24
- Fiber: 1
- Protein: 4
- Cholesterol: 15