
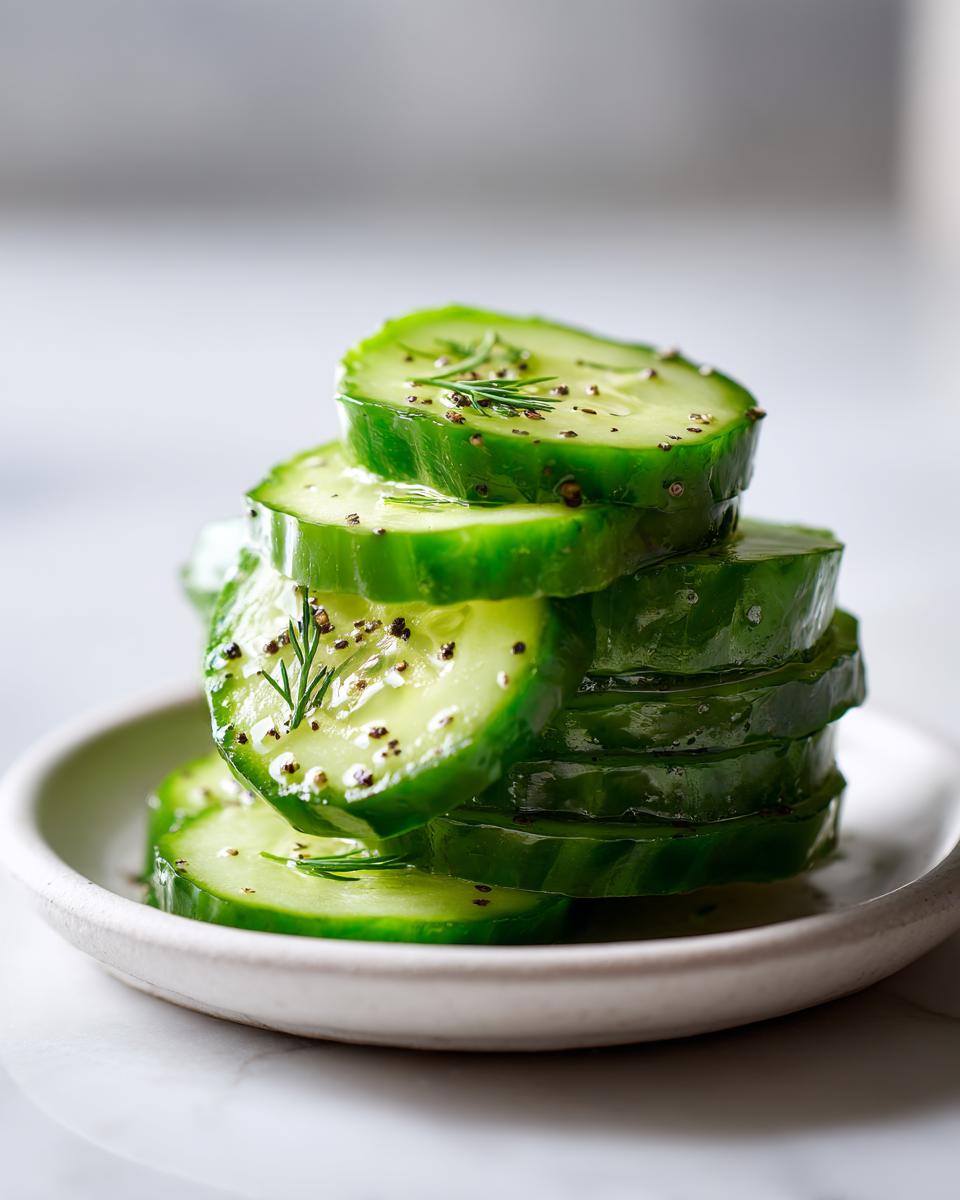
Hello and welcome back to the kitchen! Katie here, and I want to talk about something near and dear to my heart: pickles you can actually hear an entire room away when you bite into them. Are you tired of those dismal, slightly slimy store-bought jars that lose their crunch the second you open them? Me too! That’s why I’m thrilled to share my foolproof method for making the best **refrigerator pickles** you’ll ever taste. This is my favorite recipe for **Easy Homemade Pickles** because it requires zero fancy equipment—it’s totally **No Cook Pickling**. As a Food Scientist, trust me when I say I’ve engineered this brine ratio for maximum crunch and flavor extraction in under 24 hours. Get ready for pickles that actually snap!
- Why You Will Make These Crispy Refrigerator Pickles Again and Again
- Gathering Ingredients for Perfect Refrigerator Pickles with Garlic
- Essential Equipment for Making Your Refrigerator Dill Pickles Recipe
- Step-by-Step Instructions for Quick Pickles Using No Cook Pickling
- Making Your Refrigerator Pickles a Claussen Copycat Recipe Success
- Serving Suggestions for Your Easy Homemade Pickles
- Storage and Shelf Life for Fresh Pickles No Canning
- Frequently Asked Questions About Refrigerator Pickles
- Share Your Favorite Refrigerator Pickles Creations
Why You Will Make These Crispy Refrigerator Pickles Again and Again
Seriously, these aren’t your grandma’s old canning recipes unless your grandma was aiming for speed and flavor superiority! Once you try these, you’ll realize that **Quick Pickles** are an absolute game-changer for meal prep. They come together faster than you can run to the store for a jar.
- They deliver that satisfying, ear-piercing crunch you just don’t get from jars sitting on a shelf. They are truly **Crunchy Cucumber Pickles**!
- This is pure **No Cook Pickling** magic! We are just dissolving salt and sugar in hot water, saving you time and the hassle of sterilization.
- Flavor bomb alert: The fresh garlic and dill sink right into the cucumbers because we aren’t cooking the ingredients!
- Ready to eat in 24 hours—that’s right, snap to snack time in just one day.
- They taste way fresher than anything store-bought; think of our **Refrigerator Dill Pickles Recipe** as a Claussen copycat, only better.
- The brine is versatile! Once the refrigerator pickles are gone, you can reuse that leftover brine for pickled carrots or onions.
- Perfect for meal prep; they keep your fridge stocked with the best **Sandwich Toppings** all week long.
I first started making these because I needed a quick side for a spontaneous burger night. Since then, they’ve become mandatory. If you are looking for a good starting point for this quick method, check out the details I found on how others handle the initial steps over at this great guide—it shows just how simple the process starts!
Gathering Ingredients for Perfect Refrigerator Pickles with Garlic
Okay, for any recipe to work perfectly, especially quick pickles that skip the canning step, you need the right foundation. I’ve detailed everything you need below—it’s all super simple stuff you probably have or can grab easily. The most crucial thing to note here is the cucumber. If you want true crunch, skip the big slicing cucumbers and try to find small Kirby or pickling cucumbers. They have tighter seeds and firmer flesh, which is the secret to avoiding mush.
We’re using simple pantry staples for the brine—white vinegar, water, salt, and sugar. Don’t overthink the salt; make sure it’s kosher salt, as iodized salt can make your brine cloudy. Make sure you have plenty of fresh garlic and dill on hand; this is where the main flavor profile jumps into high gear for these **Garlic Dill Pickles**!
Ingredient Notes and Crispness Tips for Your Refrigerator Pickles
If you really, truly want that commercial-level, forever-crisp texture, I have a couple of little secrets pulled from my food science textbooks. Remember how I mentioned those notes at the end of the recipe card? They are important! If you are worried about your cucumbers going soft, try adding half a teaspoon of pickling lime or even a couple of fresh grape leaves to each jar before pouring the brine in. That tannin in the leaves or the calcium in the lime helps keep those **Crunchy Cucumber Pickles** super firm all the way through. It’s a little extra step, but it pays off big time!
Essential Equipment for Making Your Refrigerator Dill Pickles Recipe
You might think making pickles requires bulky canners or seals, but nope! Since this is all about **No Cook Pickling**, we keep our equipment list short and sweet. You really only need tools to slice, stir, and store. Preparation is half the battle, right? Getting everything ready makes the actual assembly feel like five minutes, which is what we love about these **Quick Pickles**!
Here’s what you need gathered on your counter before you start washing up those cucumbers:
- Clean pint-sized glass jars with lids. Since we aren’t processing these, just make sure they are spotless and the lids seal tight while they chill.
- A good, sharp knife and cutting board for getting those uniform 1/4-inch slices. Uniformity matters here for even pickling!
- One small or medium saucepan. We use this just to gently heat the brine until those salt and sugar granules disappear.
- A whisk or sturdy spoon for stirring the brine until clear.
- Your measuring cups and spoons. Precision matters in brine ratios!
That’s it! No immersion blenders, no complicated vents. Just good, old-fashioned kitchen tools for making the **Best Refrigerator Pickles**.
Step-by-Step Instructions for Quick Pickles Using No Cook Pickling
This is where the magic happens, and I promise you, it’s faster than making a sandwich! Because we are skipping the canning process entirely, we don’t need to wait hours for water baths. We just need to heat the liquid enough to get the salt and sugar to dissolve properly. Follow these steps closely, and you will have fantastic **refrigerator pickles** ready to go. Remember, the hard part is waiting after this process is done!
Preparing the Cucumbers and Flavor Base for Refrigerator Pickles
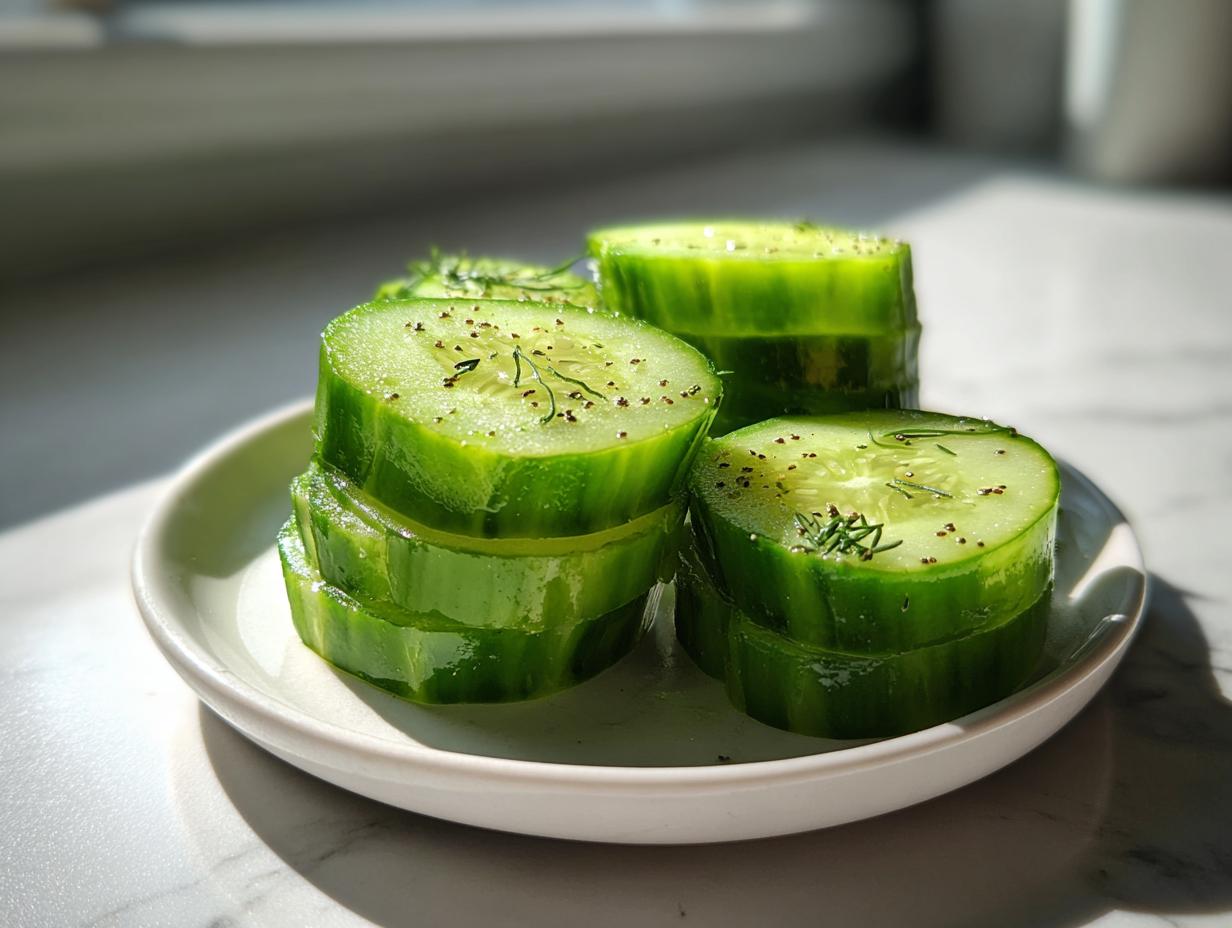
First things first, get those beautiful cucumbers washed up. You need those uniform 1/4-inch rounds we talked about—consistency is key so they all soak up the brine at the same speed. Pack those slices tightly into your clean jars. Don’t be shy about shaking the jar a bit to settle them in! Once they’re packed in snugly, tuck your smashed fresh garlic cloves, sprigs of fresh dill, and those peppercorns right in between the layers. You want those aromatics touching the cucumbers everywhere they can!
I love doing this layering because it means every single slice gets a burst of flavor. If you need a peek at some visual aids to see how tightly to pack them, I found a great example showing the layering technique perfectly over at this page.
Creating the Vinegar Pickle Brine Recipe Base
Time for the brine! In a saucepan, combine your white vinegar, water, kosher salt, and sugar. Now, this is the most important part for true **No Cook Pickling**: you only need to heat this mixture until the salt and sugar are completely dissolved. I usually stir it over medium heat until I can no longer see any grit at the bottom of the pan. Do not boil it! Boiling the brine changes the vinegar’s sharpness and might compromise your crunch.
Once everything is dissolved, turn off the heat immediately. Carefully pour that warm brine over your packed jars so that the cucumbers are totally submerged. Remember to leave about half an inch of space at the top of the jar before sealing. After giving the jars a little tap on the counter to shake out any silly air bubbles, seal them up tight, let them cool on the counter for about 30 minutes, and then straight into the fridge they go. They are ready for snacking in 24 hours, but honestly? Wait 48 hours for the absolute best flavor development. You can see how quickly Grandma made hers using a similar method here.
Making Your Refrigerator Pickles a Claussen Copycat Recipe Success
If you’re chasing that iconic, snappy crunch you usually only find in the refrigerated section—the kind that makes you think of a perfect burger—then we need to talk about texture engineering. That specific commercial crispness often comes down to one thing: temperature shock. Since we’re making **refrigerator pickles** and skipping the canning heat step, we’ve already got a huge advantage in keeping things crisp!
My professional background taught me that cucumbers must stay cold. After you pour that slightly warm brine over the cucumbers and let them cool on the counter for just 30 minutes, you need to get them into the coldest part of your fridge ASAP. Secondly, if you are aiming for that classic Kosher dill profile, doubling down on the fresh garlic (maybe even adding a tiny pinch of mustard seed) will get you super close to a Claussen copycat recipe experience right at home. Forget that sad, floppy pickle you get elsewhere; these **Homemade Condiments** are built for crunch!
If you want to see how others approach making these iconic crunchy pickles, people share great tips on achieving that perfect texture over at this site. Trust me, once you pop these open, you’ll wonder why you ever bothered with the grocery store jar!
Serving Suggestions for Your Easy Homemade Pickles
Now that you have these perfect, tangy **Easy Homemade Pickles** cooling down in the fridge, you might be wondering what to do with them besides just eating them straight out of the jar (which, let’s be honest, is my favorite way to snack!). Since these **Quick Pickles** are so wonderfully crisp and vibrant, they jazz up almost any meal you put them next to. They are perfect for everything from a simple afternoon bite to making your weeknight dinner feel a little bit special.
The best part about having jars of these **Refrigerator Dill Pickles Recipe** on hand is the sheer convenience for meal prepping. You don’t have to run out and buy a jar just for one burger when you have perfectly flavored ones waiting in the cold!
Here are a few ways I always manage to use up a batch of my **Tangy Pickled Vegetables** before I know it:
- The Ultimate Sandwich Toppings: Forget soggy lettuce! Thinly slice these and pile them high on a turkey club, pulled pork, or even a sharp cheddar grilled cheese. They provide the perfect acidic counterpoint to rich meats and cheeses.
- Snack Recipes Superstar: Seriously, this is my go-to. Keep a jar next to your lunch for a quick, healthy, zero-effort side crunch. They are far more interesting than chips, I promise!
- Salad Power-Up: Chop up a few of these **Quick Pickled Cucumbers** and toss them into tuna or chicken salad. The acidity brightens up the whole affair without adding any extra dressing.
- Burger Night Essential: When building a gourmet burger, the pickle should never be an afterthought. These are the perfect **Homemade Condiments** to dress up a patty.
- Bloody Mary Garnish: If you’re feeling fancy, these big, garlicky dill spears make the best garnish for a morning cocktail. They’re far superior to those weird, mushy spears you sometimes get at restaurants, and you can even use the residual brine for your drink mix!
If you love adding brightness to your meals, you should also check out recipes for other quick pickled items, like those tangy veggie mixes you find in delis. I found a wonderful resource for mixing up other fridge-ready vegetables that use a similar brine base, which is super handy once you realize how versatile this recipe is!
Storage and Shelf Life for Fresh Pickles No Canning
This is where managing expectations is key, friends! Because we are using the **Fresh Pickles No Canning** method, these aren’t shelf-stable like their processed cousins. They absolutely must stay cold! Think of these as super-fresh cucumbers that have been marinating in the best flavor bath ever. They don’t need the high heat processing, but that also means they rely on constant refrigeration to stay safe and, more importantly, stay crisp.
Keep your sealed jars tucked away in the main part of your refrigerator—not shoved in the door, where temperatures fluctuate too much. The primary goal here is maintaining that beautiful crunch we worked so hard to achieve!
So, how long do they last? This is the important truth bomb: the flavor profile will continue to deepen for about a week, but the texture starts to change after that. For truly amazing, snap-your-fingers **Crunchy Cucumber Pickles**, I really recommend eating them within three to four weeks of making them. After that, they’re still perfectly safe and tasty, but they might soften just a touch. You’ll know they’re past their prime crunch when they stop making that satisfying sound when you bite in.
Don’t panic if you make a huge batch, though! My rule of thumb is that if you keep them covered with brine and stick to that 4-week window, you’ll be completely fine. If you’re always looking for new ways to use up these delicious quick pickles, check out some great tips for maximizing your batch over at this spot. Having a jar of these **refrigerator pickles** ready to go is definitely worth the short wait time!
Frequently Asked Questions About Refrigerator Pickles
How long until these refrigerator pickles are ready to eat?
This is the classic question for anyone new to **Quick Pickles**! Because this is a **No Cook Pickling** method, we rely on time and cold to do the work instead of intense heat. For a passable flavor, you can technically eat these after about 12 hours, but please, have a little patience! For the flavor to even out and for those cucumbers to truly absorb the tang of the garlic and dill, you need a full 24 hours in the fridge. Honestly, if you can hold out for 48 hours, they transform into something truly special—closer to that amazing store-bought taste, which is why they make such great **Snack Recipes**!
Can I use regular slicing cucumbers instead of pickling cucumbers?
Technically, yes, you *can* use them, but I would strongly advise against it if crunch is your goal. Traditional large slicing cucumbers have looser seed pockets and much higher water content. That means they are much more prone to turning soft or mushy once they hit the brine. For the best **Crunchy Cucumber Pickles**, always hunt down smaller Kirby or specific pickling varieties. The tighter structure of those specialized cucumbers holds up perfectly to the brine, ensuring you get a guaranteed crisp bite every time you reach for one!
I’m looking for Bread and Butter Pickles Fridge style—can I adapt this recipe?
That’s a fantastic question! The beauty of this **Vinegar Pickle Brine Recipe** is its flexibility. For a quick **Bread and Butter Pickles Fridge** version, you need to adjust the sweetener and add more spices. You’ll swap out most of that sugar for brown sugar, and then you need to add thinly sliced yellow onion and maybe a tiny pinch of mustard seed and celery seed to your jar right alongside the dill. Keep the same amount of vinegar and water, but increase the sugar slightly to make it sweeter and sourer. It’s a wonderful way to use up this simple base for different flavors!
What is the secret to making these like a Claussen Copycat Recipe?
This is my favorite question! To get that specific, clean, sharp tang often associated with the best commercially available **refrigerator pickles**, the key is balance and cold. We use a 1:1 ratio of vinegar to water, which is quite sharp. But the secret weapon for that ultimate snap, like the pros use, is often achieved by ensuring the cucumbers hit the brine while it’s still warm, and then, critically, chilling them down as fast as possible. For more detailed tips on nailing that commercial intensity, check out the advice shared by my peers right here.
Can I use apple cider vinegar instead of white distilled vinegar?
You absolutely can! Switching to apple cider vinegar definitely changes the flavor profile; it adds a touch of fruity sweetness and a less sharp tang compared to plain white vinegar. If you make this swap in my **Refrigerator Dill Pickles Recipe**, I recommend maintaining the same volume but maybe cutting the added granulated sugar by half a teaspoon, since the apple cider vinegar already brings its own natural sweetness. It creates a wonderful variation for **Sandwich Toppings**! You can see another great adaptation using different fruit vinegars on this lovely site.
Share Your Favorite Refrigerator Pickles Creations
My absolute favorite part of sharing these recipes with you all is hearing how you’ve made them your own! Now that you’ve tried your hand at making these super speedy, crunchy **refrigerator pickles**, I’d love to know how they turned out. Did you stick to the garlic and dill, or did you try throwing in some spicy jalapeños for a kick? Maybe you used a different type of cucumber or tried making some **Sweet & Sour Pickles** using the brine base?
Don’t be shy! Head down to the comments below and let me know your results. Did you achieve that perfect crispness? Were they gone in 24 hours because you couldn’t stop snacking?
If you loved this recipe for **Easy Homemade Pickles** and want to tell everyone how simple and delicious they are, hitting that five-star rating button really helps other home cooks find reliable recipes. Your feedback tells me what’s working in your kitchens! And if you ended up using your own custom spice blend or experimenting with other **Meal Prep Vegetables**, I’d love to read about your successful twists. Click over to this site to see some other inspiration on how folks are enjoying their fresh pickles, and then come back and share your own masterpiece with us!
PrintQuick & Easy Crispy Refrigerator Dill Pickles with Garlic
Make crunchy, flavorful refrigerator dill pickles at home without any cooking. These easy homemade pickles are ready in 24 hours and taste better than store-bought versions.
- Prep Time: 15 min
- Cook Time: 5 min
- Total Time: 20 min
- Yield: 2 pints 1x
- Category: Side Dish
- Method: No Cook Pickling
- Cuisine: American
- Diet: Vegetarian
Ingredients
- 2 pounds pickling cucumbers (Kirby or similar), sliced into 1/4-inch rounds
- 4 cloves garlic, smashed
- 1/4 cup fresh dill sprigs or 2 teaspoons dried dill seed
- 1 teaspoon black peppercorns
- 1 1/2 cups white distilled vinegar
- 1 1/2 cups water
- 2 tablespoons kosher salt
- 1 tablespoon granulated sugar
Instructions
- Wash the cucumbers well. Slice them into uniform 1/4-inch rounds.
- Pack the sliced cucumbers tightly into two clean pint-sized glass jars, leaving about 1 inch of headspace at the top.
- Divide the smashed garlic cloves, dill, and peppercorns evenly between the two jars, tucking them between the cucumber slices.
- In a medium saucepan, combine the water, vinegar, kosher salt, and sugar.
- Heat the brine mixture over medium heat, stirring until the salt and sugar completely dissolve. Do not boil the brine.
- Carefully pour the hot brine over the cucumbers in the jars, ensuring the cucumbers are fully submerged. Leave 1/2 inch of headspace.
- Tap the jars gently on the counter to release any trapped air bubbles. Add more brine if needed to cover the cucumbers.
- Wipe the rims clean and seal the jars tightly with lids. Let the jars cool on the counter for about 30 minutes.
- Place the jars in the refrigerator. The pickles need at least 24 hours in the fridge to develop full flavor. For best results, wait 48 hours before eating.
- These refrigerator pickles are ready to use as a snack, sandwich topping, or meal prep vegetable.
Notes
- For extra crisp cucumber pickles, you can add 1/2 teaspoon of pickling lime or grape leaves to each jar before adding the brine.
- These fresh pickles no canning are best eaten within 3 to 4 weeks for optimal crunch.
- This vinegar pickle brine recipe works well for other vegetables too, like carrots or bell peppers.
Nutrition
- Serving Size: 4 slices
- Calories: 15
- Sugar: 2
- Sodium: 290
- Fat: 0.1
- Saturated Fat: 0
- Unsaturated Fat: 0.1
- Trans Fat: 0
- Carbohydrates: 3
- Fiber: 0.3
- Protein: 0.3
- Cholesterol: 0