
Hello and welcome! I’m Katherine Hayes, and I’m so thrilled you stopped by Frosted Fancies today. If you’ve been searching for that *one* dessert that stops every conversation the moment it hits the table, you’ve found it. We are diving deep into the **red velvet cheesecake**—a dessert so rich, so vibrantly colored, and so perfectly creamy that I promise you’ll be asked for the recipe everywhere you take it. Because of my background in Food Science and years perfecting recipes professionally, I know exactly how to structure this so it turns out that flawless, bakery style cheesecake you dream about. Trust me, this is the holiday showstopper you need.
- Why This Red Velvet Cheesecake is Your Next Showstopper Dessert
- Ingredients for Your Red Velvet Cheesecake with Oreo Crust
- Step-by-Step Instructions for the Best Red Velvet Cheesecake
- Tips for a Perfect Red Velvet Cheesecake Swirl
- Making Your Red Velvet Cheesecake Ahead of Time
- Serving Suggestions for This Indulgent Dessert Recipe
- Frequently Asked Questions About Creamy Red Velvet Cheesecake Recipe
- Estimated Nutrition for Your Red Velvet Cheesecake
- Share Your Red Velvet Cheesecake Creations
Why This Red Velvet Cheesecake is Your Next Showstopper Dessert
Honestly, this isn’t just a cheesecake; it’s an event! This recipe is designed to be the absolute star of your dessert table, whether it’s Christmas or Valentine’s Day. We’ve got rich red velvet flavor mingling with tangy cream cheese, all resting on a crunchy base. It truly lives up to the name showstopper desserts.
- The crunch of the dark Oreo crust meets the creamy filling perfectly.
- We use a gentle swirl technique so you get ribbons of flavor in every slice.
- It gives you that incredible, unforgettable slice every single time.
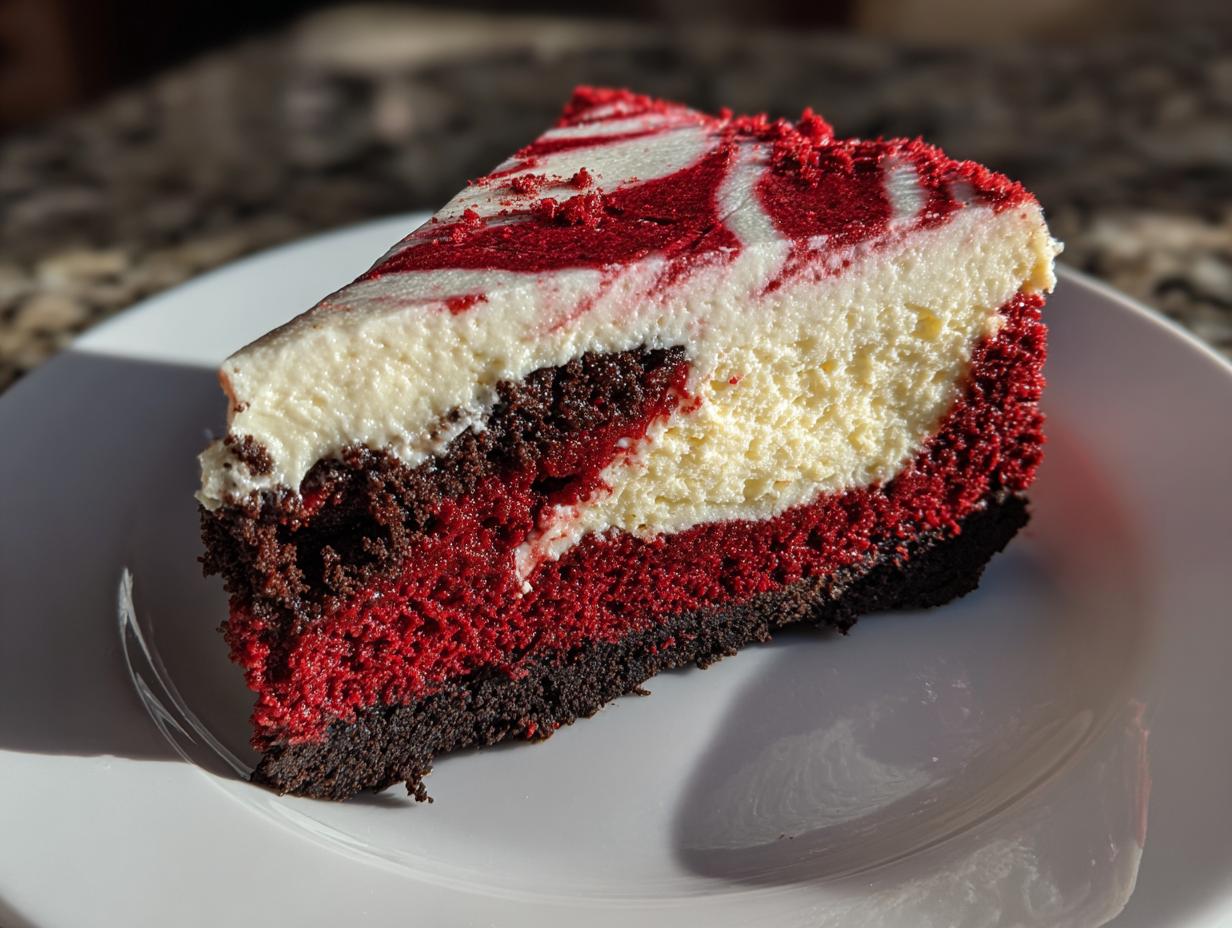
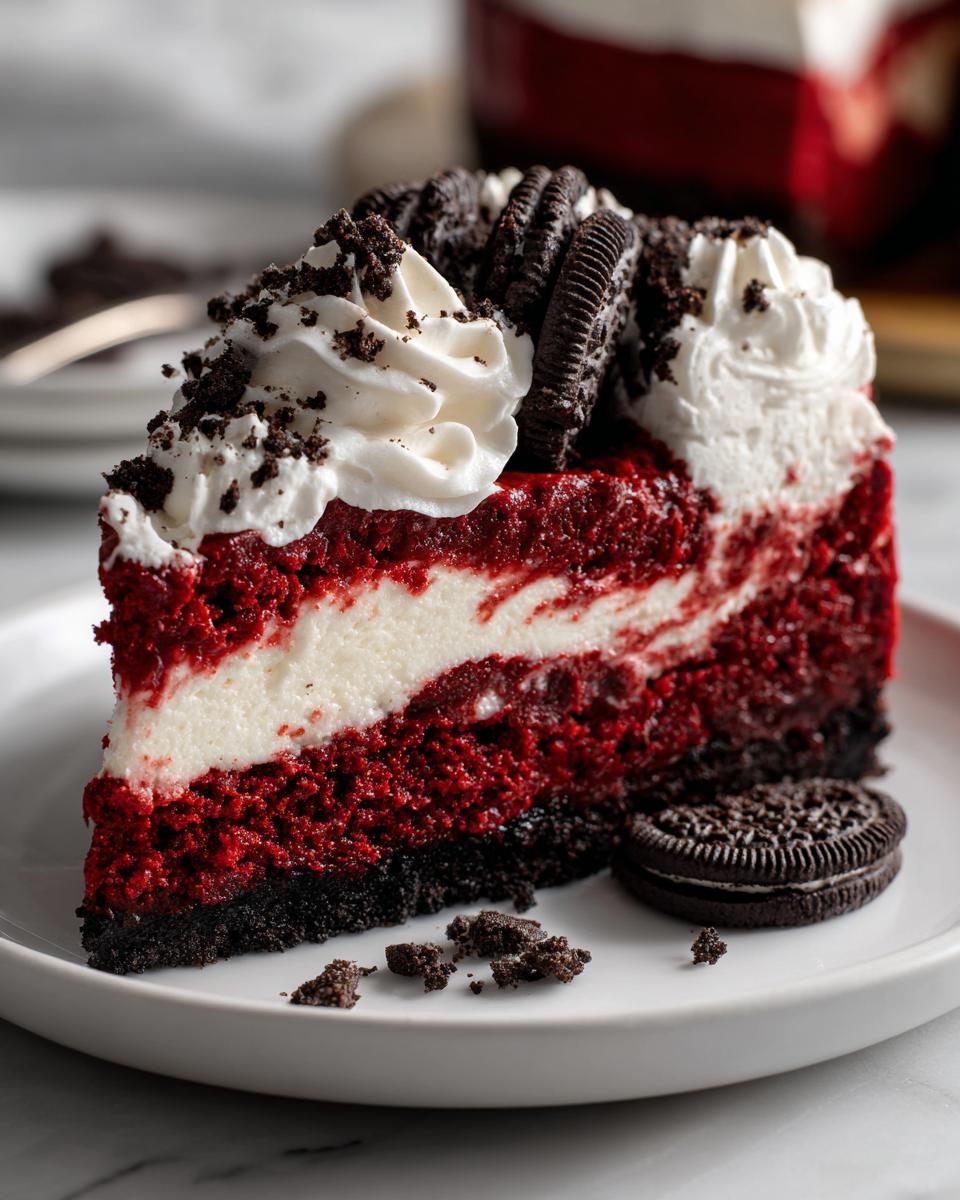
If you want to see what I mean about the texture, you should check out this gorgeous example—it shows exactly the creamy result we’re aiming for!
Achieving That Creamy Red Velvet Cheesecake Recipe Texture
The secret to that flawless, lump-free experience is all about temperature. Seriously, don’t even try cutting corners here! I can’t stress enough that your cream cheese, eggs, and sour cream absolutely must be at room temperature. If they’re cold, they fight each other, and you get lumps. We want a velvety smooth cheesecake filling, and that only happens when all your dairy components are happy, soft, and ready to incorporate beautifully.
Ingredients for Your Red Velvet Cheesecake with Oreo Crust
Okay, now for the fun part: gathering our treasures! Since this is such a visually stunning bake, precision matters, but don’t panic. We’re keeping things straightforward, just like I learned developing recipes professionally. If you follow these groups, you’ll have everything ready for a gorgeous outcome. Remember to check out this guide for more inspiration on making things look impressive! This link has some lovely ideas.
Ingredient Notes and Substitutions for Your Red Velvet Cheesecake
A quick science note here: the color is everything for a true red velvet experience! I strongly suggest using gel food coloring if you can find it. It gives you that deep, vibrant red without adding too much extra liquid, which can thin out our perfectly dense filling and lead to cracks. Also, I need you to trust me on the room temperature eggs and sour cream—it’s non-negotiable for that beautiful, rich red velvet dessert finish. That consistency is why your cheesecake will be so impossibly smooth!
Here is exactly what you need:
For the Oreo Crust:
- 1 1/2 cups Oreo cookie crumbs (yes, the whole cookie, crumbs and all!)
- 1/4 cup granulated sugar
- 6 tablespoons unsalted butter, melted
For the Main Cheesecake Batter:
- 24 ounces cream cheese, softened completely
- 1 1/2 cups granulated sugar
- 1 teaspoon vanilla extract
- 1/2 teaspoon salt
- 4 large eggs, room temperature
- 1 teaspoon white vinegar (trust me, it deepens the red color!)
- 1 tablespoon red food coloring (liquid or gel works, but gel is better)
- 1 tablespoon unsweetened cocoa powder
- 1/4 cup all-purpose flour
- 1/2 cup sour cream, room temperature
For the Cream Cheese Swirl:
- 4 ounces cream cheese, softened
- 1/4 cup granulated sugar
- 1 large egg yolk
- 1/4 teaspoon vanilla extract
For Topping (Optional):
- 1/2 cup cream cheese frosting
Step-by-Step Instructions for the Best Red Velvet Cheesecake
This is where the magic happens! We take those beautiful ingredients and assemble them into something truly spectacular. Before you even touch the mixer, make sure you’ve wrapped that 9-inch springform pan super tightly in a double or even triple layer of heavy-duty foil. Water baths are fantastic for that bakery style cheesecake look, but we do *not* want any sneaky leaks getting into our crust!
First, get your oven preheated to 350°F (175°C) and bake that Oreo crust for just 10 minutes. Let it cool while you whip up the batter.
When mixing the main batter, remember what I said about room temperature ingredients! Beat that main batch of cream cheese, sugar, vanilla, and salt until smooth, then add the eggs slowly, one at a time—we are incorporating air gently, not whipping it into oblivion. Then, mix in your gorgeous red cocoa mixture and the sour cream until just combined.
Pour about two-thirds of that vibrant red batter over your cooled crust. Then, mix up the swirl ingredients separately until they are silky smooth. Dollop spoonfuls of that white mixture over the red. For the look, I like to run a knife through it maybe three or four times—you want marble veins, not just one solid pink mess! Remember to check out this tutorial for mastering that swirl if you’re nervous.
Finally, place that foil-wrapped pan into a larger roasting pan and add the hot water. Bake for 60 to 75 minutes. The center should still have a tiny wobble when you move it, but the edges should look set.
Mastering the Water Bath for Your Red Velvet Cheesecake
Listen, this water bath is the secret weapon against cracking, plain and simple! Because cheesecake batter is so delicate, direct heat causes the edges to set too fast while the middle is still raw. That temperature difference creates stress, which results in those terrible cracks. The hot water surrounding the pan acts like a gentle, humid blanket, enveloping the cheesecake in slow, even heat. This is pure baking science ensuring you get a supremely showstopper desserts-worthy top!
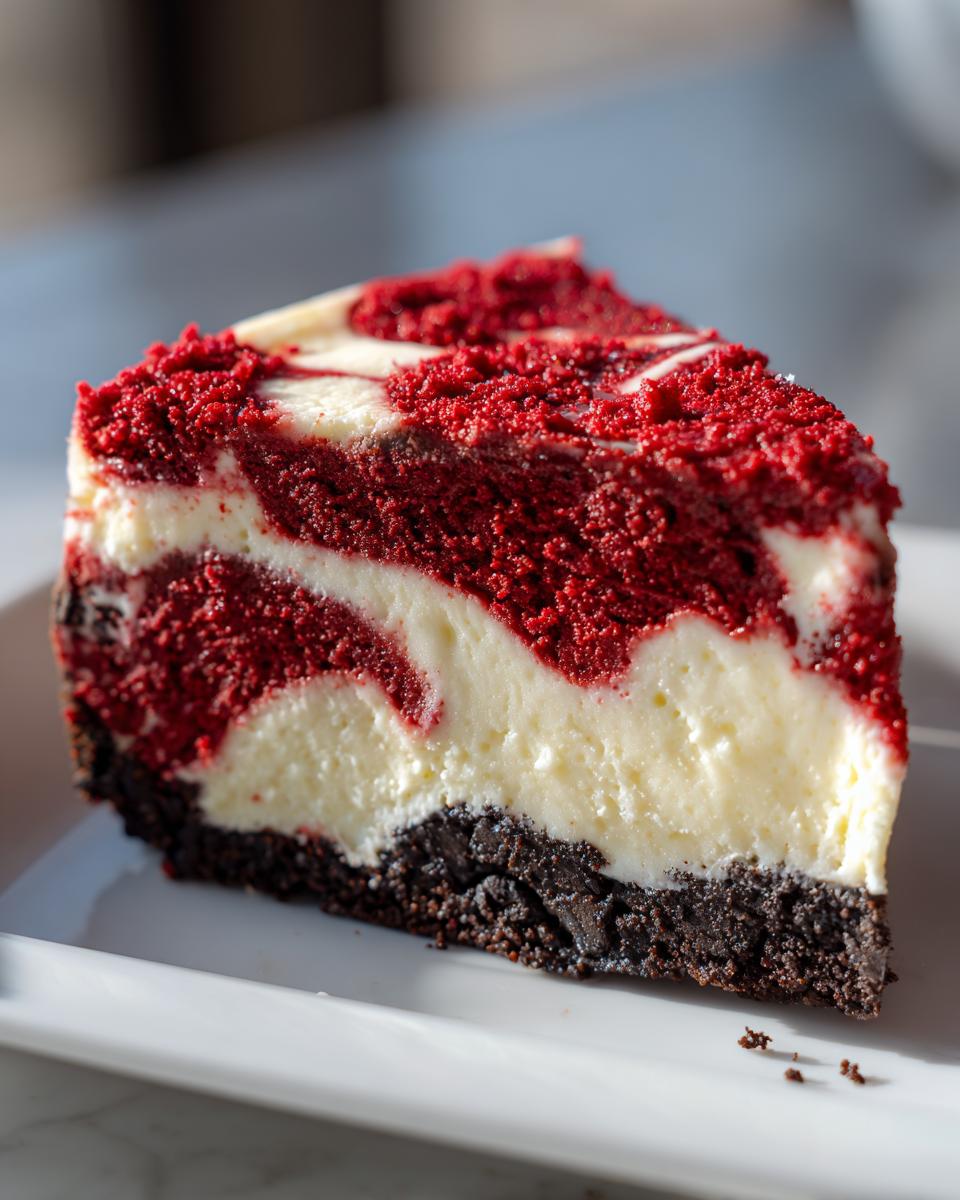
Tips for a Perfect Red Velvet Cheesecake Swirl
The swirl step is where you transition from a delicious cake into a true piece of art! After you dollop that simpler cream cheese mixture right on top of the main red velvet batter, you have to resist the urge to mix it endlessly. If you spend too much time combining them, the colors just blend into a dull rose color, which isn’t what we want for this **red velvet cheesecake swirl**.
Here is my expert technique: grab a butter knife—nothing too fancy—and dip it in straight down through both layers, then drag the knife slowly across the top in an ‘S’ pattern maybe three times total. You want distinct ribbons and pockets of white peeking through the red. Seriously, less is more here! Check out how beautifully layered this example looks for real inspiration. It keeps every bite exciting and visually stunning!
Making Your Red Velvet Cheesecake Ahead of Time
I get it; when you’re tackling a big holiday menu, timing is everything! The great news is that this red velvet cheesecake actually *prefers* to be made early. You absolutely must let it chill for a minimum of six hours, but honestly, overnight is when it truly sets up its beautiful, dense texture. Don’t treat it like a regular cake; give it time to firm up properly!
When storing leftovers, wrap the entire cheesecake loosely but tightly in plastic wrap or foil. This keeps out any fridge odors and stops the top from drying out. Because it’s such a decadent cheesecake dessert, it actually tastes even better the next day when all those red velvet spices have really married the creamy cheesecake layer. It’s the perfect make-ahead plan!
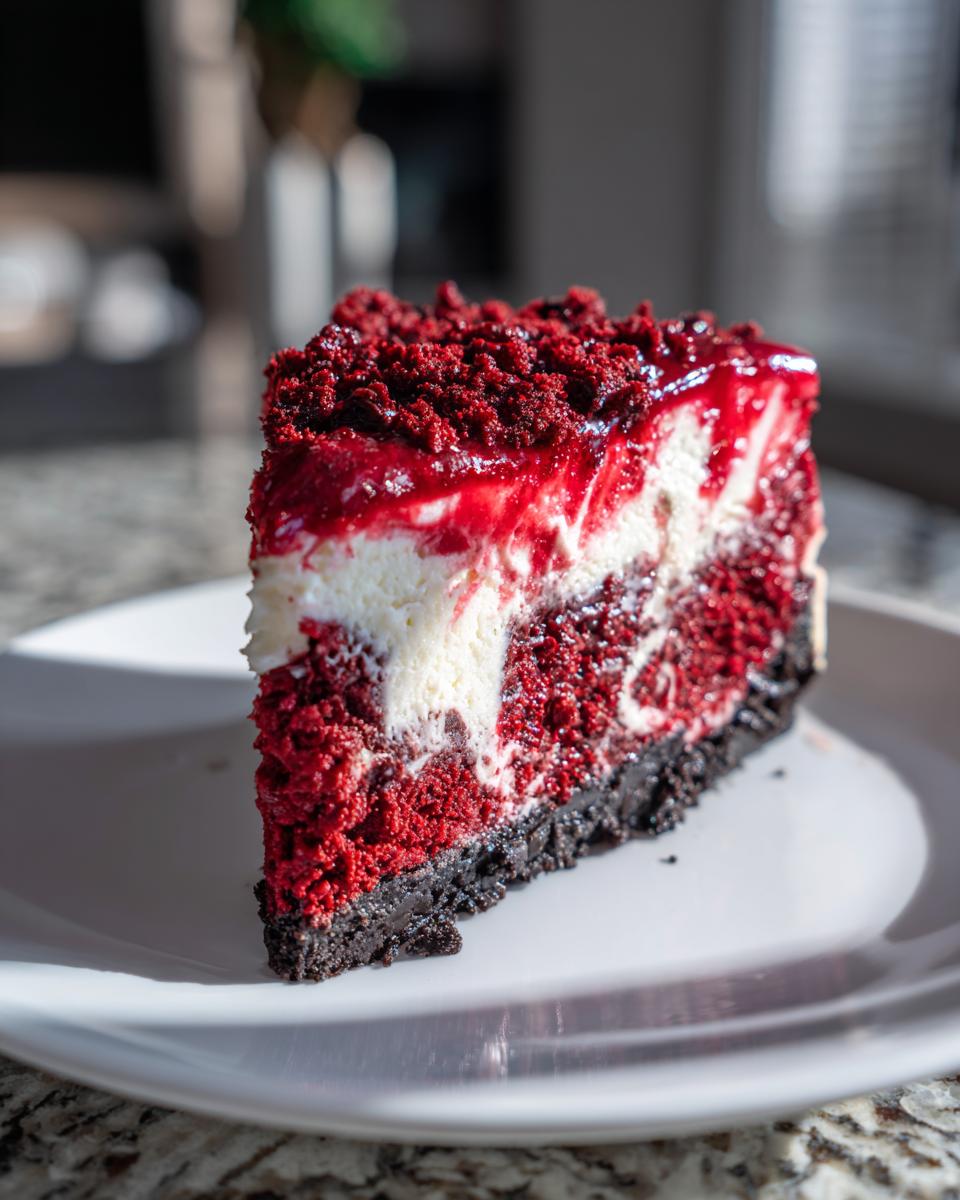
Serving Suggestions for This Indulgent Dessert Recipe
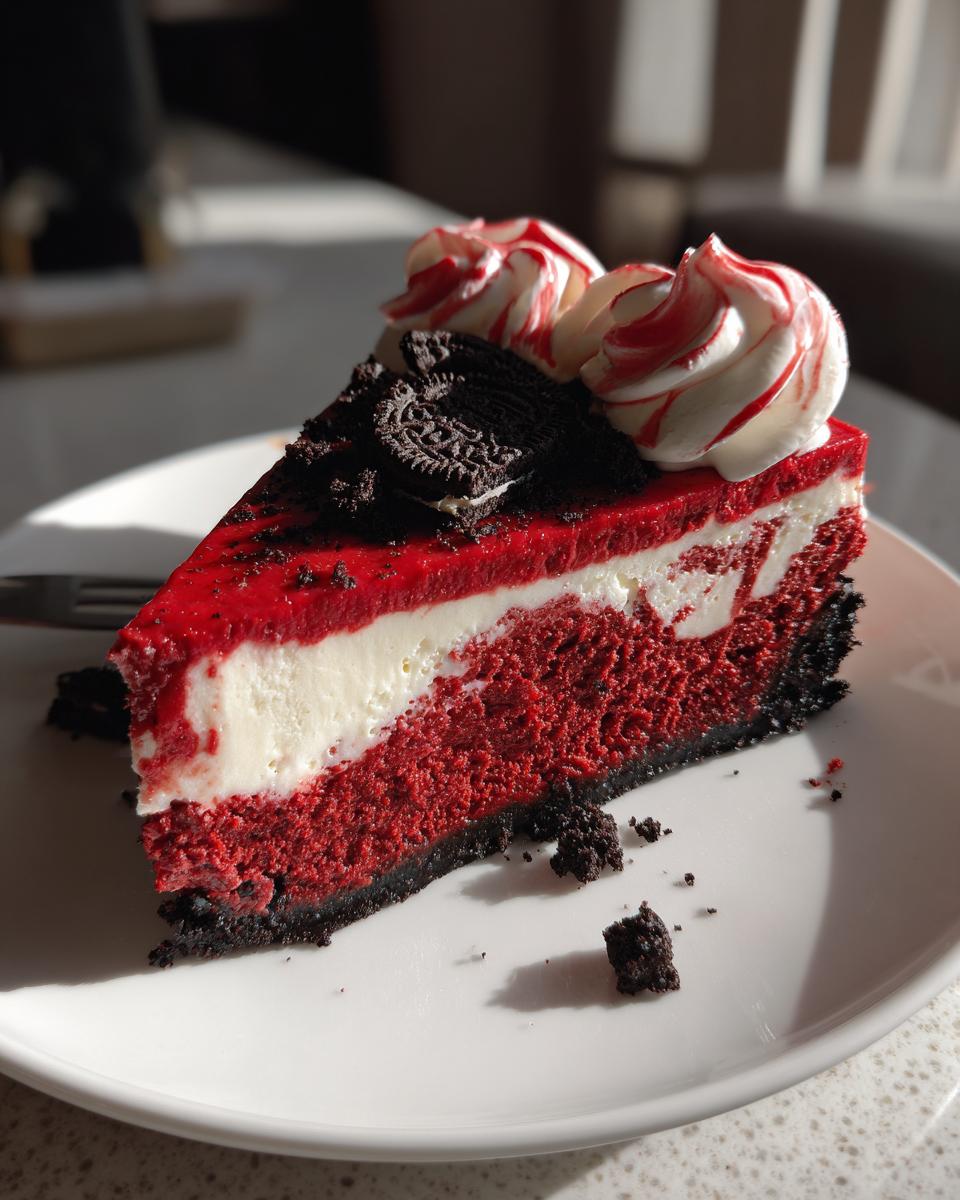
Now that you’ve made this truly magnificent creation, how do you serve it up? While this cheesecake is delicious all by itself—especially topped with that optional fluffy cream cheese frosting—sometimes you want to elevate it just a little more for a big gathering! I love pairing something so rich, like this indulgent dessert recipe, with something slightly tart to cut through the sweetness.
Think about a bright, sharp raspberry coulis or even a simple tart cherry sauce. If you need something super light, just fresh whipped cream works wonders! We also found a fantastic idea for dressing up your Christmas spread over at this holiday link. The key is letting that gorgeous red and white marble shine through!
Frequently Asked Questions About Creamy Red Velvet Cheesecake Recipe
I know you might still have a few little worries, especially if this is your first time tackling a big recipe like this! That’s totally normal. Cheesecake baking has a bit of chemistry to it, but my background ensures that this **creamy red velvet cheesecake recipe** works for you. Here are the things I get asked most often!
Can I use a graham cracker crust instead of Oreos?
Oh, you absolutely can! If the Oreos aren’t your favorite, a standard graham cracker crust works beautifully. Just make sure you still use the melted butter to bind it well. For a sweeter, bolder flavor, I sometimes even mix in a tablespoon or two of cocoa powder into the graham crackers. Either way, since this is a holiday cheesecake recipe centerpiece, we still want that crust nice and firm before we pour the filling on!
How do I ensure my cheesecake doesn’t sink or crack?
This is the big one! Two things prevent sinking and cracking: First, never, ever open that oven door during the baking time we discussed—that sudden cold shock sets off cracks immediately. Second, the slow cooling process is crucial. We turn the oven off and let it sit inside for a full hour with the door cracked. This gradual temperature change is the key to that perfectly flat top you need for a stunning presentation. It’s how we guarantee those beautiful showstopper desserts results every time!
Is this the best fit for Christmas dessert ideas?
In my professional opinion, yes, absolutely! The deep red color is so festive! We’ve got the rich flavor profile that screams holiday indulgence, and it looks fantastic cut alongside lighter desserts. I always feel like this one really stands out, especially since it pairs so well with that festive look seen over at this site. If you follow the steps, you’ll have the best red velvet cheesecake for your party!
Can I skip the swirl for an easier version?
If you need an easy red velvet cheesecake day, yes! Just leave out the small swirl ingredients and pour the entire main batter over the crust. You’ll end up with a beautiful, uniform red cheesecake. You can still top it with a lovely cream cheese frosting later for that extra flair shown in this helpful tutorial. Simple is still delicious!
Estimated Nutrition for Your Red Velvet Cheesecake
Now, I know some of you are curious about the details, or maybe you need to know this for a big holiday gathering! As a recipe developer, I always emphasize that these nutritional estimates are just that—estimates. They are calculated based on the standard amounts of the ingredients listed above, especially including the Oreo crust, and they change depending on the exact brands you use.
This is an indulgence, truly one of those indulgent dessert recipes, so enjoy it guilt-free! We only get one life, right? For a single serving slice of this decadent treat, here is my best guess based on the serving size of 12:
- Calories: Around 550
- Total Fat: Roughly 38g
- Carbohydrates: Approximately 50g
- Sugar: About 45g (that’s where all the flavor comes from!)
- Protein: Hovering near 8g
If you’re looking for a deeper breakdown, or perhaps comparing this to commercial versions, remember that the fat content comes from the generous amounts of cream cheese and butter we use for that signature creamy texture. If you try this incredible recipe, you can share your experience or rating after you look it over here: this link provides some context on other rich desserts!
Share Your Red Velvet Cheesecake Creations
Well, that’s it! We’ve conquered the showstopper—the ultimate **red velvet cheesecake**! I truly hope you feel a spark of excitement knowing you just pulled off something this elegant at home. When you make this, please, please let me know how it went! I live for those emails and comments, especially from folks who were a little nervous about attempting their first major cheesecake project. If you managed this, you are officially rocking your status as a great home cook!
Did you struggle with the water bath? Did the swirl come out perfectly? Or maybe you tried my tip on skipping the swirl for an easy red velvet cheesecake? Don’t keep all that delicious success to yourself! I’ve seen some truly stunning results when people try out these flavor combinations; take a look at some gorgeous inspiration over here!
Please leave a star rating right down below on the recipe card. If you snapped a picture of your gorgeous, ruby-red dessert, tag me on social media! Seeing your success with this homemade cheesecake tutorial makes all the testing and recipe refinement worth it. You can see some of my favorite reader photos over here: where other bakers share their triumphs.
Thank you so much for baking with me today at Frosted Fancies. I hope this decadent dessert brings tons of joy to your table. Next time you need a showstopper, you know where to find me!
PrintShowstopper Red Velvet Cheesecake with Oreo Crust and Cream Cheese Swirl

You will make an ultra-creamy, rich Red Velvet Cheesecake featuring a crunchy Oreo crust and a beautiful cream cheese swirl. This bakery-style dessert is perfect for holidays or any special occasion.
- Prep Time: 30 min
- Cook Time: 75 min
- Total Time: 9 hours 45 min
- Yield: 12 servings 1x
- Category: Dessert
- Method: Baking
- Cuisine: American
- Diet: Vegetarian
Ingredients
- 1 1/2 cups Oreo cookie crumbs
- 1/4 cup granulated sugar
- 6 tablespoons unsalted butter, melted
- 24 ounces cream cheese, softened
- 1 1/2 cups granulated sugar
- 1 teaspoon vanilla extract
- 1/2 teaspoon salt
- 4 large eggs, room temperature
- 1 teaspoon white vinegar
- 1 tablespoon red food coloring (liquid or gel)
- 1 tablespoon unsweetened cocoa powder
- 1/4 cup all-purpose flour
- 1/2 cup sour cream, room temperature
- 4 ounces cream cheese, softened (for swirl)
- 1/4 cup granulated sugar (for swirl)
- 1 large egg yolk (for swirl)
- 1/4 teaspoon vanilla extract (for swirl)
- 1/2 cup cream cheese frosting, for topping (optional)
Instructions
- Preheat your oven to 350°F (175°C). Wrap the outside of a 9-inch springform pan tightly with heavy-duty aluminum foil.
- Prepare the crust: Mix the Oreo crumbs, 1/4 cup sugar, and melted butter until combined. Press the mixture firmly into the bottom of the prepared springform pan. Bake for 10 minutes. Let cool slightly.
- Prepare the main cheesecake batter: In a large bowl, beat the 24 ounces of softened cream cheese, 1 1/2 cups sugar, vanilla extract, and salt until smooth. Beat in the eggs one at a time, mixing just until combined after each addition. Do not overmix.
- In a small bowl, whisk together the red food coloring, cocoa powder, vinegar, and flour. Add this red mixture to the cream cheese batter and mix on low speed until the color is uniform. Stir in the sour cream.
- Pour about two-thirds of the red velvet batter over the cooled Oreo crust.
- Prepare the cream cheese swirl: In a separate small bowl, beat the 4 ounces of softened cream cheese, 1/4 cup sugar, egg yolk, and 1/4 teaspoon vanilla extract until smooth.
- Dollop spoonfuls of the cream cheese mixture over the red velvet batter in the pan. Use a knife or skewer to gently swirl the two mixtures together to create a marbled effect.
- Place the foil-wrapped springform pan into a larger roasting pan. Carefully pour hot water into the roasting pan until the water reaches about halfway up the sides of the springform pan (this is a water bath).
- Bake for 60 to 75 minutes, or until the edges are set but the center still has a slight jiggle.
- Turn off the oven, crack the oven door open slightly, and let the cheesecake cool inside the oven for 1 hour. This prevents cracking.
- Remove the cheesecake from the water bath and foil. Let it cool completely on a wire rack. Once cool, cover and refrigerate for at least 6 hours, or preferably overnight, before serving.
- If desired, top with cream cheese frosting before slicing.
Notes
- Use room temperature ingredients for the cheesecake filling; this prevents lumps and ensures a velvety smooth texture.
- Do not skip the water bath; it provides gentle, even heat necessary for a creamy, crack-free cheesecake.
- If you prefer a simpler presentation, you can skip the cream cheese swirl and top the entire cheesecake with the red velvet batter, then bake.
Nutrition
- Serving Size: 1 slice
- Calories: 550
- Sugar: 45g
- Sodium: 350mg
- Fat: 38g
- Saturated Fat: 22g
- Unsaturated Fat: 16g
- Trans Fat: 0.5g
- Carbohydrates: 50g
- Fiber: 1g
- Protein: 8g
- Cholesterol: 150mg