
Oh my gosh, are you scrambling for an easy fall dessert that still tastes totally special? I totally get it. The holidays sneak up on us, and who has time for fussy layering and chilling times when you should be deciding on side dishes? That’s why I’m handing this one straight to you: the **pumpkin dump cake**. Seriously, this recipe is my secret weapon for potlucks and Thanksgiving gatherings. Why is it so good? Because it follows the golden rule Katie lives by here at Frosted Fancies—simple ingredients, zero stress, totally delicious results. You’re basically just dumping, sprinkling, and drizzling, but the chemical magic that happens in the oven creates this incredible, rich, cozy pumpkin layer topped with this perfectly crisp, buttery cake crust. Trust me, your friends will think you spent hours on this!
- Why This Pumpkin Dump Cake is Your New Favorite Easy Fall Dessert
- Gathering Ingredients for Your Pumpkin Dump Cake Recipe
- Step-by-Step Instructions for the Perfect Pumpkin Dump Cake
- Baking Time and Testing Doneness for Your Pumpkin Dump Cake
- Serving Suggestions for This Crowd Dessert
- Make Ahead Dessert and Storage Instructions
- Troubleshooting Common Issues with Your Dump Cake Recipe
- Frequently Asked Questions About Pumpkin Dump Cake
- Share Your Cozy Pumpkin Recipes Experience
Why This Pumpkin Dump Cake is Your New Favorite Easy Fall Dessert
When I tell you this **pumpkin dump cake** is a winner, I mean it was born for busy times like Thanksgiving. You truly cannot beat the efficiency here! It takes less than ten minutes of hands-on time, making it one of the best easy fall dessert options out there. Plus, since it’s all done in one dish, cleanup is a dream.
Here are the top three reasons this recipe is always in my rotation:
- Incredible Simplicity: We rely on a trusty box cake mix, so we skip all the measuring of leavening agents and flour. Hello, shortcut magic!
- Crowd-Pleaser Potential: This bakes up huge in a 9×13 pan, making it the perfect crowd dessert for feeding everyone without stressing out.
- One Pan Wonder: No greasy mixing bowls everywhere—just one pan to bake and serve from. That’s my kind of baking after a huge meal.
Gathering Ingredients for Your Pumpkin Dump Cake Recipe
Okay, before we get into the layering craziness that makes this cake, let’s talk about what you need. This is where the trust factor comes in, because Katie developed this recipe using simple pantry items that just *work*. Having everything ready to go makes the actual prep time fly by, which is why I call this an assembly, not a recipe!
You’ll need the essentials, and remember, the dry cake mix and the butter are key players here. Make sure that butter is fully melted but not sizzling hot when you get to the drizzling step!
- One 15-ounce can of plain pumpkin puree—not pumpkin pie filling, okay? That’s a crucial difference for these cozy pumpkin recipes.
- One 12-ounce can of evaporated milk.
- Two large eggs.
- One teaspoon of pumpkin pie spice.
- One full 18.25-ounce box of yellow cake mix—keep it dry!
- Chopped pecans, if you’re feeling fancy (they are totally optional).
- One cup (that’s two sticks!) of unsalted butter, completely melted.
Ingredient Notes and Substitutions for Pumpkin Dump Cake
If you happen to be out of yellow cake mix, don’t panic! A spice cake mix works beautifully, but you should skip adding the extra teaspoon of pumpkin pie spice, since the mix already has flavor. If you skip the optional pecans, you’re fine—it just won’t have that tiny bit of crunch on top. Honestly, the most important thing is using pure pumpkin puree, not pie filling. That filling already has all the sugar, and we are controlling the sweetness entirely with the box mix and the butter layer!
Step-by-Step Instructions for the Perfect Pumpkin Dump Cake
Alright, let’s get this **pumpkin dump cake** assembled! This is the fun part where you get to see five separate ingredients just stack up in the pan, and I promise you, you don’t need any fancy equipment for this. First things first: get that oven preheated to 350 degrees Fahrenheit. Remember to properly grease your 9×13 inch baking dish. If you’re feeling nervous about sticking, a quick spray of baking non-stick spray works wonders!
First, whisk together all your wet base ingredients—the pumpkin, the evaporated milk, the eggs, and the spice—in a big bowl until they are nicely happy together. Pour this entire, smooth pumpkin mixture right into the bottom of your prepared dish. It settles right in, creating our wonderful, thick first layer. Now for the magic that makes this a dump cake recipe!
Next, sprinkle that dry yellow cake mix evenly across the entire top surface. Don’t stir it in! Then, if you’re using them, sprinkle those pecans over the top of the dry mix. The very last step before baking is drizzling that melted butter slowly and evenly over everything. I once messed up and poured the butter in a big blob in the center, and that spot stayed gummy, so take your time drizzling!
Tips for Layering Your Pumpkin Dump Cake
The secret to this entire structure lies in *not mixing* anything after that initial pumpkin whisking. When you sprinkle the dry cake mix on top of the wet pumpkin layer, and then gently drizzle the butter over the top, the butter sinks down, essentially cooking the dry mix into crisp, buttery patches as it bakes. If you mix it, you just get a heavy, spiced pumpkin batter, and we lose that glorious contrast! My first attempt at any dump cake recipe ended up totally mixed, and it was fine, but it wasn’t the *dump cake* experience.
Baking Time and Testing Doneness for Your Pumpkin Dump Cake
Now for the waiting game! Get this **pumpkin dump cake** into that 350-degree oven and set a timer for 50 minutes. Do not open the door before then, because we don’t want to deflate our beautiful top layer. When the timer goes off, you’re looking for that lovely golden brown color on top. For testing doneness, just like any good bake, grab a toothpick. Insert it right into the center where the cake mix lines are—if it comes out clean or with just moist crumbs clinging to it, you’re ready to pull it out!
Serving Suggestions for This Crowd Dessert
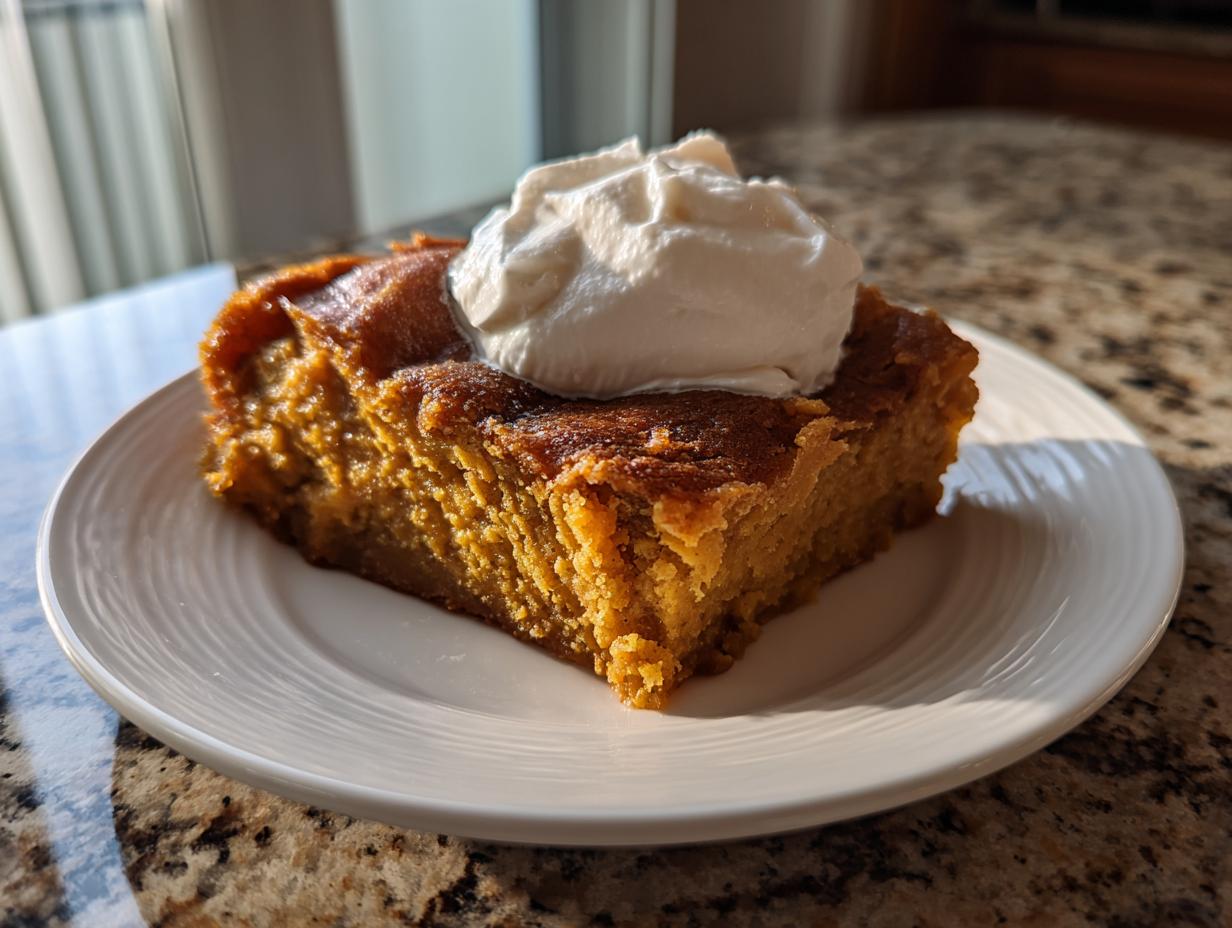
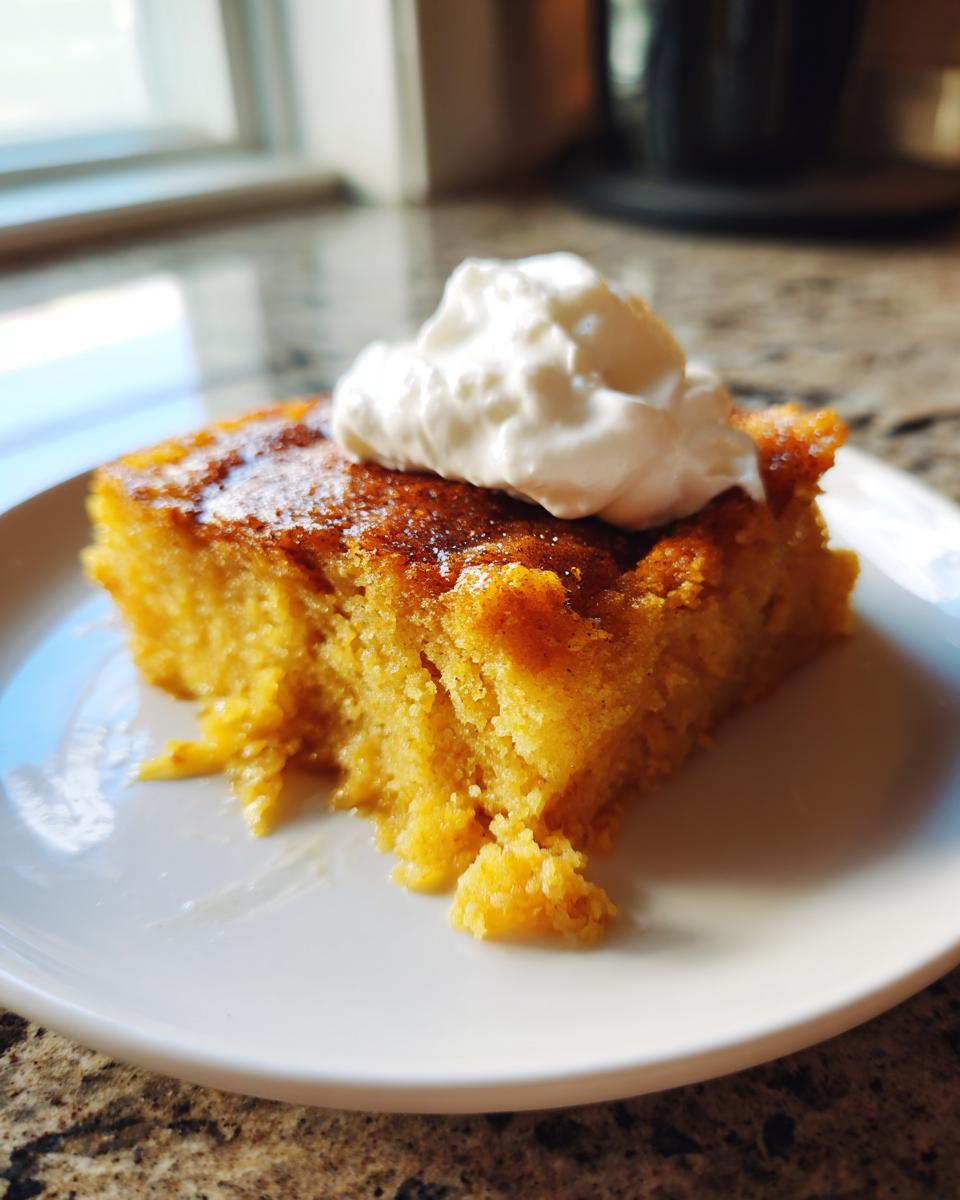
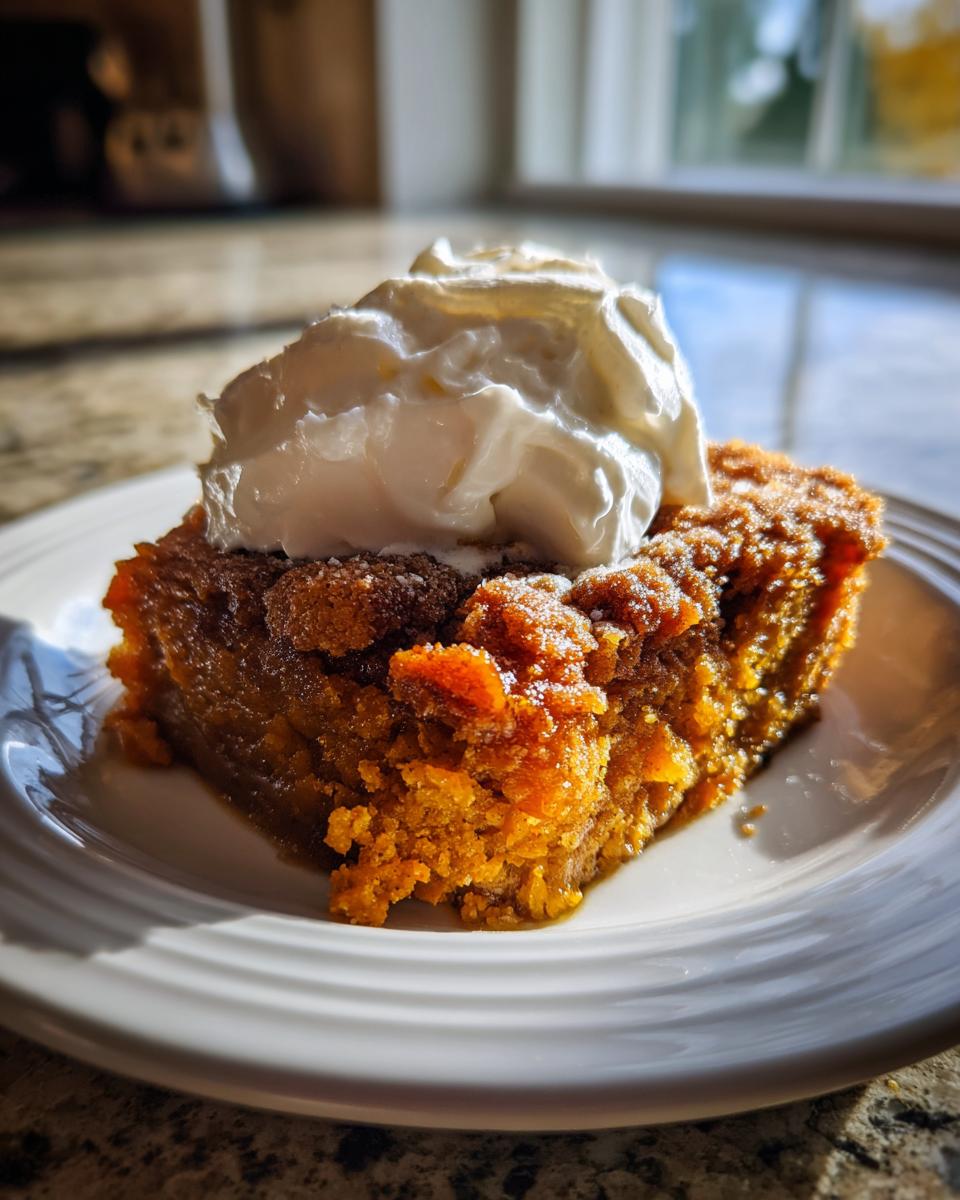
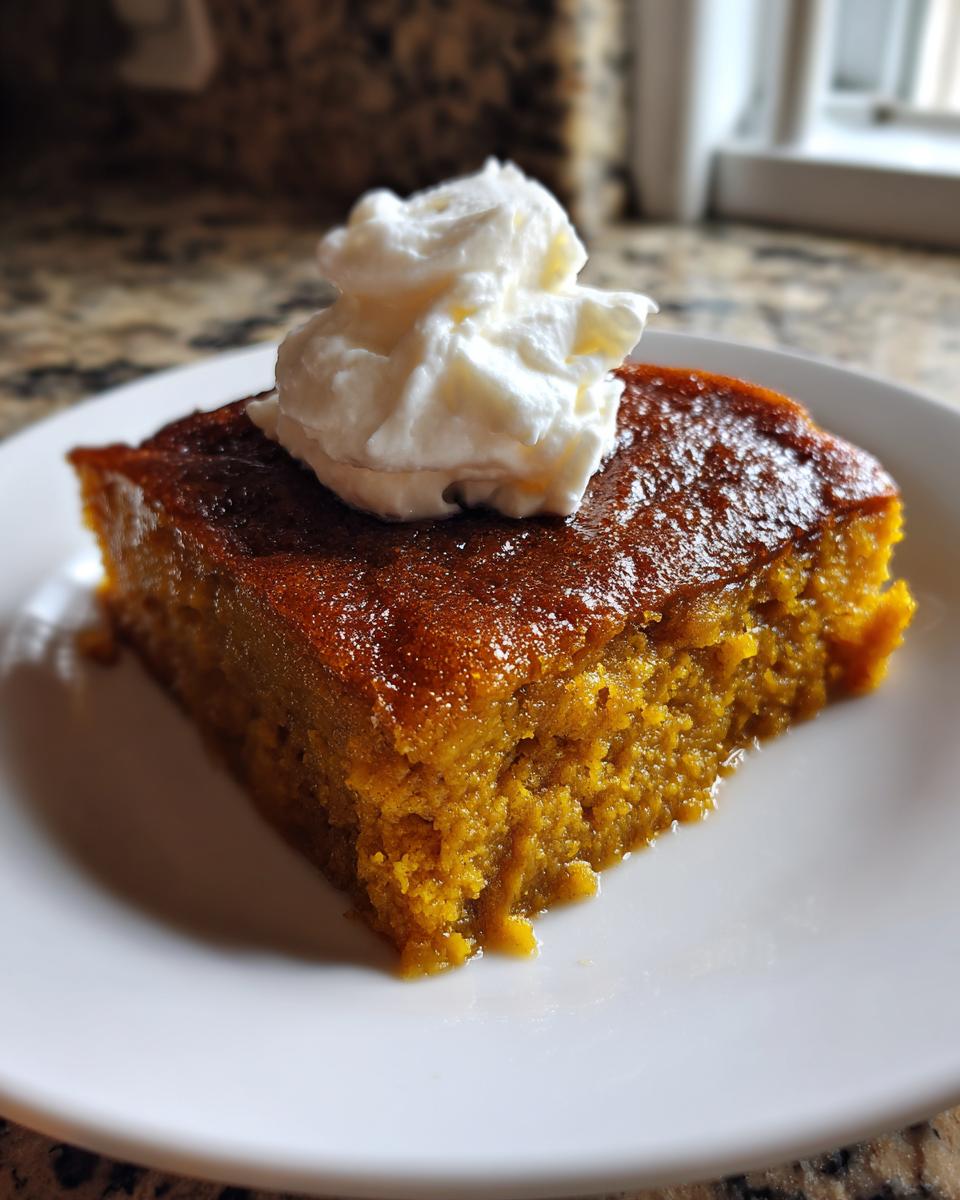
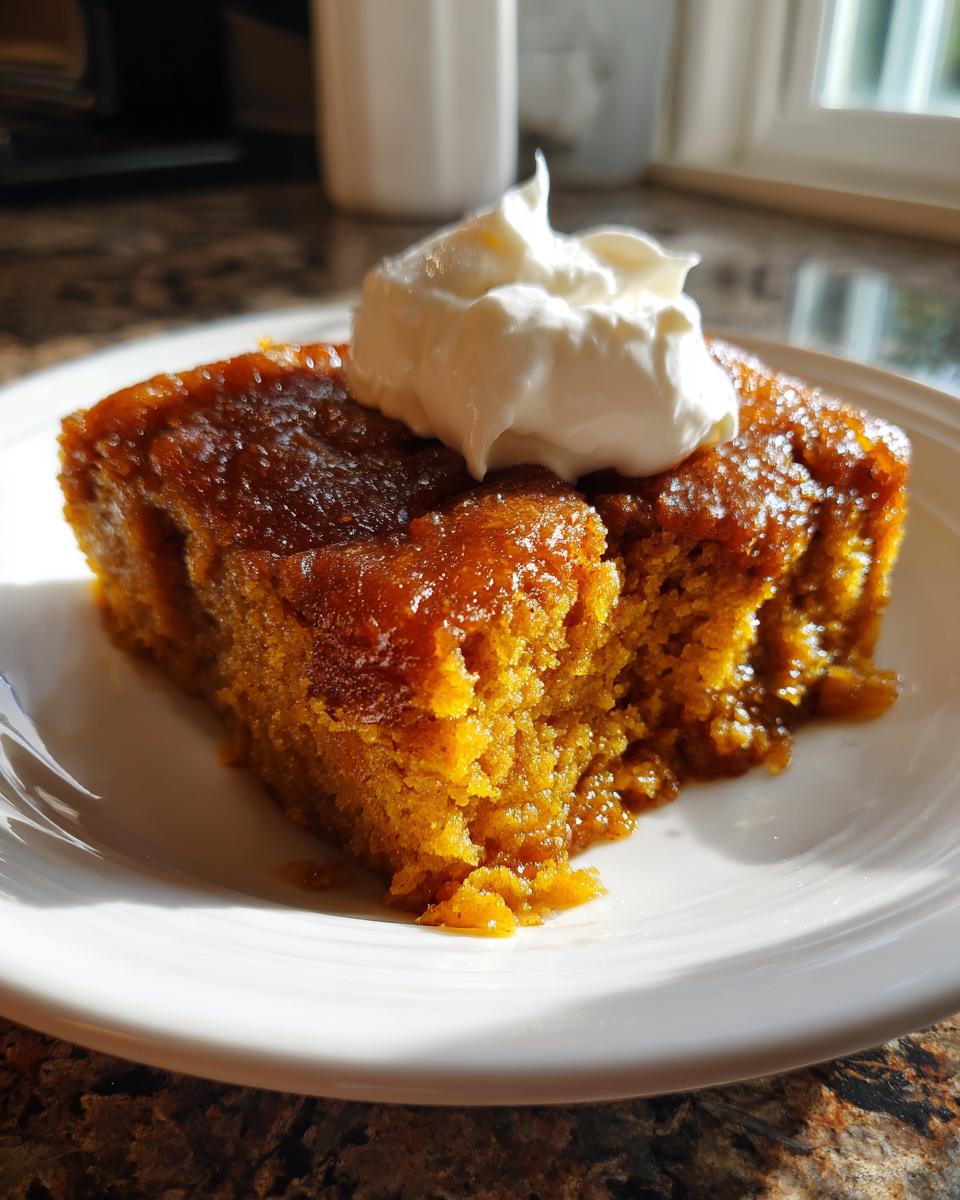
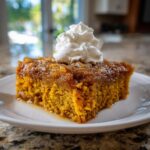
This cake is practically begging for a dollop of something light to contrast that rich pumpkin and buttery top! Since it’s a total crowd dessert, I always have a huge batch of whipped topping ready to go. You definitely need to let the **pumpkin dump cake** cool down completely—and I mean *completely*—before you try to top it. If you put fluffy whipped cream topping on a warm cake, you’ll end up with a soupy, sad mess, and nobody wants that at the Thanksgiving table!
If you’re serving this right away, cool it on the counter until it’s just warm, and then pile on soft whipped cream for that classic cozy look. If you’re making it ahead for the holiday, chilling it completely first is even better. When you serve slices, just put a little swirl of cold whipped cream (or even vanilla ice cream) right on top of each portion. It looks so much nicer than trying to frost the whole thing!
Make Ahead Dessert and Storage Instructions
This is why the **pumpkin dump cake** is a lifesaver for big entertaining days! You can absolutely get this done a day ahead of time. Once it has cooled completely—and I really mean cool, not even slightly warm—just cover that 9×13 dish tightly with foil or plastic wrap and pop it right into the fridge. It is a fantastic make ahead dessert option for your schedule.
It keeps beautifully for up to four days covered in the refrigerator. When you pull it out, you can serve it chilled, which is delicious, or, if you prefer that warm gooey center feeling, you can pop the whole thing back into a 300-degree oven for about 10 minutes just to warm it through slightly before serving with that cool whipped cream!
Troubleshooting Common Issues with Your Dump Cake Recipe
Even though this is the easiest **dump cake recipe**, sometimes things go a little sideways, right? Don’t sweat it; I run into little glitches, too! The number one complaint I hear about dump cakes is the cake mix layer turning out gummy or doughy instead of crisp. Nine times out of ten, this happens because the melted butter didn’t get drizzled evenly over *every single bit* of that dry cake mix layer. That butter is what cooks those dry bits into that lovely crust we want.
If your center is staying wet even after the edges look done, it just means it needs a little more time to set up. Because the pumpkin mixture is so dense, it holds onto heat! You can always stick it back in the oven for another five to ten minutes. If you’re worried about the top burning, just cover the pan loosely with foil before you tuck it back in. For all my hard-won tips on fixing baking oopsies, check out my guide on baking troubleshooting!
Frequently Asked Questions About Pumpkin Dump Cake
I know you probably have a few last-minute questions scrolling through because you want this to be perfect for your potluck! That’s fair. Perfection requires a little clarity, especially with this specific **dump cake recipe**. Here are the things folks always ask me about this delightfully easy fall dessert.
So, is this truly a one pan dessert? Yes! That’s the beauty—you mix your wet ingredients, layer everything in one 9×13 dish, and bake it all in that single pan. No extra bowls needed for cleanup, which is ideal for big gatherings filled with other delicious **thanksgiving desserts**.
Another biggie: Can I use pumpkin pie filling instead of plain puree? Please don’t! The filling is already sweetened and spiced, and it will throw off the texture entirely. We need the plain puree so we can control the seasoning with our own spice measurement. And yes, this needs time to cool completely—aim for at least two hours on the counter before you even think about setting that beautiful **whipped cream topping** on it!
Can I use a different flavor of box cake mix in this pumpkin dump cake?
Oh yes, you totally can experiment! If you swap the yellow cake mix for a spice cake mix, which is yummy, you need to be conscious of the spice level. Since the spice cake mix already has warm flavors built in, I always suggest cutting the added teaspoon of pumpkin pie spice in half, or maybe leaving it out entirely, just so the ginger and cinnamon don’t totally overpower the pumpkin flavor!
Share Your Cozy Pumpkin Recipes Experience
I hope this **pumpkin dump cake** brings as much ease and joy to your holiday table as it does to mine! Seriously, drop by the comments below and let me know how it went. Did you take it to a huge potluck? Did everyone ask you what fancy chef created this ridiculously easy fall dessert?
Tell me how many servings you got out of your 9×13 pan—we aim for about 12 generous slices here, but you know your crowd best!
Snap a picture and share it with me; I always love seeing these simple bakes come to life in your kitchens. Happy baking, and enjoy all those delicious, cozy moments!
PrintSimple Pumpkin Dump Cake
Make this easy fall dessert using a box cake mix. It serves a crowd and is perfect for potlucks.
- Prep Time: 10 min
- Cook Time: 60 min
- Total Time: 70 min
- Yield: 12 servings 1x
- Category: Dessert
- Method: Baking
- Cuisine: American
- Diet: Vegetarian
Ingredients
- 1 (15 ounce) can pumpkin puree
- 1 (12 ounce) can evaporated milk
- 2 large eggs
- 1 teaspoon pumpkin pie spice
- 1 (18.25 ounce) box yellow cake mix
- 1 cup chopped pecans (optional)
- 1 cup (2 sticks) unsalted butter, melted
Instructions
- Preheat your oven to 350 degrees Fahrenheit. Lightly grease a 9×13 inch baking dish.
- In a large bowl, whisk together the pumpkin puree, evaporated milk, eggs, and pumpkin pie spice until combined.
- Pour the pumpkin mixture evenly into the prepared baking dish.
- Sprinkle the dry yellow cake mix evenly over the pumpkin layer. Do not mix.
- Sprinkle the chopped pecans over the cake mix layer, if using.
- Slowly drizzle the melted butter evenly over the entire top layer. Again, do not mix.
- Bake for 50 to 60 minutes, or until the top is golden brown and a toothpick inserted into the center comes out clean.
- Let the cake cool completely before serving. Top with whipped cream.
Notes
- You can prepare this dessert a day ahead. Cover and refrigerate after it has cooled completely. Reheat slightly or serve chilled.
- This cake stores well covered in the refrigerator for up to 4 days.
- For the best presentation with whipped cream, allow the cake to cool fully before topping.
Nutrition
- Serving Size: 1 slice
- Calories: 350
- Sugar: 35
- Sodium: 250
- Fat: 18
- Saturated Fat: 10
- Unsaturated Fat: 8
- Trans Fat: 0
- Carbohydrates: 45
- Fiber: 2
- Protein: 5
- Cholesterol: 45