

Hello there, and welcome! I’m Katherine Hayes, and I couldn’t be more thrilled you stopped by Frosted Fancies today. If you’ve dreamed of pulling a golden, bakery-style loaf of Italian bread out of your home oven—one that absolutely cracks when you squeeze it—then you’re in the right spot. My background is actually rooted in Food Science and professional recipe development, so I know just how to take complex baking and distill it down to something simple and foolproof.
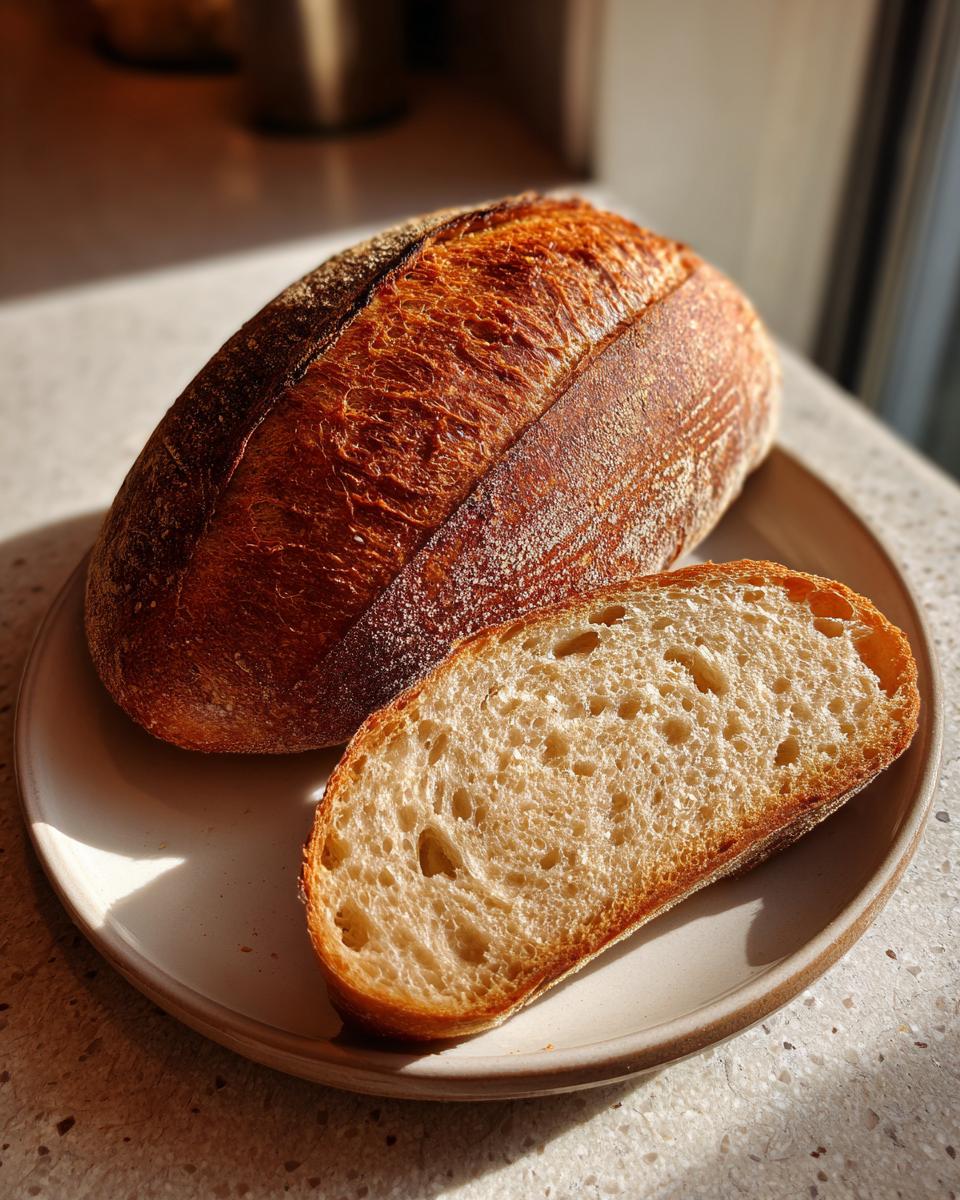
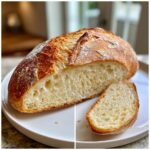
That’s exactly what this Easy Crusty Italian Bread Recipe is: my promise to you of a beautiful, crispy crust wrapped around a magically soft and chewy interior. Seriously, this recipe is perfect for even the newest beginner baker. Let’s get baking!
- Why This Easy Crusty Italian Bread Recipe Works for Everyone
- Simple Bread Ingredients for Your Italian Bread
- Tips for Perfecting Your Italian Bread Crust
- How to Prepare Bakery Style Bread at Home: Step-by-Step Instructions for my Italian Bread
- Ingredient Notes and Substitutions for Making Italian Bread
- Serving Suggestions: What to Serve with Italian Bread
- Storage & Reheating Instructions for Your Warm Italian Loaf
- Frequently Asked Questions About This Italian Bread Recipe
- Nutritional Estimates for Homemade Italian Bread
- Share Your Golden Brown Italian Loaf Creations
Why This Easy Crusty Italian Bread Recipe Works for Everyone
When I developed this recipe, I focused hard on making sure that bakery magic happened right in your home kitchen. You might worry that making Easy Homemade Bread is too much work, but trust me, this recipe skips all the fuss without skipping any flavor!
Here is why I know you are going to love this loaf:
- Speedy Prep: The actual mixing time is super minimal. We’re talking about 15 minutes of hands-on work, maximum!
- Pantry Staples Only: You likely have everything needed right now. No scrambling for specialty items here—just flour, water, yeast, and a touch of oil.
- Soft and Chewy Italian Loaf Guaranteed: The combination of simple kneading and that steam trick in the oven ensures you get that perfect interior texture every single time.
- Beginner Approved: If you haven’t baked bread before, this is your perfect starting point for achieving that beautiful, golden-brown look. You can print out the recipe now right here if you want to get organized!
Simple Bread Ingredients for Your Italian Bread
This whole concept of baking bakery style bread at home hinges on keeping the ingredient list short, sweet, and reliable. Because this recipe is so straightforward (my favorite kind!), the quality of these basic pantry staples really shines through. Don’t feel pressured to buy anything fancy—we are letting the baking science, specifically the steam, do the heavy lifting for that crust!
Here is exactly what you need for one delicious, rustic loaf. I’ve pulled this straight from my development notes to make sure you don’t miss anything:
- 3 1/2 cups all-purpose flour
- 1 1/2 teaspoons salt
- 1 teaspoon granulated sugar
- 2 1/4 teaspoons active dry yeast (that’s one standard packet!)
- 1 1/4 cups warm water (it needs to be about 105-115°F—not hot enough to burn your finger, just pleasantly warm)
- 2 tablespoons olive oil
My professional advice here? Use good quality, fresh flour. Since we aren’t using any eggs or dairy, the flour is the star of the structure. When you use simple ingredients like this for Italian bread, making sure your yeast is fresh and active is key to ensuring we get that lovely rise we are looking for!
Tips for Perfecting Your Italian Bread Crust
Okay, let’s talk about the holy grail of this recipe: that beautiful, crackly, golden crust. Since we aren’t using a fancy mixer or an artisan dough starter, we have to trick the oven into doing the heavy lifting! This is how we move from a nice homemade loaf to something that genuinely looks like it came from a small town bakery. It’s all about technique, especially steam.
In my professional development kitchen, we learned that steam is non-negotiable if you want that crunchy exterior. I’ve linked a great explanation here regarding why it works, but for us home cooks, the simplest explanation is this: steam keeps the surface of your dough moist for the first 10 minutes of baking. This moisture allows the bread to expand fully—that’s called oven spring!—before the crust sets hard.
Once it’s sprung up nice and tall, *then* the dry heat sets that gorgeous, crispy shell. And don’t forget scoring—those little cuts you make on top aren’t just for looks; they control where the dough expands. I always use a very sharp razor blade (or the tip of a small, sharp paring knife) for four clean slashes down the top of the loaf. Head over to this resource for visual guidance on scoring, it really helps!
The Science of Steam for a Golden Brown Italian Loaf
Steam is crucial because it delays the formation of the crust. Think of it like this: if the outside dries out immediately in the hot oven, it locks the shape of the dough too soon, resulting in a dense loaf. By bathing the loaf in steam for those first critical minutes, we keep the dough supple. This means we get maximum volume and a fantastic final crust when the steam dissipates and the heat takes over.
My personal Katherine-approved addition to this whole Crispy Crust Bread Tutorial? Once you put your loaf in the oven, quickly spray the inside walls of the oven (avoiding the light bulb!) with water a couple of times in the first 10 minutes. It gives you an extra blast of moisture and ensures the crust gets unbelievably crunchy!
How to Prepare Bakery Style Bread at Home: Step-by-Step Instructions for my Italian Bread
Alright, let’s turn those simple ingredients into a loaf worthy of any Italian dinner table! Since this recipe is designed to be incredibly friendly to the Beginner Bread Baking crowd, I’ve broken down the process exactly as I do it in my development kitchen. Pay close attention to your timing, especially during the kneading and rising phases, because that’s where we develop the structure for that lovely chewiness.
Mixing and Kneading the Soft and Chewy Italian Loaf Dough
First things first: get all your dry stuff—flour, salt, sugar, and yeast—in a big bowl and whisk it up good. Then, pour in that warm water and the olive oil. Mix it with a sturdy spoon; you’re just looking to combine everything into what I call ‘shaggy dough.’ Don’t panic; it looks messy! Now, turn it out onto a lightly floured surface. We need to knead this for about 5 to 7 solid minutes. Keep working it until it feels smooth and elastic—you should be able to gently stretch a small piece without it tearing immediately. Once it passes the stretch test, lightly oil a clean bowl, pop the dough in there, turn it once to coat, and cover it up! Let it sit in a nice warm spot for 1 to 1.5 hours until it’s doubled. That’s the first rise done!
Shaping and Second Rise for Your Rustic Italian Loaf
Once the dough has puffed up beautifully, it’s time to gently deflate it—give it a soft punch right in the center! Turn it out onto your lightly floured counter again. Now, gently shape it! I usually aim for a nice, long oval shape for a classic baguette-style look. Place that shaped loaf onto a baking sheet lined with parchment paper. This step is important for easy transfer later on. Cover it again, but this time, it only rests for 30 minutes. This second, shorter rise is what sets up that beautiful final shape before the oven blast.
Baking Your Italian Bread with Steam
This is where the crust magic happens! Preheat your oven to 400°F (200°C). Crucially, put an old, shallow pan on the bottom rack while it preheats. Once your loaf has rested those 30 minutes, lightly brush the top with some water and make 3 or 4 quick, decisive slashes across the top with a sharp knife—this helps it expand evenly. Now for the steam: open the door, dump about 1/2 cup of hot water into that hot pan you preheated, and shut the door fast! Bake it for 30 to 35 minutes until it’s deep golden brown outside. As an expert check for doneness, I always aim for an internal temperature of 200°F, which ensures the inside is gloriously cooked through. You can find more detailed tutorials on this precise method over here, which I always recommend checking out if you’re new to steam baking. Don’t forget, you can grab my personal tips for cutting loaf times using instant yeast if you’re in a real hurry!
Ingredient Notes and Substitutions for Making Italian Bread
Since this recipe relies on just a few core components, I want to make sure we talk about those staples for a moment. My professional background in Food Science tells me that the all-purpose flour works just beautifully here, giving us that perfect balance between structure and tenderness. You might wonder about bread flour? You can absolutely use it! Bread flour has higher protein, which will give you a slightly chewier crumb, so feel free to try it out for your next batch!
Regarding the yeast, the recipe calls for active dry yeast, which needs that warm water bath to wake up first—that’s part of the process you saw in the kneading steps. If you only have instant yeast, you can skip the warm water bath entirely and mix the instant yeast right in with the dry ingredients. It speeds up the first rise just a little bit, which is handy if you need a loaf faster!
Also, use a decent quality olive oil here; since it’s one of the main flavor contributors besides the salt, a subtle fruity note is lovely. If you want to try cutting the sugar? Go ahead! Sugar is primarily there to feed the yeast and help with browning, so reducing it slightly won’t harm the bread structure much at all. You can learn more about adjusting ingredients in speedy recipes like this here!
Serving Suggestions: What to Serve with Italian Bread
The absolute best part about baking this lovely loaf is figuring out how to devour it warm from the oven! Seriously, the aroma alone is heavenly, but the taste when it’s still warm? Unmatched.
This bread is sturdy enough to handle anything. It makes amazing Italian Sandwich Bread—think salami, mozzarella, and basil piled high. But truly, my favorite way is simple Italian Bread for Dipping. Grab a shallow bowl, fill it with good olive oil, then add a sprinkle of flaky salt, some dried oregano, and a pinch of crushed red pepper flakes. You just tear off chunks and dip away!
It’s also the perfect companion for Sunday gravy or any hearty pasta sauce. You can find some great ideas on how to serve this crusty delight right here on Dana’s site!
Storage & Reheating Instructions for Your Warm Italian Loaf
Now that you have achieved that perfect loaf, we need to discuss keeping that crust crunchy! This is a hard one, because most home cooks instinctively wrap their bread in plastic wrap, but trust me, that seals in moisture and makes your beautiful crispy crust go soft instantly.
For storing, use a paper bag or wrap it loosely in a clean kitchen towel and keep it on the counter for 1 to 2 days. If you absolutely need more time, you can freeze any leftover slices wrapped tightly in plastic film and foil. To bring that crunch back, just pop the bread—wrapped or unwrapped—into a 350°F oven for about 5 to 8 minutes. The dry heat instantly crisps up that exterior again! You can check out some great storage tips here.
Frequently Asked Questions About This Italian Bread Recipe
I know that whenever I start making a new style of bread, I always have a million little questions buzzing around! Baking is chemistry, after all, and sometimes you need confirmation before you start mixing. I’ve collected a few of the most common questions I get about achieving this crusty Italian bread recipe perfection at home.
Can I make this a No Knead Italian Bread?
That’s a great question! While this recipe benefits greatly from that 7 minutes of kneading to develop the gluten needed for that soft, chewy center, you *could* try a very long, cold rise (like 12-18 hours in the fridge) to develop the structure without working it by hand. However, for the absolute best results delivering that authentic bakery style bread at home texture, I really recommend sticking to the 5 to 7 minutes of kneading specified for this straightforward recipe. It’s worth the effort!
How long until my bread is ready in total?
While the hands-on time is super fast—only about 15 minutes total—you need to account for rising time. The entire process, including the first rise (1 to 1.5 hours), the second short rise (30 minutes), and the 35 minutes of baking, puts the total time around 2 hours and 25 minutes. That’s honestly quite quick for an easy homemade bread that tastes this incredible!
Can I use bread flour instead of all-purpose flour?
Yes, absolutely! As I mentioned above, bread flour has a higher protein content, which means you’ll get a slightly stronger gluten network. If you swap out the all-purpose flour for bread flour, you’ll end up with a loaf that is noticeably chewier. It’s a wonderful variation, especially if you plan to use the bread for hearty filling like in an Italian sandwich bread. If you tried it, I’d love to hear how it went over on my comments section!
Nutritional Estimates for Homemade Italian Bread
As a food scientist before I became a full-time recipe developer, I feel like I have to give a little disclaimer here! When you’re baking at home, especially with simple ingredients like these, the nutritional breakdown can change slightly based on how you measure or if you use a smidgen less oil. So please remember that these figures are estimates based on the recipe as written, which yields about 14 standard slices.
This is fantastic news if you’re looking for an easy, delicious side dish without a lot of added fat or sugar! Here are the numbers per slice, just for your reference:
- Serving Size: 1 slice
- Calories: 150
- Sugar: 0.5g
- Sodium: 250mg
- Fat: 2g
- Saturated Fat: 0.3g
- Unsaturated Fat: 1.7g
- Trans Fat: 0g
- Carbohydrates: 30g
- Fiber: 1.5g
- Protein: 4g
- Cholesterol: 0mg
Isn’t that wonderful? Simple, whole ingredients lead to clean nutrition when you’re making crusty Italian bread yourself! You are in complete control of what goes into your family’s food, and that’s such a great feeling.
Share Your Golden Brown Italian Loaf Creations
Well, we did it! We turned humble pantry staples into a stunning, bakery-quality loaf of Italian bread. Now, the absolute best part of my job as a recipe developer is hearing from you—my home cooks! I truly hope you had an amazing time making this dough and that your kitchen smells like the best Italian bakery right now.
I pour my heart and my Food Science knowledge into creating these recipes, so when you try it, please let me know how it turned out for you. Did you love the steam trick? Was your crust perfectly crackly? Tell me everything!
Here are a few ways you can share your success:
- Rate the Recipe: If you loved this recipe and it earned a spot in your regular rotation, please leave a quick star rating right below this section. Nothing helps me more than knowing this Best Italian Bread Recipe is working for people around the country! It helps other beginner bakers feel confident trying it out.
- Leave a Comment: Have a question about substituting flour or kneading time? Or maybe you found a new twist that worked perfectly? Drop a comment below. I read every single one and love troubleshooting with you.
- Tag Us on Social Media: Seeing your gorgeous, golden brown Italian loaf creations is the highlight of my week! Snap a picture of that crusty exterior and tag us. Seeing your success is what keeps me passionate about demystifying baking for everyone. You can see what others are making here for inspiration!
Thank you so much for baking with me today. Happy slicing, dipping, and enjoying that wonderful, warm homemade bread!
PrintEasy Crusty Italian Bread Recipe: Bakery Style Loaf
Bake bakery-style Italian bread at home with this easy recipe. You get a golden, crispy crust and a soft, chewy interior using simple ingredients. This recipe is perfect for beginners.
- Prep Time: 15 min
- Cook Time: 35 min
- Total Time: 2 hours 25 min
- Yield: 1 large loaf 1x
- Category: Bread
- Method: Baking
- Cuisine: Italian
- Diet: Vegetarian
Ingredients
- 3 1/2 cups all-purpose flour
- 1 1/2 teaspoons salt
- 1 teaspoon granulated sugar
- 2 1/4 teaspoons active dry yeast (1 packet)
- 1 1/4 cups warm water (about 105-115°F)
- 2 tablespoons olive oil
Instructions
- In a large bowl, mix the flour, salt, sugar, and yeast together.
- Add the warm water and olive oil to the dry ingredients. Mix with a wooden spoon until a shaggy dough forms.
- Turn the dough out onto a lightly floured surface. Knead the dough for 5 to 7 minutes until it becomes smooth and elastic.
- Lightly grease a clean bowl with olive oil. Place the dough in the bowl, turning it once to coat. Cover the bowl with plastic wrap or a clean kitchen towel.
- Let the dough rise in a warm place for 1 to 1.5 hours, or until it doubles in size. This is your first rise.
- Gently punch down the risen dough. Shape it into a long, oval loaf.
- Place the shaped loaf on a baking sheet lined with parchment paper or on a pizza stone. Cover loosely and let it rest for 30 minutes for the second rise.
- Preheat your oven to 400°F (200°C). Place a shallow pan on the bottom rack of the oven while preheating to create steam.
- Before baking, lightly brush the top of the loaf with water. Score the top of the loaf with a sharp knife or razor blade 3 or 4 times.
- Carefully pour about 1/2 cup of hot water into the preheated shallow pan to create steam, then quickly close the oven door.
- Bake for 30 to 35 minutes, or until the crust is deep golden brown and the internal temperature reaches 200°F (93°C).
- Remove the bread from the oven and let it cool completely on a wire rack before slicing.
Notes
- For an extra crispy crust, spray the sides of the oven with water a few times during the first 10 minutes of baking.
- This bread is excellent for dipping in olive oil or serving alongside pasta dishes.
- If you prefer a slightly faster rise, use instant yeast and mix it directly with the dry ingredients without proofing it in the water first.
Nutrition
- Serving Size: 1 slice
- Calories: 150
- Sugar: 0.5
- Sodium: 250
- Fat: 2
- Saturated Fat: 0.3
- Unsaturated Fat: 1.7
- Trans Fat: 0
- Carbohydrates: 30
- Fiber: 1.5
- Protein: 4
- Cholesterol: 0