
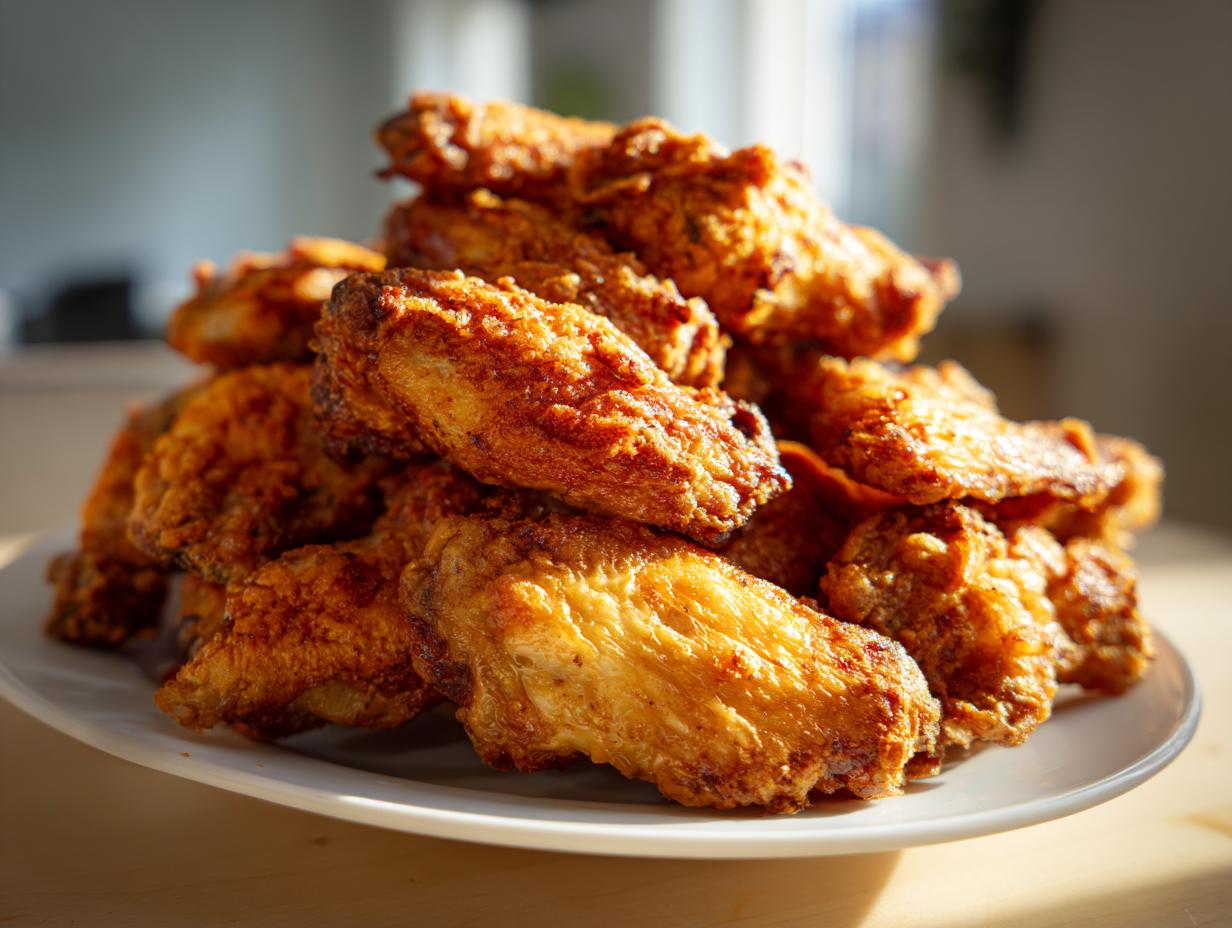
If you’re anything like me, you’ve been burned by baked chicken wings before. You watch them closely, you pray to the oven gods, and yet—soggy, rubbery skin. It’s the biggest letdown when you’re craving that perfect game-day snack. But trust me when I say you can banish the soggy bottom forever! I spent years in professional test kitchens, not just cooking, but studying the actual science of how heat interacts with chicken skin. That knowledge is why I can promise you that this simple oven-baked method, featuring a key little ingredient, reliably produces shatteringly crispy **crispy baked chicken wings** that taste every bit as good as deep-fried, without needing a vat of oil. Let’s ditch the mess and get to the crunch!
- Why You Will Achieve Ultra Crispy Wings Oven Results
- The Essential Ingredients for Crispy Baked Chicken Wings
- How to Bake Crispy Wings: Step-by-Step Instructions
- Tips for Success with Your Crispy Baked Chicken Wings
- Flavor Variations: Beyond Classic Crispy Baked Chicken Wings
- Serving Suggestions for Game Day Chicken Appetizers
- Storage and Reheating for Your No Fry Chicken Wings
- Frequently Asked Questions About Crispy Baked Chicken Wings
- Nutritional Estimates for Your Crispy Baked Chicken Wings
- Share Your Success with These Crispy Baked Chicken Wings
Why You Will Achieve Ultra Crispy Wings Oven Results
The secret to getting those glorious, crunchy results in the oven—what I call **Ultra Crispy Wings Oven** results—comes down to chemistry and airflow, not just cranking up the heat. My food science background showed me exactly what messes with crisping: moisture! We attack this in two ways. First, we use a touch of baking powder in our rub. This tiny bit raises the pH level on the skin surface, which helps the proteins break down faster and dry out beautifully during that initial bake. Second, you must use a wire rack over a baking sheet. This lets the heat circulate completely around the wing, preventing any moisture from sitting underneath. If you plan to sauce them later, maybe tossing them in a Buffalo glaze like the one you find at this great recipe shows, air circulation is even more vital!

The Essential Ingredients for Crispy Baked Chicken Wings
You don’t need much fancy stuff for these wings, which is the best part! We’re keeping the ingredient list short and focused on exactly what gets the skin that crunch. You’ll need about two pounds of wings, separated into drumettes and flats so they cook evenly—no huge clumps! The dry rub is composed of salt, garlic powder, onion powder, pepper, and just a hint of cayenne if you like a little kick. Don’t forget the melted butter for tossing afterwards. But the absolute MVP here?
- 2 lbs chicken wings, separated
- 1 tablespoon **aluminum-free baking powder** (this is your MVP!)
- 1 teaspoon kosher salt
- 1 teaspoon garlic powder
- 1 teaspoon onion powder
- 1/2 teaspoon black pepper
- 1/4 teaspoon cayenne pepper (only if you want it spicy)
- 2 tablespoons melted butter (optional toss)
- 1/4 cup Buffalo or other sauce (optional)
Ingredient Notes and Substitutions for Your Crispy Baked Chicken Wings
Now, let’s talk about that baking powder. You really, really want to use *aluminum-free* baking powder if you can find it. Regular baking powder sometimes leaves behind a slight metallic taste when used at high heat, which we absolutely do not want distracting from our beautiful chicken flavor! If you accidentally grab baking soda, forget it—the flavor will be off. If you decide to skip the optional butter and sauce toss entirely upon finishing, you’ll end up with intensely flavorful dry-rub wings that stay crispier for much longer. For saucy wings, toss immediately and serve fast! You can find a great guide on sauce timing over at Chef Savvy.
How to Bake Crispy Wings: Step-by-Step Instructions
So, how do we actually pull off this magic trick? Learning **How to Bake Crispy Wings** is all about preparation and controlling the heat. First things first: preheat that oven way up high to 425°F. You want it screaming hot before those wings even think about going in. Line a sheet pan with foil—trust me, cleaning baked-on grease is no fun—and put your wire rack right on top. That rack is essential for airflow, remember? For an in-depth look at timing, you can see great advice over at Run Lift Eat Repeat.
Prepping the Wings for Maximum Crunch
This is the step I see most people rush, and they end up with sad, floppy wings. Don’t ruin the great ingredients we just talked about! You have to pat those wings bone-dry using paper towels until you feel like you’re going to rub the skin off. That surface moisture is the enemy of crunch. When I was testing these professionally, I learned that patting them dry, turning them over, and patting them *again* is the secret to building the proper foundation for your **crispy baked chicken wings**.
Once they are dry, combine your baking powder mixture in a bowl and toss those wings until they are totally coated. You want a thin, even layer of powder covering every nook and cranny.
The Two-Stage Baking Process for Juicy Inside Crispy Outside Wings
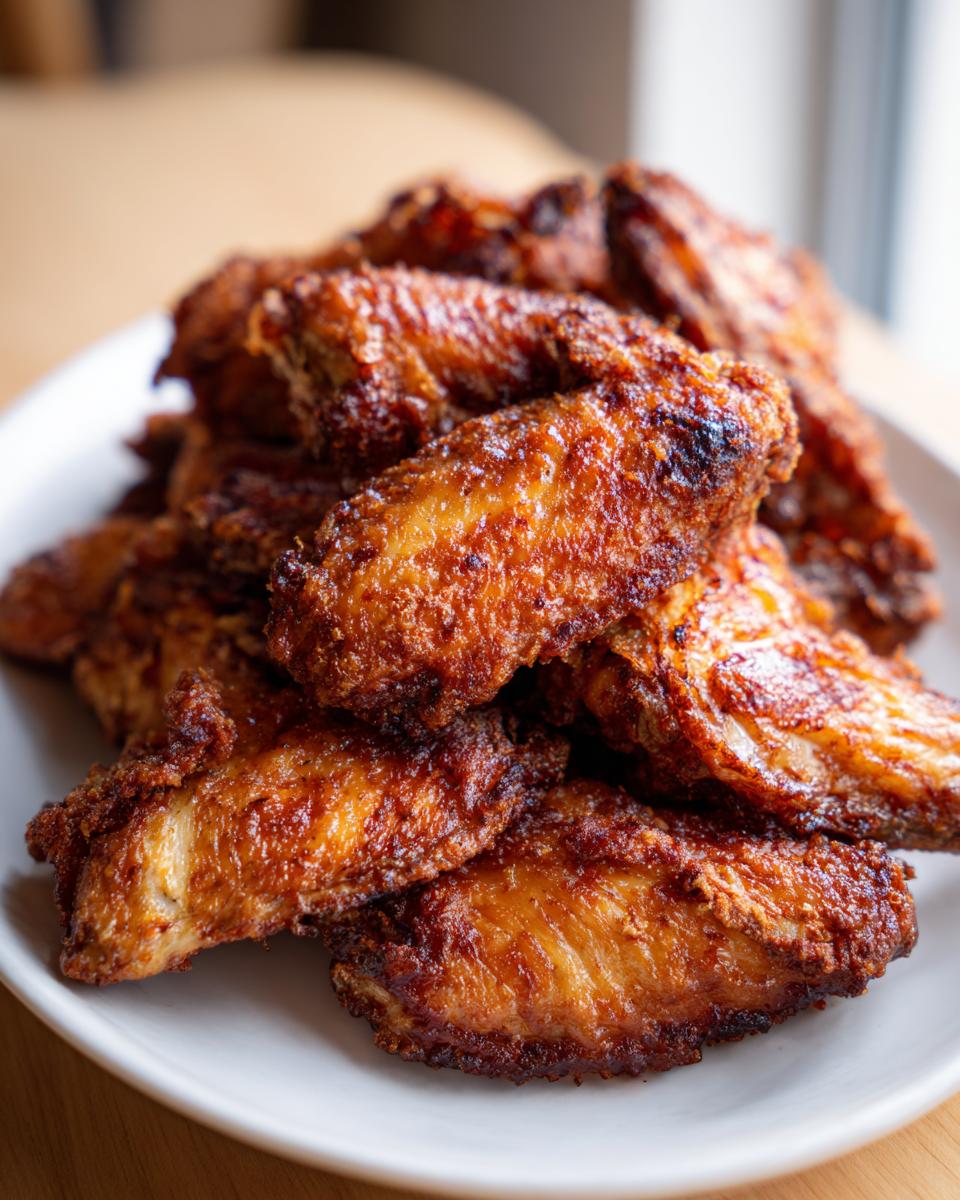
Place those seasoned wings on the rack, making sure they aren’t touching—give them some space to breathe! Bake them hard at 425°F for 25 minutes. This high blast immediately starts rendering the fat and getting the drying action going. Now for the tricky part: flip them over. Once flipped, drop the oven temperature down to 400°F and bake for another 20 to 25 minutes. This second phase lets the inside finish cooking gently, ensuring you get those perfect **Juicy Inside Crispy Outside Wings** without scorching the outside coating.
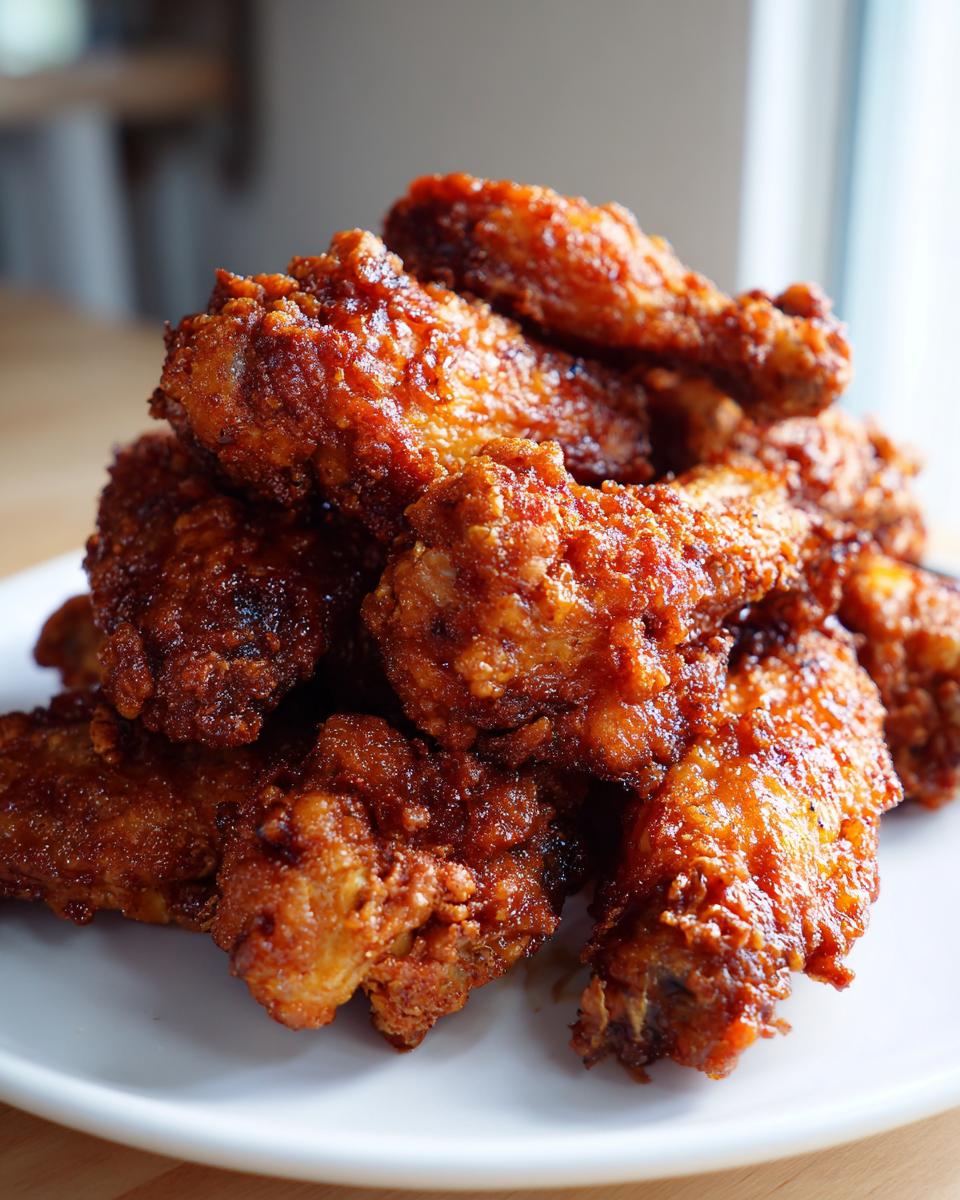
When they look perfectly brown and crunchy, pull them out. If you’re saucing them, let them get a quick toss in melted butter and then your favorite sauce right away before serving hot. If you want crunchy wings that stay that way longer, check out the tips on timing over at What Molly Made.
Tips for Success with Your Crispy Baked Chicken Wings
Achieving those legendary, shatter-crisp results with **crispy baked chicken wings** really comes down to respecting two main rules I learned back in the lab. First, air circulation is non-negotiable! If you skip the wire rack, you are guaranteeing a soggy bottom because steam gets trapped. I always check the rack placement before they even go in the oven—your wings need room to breathe on all sides.
Second, think like a restaurant! If you are planning to cover these beauties in Buffalo sauce, you must sauce them immediately after they come out of the oven while they are still piping hot, and then get them back under the broiler for just two or three minutes. This re-crisps the skin that inevitably softens when the sauce hits it. For the crispiest experience possible, you should really check out the method shared by The Women Home on saucing timing. If you want them to last longer on a party platter, skip the sauce entirely, or use a dry seasoning like the one found on Al Dente Diva.
Flavor Variations: Beyond Classic Crispy Baked Chicken Wings
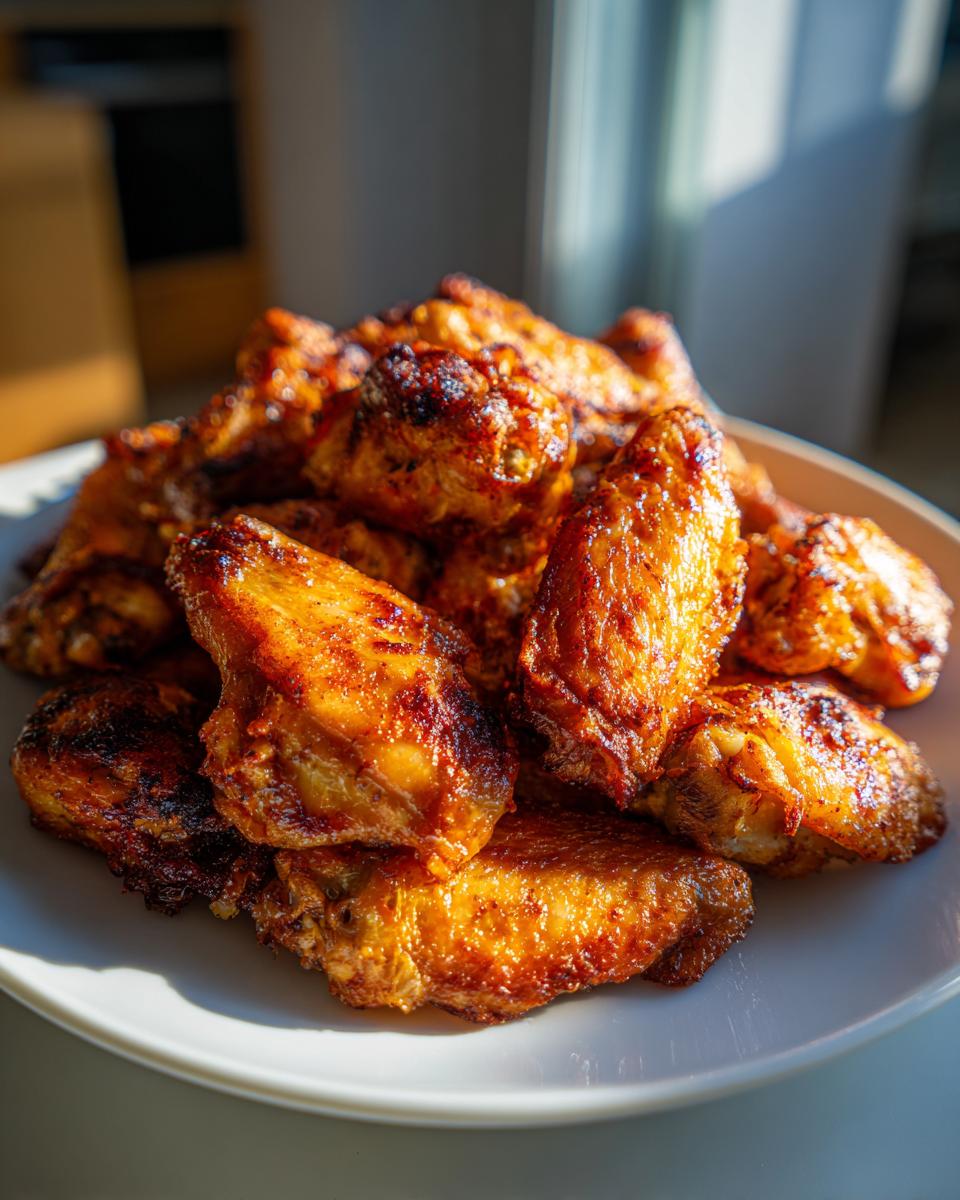
We start with this killer base—the drying trick and the baking powder magic—which gives us incredible texture. But honestly, those spicy, seasoned wings are just begging for us to play around with the flavor profiles! That dry rub we used is wonderful, but you can totally swap it out or add to it. The beauty of using a dry method first is that the skin gets super crisp before we even think about adding wet sauce.
If you’re tired of standard spice mixes, try swapping our initial seasoning blend for a robust Lemon Pepper rub. You just need to replace the cayenne with a teaspoon of robust lemon pepper seasoning—keep the baking powder and salt, though! The citrus cuts through the richness of the chicken fat perfectly. If you’re looking for the absolute best **Seasoning for Crispy Baked Wings**, you have to test a Garlic Parmesan blend.
For Garlic Parmesan **crispy baked chicken wings**, you bake them naked (no butter or sauce) following the first 45 minutes of the recipe. Then, when they come out, toss them immediately in a mix of two tablespoons of melted butter, half a cup of grated Parmesan cheese, and about a teaspoon of garlic powder. Toss them quickly and serve right away! You can see what kind of great ideas they have over at My Kitchen Kind.
If you prefer a wet sauce finish, Buffalo is great, but try a sweet and spicy Mango Habanero sauce. Since the wings are already done, you just toss them lightly in the sauce right before serving. If you need them to stay crispy longer for a party, try dusting them with your favorite dry rub *after* they come out of the oven instead of using a wet sauce!
Serving Suggestions for Game Day Chicken Appetizers
Now that you have these perfectly crunchy wonders, how should you serve them up? For me, these **Game Day Chicken Appetizers** are just begging for the classics. You absolutely need crisp, cold celery sticks and carrot sticks on the side. Why? Because crunch deserves a counter-crunch! Plus, they are the perfect edible vehicle for our dipping sauces.
Speaking of dips, you can’t go wrong with a big bowl of ultra-creamy blue cheese dressing or cool ranch. I find the richness of the cool dip balances the heat of the Buffalo sauce perfectly. For a guaranteed touchdown, check out the way the folks at A Spicy Perspective plate their wings for maximum visual appeal!
Storage and Reheating for Your No Fry Chicken Wings
This is where a lot of people go wrong after they finish a batch of **No Fry Chicken Wings**! You are so focused on making them totally crispy when they come out of the oven that you forget about the leftovers. And let’s be honest, sometimes you make too many because you just can’t stop eating them!
If you have any left—maybe a few sauced ones from the bottom of the bowl—you need to handle them gently. If you sauced them, try to blot off the excess liquid gently with a paper towel before storage. Then, store them immediately in an airtight container in the fridge. They won’t stay shatteringly crisp, and that’s just the reality when moisture gets involved, but we can rescue them!
The microwave is your enemy here; it turns wings into mushy steam-pockets. Seriously, don’t do it. The best way to get that crunch back is to use high, dry heat. Preheat your oven to about 375°F, or crank up your air fryer if you have one. Place the wings directly on a wire rack set over a foil-lined sheet pan—yes, we are using that rack magic again even for reheating! Bake or air fry for about 8 to 10 minutes until they are hot all the way through and the skin has tightened back up. This brings back a surprising amount of that original texture!
If you made dry-rub wings (no sauce at all), they actually reheat beautifully! You can often get away with just 5 minutes in a hot oven. For more great tips on keeping your wings flavorful, check out the saucing timing advice on Yummy Kitchen.
Frequently Asked Questions About Crispy Baked Chicken Wings
I know you might still have a lingering question or two, especially if you’ve had sad wings in the past! That’s totally normal. My goal is to give you the full confidence to nail this recipe every single time you cook. Getting that perfect crunch is really about following the science, and these answers should help clear up any last-minute confusion about achieving the **Best Crispy Baked Wings Recipe**.
Can I skip the baking powder in this Easy Chicken Wing Recipe?
Oh, please don’t! I know it seems weird, but that baking powder is essential for this specific result in our **Easy Chicken Wing Recipe**. It’s the pH-raiser that helps dry out the skin and lets it brown instead of steam. If you skip it, you’ll end up with something closer to boiled skin rather than the shatteringly crisp texture we are aiming for. Seriously, make sure you have it!
How do I make these Healthy Chicken Wings even lighter?
That’s a great question if you’re watching fat intake closely. Our recipe is already miles ahead of frying, but to make them the absolute lightest, you should skip both the melted butter and any sauce toss at the end. The flavor still comes through beautifully from the dry rub we used in step three. Just bake them, take them off the rack, and enjoy them as pure **Healthy Chicken Wings**! They’ll still be delicious and juicy inside.
What is the best temperature for High Heat Baked Wings?
For the initial blast, you absolutely need that high heat. We start at 425°F! This intense heat is what forces the fat out of the skin quickly, which is the whole point when trying to achieve **High Heat Baked Wings**. After that initial 25 minutes, we drop it down to 400°F so we don’t end up burning the beautiful crust before the meat is fully cooked. For more recipe ideas that focus on temperature control, you can browse the excellent collection at the Nom Nom Notebook.
Nutritional Estimates for Your Crispy Baked Chicken Wings
Okay, so while my background is rooted in recipe development and food science, I need to be super clear about one thing: these numbers are estimates! They help give us a guideline, which is nice when planning meals, especially if you’re worried about keeping things light. These numbers reflect the wings tossed with just the initial dry rub and that drizzle of butter, but they totally change if you dump a whole cup of sugary Buffalo sauce on them later! Remember, these figures are based on a serving size of about 5 wings.
When you look at the breakdown, you can see why they are a great choice for game day appetizers—lots of protein! I always suggest you check the exact packaging for things like the baking powder and butter you use, because that’s where the real numbers will vary. For full details on protein and fat content based on different sauce options, take a peek at the ideas over at Breeze Bread.
- Serving Size: 5 wings
- Calories: Approximately 350
- Protein: Around 30g
- Fat: About 25g (mostly from the skin rendering)
- Carbohydrates: Very low, only about 2g
- Sugar: Minimal, around 1g
So, while they aren’t strictly ‘low fat’ because we let the skin crisp up (which lets the fat render out!), they are definitely a much healthier choice than anything steeped in oil. You’re getting great flavor and satisfying crunch without that heavy feeling afterwards!
Share Your Success with These Crispy Baked Chicken Wings
Honestly, after all this talk about the science of crispiness and making sure your wings aren’t soggy, the only thing missing is hearing about *your* success! I truly believe that when you follow these steps—especially drying the wings and using that magic baking powder—you end up with the best **crispy baked chicken wings** you’ve ever made without frying.
Once you’ve pulled that first perfect batch off the rack, I would absolutely love it if you came back here and let me know how it went! Did the two-stage temperature change make a difference for you? Did you go for the Buffalo sauce or stick to the dry rub? Tell me everything in the comments below!
If you happen to snap a photo of your beautifully golden and crunchy wings—maybe set up next to some celery sticks—please tag me! Seeing your creations in your kitchens is literally the best part of running Frosted Fancies. It proves the science works for everyone! When you’re ready, leave a rating (and if you got that unbelievable crunch, don’t hesitate to give it five stars!) and share your thoughts. If you want to check out some other amazing baked creations, see what’s getting rave reviews over at Emily’s Sweets!
PrintUltra Crispy Baked Chicken Wings: The No-Fry Secret

You can achieve shatteringly crisp skin on chicken wings using only your oven. This reliable recipe uses a simple baking powder trick and high heat to render fat, giving you juicy meat and the crunch you expect without deep frying.
- Prep Time: 15 min
- Cook Time: 50 min
- Total Time: 65 min
- Yield: 4 servings 1x
- Category: Appetizer
- Method: Baking
- Cuisine: American
- Diet: Low Fat
Ingredients
- 2 lbs chicken wings, separated into drumettes and flats
- 1 tablespoon baking powder (aluminum-free preferred)
- 1 teaspoon kosher salt
- 1 teaspoon garlic powder
- 1 teaspoon onion powder
- 1/2 teaspoon black pepper
- 1/4 teaspoon cayenne pepper (optional)
- 2 tablespoons unsalted butter, melted (for tossing after baking)
- 1/4 cup Buffalo sauce or your favorite sauce (optional)
Instructions
- Preheat your oven to 425 degrees Fahrenheit. Line a large baking sheet with foil for easy cleanup. Place a wire cooling rack on top of the prepared baking sheet.
- Pat the chicken wings completely dry using paper towels. This step is crucial for crispiness.
- In a medium bowl, combine the baking powder, salt, garlic powder, onion powder, black pepper, and cayenne pepper.
- Add the dried chicken wings to the bowl. Toss thoroughly until every piece is evenly coated with the dry seasoning mixture. The baking powder reacts with the chicken skin to promote browning and crisping.
- Arrange the seasoned wings in a single layer on the wire rack. Do not let the wings touch each other; space them out for air circulation.
- Bake for 25 minutes at 425 degrees Fahrenheit.
- Flip the wings over. Reduce the oven temperature to 400 degrees Fahrenheit and bake for another 20 to 25 minutes, or until the skin is deeply golden brown and very crisp.
- Remove the wings from the oven. Immediately place them in a clean bowl. Drizzle with melted butter and toss to coat lightly.
- If you want sauce, add your Buffalo sauce now and toss again until coated. For extra crispiness after saucing, return the wings to the oven or broiler for 2 to 3 minutes, watching closely to prevent burning.
- Serve your crispy baked chicken wings immediately with celery sticks and blue cheese dressing.
Notes
- The key to ultra crispy wings is ensuring the skin is completely dry before seasoning.
- Using a wire rack allows heat to circulate underneath the wings, preventing a soggy bottom.
- If you skip the sauce, the wings will stay crispier longer. Sauce them just before serving.
- For a simple dry rub finish, skip the butter and sauce steps and toss with extra seasoning blend after baking.
Nutrition
- Serving Size: 5 wings
- Calories: 350
- Sugar: 1
- Sodium: 450
- Fat: 25
- Saturated Fat: 7
- Unsaturated Fat: 18
- Trans Fat: 0
- Carbohydrates: 2
- Fiber: 0
- Protein: 30
- Cholesterol: 110