
Hello there, and welcome! I’m Katherine, and honestly, there is nothing quite as comforting as sinking a fork into a slice of the richest, creamiest dessert imaginable. If you’re searching for that perfect, melt-in-your-mouth experience, you have absolutely landed in the right place. This is my foolproof, classic homemade butterscotch pie recipe, and trust me, it’s going to be your new standard. After spending years as a professional recipe developer focusing on the science behind perfect textures, I figured out exactly how to nail that silky smooth filling without any of the fuss or guesswork. Get ready for the best pie you’ve ever made!
- Why This Classic Butterscotch Pie Recipe Works Every Time
- Gathering Ingredients for Your Homemade Butterscotch Pie
- Step-by-Step Instructions for Classic Butterscotch Pie
- Tips for the Best Butterscotch Pie Success
- Quick Dessert Option: No Bake Butterscotch Pie Variation
- Storing and Reheating Your Homemade Butterscotch Dessert
- Serving Suggestions for This Comfort Food Desserts Classic
- Frequently Asked Questions About Butterscotch Pie Recipe
- Nutritional Estimates for One Slice of Butterscotch Pie
- Share Your Homemade Butterscotch Dessert Experience
- Nutritional Estimates for One Slice of Butterscotch Pie
- Share Your Homemade Butterscotch Dessert Experience
Why This Classic Butterscotch Pie Recipe Works Every Time
Okay, let’s talk technique because that’s where the magic happens, especially when we are aiming for that iconic butterscotch pie. I took all the trial-and-error I learned in professional kitchens and simplified it for you. No more grainy fillings or runny tops here; we are aiming for pure, nostalgic perfection that holds its shape beautifully. It’s these few precise steps that separate a good pie from a legendary one.
- We cook the starch properly before adding the eggs, which makes the structure sturdy.
- We always temper the yolks—this is non-negotiable for a silky texture!
- We use a mix of brown sugar and butter that caramelizes just right during cooking.
This method ensures that everything sets up perfectly when it cools down. You can check out some other fantastic family-approved pie methods over here for inspiration as well: Classic Grandma’s Butterscotch Pie Recipe.
The Science Behind Silky Smooth Pie Filling
The secret to that *Creamy Butterscotch Filling* is simply giving the cornstarch a head start. By boiling the starch mixture first, we allow the starch granules to fully hydrate and swell up. When the tempered egg yolks join the party, they stabilize that structure completely. This prevents weeping and graininess, locking in that smooth, luxurious finish we all dream about!
Gathering Ingredients for Your Homemade Butterscotch Pie
You know, having the right ingredients lined up before you even start cooking is half the battle won! Especially for a showstopper like this butterscotch pie, preparation makes all the difference. I’ve listed out everything you need below, divided into the rich filling and the fluffy topping. Remember, this pie relies on simple pantry staples, but using good quality butter makes that *Sweet Caramel Dessert* flavor really shine through. You can find links to some of my favorite ingredient notes on this collection, too: Butterscotch Pie recipes!
Essential Components for the Creamy Butterscotch Filling
For the base that makes your kitchen smell like heaven, you’ll need:
- 1 (9 inch) unbaked pie crust – make sure it’s completely cooled!
- 1 cup packed light brown sugar – pack it in there!
- 1/4 cup cornstarch
- 1/4 teaspoon salt
- 1 1/2 cups cold water
- 3 large egg yolks, lightly beaten – this is key for richness!
- 2 tablespoons unsalted butter
- 1 teaspoon vanilla extract
Ingredients for the Perfect Butterscotch Meringue Pie Topping
The meringue is what gives the classic pie that towering, glorious cap. For the fluffiest, most stable topping, make sure you use egg whites that are at room temperature. Seriously, this is my expert trick—room temperature whites whip up to a much higher volume than cold ones!
- 3 large egg whites, room temperature
- 1/4 teaspoon cream of tartar
- 6 tablespoons granulated sugar
Step-by-Step Instructions for Classic Butterscotch Pie
Alright, let’s get baking! This is where we put all those great ingredients to work. We need clear instructions because we are aiming for that incredible, show-stopping result. Don’t worry about rushing; this isn’t a race. Precision is what makes this butterscotch pie taste like it came straight from an old-school bakery. Remember, we’re baking the crust first, so make sure that shell is completely cool before we add the hot filling!
Preparing the Pie Crust Base
First things first: the foundation. If you’re using a store-bought pastry crust or making one from scratch, you absolutely must blind bake it until it’s lightly golden. I usually check the package instructions, but generally, that means baking at about 375 degrees F until it’s sealed and firm. Once it’s out, let it cool down completely on a wire rack. A warm or hot shell will melt our gorgeous filling, and nobody wants that soupiness! If you decided to use a graham cracker crust for an Easy Butterscotch Dessert, just press it firmly into your pie plate and stick it in the fridge to firm up while we tackle the filling.
Cooking the Silky Smooth Pie Filling
Grab a medium saucepan—this is where the caramel magic starts. Whisk together your brown sugar, cornstarch, and salt until they look like one uniform, powdery mix. Next, slowly whisk in that cold water until everything smooths out and there are no lumps clinging to the bottom. Now, turn the heat to medium. You must stir constantly here—seriously, don’t walk away! We are cooking this until it boils and thickens up like pudding. Once it hits that boil, let it bubble hard for just one full minute while still stirring, then pull it right off the heat. This step gets rid of that raw starch flavor the best way possible.
Tempering and Finishing the Creamy Butterscotch Filling
This next part is the single most important step to guarantee that *Silky Smooth Pie Filling*. We need to temper the egg yolks. Take your lightly beaten yolks in a separate little bowl. Now, scoop about one cup of that hot sugar mixture from the saucepan and drizzle it *very* slowly into the yolks while whisking the yolks non-stop. If you dump it fast, you’ll get scrambled eggs, and we’ll cry! Once those yolks are warmed up gently, pour that tempered yolk mixture right back into the saucepan with the rest of the hot sugar. Put it back on medium heat and stir constantly until it thickens *again* and just begins to bubble softly. Once it looks thick, stir in your butter and vanilla until everything melts and blends. It should look incredibly glossy! If you want to see some other amazing pie crust techniques, check out these tips here: Best Butterscotch Pie methods.
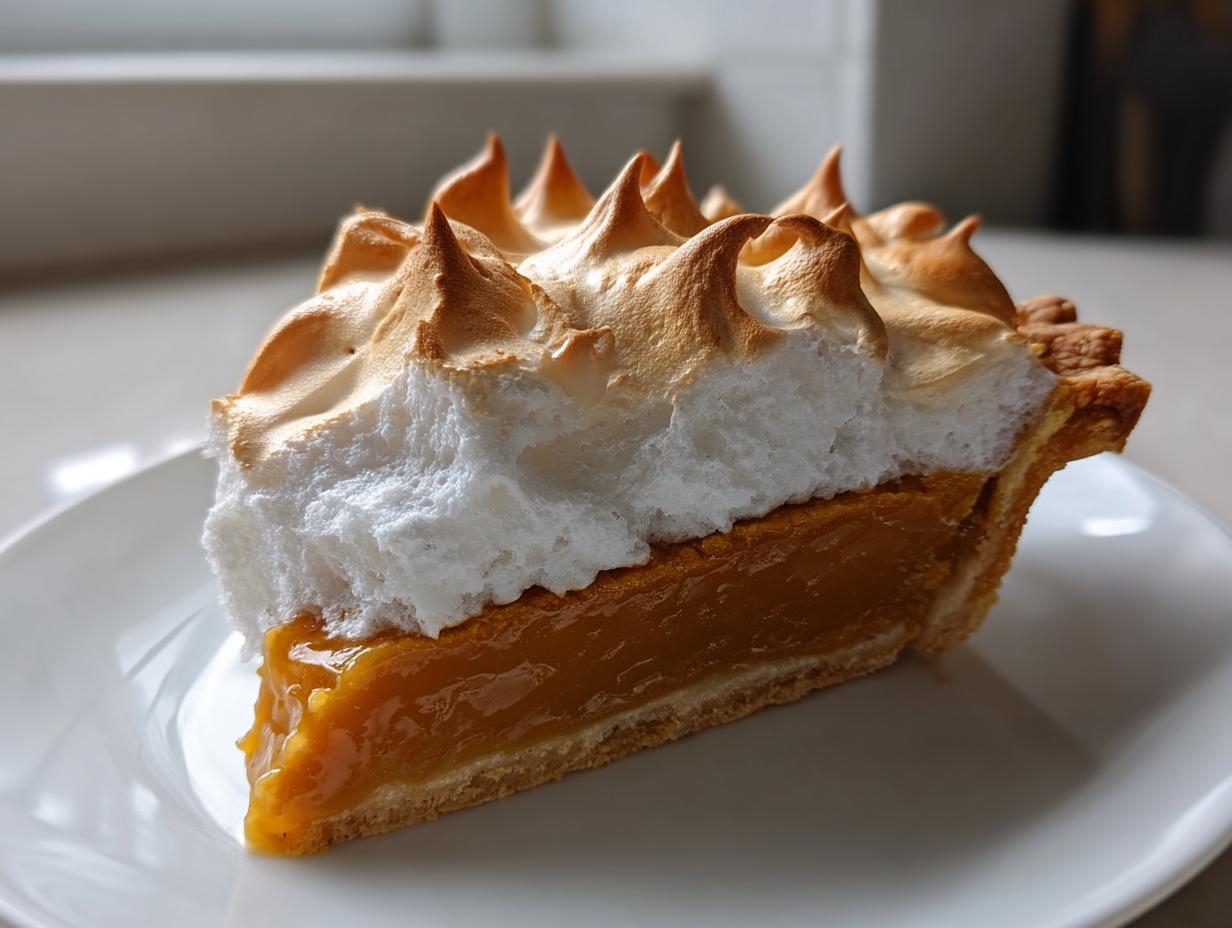
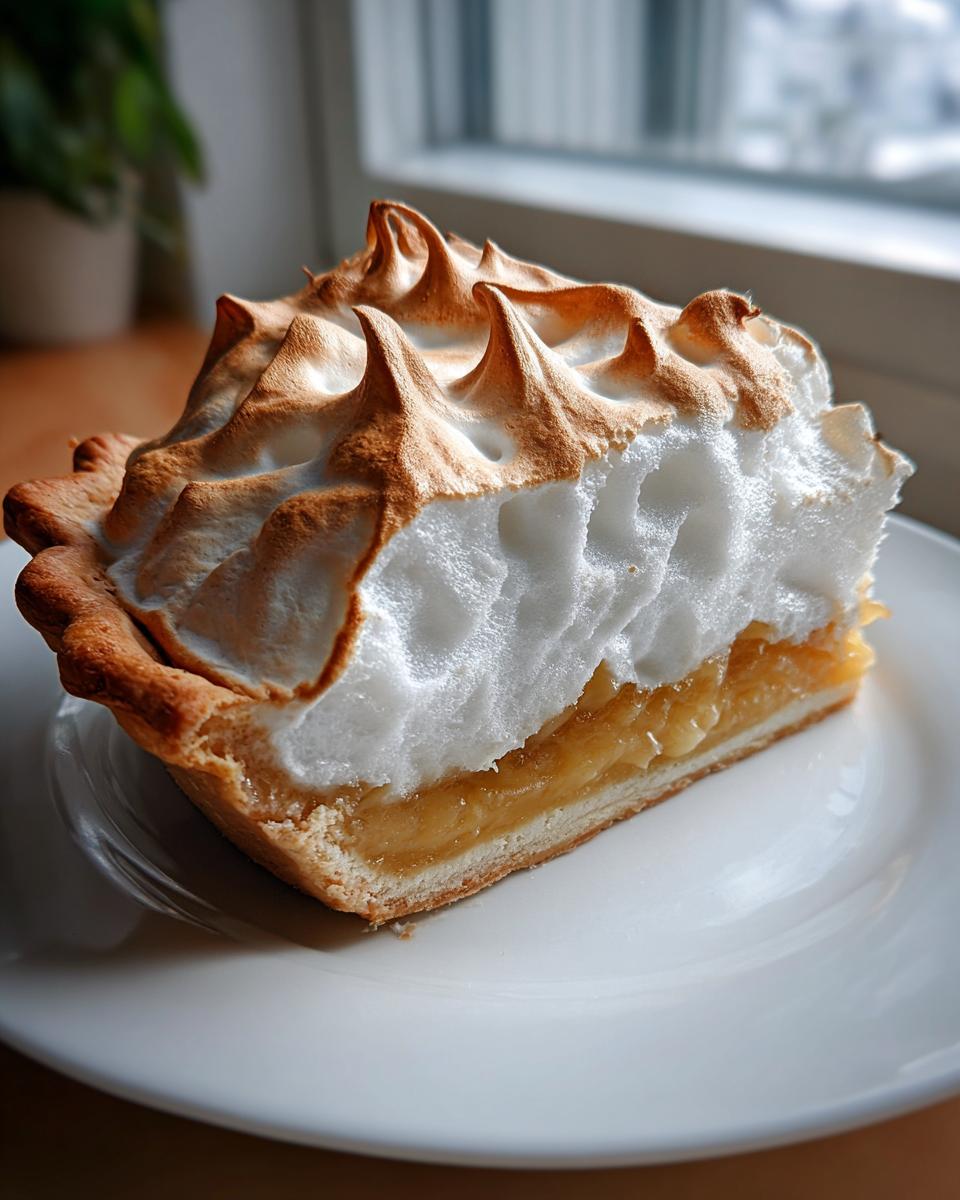
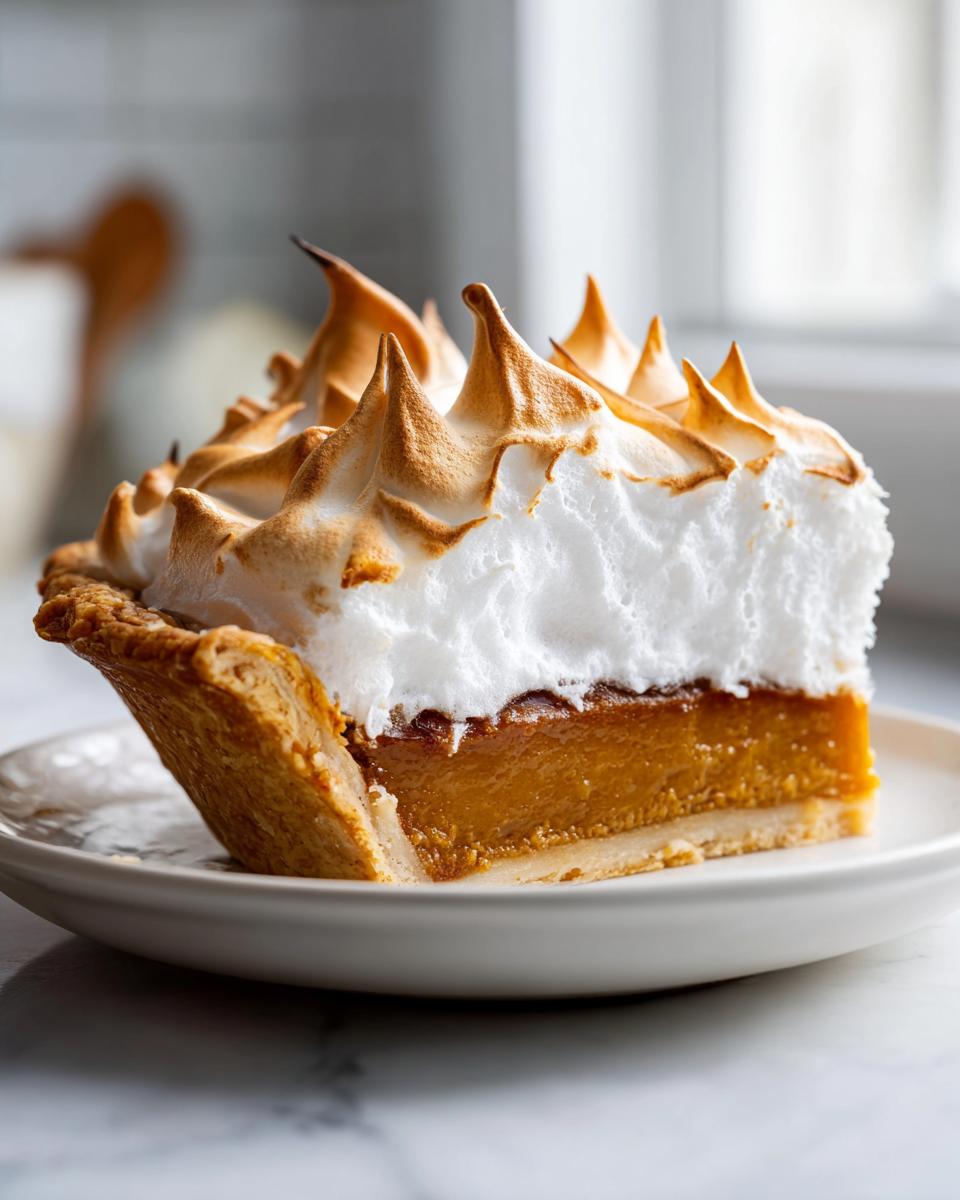
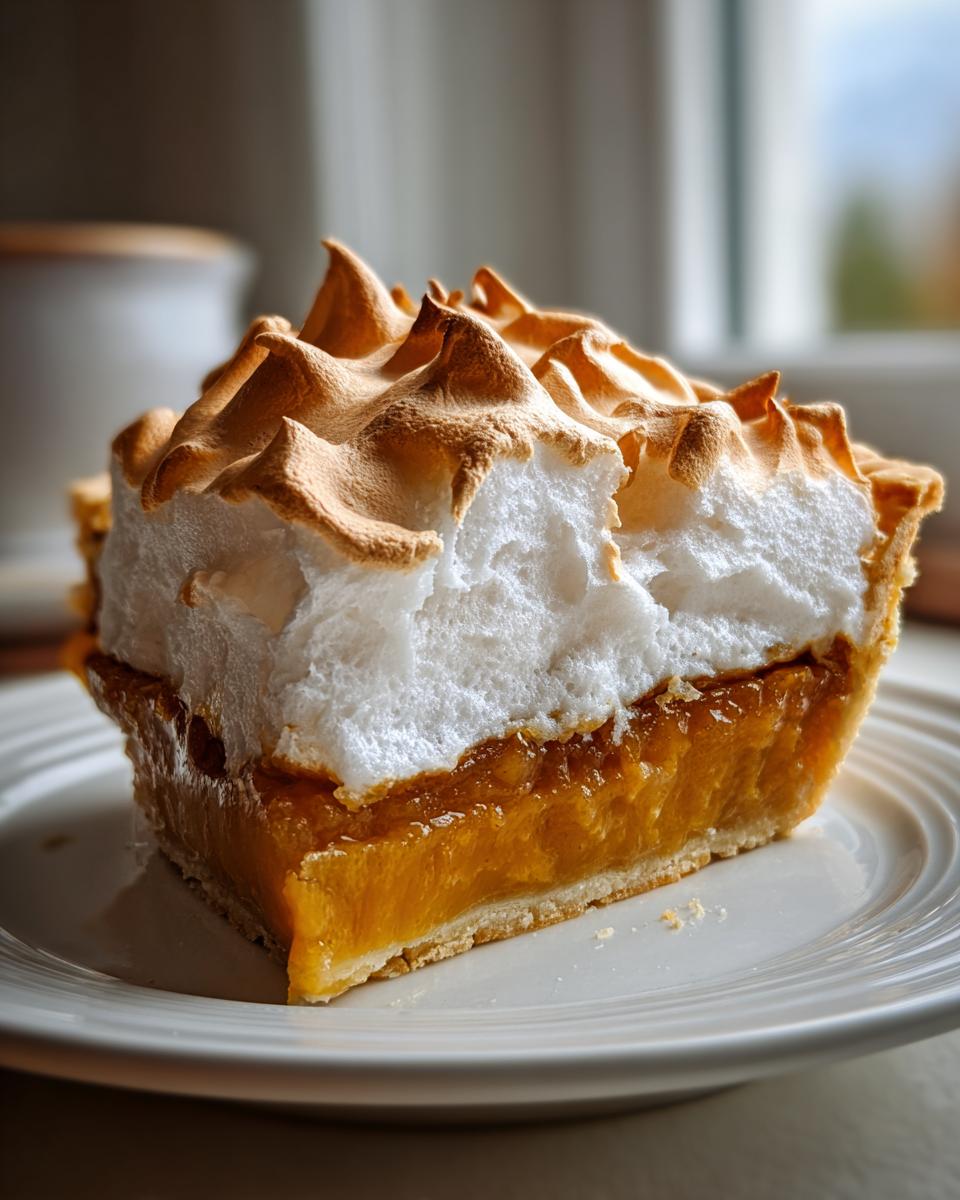
Achieving Stiff Peaks for Your Butterscotch Meringue Pie
While the filling is still hot—yes, hot filling is best for *Butterscotch Meringue Pie*!—it’s time to whip up the topping. Grab a perfectly clean, grease-free bowl for your egg whites. Beat them on medium speed until they look foamy and soft peaks start to form. Add that cream of tartar—it’s the insurance policy for volume! Now, stream in that granulated sugar one tablespoon at a time while increasing the speed slightly. Keep beating until you have stiff, glossy peaks that stand straight up when you lift the whisk. Spoon this glorious mound onto the hot filling immediately. Here’s the pro move: make sure you push the meringue completely to the edges of the crust. This seals the pie, which is the best way to prevent that annoying meringue weeping later!
Tips for the Best Butterscotch Pie Success
I know pies can feel intimidating, but I promise, mastering this butterscotch pie just takes knowing a few little secrets. Since I’ve messed this up more times than I care to admit in my early days, I can pass on the official troubleshooting guide!
First, never skip tempering those egg yolks; that’s your insurance against scrambling. Second, when you make the meringue, the bowl *must* be spotless. Any trace of fat means sad, flat peaks.
For that *Old Fashioned Pie Recipes* authenticity, use the best quality butter you can find. Finally, once the meringue is on, don’t refrigerate right away! Let it cool mostly on the counter. If you want more flavor ideas, you can browse some delicious pairings over at Butterscotch Cinnamon Pie discussions!
Quick Dessert Option: No Bake Butterscotch Pie Variation
Now, I know sometimes you need something utterly delicious but you just don’t have the time (or the patience!) for tempering eggs and creating a towering meringue. I totally get it! That’s why I always keep a quick adaptation in my back pocket for when I need an *Easy Dessert* yesterday.
For a fantastic *No Bake Butterscotch Pie*, we ditch the oven steps completely. It’s an absolute lifesaver for last-minute potlucks or when you just want that sweet, creamy flavor in under an hour of active work. This version relies on chilling to set up, not baking starch or egg whites.
Here’s how you pivot:
- First off, you must use a pre-made shell, preferably a graham cracker crust, since we aren’t baking anything. You can find my favorite graham cracker crust tips here: Best No Bake Butterscotch Pudding Pie.
- Make the creamy filling exactly as directed in steps 2 through 6—you still need that cooked base to ensure it thickens properly and tastes rich!
- Instead of worrying about the meringue, you’ll simply let the hot filling cool down on the counter for about 30 minutes—it needs to stop scalding hot, or it will melt your topping!
- Once cooled slightly, you fold in your topping. You can use stabilized whipped cream (if you’re feeling ambitious) or just grab a tub of Cool Whip. Gently fold the whipped topping right into the slightly cooled butterscotch base until everything is uniform.
- Pour the mixture into your graham cracker crust and chill it in the refrigerator for at least four hours, or until it’s completely firm. This yields a fantastic *No Bake Cream Pie* texture!
It’s still decadent and deeply satisfying, but with way less fuss. It proves you can still have that lovely, rich, homemade pudding pie experience without turning on the oven!
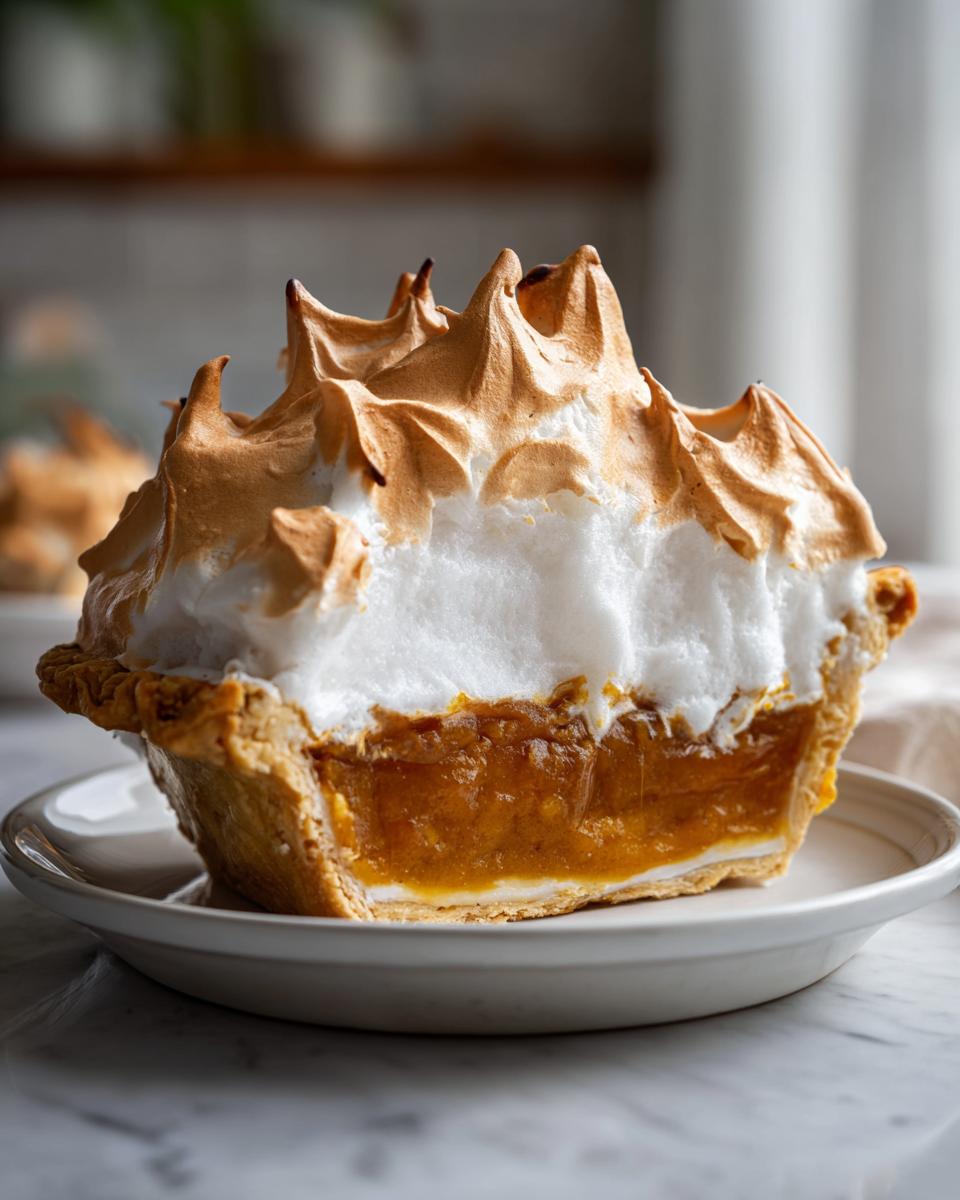
Storing and Reheating Your Homemade Butterscotch Dessert
After all that hard work, we want this incredible butterscotch pie to last! Here’s the thing about that beautiful meringue: if you place the whole pie straight into the fridge while the meringue is still warm, you are asking for weeping—that sad, watery condensation under the foam. So, let the pie cool completely on the counter top for a solid two hours first.
Once it’s nice and cool, you can cover it and move it to the fridge. It holds up beautifully for about three days. If you are slicing it right away, cover the exposed filling gently with plastic wrap, or use a pie travel carrier so you don’t flatten that lovely meringue. If you want a quick touch-up before serving later, a tiny dollop of fresh whipped cream on individual slices works wonders! For even easier storing options, especially if you made the whipped topping version, check out these cool tips here: Butterscotch Cool Whip Pie Dessert ideas.
Serving Suggestions for This Comfort Food Desserts Classic
This pie is already so rich and deeply flavored, so I usually like to keep the garnishes simple so the butterscotch flavor truly shines through. It’s a powerhouse of a *Comfort Food Desserts* treat on its own, but a little something extra never hurt anyone!
My first suggestion is always a dark roast coffee or a strong espresso. The slight bitterness of the coffee really cuts through the intense sweetness of the butterscotch and pairs beautifully with that caramelized sugar note. Honestly, I can’t imagine an afternoon slice without a hot cup nearby!
If you want something fresh, try a small side of tart fruit. A light scattering of fresh raspberries or thinly sliced Granny Smith apples—maybe tossed lightly in a little lemon juice—cuts the richness just right. It provides the perfect little acidic contrast.
If you skipped the meringue and went for the no-bake version, a dollop of lightly sweetened whipped cream is always lovely. It adds another layer of texture without competing with the filling. For more serving inspiration that keeps things decadent, take a look at this Butterscotch Heaven Pie.
Frequently Asked Questions About Butterscotch Pie Recipe
I know you might have a few questions still swirling around, and that’s perfectly normal when diving into a treasured recipe. Making a *Classic Butterscotch Pie* from scratch involves a few more steps than just opening a box, but I’m here to help demystify everything so you get that perfectly creamy, wonderful flavor every single time. Here are some things I hear most often!
Can I just use store-bought butterscotch pudding instead of making the filling from scratch?
Oh, tempting, I know! While you absolutely *can* use packaged pudding for an *Easy Butterscotch Dessert*, if you’re going for that deep, rich flavor reminiscent of the *Old Fashioned Pie Recipes* you grew up with, homemade is where it’s at. The flavor concentration you get from cooking down the brown sugar and butter is totally different from the shelf-stable stuff. Plus, we get to control the texture so it becomes that perfect, thick base for our meringue!
What is the secret to stopping the meringue from weeping?
Ugh, weeping meringue! It drives me crazy, but it’s usually a simple fix. Weeping happens when there’s separation between the meringue and the hot filling underneath. My two big rules are: Make sure your egg whites are beaten until truly stiff, glossy peaks form, and when you spread that topping, push it firmly all the way to the edge of the crust—seal it in completely, like you’re tucking it in for a nap! Also, cooling the pie on the counter before chilling, like I mention above, helps immensely. If you’re interested in other ways people handle this topping, check out how the folks over at Dolly Parton’s Butterscotch Pie creators approach it!
Is butterscotch pie the same as caramel pie?
That’s a great pastry question! They are cousins, but not twins. Caramel is generally made by heating only refined white sugar until it melts and browns, often adding cream or butter later. Butterscotch, on the other hand, relies on **brown sugar**—which already contains molasses—as its base. That molasses gives butterscotch its signature deeper, slightly smoky, and more complex flavor compared to the bright sweetness of caramel. If you want that true Southern flavor, you stick to brown sugar for your *Homemade Butterscotch Dessert*!
My filling seems lumpy. What did I do wrong?
Don’t panic, it happens! Lumps usually mean one of two things for our *Homemade Pudding Pie*. Either you didn’t fully whisk the cornstarch into the dry sugar mixture before adding the water, or, more commonly, you didn’t temper the egg yolks correctly. Tempering is crucial—it gradually warms the yolks so they don’t instantly cook and clump when they hit the hot base. If you catch it early, whisk the mixture vigorously off the heat; sometimes it smooths out! For more troubleshooting tips on achieving perfect results, I read through this helpful resource on Dolly Parton’s Butterscotch Pie approach.
Nutritional Estimates for One Slice of Butterscotch Pie
While this *Classic Butterscotch Pie* is certainly an indulgence—and one you absolutely deserve!—I always like to give a general idea of what you’re enjoying. Remember, these numbers are estimates based on the standard recipe I provided, using a traditional baked crust and meringue topping, not the no-bake version.
Keep in mind that the sugar content is high because we are making a custard/pudding pie with a significant amount of refined sugar both in the filling and in that towering meringue!
- Serving Size: 1 slice
- Calories: 380
- Sugar: 45g
- Fat: 18g
- Carbohydrates: 52g
- Protein: 6g
For a pie this decadent, that’s a pretty good little snapshot! Enjoy knowing exactly what you are diving into the next time you serve up this stunning dessert. Here is some general info regarding the recipe components: Dolly Parton Butterscotch Pie nutritional breakdown.
Share Your Homemade Butterscotch Dessert Experience
The best part of sharing recipes is hearing from you! Did you make this for a holiday gathering? Did your family argue over who got the biggest slice of that sweet, glossy meringue? I truly hope this *Butterscotch Pie Recipe* becomes a staple in your kitchen, just like it is in mine.
Please take a minute to rate the recipe below and leave a comment telling me how it turned out! Did you try the *No Bake Butterscotch Pie* option, or did you go full-out classic? If you snapped a photo of your beautiful pie, I’d love to see it! Tag me on social media; seeing your success is what keeps me developing these foolproof recipes for you all. Come connect with me over on Instagram to share your beautiful bakes here: Butterscotch Pie Reel!
Nutritional Estimates for One Slice of Butterscotch Pie
When you’re making something this decadent and absolutely delicious, sometimes it’s nice to peek at the numbers, right? I always include this section so you know what you’re getting into. I want to be super clear, though: these figures are based on standard calculations using the ingredients listed for the classic version—the one with the baked crust and the towering meringue. If you went for the lighter no-bake route, your numbers will look different!
I use my old food science notes to generate these averages, but always remember these are just estimates based on averages. You might vary slightly depending on your specific brand of butter or how heavily you sugar that meringue! For a breakdown looking at a similar recipe inspiration, check out these stats over at Taste of Home’s Dolly Parton Pie Recipe.
Here is the general breakdown for one generously sized slice of our creamy, old-fashioned pie:
- Serving Size: 1 slice
- Calories: 380
- Sugar: 45g
- Fat: 18g
- Carbohydrates: 52g
- Protein: 6g
It’s a bit of a treat, which is exactly what a proper holiday or Sunday dessert should be! Knowing the components lets you decide if you need an extra cup of coffee alongside it!
Share Your Homemade Butterscotch Dessert Experience
The best part of sharing recipes is hearing from you! Did you make this for a holiday gathering? Did your family argue over who got the biggest slice of that sweet, glossy meringue? I truly hope this butterscotch pie recipe becomes a staple in your kitchen, just like it is in mine. It just warms my heart to know these foolproof methods are making it onto your tables!
Please take a minute to rate the recipe below and leave a comment telling me how it turned out! Did you try the *No Bake Butterscotch Pie* option, or did you go full-out classic with the meringue? I’m especially curious if you felt that little touch of Southern comfort we were aiming for, maybe even inspired by the famous Dolly Parton Butterscotch Pie versions out there!
Also, if you snapped a photo of your beautiful pie—especially one with a perfectly golden meringue top—I’d love to see it! Tag me on social media; seeing your success is what keeps me developing these reliable recipes for you all. Come connect with me over on Instagram to share your beautiful bakes here: Butterscotch Pie Reel! And if you’re looking for alternative crust ideas, check out what my friends are doing with pie dough over at Butterscotch Pie inspiration.
PrintClassic Homemade Butterscotch Pie with Meringue Topping

This recipe delivers a truly heavenly, rich butterscotch pie featuring a silky-smooth filling and a dreamy, towering meringue topping. It is a nostalgic, comforting classic perfect for any gathering.
- Prep Time: 25 min
- Cook Time: 25 min
- Total Time: 50 min
- Yield: 8 servings 1x
- Category: Dessert
- Method: Baking
- Cuisine: American
- Diet: Vegetarian
Ingredients
- 1 (9 inch) unbaked pie crust (or use a graham cracker crust for a quick option)
- 1 cup packed light brown sugar
- 1/4 cup cornstarch
- 1/4 teaspoon salt
- 1 1/2 cups cold water
- 3 large egg yolks, lightly beaten
- 2 tablespoons unsalted butter
- 1 teaspoon vanilla extract
- For the Meringue:
- 3 large egg whites, room temperature
- 1/4 teaspoon cream of tartar
- 6 tablespoons granulated sugar
Instructions
- Prepare your pie crust: If using a traditional crust, bake it according to package directions until lightly golden. Cool completely on a wire rack. If using a graham cracker crust, prepare it now and set aside.
- Make the filling: In a medium saucepan, whisk together the brown sugar, cornstarch, and salt. Gradually whisk in the cold water until smooth.
- Cook the base: Place the saucepan over medium heat. Cook, stirring constantly, until the mixture thickens significantly and comes to a boil. Boil for 1 minute, stirring constantly. Remove from heat.
- Temper the egg yolks: In a small bowl, whisk the egg yolks. Slowly pour about 1 cup of the hot sugar mixture into the yolks while whisking constantly to temper them.
- Combine mixtures: Pour the tempered yolk mixture back into the saucepan with the remaining hot sugar mixture. Return the pan to medium heat. Cook, stirring constantly, until the filling thickens again and just begins to bubble. Do not let it boil rapidly.
- Finish the filling: Remove from heat. Stir in the butter and vanilla extract until the butter is completely melted and incorporated.
- Fill the crust: Pour the hot butterscotch filling immediately into the cooled, pre-baked pie crust.
- Make the meringue: In a clean, grease-free bowl, beat the egg whites with an electric mixer on medium speed until soft peaks form. Add the cream of tartar and continue beating. Gradually add the granulated sugar, beating until stiff, glossy peaks form.
- Top the pie: Spoon the meringue over the hot filling, spreading it to touch the edges of the crust all around to prevent shrinking.
- Bake the meringue: Bake at 350 degrees F for 10 to 15 minutes, or until the meringue tips are lightly golden brown.
- Cool: Cool the pie completely on a wire rack at room temperature for at least 2 hours before slicing. Avoid placing it in the refrigerator immediately, as this can cause the meringue to weep.
Notes
- For a quick, no-bake version, skip the meringue and use a store-bought graham cracker crust. Chill the filling for 4 hours or until firm, then top with stabilized whipped cream or Cool Whip instead of meringue.
- If you want a Dolly Parton inspired pie, ensure your filling is rich and use a generous, high meringue topping.
- To prevent weeping in your meringue, make sure your mixing bowl and beaters are completely free of any grease or fat.
Nutrition
- Serving Size: 1 slice
- Calories: 380
- Sugar: 45g
- Sodium: 250mg
- Fat: 18g
- Saturated Fat: 10g
- Unsaturated Fat: 8g
- Trans Fat: 0.5g
- Carbohydrates: 52g
- Fiber: 1g
- Protein: 6g
- Cholesterol: 110mg