
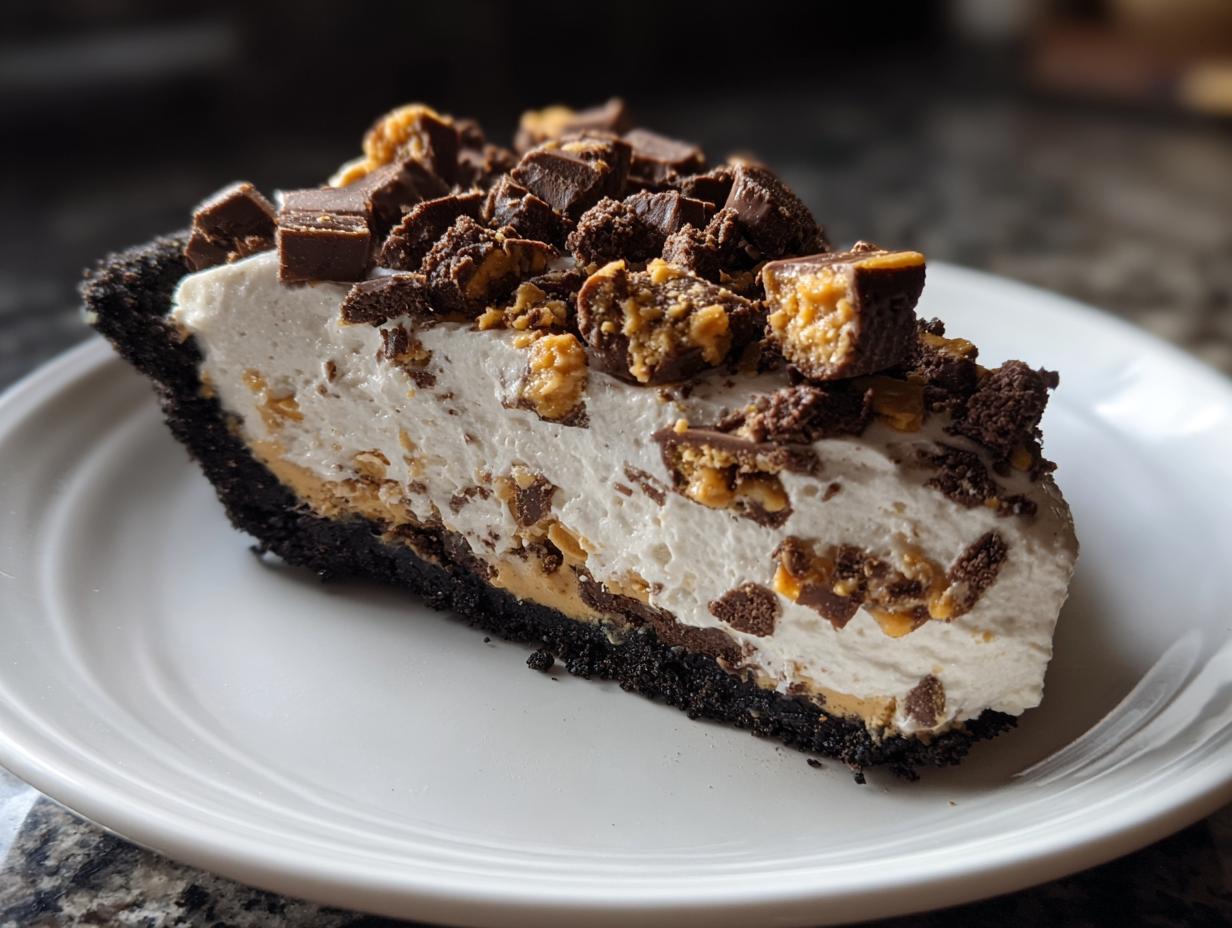
Hello there, and welcome in! I’m Katherine Hayes, and if you love treats that taste incredibly indulgent but take zero time to bake, you are absolutely in the right place. Forget standing over a hot stove; this is my recipe for the ultimate butterfinger pie. Seriously, this pie is creamy, deeply satisfying, and requires absolutely no oven time whatsoever. It’s my go-to no-bake recipe for those moments when a craving hits fast. Because I spent years in professional test kitchens, I promise you the science behind this fluffy peanut butter filling is sound. You will have a perfect, foolproof, creamy dessert ready for the fridge in about 20 minutes flat.
- Why This Creamy No-Bake Butterfinger Pie is Your New Favorite
- Gathering Ingredients for Your Butterfinger Pie
- Step-by-Step Instructions for the Ultimate Butterfinger Dessert
- Tips for Success with Your No Oven Desserts
- Serving Suggestions for This Family Favorite Desserts
- Storage & Reheating Instructions for Indulgent Sweet Treats
- Frequently Asked Questions About This Butterfinger Pie
- Estimated Nutrition for This Creamy Dessert
- Share Your Butterfinger Pie Creations
Why This Creamy No-Bake Butterfinger Pie is Your New Favorite
Why fuss with crust shrinking or cakes that need hours to cool when you can have this beauty ready in minutes? This recipe hits all the marks for a busy cook!
- Zero Oven Time: Perfect No Bake Pie Recipes
We are skipping the oven completely! If you need a fantastic, reliable no bake pie for a last-minute gathering, this is it. Prep flies by in about 20 minutes.
- Velvety Texture Meets Crunchy Candy Bar Desserts
The filling is where the magic happens. It’s so rich and light—the definition of a fluffy peanut butter filling. Then, you get that amazing snap from the real Butterfinger pieces. It’s the best kind of quick candy dessert combo!
Gathering Ingredients for Your Butterfinger Pie
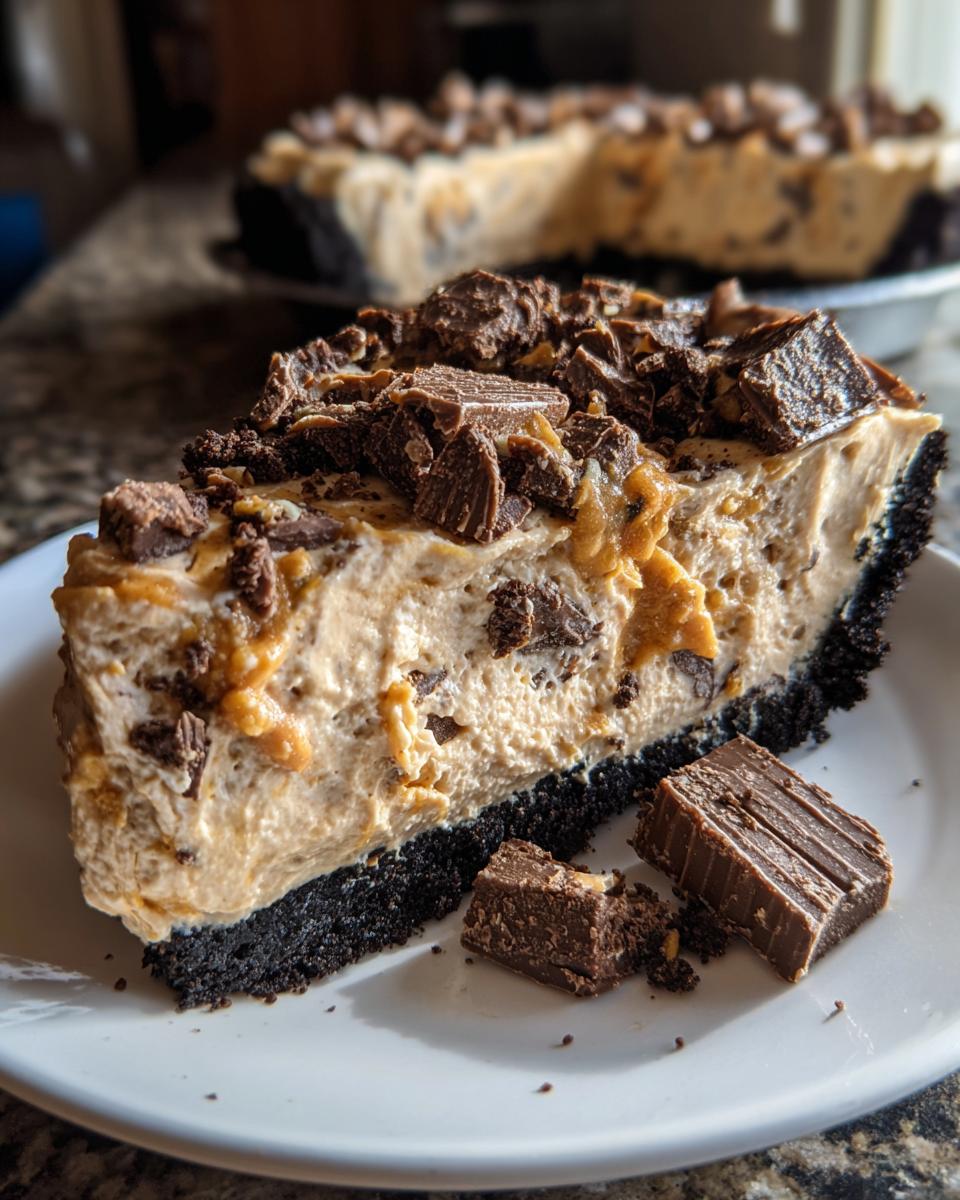
Okay, let’s talk supplies for this incredible butterfinger pie. Because this is a no bake pie recipe, we rely on quality store-bought bits rather than the oven! I’m focusing on that decadent chocolate cookie crust because it just pairs so perfectly with the peanut butter filling. You can see the full details below, but make sure that cream cheese is really soft so you get that truly velvety result we’re aiming for. If you grab everything on this list, this easy pie recipe will come together super fast!
For the Chocolate Cookie Crust Pies
- 1 1/2 cups chocolate cookie crumbs (you’ll need about 25 Oreos here, or just use a food processor!)
- 6 tablespoons unsalted butter, melted
For the Fluffy Peanut Butter Filling
- 1 (8 ounce) package cream cheese, make sure it’s softened!
- 1 cup powdered sugar
- 1 cup creamy peanut butter (trust me, creamy works best for that fluffy peanut butter filling!)
- 1 teaspoon vanilla extract
- 1 (12 ounce) container frozen whipped topping, fully thawed
For the Butterfinger Candy Topping
- 1 cup Butterfinger candy bars, chopped (these go right into the filling)
- 1/2 cup Butterfinger candy bars, chopped (save these lovely pieces for the top garnish—it makes a huge difference!)
Step-by-Step Instructions for the Ultimate Butterfinger Dessert
It’s time for assembly! I promised you fast prep, and we are sticking to that—this whole assembly process should take you under 20 minutes. We need precision to get that perfect texture, so pay attention to those gentle folds! Getting this creamy butterfinger pie right means following a few key science-backed steps. While you’re working, remember that for the absolute best results, you can check out some other great techniques online, like what they do over at Cooking Inspirations.
Preparing and Chilling the Chocolate Cookie Crust Pies
First up is the foundation. Just mix those chocolate cookie crumbs and your melted butter right in a bowl until everything looks like damp sand. Press that mixture firmly, really packing it into your 9-inch pie plate—push it up the sides too! As my professional background taught me, you need a solid base for a filling this rich. Pop that plate into the freezer right away while you work on the star of the show. Oh, and if you decided to use a graham cracker crust instead? Make sure it’s nice and tight!
Creating the Creamy Dessert Ideas Filling Base
Now for the filling that earns us those lovely creamy dessert ideas compliments! Grab your mixer. Beat the softened cream cheese first until it’s completely smooth—you don’t want any lumps in your fluffy peanut butter filling! Then, slowly mix in the powdered sugar, the peanut butter, and the vanilla. Remember to stop and scrape down the sides often. We are aiming for pure, smooth velvet here!
Folding and Assembling Your Quick Candy Dessert
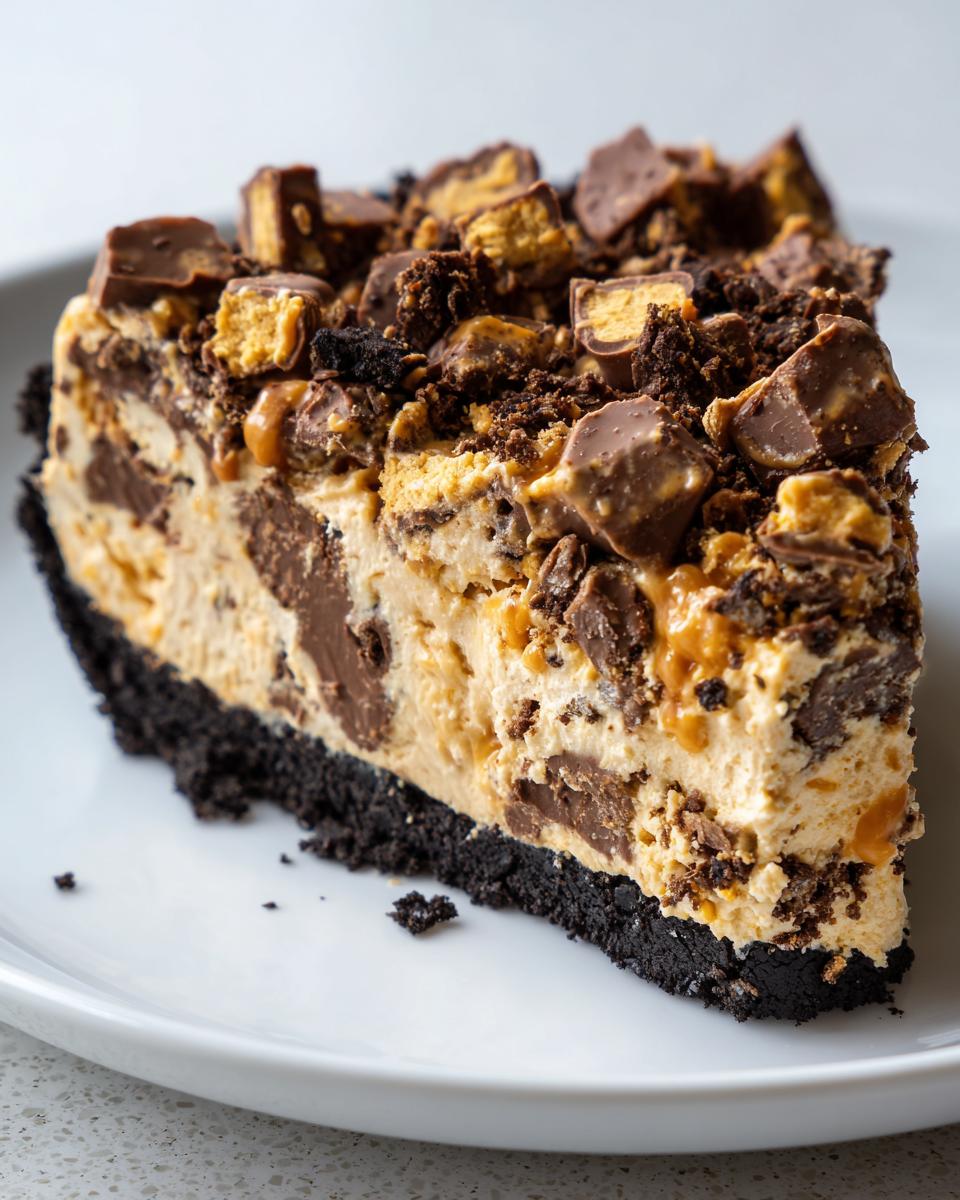
This is where you need to be gentle! Take your thawed whipped topping and fold it into that peanut butter mixture. I mean GENTLY. Overmixing this step makes the filling deflate, and we want it fluffy! Once it’s *just* combined, fold in that first cup of chopped Butterfinger candy bars. See how easy that was? Now, spoon all that deliciousness evenly into your chilled crust and smooth out the top with an offset spatula.
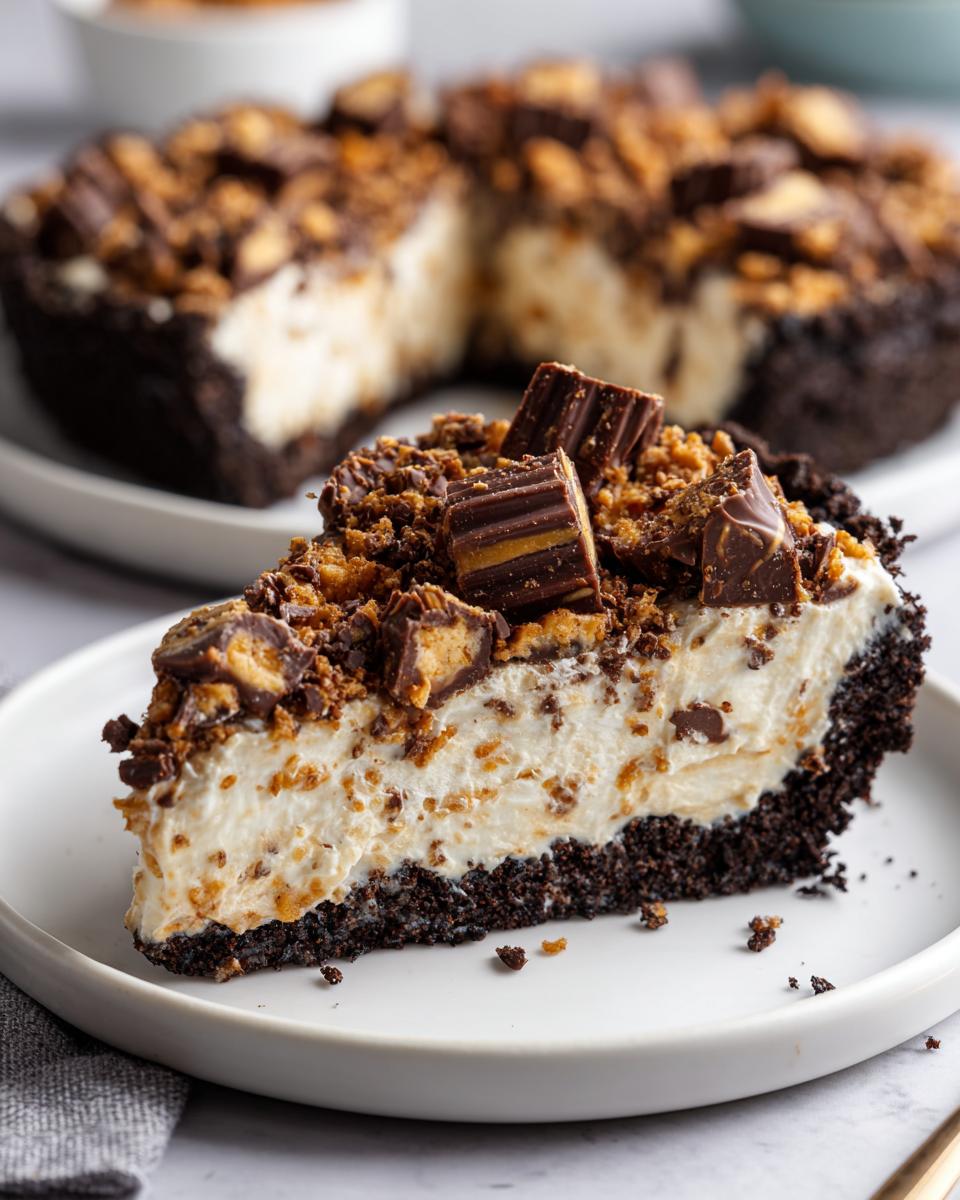
Chilling and Garnishing the Butterfinger Pie
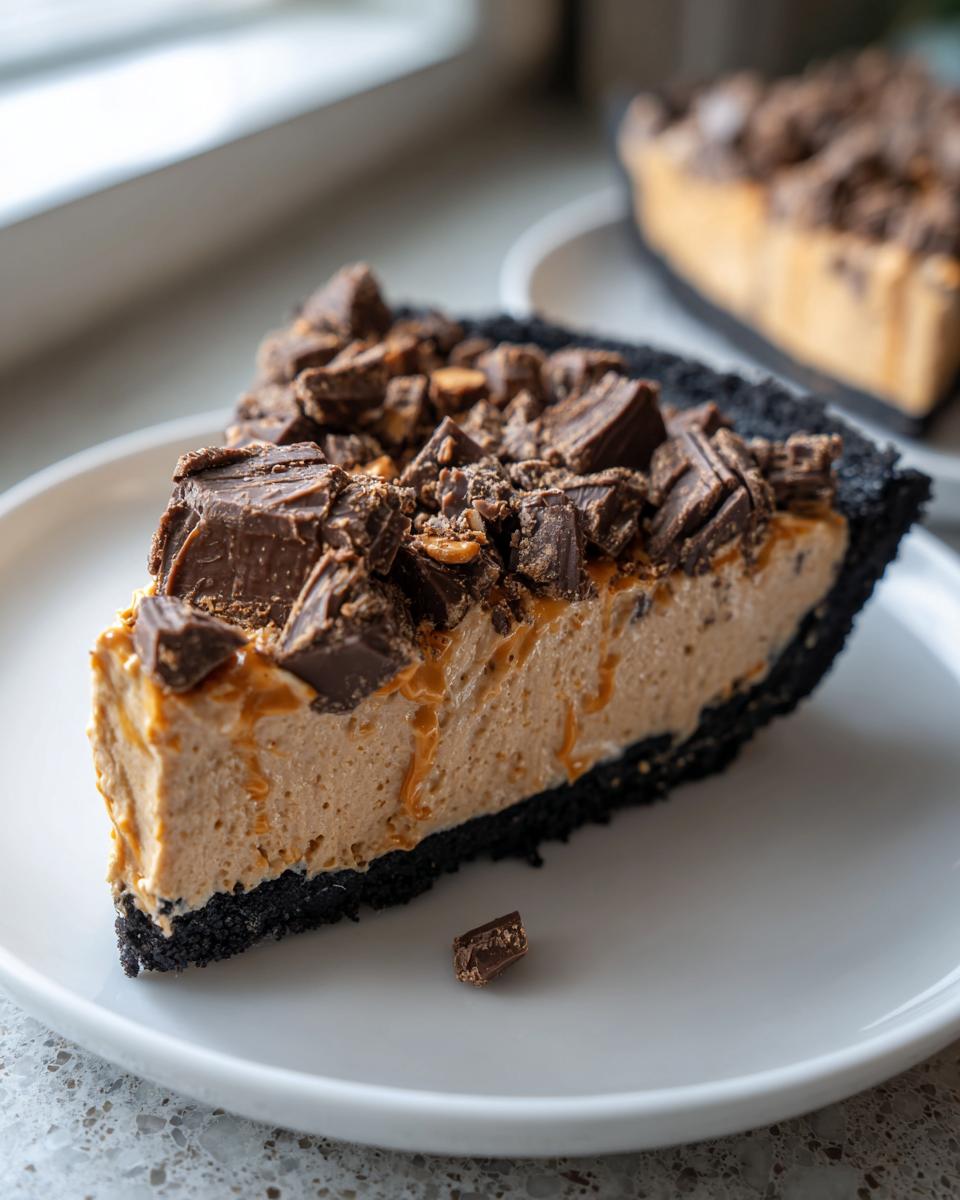
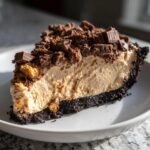
Here’s the hard part: waiting! Cover the pie loosely—plastic wrap touching the surface is a no-go, trust me—and put it in the fridge for at least four long hours. Honestly, I always make this the day before because chilling overnight guarantees the cleanest, dreamiest slices. Right before you serve this amazing butterfinger pie, sprinkle that reserved half-cup of chopped candy bars right over the top for that final, spectacular crunch!
Tips for Success with Your No Oven Desserts
Since this is a make ahead dessert that relies on temperature science instead of heat, a couple of small steps make a huge difference between a good pie and a fantastic one. Don’t worry, I learned these little tricks back when I was developing recipes professionally, so you get the foolproof version! You can see how others managed their creamy desserts, but trust me, my steps below are the key to making this pie perfectly.
Achieving the Perfect Fluffy Peanut Butter Filling
Temperature is everything here. Your cream cheese absolutely must be fully softened—if it’s cold, you get tiny, stubborn lumps, and we want velvety smooth here! Just as important is the whipped topping; make sure it’s thawed but still cold. When you fold it in, be super gentle. If you beat it like you did the peanut butter mix, you deflate all those necessary air bubbles, and you end up with a dense filling instead of that gorgeous, light texture we are after!
Keeping the Crunch in Your Butterfinger Pie
Nobody wants a soft, chewy Butterfinger bar in their slice—we want that signature snap! So, here’s my pro tip: only chop the candy bars you are folding into the filling just before you mix them in. And please, I beg of you, do not put the reserved topping on the pie until the absolute last minute. Seriously, top it right before you carry it to the table! If you want to see how others ensure a spectacular result, check out the tips from The Tasty Fork. That final topping layer makes all the difference!
Serving Suggestions for This Family Favorite Desserts
Now that you’ve made this amazing, easy pie, you might be wondering how to serve it up at your next get-together! Because this butterfinger pie is so rich—I mean, it’s peanut butter, chocolate, and candy—I find that a good pairing can really balance everything out perfectly.
Pairing with Beverages
A piping hot cup of coffee is probably my top pick, as the bitterness cuts right through the sweetness beautifully. For summer, though, you can’t beat a big, cold glass of milk. If you’re having this after a big meal, a slightly tart iced tea works wonders to cleanse the palate!
Optional Additions to the Slice
If you don’t want to eat it plain—though honestly, it’s perfect as is—a tiny drizzle of dark chocolate syrup will make it look restaurant-worthy. I also love setting out a small bowl of fresh raspberries on the side. That little burst of bright acidity alongside the creamy chocolate flavor is just heaven.
Storage & Reheating Instructions for Indulgent Sweet Treats
Since we aren’t using an oven, this butterfinger pie is all about keeping things cool and firm! The good news is that this makes it one of the absolute best make ahead desserts you can whip up. You want to manage that texture to keep that filling fluffy and the crust crisp.
Refrigerating Your Butterfinger Pie
Once it’s fully set up—ideally after chilling overnight—just cover that pie plate tightly with plastic wrap. Make sure the wrap isn’t sticking to the topping if you’ve already garnished it! It keeps beautifully in the fridge for about three to four days. Any longer and the crust starts getting a little sad, if you know what I mean.
Freezing for Later Enjoyment
If you made this for a potluck next week, good news! You can absolutely freeze the whole pie, but here’s the trick: Don’t put the candy topping on yet! Just cover it well and freeze it. It thaws perfectly overnight in the fridge. This means it’s ready right when you need it—super convenient for those last-minute potluck desserts!
Frequently Asked Questions About This Butterfinger Pie
I get so many great questions about this pie, which I totally understand! When you make something this indulgent, you want to make sure it turns out right. I pulled together the most common ones here just for you. If you’re looking to master the art of candy bar desserts without turning on the oven, read on!
Can I use a graham cracker crust instead of Oreos for this butterfinger pie?
Absolutely, you can! I love the deep chocolate flavor of the Oreos, but if you prefer something a little lighter, a graham cracker crust is perfect. Just follow the basic technique you already used: you need about 1 1/2 cups of crumbs, 6 tablespoons of melted butter, and you can mix in about 1/4 cup of sugar with the graham cracker crumbs for flavor. Press that into your pie plate and freeze it solid!
How long does the filling need to set before serving?
This is crucial for getting those picture-perfect slices! The absolute bare minimum chilling time is four hours in the fridge, but I really, really recommend making this the day before you plan to serve it. Chilling it overnight lets that fluffy peanut butter filling firm up completely. If the filling isn’t totally set, you’ll end up with a glorious, creamy puddle instead of a lovely slice of pie—and nobody wants that!
What is the best way to chop Butterfinger bars without making a mess?
Oh, those crunchy things go everywhere if you just attack them with a knife! The easiest way, honestly, is to put your Butterfinger bars into a sturdy, zip-top plastic bag—the thick kind! Seal most of the air out, lay it on your counter, and just gently whack it a few times with a rolling pin or the flat side of a meat mallet. You get perfectly sized chunks, and all the crumbs stay contained right in the bag. Perfect for sprinkling on top of your butterfinger pie!
Estimated Nutrition for This Creamy Dessert
Now, I always tell folks that looking at nutrition labels on desserts like this spectacular butterfinger pie is a little like checking the calories on a birthday candle—you know it’s going to be big, but you eat it for the joy of it! Seriously, this is pure indulgence, so enjoy every bite guilt-free. Remember, this estimated breakdown is based on getting 8 lovely, generous slices out of the whole pie.
Nutritional Breakdown Per Slice
This data is just an estimate, especially since every time I make it, I swear the slices get bigger! But if you’re tracking, here are the ballpark numbers based on dividing the whole recipe into 8 servings:
- Calories: 450
- Total Fat: 28g
- Carbohydrates: 45g
- Protein: 6g
It’s a truly decadent treat, perfect for when you need an amazing, rich dessert. If you want to see how other great bakers track their sweet creations, you might want to check out what some folks share over at This Is Not Diet Food!
Share Your Butterfinger Pie Creations
I genuinely hope you loved making this butterfinger pie as much as I love sharing it with you! When you try this rich, creamy, no-bake magic, I want to see it! Please leave me a rating underneath the recipe card and tell me what you thought. Did you stick with the Oreo crust or try the graham cracker swap? Your feedback truly helps me know which indulgent sweet treats you want to see next. Happy baking!
PrintCreamy No-Bake Butterfinger Pie with Oreo Crust
Make this rich, creamy no-bake Butterfinger pie featuring a chocolate cookie crust and a filling loaded with crunchy Butterfinger candy pieces. This easy dessert requires no oven time.
- Prep Time: 20 min
- Cook Time: 0 min
- Total Time: 4 hr 20 min
- Yield: 8 servings 1x
- Category: Dessert
- Method: No-Bake
- Cuisine: American
- Diet: Vegetarian
Ingredients
- 1 1/2 cups chocolate cookie crumbs (about 25 Oreo cookies)
- 6 tablespoons unsalted butter, melted
- 1 (8 ounce) package cream cheese, softened
- 1 cup powdered sugar
- 1 cup creamy peanut butter
- 1 teaspoon vanilla extract
- 1 (12 ounce) container frozen whipped topping, thawed
- 1 cup Butterfinger candy bars, chopped (about 6–8 bars)
- 1/2 cup Butterfinger candy bars, chopped, for topping
Instructions
- Prepare the crust: Mix the chocolate cookie crumbs and melted butter in a medium bowl until combined. Press the mixture firmly into the bottom and up the sides of a 9-inch pie plate. Place the crust in the freezer while you prepare the filling.
- Make the filling base: In a large bowl, beat the softened cream cheese, powdered sugar, peanut butter, and vanilla extract with an electric mixer until the mixture is smooth and creamy. Scrape down the sides of the bowl as needed.
- Fold in whipped topping: Gently fold the thawed whipped topping into the peanut butter mixture until just combined. Do not overmix.
- Add candy pieces: Fold in 1 cup of the chopped Butterfinger candy bars.
- Assemble the pie: Spoon the filling evenly into the chilled crust. Smooth the top with a spatula.
- Chill the pie: Cover the pie loosely with plastic wrap and refrigerate for at least 4 hours, or until the filling is firm. For best results, chill overnight.
- Garnish and serve: Before serving, sprinkle the remaining 1/2 cup of chopped Butterfinger candy bars over the top of the pie. Slice and serve cold.
Notes
- For the easiest crust, place whole cookies in a food processor and pulse until fine crumbs form.
- If you do not have an Oreo crust preference, you can substitute with 1 1/2 cups of graham cracker crumbs mixed with 1/4 cup sugar and 6 tablespoons melted butter.
- Chop the Butterfinger bars right before you need them to keep them crunchy.
Nutrition
- Serving Size: 1 slice
- Calories: 450
- Sugar: 35g
- Sodium: 320mg
- Fat: 28g
- Saturated Fat: 10g
- Unsaturated Fat: 18g
- Trans Fat: 0.5g
- Carbohydrates: 45g
- Fiber: 1g
- Protein: 6g
- Cholesterol: 35mg