
Hello there, and welcome back to Frosted Fancies! I’m Katie, and I am just bubbling over with excitement today because we are tackling the king of all desserts: the New York cheesecake. I know, I know—cheesecake can be intimidating. People worry it’s too fussy, too dense, or just destined to crack the second it leaves the oven. Forget all that! Because I spent years in professional test kitchens, diving deep into the science behind perfect baking, I’ve cracked the code (pun intended!) on delivering that signature thick, creamy, and unbelievably rich texture that defines a true New York classic on your first try.
This isn’t just any recipe; this is my foolproof system for the best cheesecake recipe you’ll ever make from scratch. We are going heavy on the full-fat dairy, we are mastering the gentle water bath, and we are locking in that velvety smooth finish time and time again. Trust me, once you see how achievable this indulgent dessert is, you’ll be making it for every special occasion!
- Why This Is The Best New York Cheesecake Recipe You Will Ever Make
- Ingredients for Your New York Cheesecake
- Step-by-Step Instructions to Make the New York Cheesecake
- Tips for Achieving Bakery Style Cheesecake Results
- Ingredient Notes and Substitutions for Your Classic Cheesecake
- Storage and Reheating Instructions
- Serving Suggestions for this Rich Dessert
- Frequently Asked Questions About Making Homemade Cheesecake
- Estimated Nutritional Data for Your New York Cheesecake
- Share Your New York Cheesecake Creations
Why This Is The Best New York Cheesecake Recipe You Will Ever Make
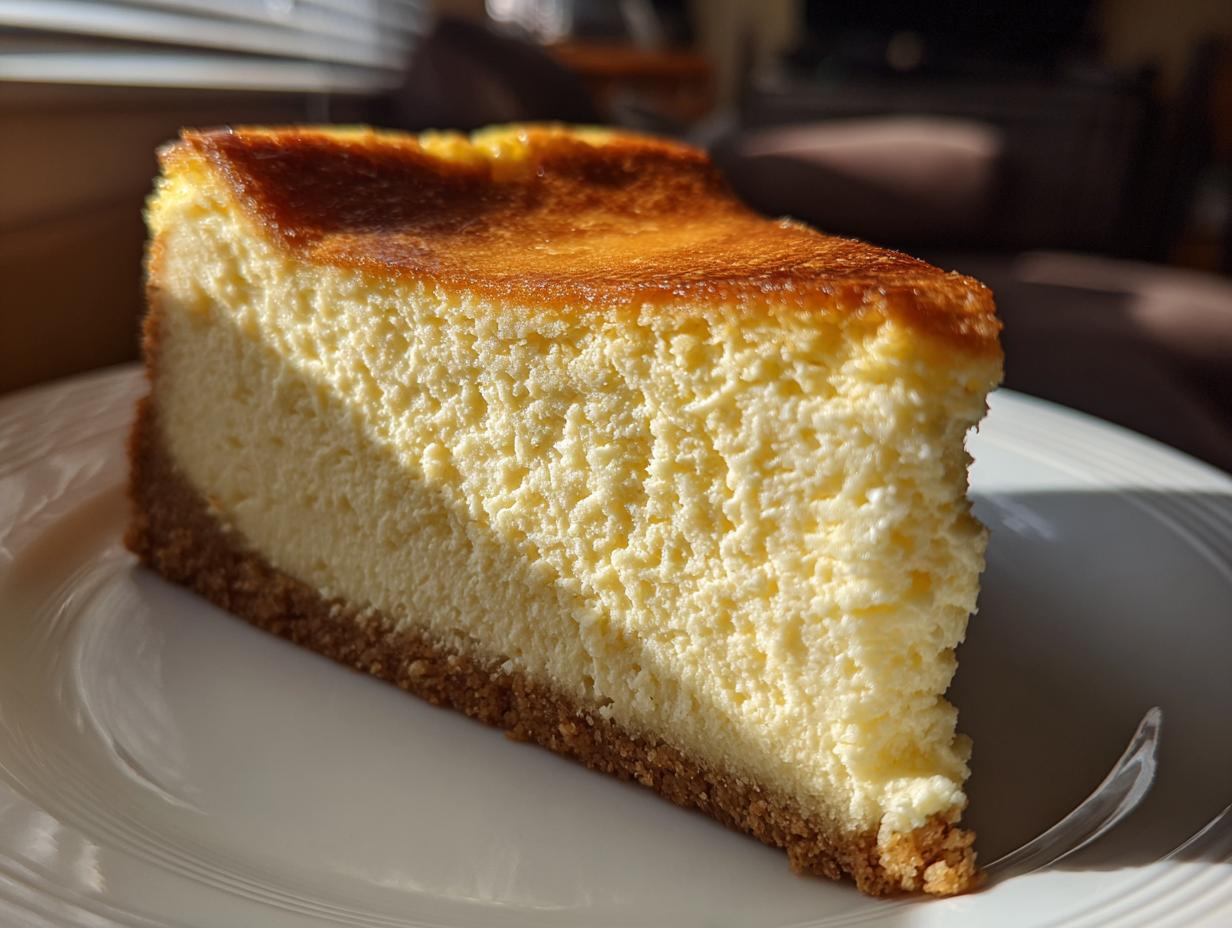
I’ve developed literally hundreds of tested desserts in my professional life, and I promise you, this New York Cheesecake recipe is the one I always come back to. It doesn’t rely on complicated pastry skills; it relies on science and technique. When you pull this out of the oven, it’ll be tall, it’ll be proud, and most importantly—it won’t have any ugly cracks marring the top!
Stop worrying about achieving that mythical status of a Bakery Style Cheesecake because we’re building it right here at home. My goal was simple: to create the ultimate textural experience. You deserve that perfectly creamy, dense result!
Here’s what makes this the one you should save right now:
- The Ultimate Creamy Texture: We use the exact right amount of full-fat ingredients mixed gently to achieve that signature velvety mouthfeel that separates the good ones from the truly great ones. It’s the Best Cheesecake Recipe, hands down.
- Impressive Density: This isn’t a light, fluffy cake. It’s meant to be substantial! The recipe delivers that dense cheesecake filling that holds its shape beautifully when sliced.
- The No-Crack Guarantee: I’m handing you the secret weapon—the water bath—which is the magic step that ensures a flawless top every single time. Achieving that Perfect Cheesecake Texture means controlling the baking environment!
If you’re looking for the absolute best experience, check out some great inspiration on how others have tackled their baking conquests right here. But remember, our method is tried and tested for guaranteed success!
Ingredients for Your New York Cheesecake
Okay, gathering your ingredients is half the battle won when making a Classic Cheesecake. This recipe needs high-quality components, so please don’t try to skimp on the fat content—that’s what gives us that wonderful, rich flavor profile we’re aiming for! Seriously, I want you to look at your cream cheese, sour cream, and eggs right now. Are they out on the counter? They need to be at true room temperature, or we’ll end up with lumps, and nobody wants a lumpy cheesecake. It’s a non-negotiable step for smooth mixing!
If you want to see how others approach their ingredient lists, I saw some great tips over here, but stick with these precise measurements for my version!
For the Buttery Graham Cracker Crust
This crust is simple perfection—but it needs to be packed down like you mean it! Pressing it firmly in the bottom of the pan is crucial so it doesn’t crumble away when you slice into the finished product.
- 1 1/2 cups graham cracker crumbs
- 1/4 cup granulated sugar
- 6 tablespoons unsalted butter, melted
For the Dense Cheesecake Filling
This is where the magic happens! Remember that word: gentle. We want this mixture smooth as silk for that Creamy Baked Cheesecake texture. Having all dairy and eggs fully softened ensures this happens without any heavy mixing.
- 4 (8 ounce) packages full-fat cream cheese, softened to room temperature
- 1 1/2 cups granulated sugar
- 1/4 cup all-purpose flour (yes, flour! It helps stabilize the structure)
- 1 teaspoon vanilla extract
- 1/4 teaspoon salt
- 1 cup sour cream, room temperature
- 4 large eggs, room temperature
Step-by-Step Instructions to Make the New York Cheesecake
Alright, deep breath! This is where we turn those beautiful ingredients into the New York Cheesecake of your dreams. I know everyone stresses about this part, but I promise, if you follow my cheat-sheet, you’ll be golden. We are going heavy on the full-fat dairy, we are mastering the gentle water bath, and we are locking in that signature thick, creamy, and unbelievably rich texture on your first try. Trust me, once you see how achievable this indulgent dessert is, you’ll be making it for every special occasion!
Preparing the Crust and Pan
First things first: grab that chilled crust we made earlier. It needs to be rock solid before we go any further! Now, here is the absolutely critical step—the foil wrapping. You must wrap the outside of that 9-inch springform pan at least twice with heavy-duty aluminum foil. I mean tightly, like we’re sending it into space! This creates a watertight barrier so that when we introduce the water bath, not a single rogue drop seeps in and ruins our buttery Graham Cracker Crust. Get that layer on thick; it’s your disaster prevention plan!
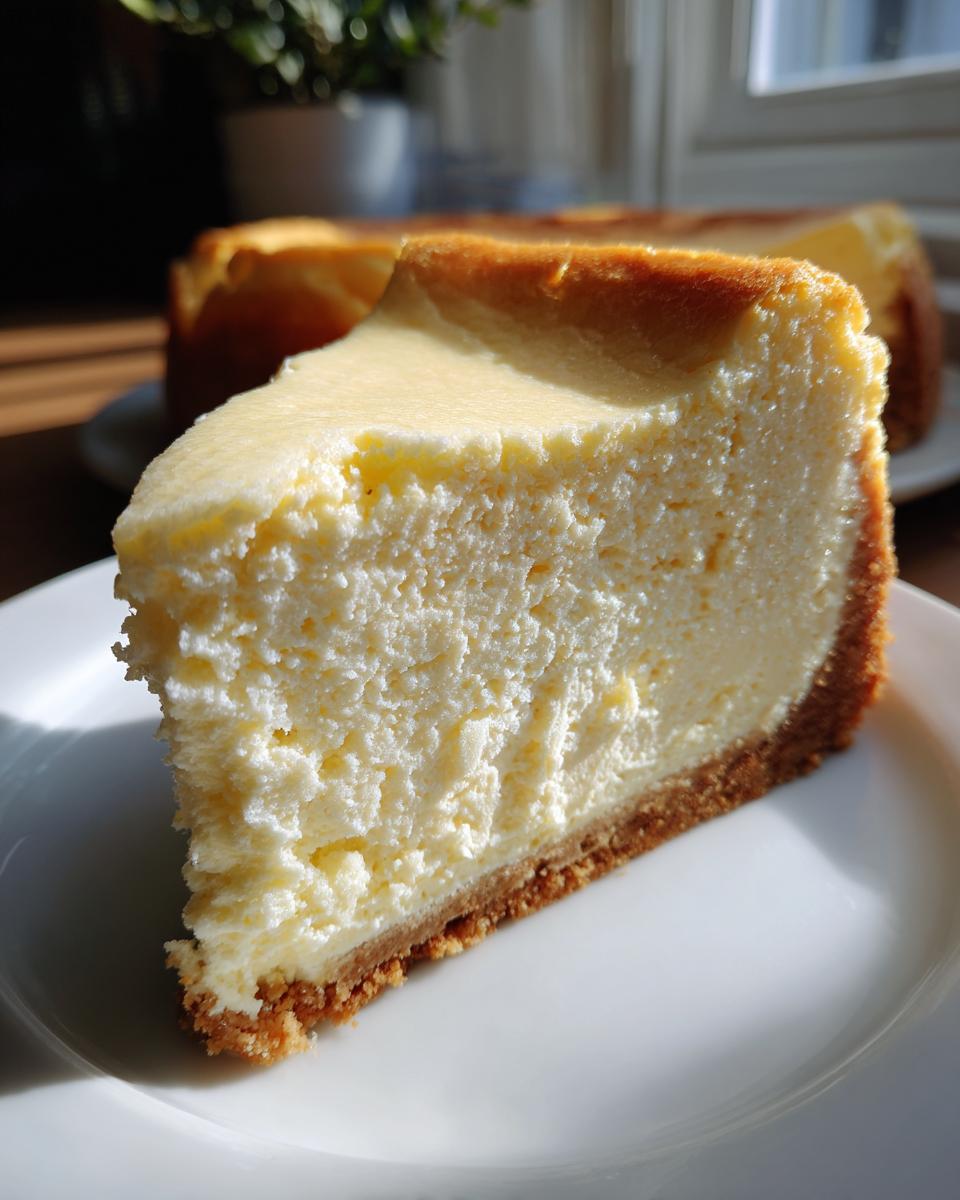
Mixing the Creamy Baked Cheesecake Batter
Grab your mixer and set it to medium speed. We need to beat that room-temperature cream cheese until it’s utterly smooth—I mean, you shouldn’t feel any tiny lumps when you scrape the sides. Once that’s perfect, gently mix in the 1 1/2 cups of sugar, the flour, vanilla, and salt just until everything is incorporated. Now, for the most important technical detail: add the sour cream, mix till smooth, and then add the four eggs, one at a time. You have to mix only until each egg disappears. Seriously, as soon as the last bit of yolk is gone, turn the mixer OFF. If you incorporate too much air, the cake will rise too fast and the resulting structure will crack later. We are aiming for a dense, Creamy Baked Cheesecake, not an angel food cake!
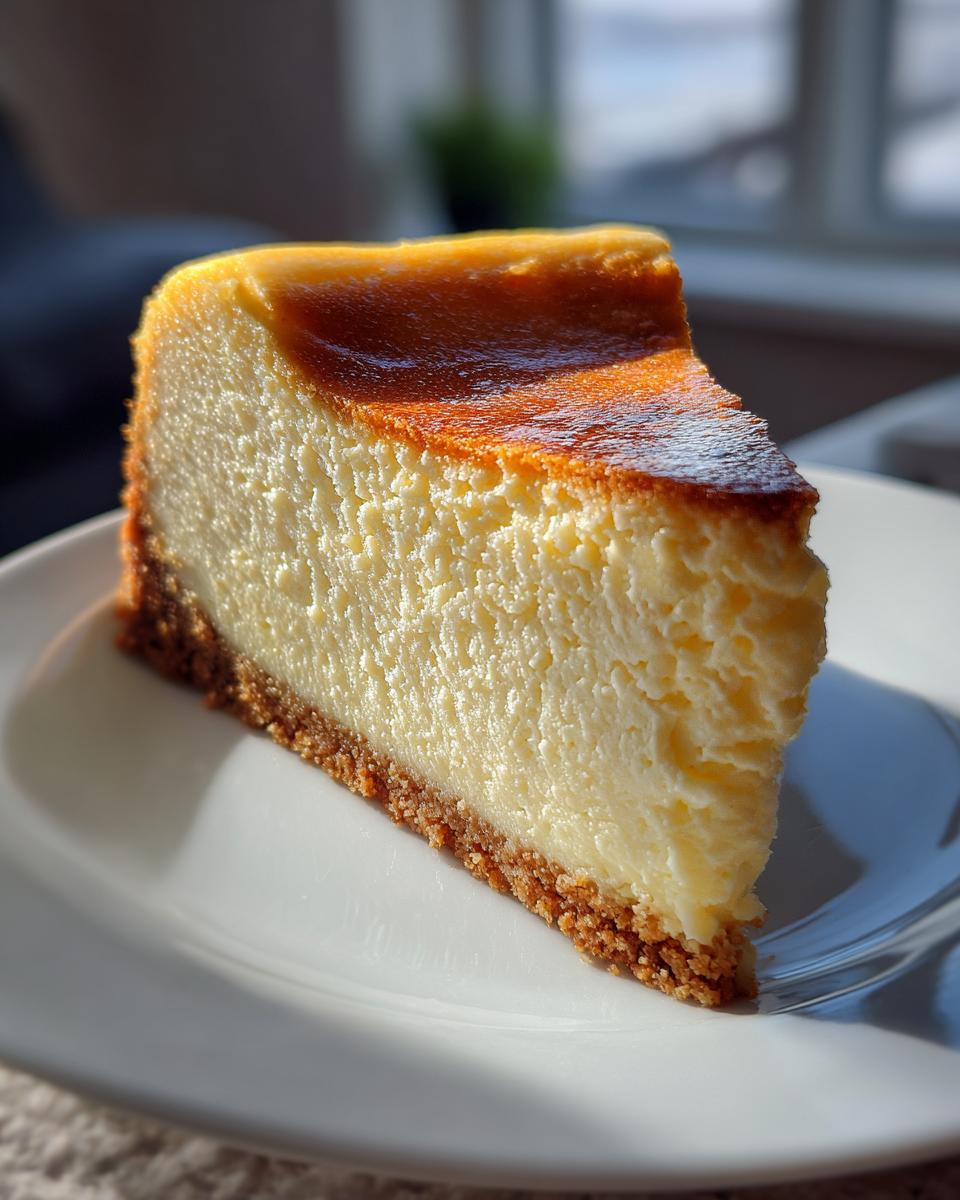
Executing the Water Bath and Baking for a No Crack Cheesecake
Time for the water bath, or as I like to call it, the steam magic! Place your foil-wrapped springform pan inside a larger roasting pan. This is easy to visualize if you are looking for tall, classic results, like those featured over here. Carefully pour very hot water into the roasting pan until it comes halfway up the sides of your cheesecake pan. This gentle, moist heat is your secret weapon for a No Crack Cheesecake. Bake at 350°F (175°C) for 60 to 75 minutes. When checking doneness, look for set edges and a light wobble right in the center. If you’re worried about technique, reading guides like this one can help!
The Slow Cooling Process for Perfect Cheesecake Texture
The cooling process is just as crucial as the baking! Do NOT pull the cheesecake out right away. When that 75 minutes is up, turn the oven completely off. Take a wooden spoon and prop the oven door open about two inches. Let that cheesecake sit in the residual heat for a solid hour. This slow cool-down prevents the rapid temperature change that causes big cracks and guarantees that supremely smooth, dense result. After an hour waiting patiently in the darkness, take it out of the water bath and foil, let it cool to room temperature, and then chill it overnight. That final chill is what sets that flawless Perfect Cheesecake Texture. You’ll definitely want to check out tips on achieving that perfect bake here, too!
Tips for Achieving Bakery Style Cheesecake Results
I want you to have that glossy, tall, picture-perfect presentation you see in fancy bakeries, and it all comes down to disciplined mixing. Early in my career, before I fully leaned into Food Science, I used to rush the eggs. I’d just dump them in, hoping for the best, and inevitably, I’d end up with a sad, cracked dome! The cake would taste fine, but it just felt… messy.
That’s when understanding the chemistry really clicked for me. When you overbeat the batter after the flour and dairy are in, you’re whipping tons of tiny air bubbles into the mixture. As that trapped air tries to escape during baking and cooling, it causes the surface to puff up, then shrink suddenly—hello, crack! So, my biggest professional tip, which you see repeated in the instructions, is simple: embrace slow mixing speeds and stop the second the eggs are blended in. You are creating a rich, dense batter, not a light sponge!
Another thing that separates the pros? Ingredient temperature. I stressed room temperature earlier, but let me reiterate: if your cream cheese is even slightly cool, it creates resistant lumps that you can only smooth out by aggressively beating the mixture. That aggressive beating introduces the pesky air bubbles we’re trying to avoid! Take the time to let your dairy sit out. For more insights on nailing the texture, you can always check out the great advice here. Patience with temperature equals a flawless Homemade Cheesecake!
Ingredient Notes and Substitutions for Your Classic Cheesecake
Let’s talk product quality, because when you’re making something as structurally important as a Classic Cheesecake, the ingredients really matter. You simply cannot compromise on the cream cheese here. I’m talking specifically about full-fat brick-style cream cheese. Why? Because that fat content is what gives us the density and the incredible richness that makes the New York version so famous. If you substitute low-fat or whipped varieties, you are changing the structural integrity of the entire dessert, and you’re much more likely to end up with a weeping, soft texture rather than that firm, satisfying bite we are looking for.
What about the sour cream? That ingredient adds the necessary slight tartness to cut through all that richness, and it keeps the texture velvety. If, for some reason, you’re out of it, you can usually substitute it with an equal part of full-fat Greek yogurt. Just make sure that yogurt is thoroughly stirred so it’s smooth before you mix it in! However, I always recommend sticking to the sour cream if you can help it, as the slight difference in proteins can affect the final set. You can find some great inspiration about keeping things classic here, but remember, this recipe is designed around these exact dairy products!
Storage and Reheating Instructions
Okay, you’ve navigated the water bath, you’ve waited patiently for the slow cool down, and now you have this magnificent, towering dessert! Before you even think about slicing into it, we have mandatory waiting time. This isn’t like a loaf cake that’s good warm; this New York Cheesecake absolutely needs to chill. We are talking a minimum of 6 hours, but honestly, if you can manage overnight, do it. That time in the fridge is essential for the filling to fully set up and achieve that dense, satisfying chew. If you cut it while it’s warm, it will just melt into a puddle, no matter how perfectly you baked it!
For storing leftovers—and if you have any leftovers, you’re a stronger person than I am!—you need to handle it carefully. Once it’s completely cooled after the initial chill, cover the entire cake loosely with plastic wrap. I like to use a cake dome if I have one, or just tents of plastic wrap so the surface doesn’t dry out or absorb any fridge odors. Keep it refrigerated. It stays fantastic for about four to five days in the fridge. If you want to show off your baking skills later, you can freeze it too! Just wrap it very tightly in plastic wrap, then a layer of foil, and it keeps well for up to a month.
When you’re ready to serve a slice that you’ve stored, don’t try to eat it straight from the cold fridge! That cold dulls the flavor and makes the texture firmer than we want. Take your slice out about 30 to 45 minutes—maybe an hour if it was frozen—before you plan to serve it, and let it sit on the counter while covered loosely. This lets those sweet, tangy flavors bloom again and restores a bit of that creamy texture. It’s the final step to perfection, so don’t rush it! You can always peek at some serving inspiration over here while you wait for the chilling to finish.
Remember, chilling is not optional; it’s part of the recipe! For more general tips on handling and storing, I found this guide helpful when I was testing my first batches here.
Serving Suggestions for this Rich Dessert
Okay, the moment of truth! You’ve spent hours perfecting this beautiful, towering Rich Dessert, and now you have to decide how to serve it. My biggest rule, and Katie Holmes always taught me this, is that a truly perfect, classic New York Cheesecake really doesn’t *need* much adornment. The flavor profile of the tangy cream cheese and the buttery crust is so complex and satisfying on its own. Honestly, if I’m serving it for a simple family dessert, I’ll just let it stand proud with nothing but a light dusting of powdered sugar.
But, if you are serving this as the showstopper for a holiday or a dinner party, we absolutely have to complement that richness without drowning out the flavor. Think delicate accents, not heavy blankets of topping!
Here are my favorite ways to dress up this indulgent treat:
- Fresh Seasonal Fruit: Nothing beats the brightness of fresh fruit against the dense, creamy filling. Think thinly sliced strawberries, vibrant raspberries, or deep, dark blueberries. They add color and a lovely little burst of acidity. You can serve them alongside, or gently cascade a small pile over just one slice.
- Simple Berry Compote: If you want a little sauce, keep it light. I make a quick stovetop compote using frozen mixed berries, a squeeze of lemon juice, and just a tablespoon of sugar. Cook it until it thickens slightly, and then let it cool completely. The slight tartness is gorgeous against the sweetness. You can check out a simple recipe idea for inspiration right here, but I usually just eyeball it!
- A Drizzle of Quality Sauce: If you must have chocolate or caramel, use the absolute best quality you can find, and drizzle it very sparingly right before serving. We want a suggestion of chocolate, not a mudslide! A tiny, thin ribbon across the plate is all you need.
The key here is restraint. This Homemade Cheesecake is already incredibly rich and decadent. Let the texture and the classic flavor shine!
Frequently Asked Questions About Making Homemade Cheesecake
I get so many messages after people try making this recipe, and that’s fantastic! It means you’re getting in the kitchen and creating something amazing. Most questions usually circle back to texture and cracking, which is totally normal when tackling a Classic Cheesecake. I’ve pulled together some of the most frequent queries I hear about achieving that perfect, dense dessert.
Can I skip the water bath? I’m worried about wrapping the pan!
Oh, honey, this is the question I get every single time! If you are aiming for that truly signature, velvety, Creamy Baked Cheesecake texture, then no, you really shouldn’t skip the water bath (or bain-marie). The water bath creates steam in the oven, and steam is the secret to gentle, even baking. Without it, the dry heat of the oven bakes the cheesecake mixture rapidly from the outside in. This causes the edges to set way before the center, leading to shrinkage and, yup, cracks!
Wrapping the pan correctly is super important, but once you do it once, you’ll realize it’s just a simple preventative measure. Think of it as essential safety gear for your New York Cheesecake! If you absolutely cannot do it, you must drastically lower your oven temperature and increase your slow cooling time, but that’s playing a risky game.
Why is my filling lumpy even though my cream cheese was room temperature?
I was working with a reader recently who had this exact issue with her Homemade Cheesecake! The number one reason for lumps, besides cool cream cheese, is using an electric mixer that’s too powerful, or mixing too long. We worked through this by learning to scrape down the bowl more frequently than I thought necessary. If you’re using a paddle attachment, make sure you stop the mixer and physically scrape the sides and bottom—especially where the dense cream cheese likes to hide—every minute or so while beating the initial block. Then, once the eggs go in, switch to the lowest speed possible! Slow and steady wins the race for that smooth finish. You can read more about common pitfalls here.
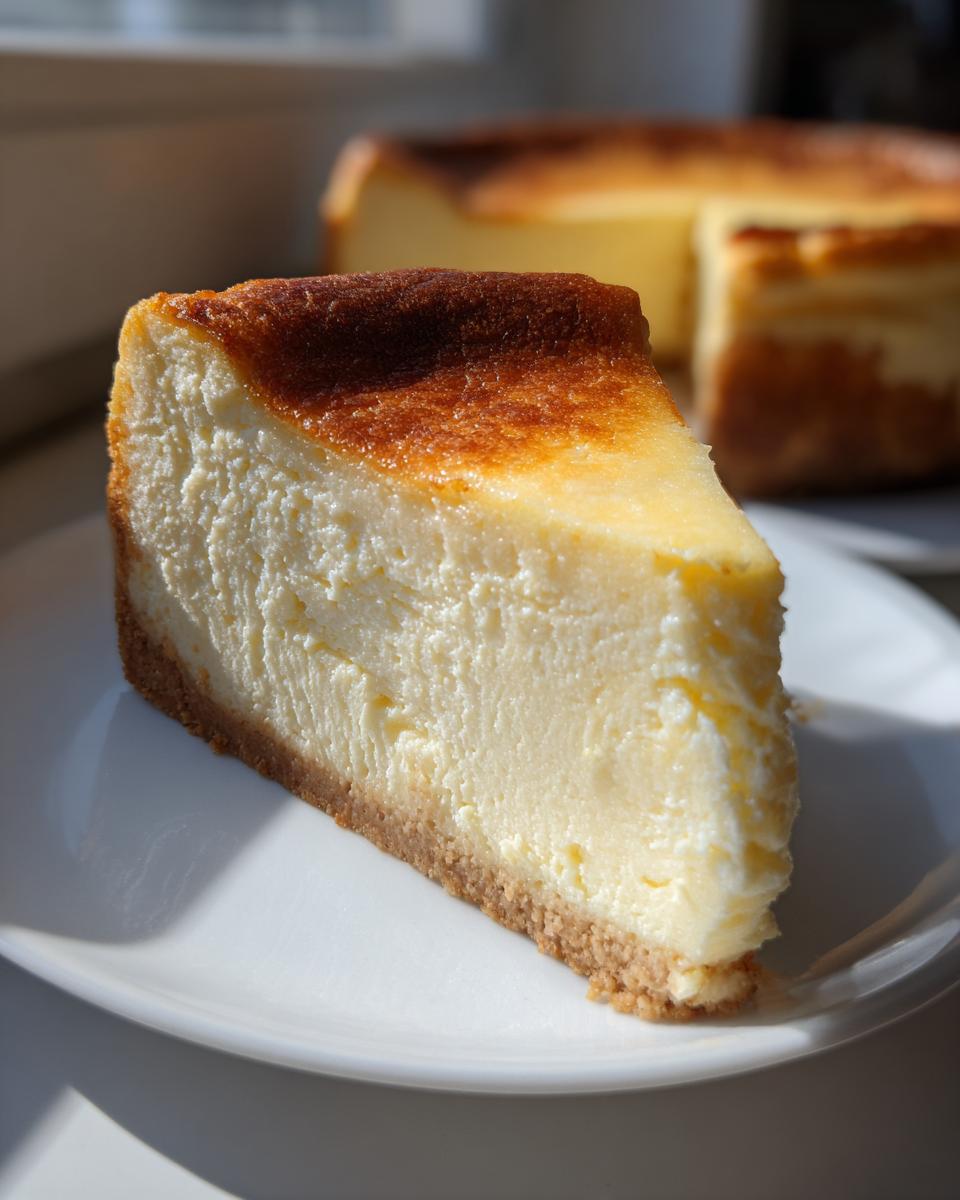
How tall should my finished cheesecake be?
That’s a great question that gets right to the heart of the classic New York style! We are aiming high! Because we are careful not to overmix and we’re using that stabilizing flour, this recipe is designed to bake up tall and proud, resulting in a gorgeous, thick slice. You should expect your finished, chilled cheesecake to be at least 2 to 2.5 inches tall in the center. If yours came out much flatter, it usually means the batter rose too quickly in the oven, likely due to excess air incorporated during mixing. Keep practicing that gentle mixing technique from the instructions!
Can I use alternative crackers for the crust?
While the buttery Graham Cracker Crust is the classic pairing for this Rich Dessert, you absolutely can switch it up if you want! Vanilla wafers or even finely crushed gingersnaps make delicious bases. Just make sure you use the same binding agent—the melted butter and sugar—and press it with the same amount of force. We want that solid foundation underneath all that creamy goodness without having to rely on the sides of the pan to hold the structure!
For even more troubleshooting insights, especially if you’re looking to make a crustless version, I always recommend looking at established bakers like the folks over here for alternative ideas!
Estimated Nutritional Data for Your New York Cheesecake
Now we come to the part where we count the cost—figuratively and literally! Because this is a decadent, rich dessert made with full-fat dairy, it should certainly be saved for special occasions. Remember that this nutritional breakdown is based on my specific ingredient ratios for 12 generous servings, and your numbers might shift a little depending on the brands of cream cheese or butter you choose. A slice of this New York Cheesecake is truly an indulgence, so let’s look at what makes it so satisfying!
For one slice of this incredibly dense and creamy delight, here is the estimated nutritional profile:
- Calories: Roughly 450 per slice. Yes, this is not a light treat, but notice the balance!
- Fat: Around 30g total, with about 18g being saturated fat—that’s the goodness from the cream cheese and butter that gives us that luxurious mouthfeel.
- Carbohydrates: About 38g, mostly coming from the sugars in the filling and the crust.
- Protein: A solid 8g, thanks to all that dairy content.
- Sugar: Roughly 35g. Remember, a good portion of that is natural sugar from the dairy itself, but it’s definitely a sweet treat bound for celebrations!
I always say, if you’re going to indulge, indulge properly! This is why we go all-in on the full-fat ingredients to ensure we get that Perfect Cheesecake Texture. Don’t feel guilty about the numbers; just know that every bite of this Homemade Cheesecake is worth the effort. Enjoy it slowly!
Share Your New York Cheesecake Creations
Whew! We made it! Now you have successfully navigated the world of room-temperature dairy, performed the delicate task of water bath wrapping, and resisted the urge to overmix—that means you’ve earned yourself the best slice of dense, creamy dessert possible!
I am genuinely so excited for you to try this method. When you finally pull that flawless, tall New York Cheesecake out of the oven and see that perfect surface, I want to hear every single detail! Did you use the slow cooling trick? Did your edges stay firm but your center still have that little wobble we talked about? Don’t keep those successes a secret!
Please, please, please head down to the comments section below and leave a rating. Five stars if you managed to capture that ultra-creamy texture and, most importantly, if you achieved a totally crack-free top! Telling me you nailed the No Crack Cheesecake technique just makes my entire week. Your feedback helps other home bakers who might be nervous about baking their first truly Classic Cheesecake.
And if you took photos—and I really, really hope you did!—tag me on social media! I love seeing your beautiful, towering creations warming up your tables. It brings me so much joy to see my professional knowledge translate into such a wonderful, indulgent dessert coming straight from your kitchen. I saw some stunning results from early testers while developing this, and I know you can match that level of perfection. If you’re looking for other ways people are serving their rich treats, check out the inspiration shared over here. Happy baking, everyone!
PrintThe Best Classic New York Cheesecake Recipe: Rich, Creamy, and No Cracks

Achieve the ultimate dessert perfection with this classic New York Style Cheesecake. This recipe delivers a dense, rich, and velvety smooth filling atop a buttery graham cracker crust, using the water bath method to guarantee a flawless, no-crack finish.
- Prep Time: 30 min
- Cook Time: 75 min
- Total Time: 9 hours 45 min
- Yield: 12 servings 1x
- Category: Dessert
- Method: Baking
- Cuisine: American
- Diet: Vegetarian
Ingredients
- 1 1/2 cups graham cracker crumbs
- 1/4 cup granulated sugar (for crust)
- 6 tablespoons unsalted butter, melted
- 4 (8 ounce) packages full-fat cream cheese, softened to room temperature
- 1 1/2 cups granulated sugar (for filling)
- 1/4 cup all-purpose flour
- 1 teaspoon vanilla extract
- 1/4 teaspoon salt
- 1 cup sour cream, room temperature
- 4 large eggs, room temperature
Instructions
- Prepare the crust: Combine graham cracker crumbs, 1/4 cup sugar, and melted butter. Press the mixture firmly into the bottom of a 9-inch springform pan. Chill the crust for 30 minutes while you prepare the filling.
- Preheat your oven to 350°F (175°C). Wrap the outside of the springform pan tightly with heavy-duty aluminum foil to prevent water from entering during the water bath.
- Make the filling: In a large bowl using an electric mixer on medium speed, beat the softened cream cheese until completely smooth, about 3 minutes. Scrape down the sides of the bowl frequently.
- Add the 1 1/2 cups sugar, flour, vanilla extract, and salt. Mix until just combined, being careful not to overmix.
- Beat in the sour cream until smooth. Add the eggs one at a time, mixing only until each egg is incorporated. Stop mixing as soon as the last egg is combined to avoid incorporating too much air, which causes cracks.
- Pour the filling over the chilled crust in the prepared springform pan.
- Prepare the water bath: Place the foil-wrapped springform pan inside a larger roasting pan. Carefully pour hot water into the roasting pan until the water reaches about halfway up the sides of the springform pan.
- Bake for 60 to 75 minutes. The edges should look set, but the center 2 inches should still have a slight jiggle when gently nudged.
- Turn off the oven. Prop the oven door open slightly (about 2 inches) using a wooden spoon. Let the cheesecake cool inside the oven on the rack for 1 hour. This slow cooling prevents cracking.
- Remove the cheesecake from the water bath and foil. Let it cool completely on a wire rack at room temperature.
- Chill: Once cool, cover the cheesecake loosely with plastic wrap and refrigerate for at least 6 hours, or preferably overnight, before slicing and serving.
Notes
- Ensure all dairy ingredients (cream cheese, sour cream, eggs) are at true room temperature. This is key for a smooth, dense cheesecake texture.
- Do not overbeat the batter once the eggs are added; excess air leads to rising and subsequent cracking during cooling.
- The water bath (bain-marie) creates steam, which bakes the cheesecake gently and evenly, resulting in that signature velvety cheesecake texture.
Nutrition
- Serving Size: 1 slice
- Calories: 450
- Sugar: 35g
- Sodium: 350mg
- Fat: 30g
- Saturated Fat: 18g
- Unsaturated Fat: 12g
- Trans Fat: 0.5g
- Carbohydrates: 38g
- Fiber: 1g
- Protein: 8g
- Cholesterol: 120mg