
Hello there, and welcome in! I’m Katie, and I’m so excited you stopped by Frosted Fancies today. If you’re looking for a dessert that screams summer fun but doesn’t require you to even peek at your oven dial, you are in the right place! We are making the most incredible banana split cake today. This dreamy, creamy creation captures every bit of that classic ice cream parlor flavor without any real fuss. Believe me, after years developing recipes for big brands, I know exactly how to get that perfect layered structure reliably, and this No Bake Banana Split Cake is truly foolproof.
- Why This No Bake Banana Split Cake is Your New Favorite Summer Dessert
- Gathering Ingredients for Your Banana Split Cake
- How to Prepare the Best No Bake Banana Split Cake
- Expert Tips for a Perfect Chilled Banana Dessert
- Variations on the Classic Banana Split Cake
- Serving Suggestions for Your Banana Split Cake
- Storage & Reheating Instructions for This Retro Banana Dessert
- Frequently Asked Questions About Banana Split Cake
- Nutritional Data for the Banana Split Cake
Why This No Bake Banana Split Cake is Your New Favorite Summer Dessert
When the sun is blazing, the last thing I want to do is heat up the kitchen. That’s why this No Bake Banana Split Cake is an absolute lifesaver! It comes together so fast, and since it chills instead of bakes, you get that rich, thick texture without the heat. It’s truly the recipe you need for those busy afternoons.
When I first tested this recipe, I realized it checked every box for a perfect summer dessert. You can check out the original inspiration here: No-Bake Banana Split Cake.
- It’s a genuinely Creamy Summer Cake—cool, fluffy, and refreshing in every bite.
- It’s completely reliable, making it a true Potluck Perfect Dessert you never have to worry about.
- You get all the classic banana split flavors—chocolate, fruit, cream—in one easy slice!
No Oven Required Treats for Hot Days
Seriously, who needs an oven when you have a refrigerator? This recipe is firmly in the “no oven required treats” category. That means less cleanup, less heat, and more time spent relaxing outside. It’s the definition of a stress-free, sweet ending to any summer meal.
Simple Party Desserts Assembly
Honestly, the active assembly time is less than 25 minutes if you have everything ready to go. You’re mostly just layering and spreading! This ease of assembly makes it a fantastic Crowd Pleaser Dessert because I can whip it up in the morning and have it ready for the evening potluck without rearranging my whole day.
Gathering Ingredients for Your Banana Split Cake
Alright, let’s talk ingredients! Because this is a no-bake wonder, the quality and preparation of what you bring into the kitchen really matter. I always like to have everything measured out before I start mixing—I call it my ‘mise en place’ moment—because once we start building the layers for this banana split cake, things move quickly. You can jump over and see what I use in my own kitchen planning right here.
Graham Cracker Crust Dessert Base
This is the sturdy, slightly salty foundation that holds everything together. You’ll need 1 1/2 cups of graham cracker crumbs—make sure they’re fine! Then, you mix that with 1/2 cup of unsalted butter that’s been melted down gently. We want that whole mixture to look like wet sand before it hits the dish.
Creamy Filling and Fruit Layers for Banana Split Cake
For the creamy heart of this layered fruit cake, we start with 8 ounces of cream cheese, which absolutely must be softened—no shortcuts there! We mix that with 1 cup of granulated sugar and 1 teaspoon of vanilla extract. Then, here’s the crucial part for texture: you’ll fold in about half of your thawed whipped topping, and then we get to the fruit!
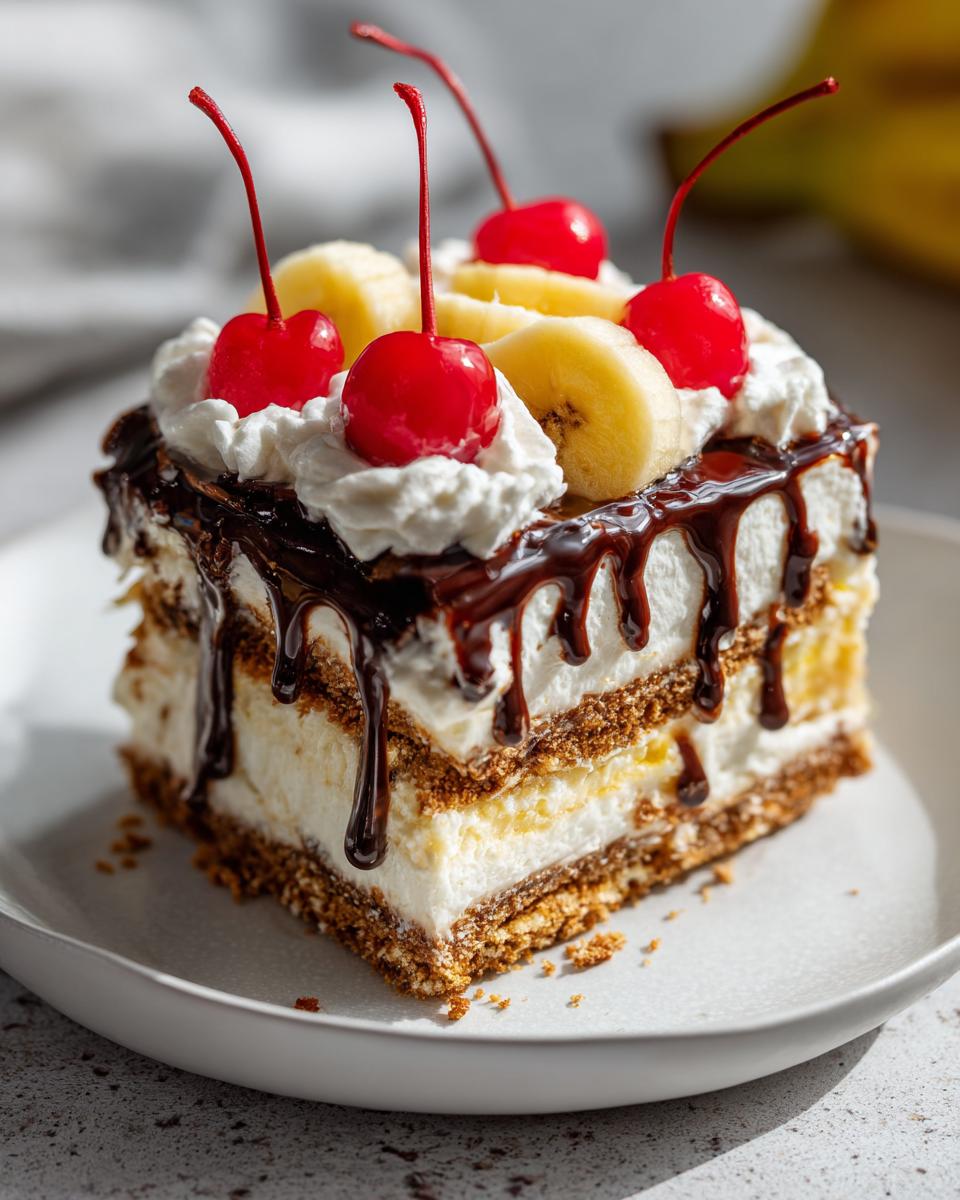
You’ll need 3 large, ripe bananas, sliced nicely, and that 20-ounce can of crushed pineapple. Listen to me now: drain that pineapple until you think it’s done, and then drain it again! Excess liquid is the enemy of a perfectly set banana split cake. Finish it off with those halved maraschino cherries, a drizzle of chocolate syrup, and nuts if you’re feeling fancy.
How to Prepare the Best No Bake Banana Split Cake
This is where we bring all those beautiful ingredients together! Since we aren’t using the oven, precision in layering is everything for a structured, perfect serving every time. My background in recipe development is all about making sure these steps are totally clear so you get that beautiful, tall slice of banana split cake. This is truly an easy process, but we need to be gentle when folding to keep that filling light!
Step 1: Setting the Graham Cracker Crust Dessert
First thing’s first: the crust! In a medium bowl, mix up your graham cracker crumbs and melted butter until everything is moistened perfectly. Then, press that mixture down firmly and evenly onto the bottom of your 9×13 dish. You want a solid base! Pop that dish into the refrigerator now; it needs to chill for about 15 minutes while you move onto the filling. This short chill time makes sure the crust doesn’t crumble when we lay our first layer down.
Step 2: Creating the Fluffy Creamy Cake Filling
Grab your big mixing bowl. Beat the softened cream cheese, granulated sugar, and vanilla extract until it’s totally smooth—no lumps allowed! Then, take about half of your thawed whipped topping and gently, I mean *gently*, fold it in with a rubber spatula. Don’t use the mixer here! We are trying to keep those air bubbles in there to make this a truly Fluffy Creamy Cake, so fold until *just* combined. You can see my technique in action for similar recipes over here.
Step 3: Layering the Banana Split Inspired Dessert
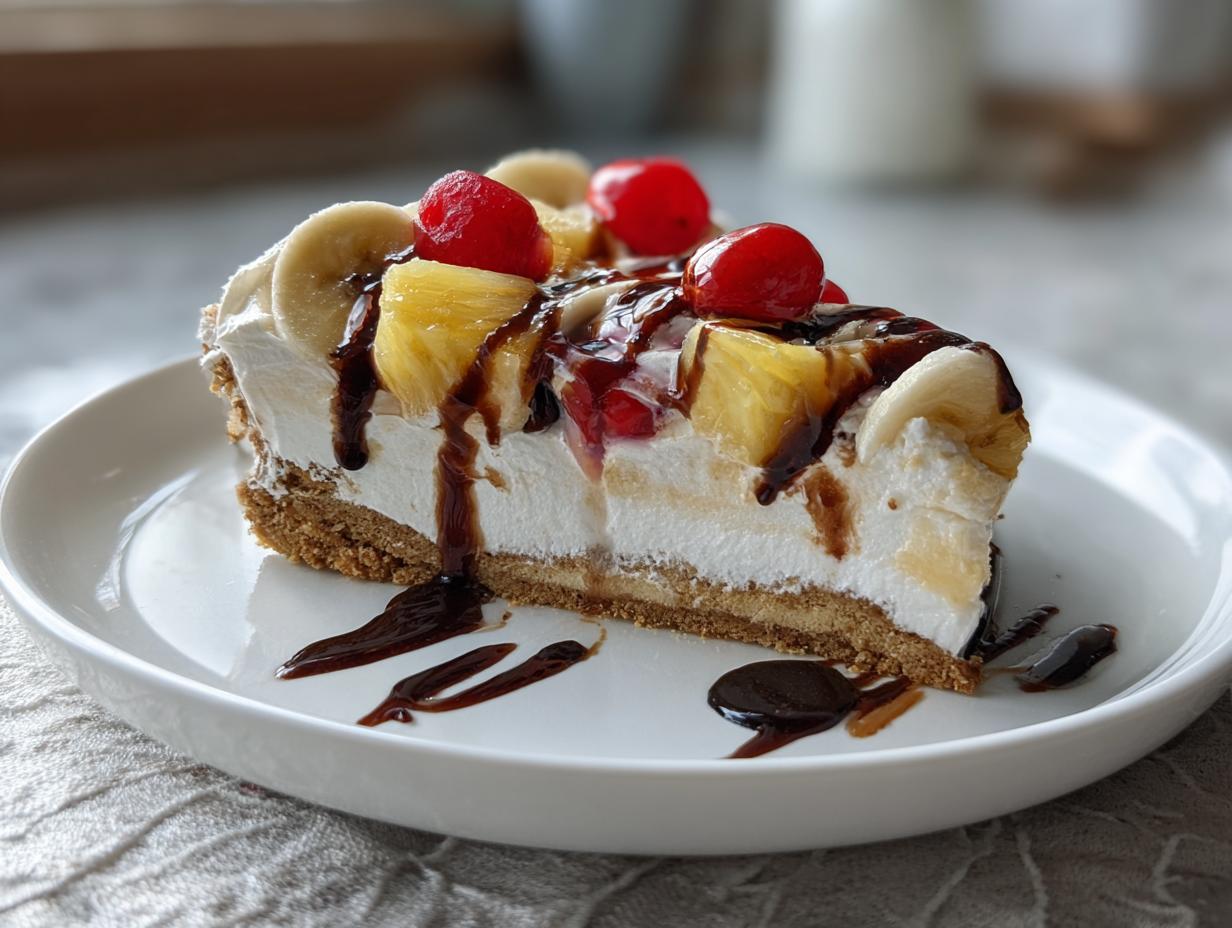
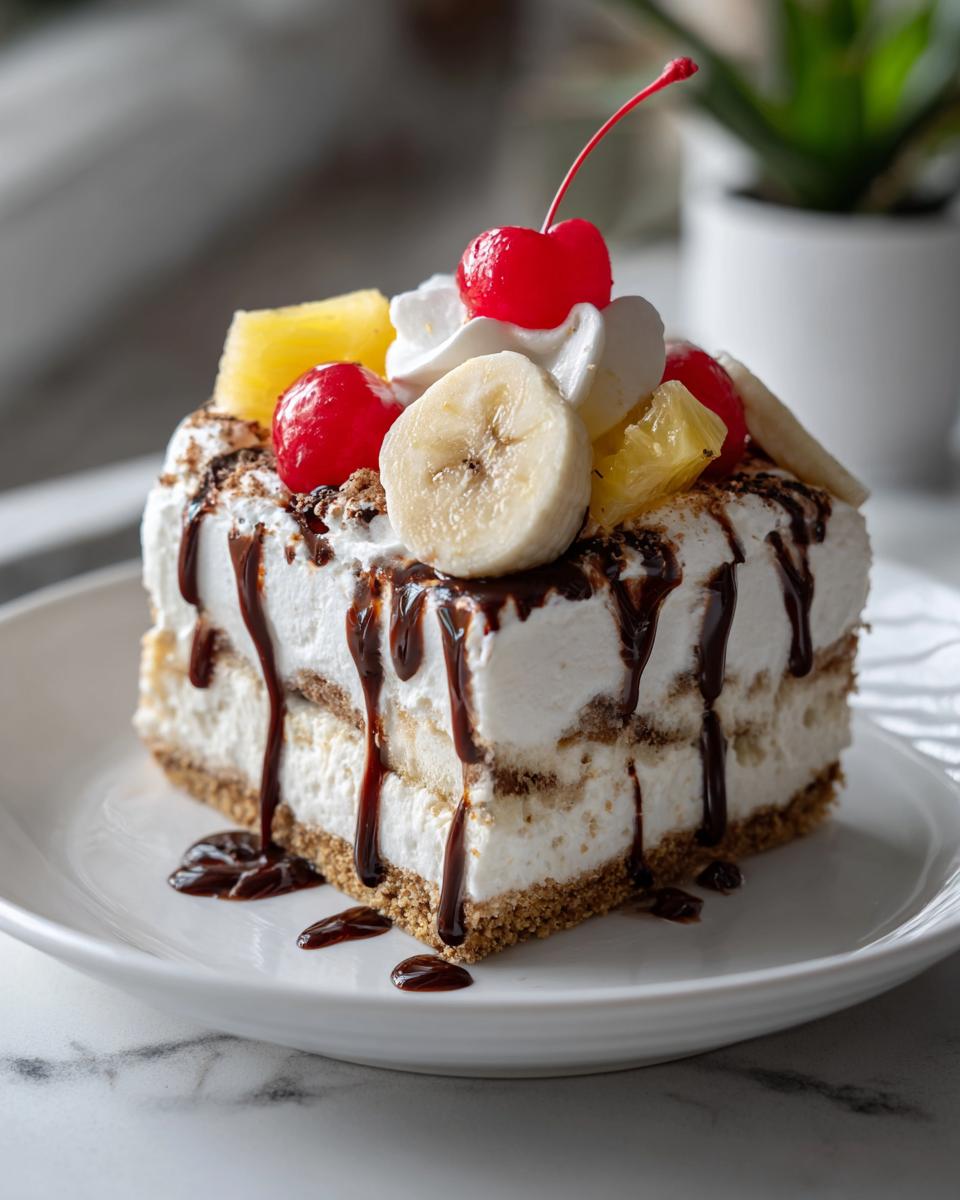
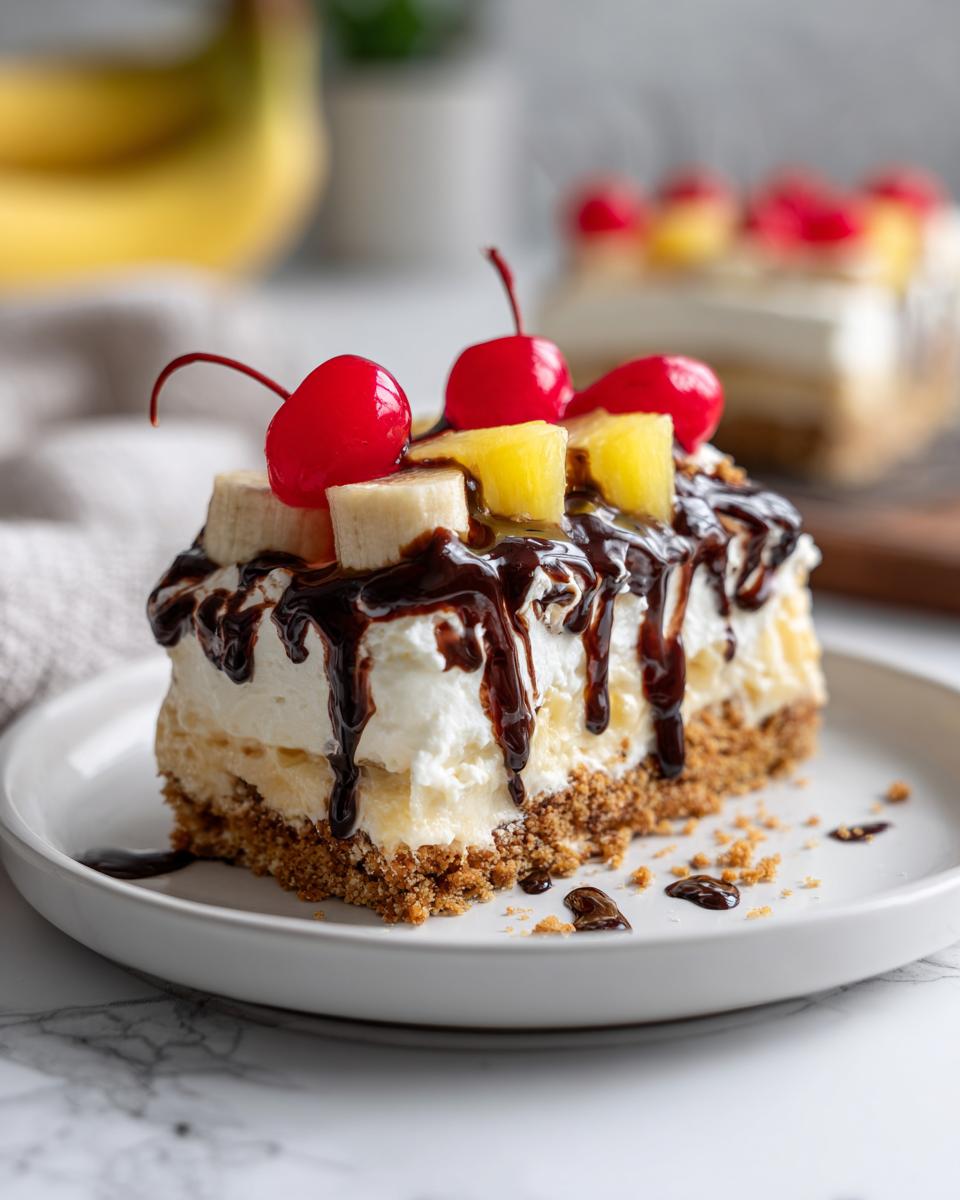
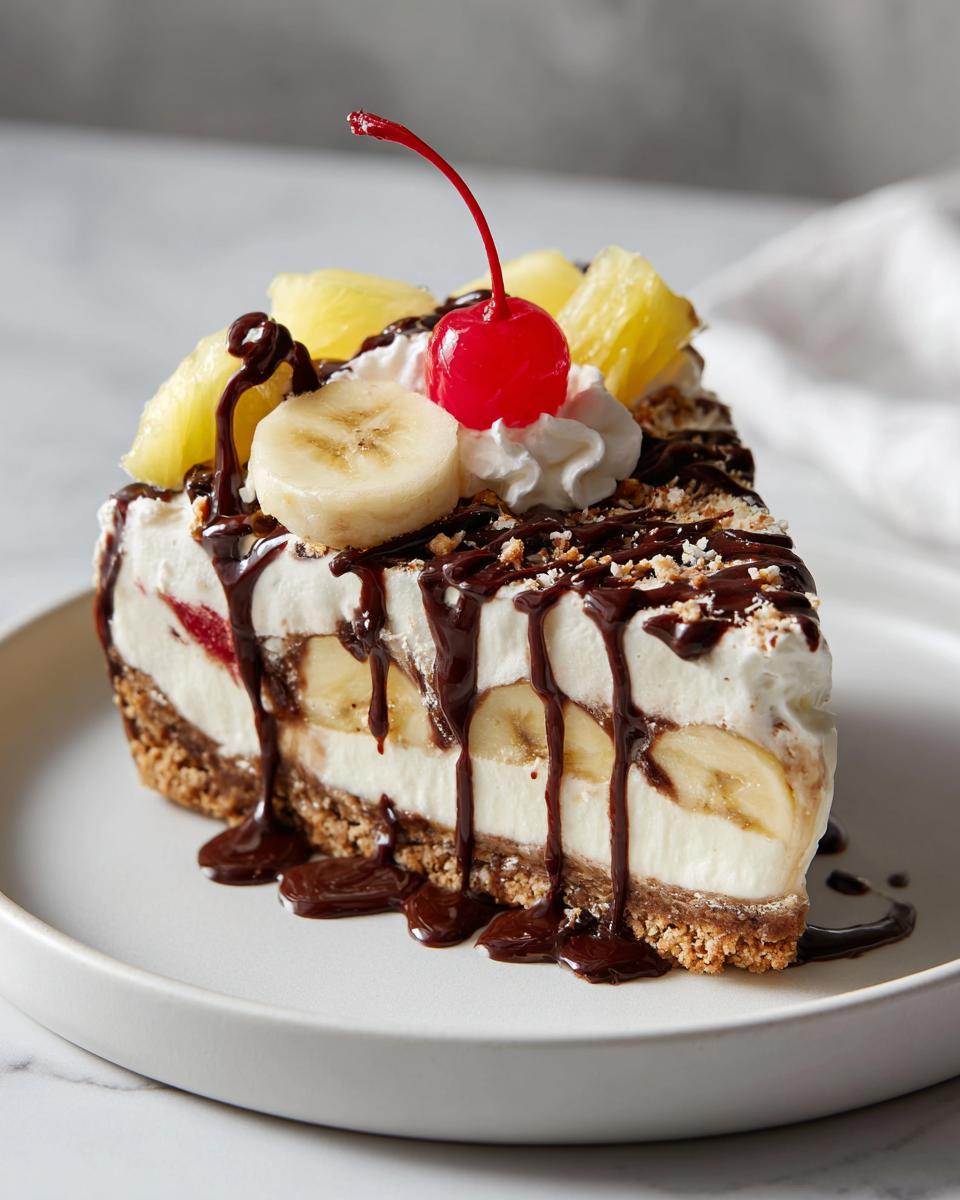
Time to build! Spread that luscious cream cheese mixture right over your chilled crust. Don’t peek at the instructions too much; just focus on an even layer. Next, arrange your sliced bananas neatly over that cream layer. Once the bananas are down, sprinkle that well-drained crushed pineapple all over the top of them. You’re starting to see the magic of this Banana Split Inspired Dessert come together!
Step 4: Final Chill and Garnish for Your Banana Split Cake
Spread the remaining half of the whipped topping over the fruit. Now, we make it pretty! Drizzle generously with chocolate syrup—don’t be shy there—and carefully place those halved maraschino cherries across the top. If you are using nuts, sprinkle them on last. The absolute, non-negotiable final step for any good banana split cake is chilling. Cover it tightly and stick it in the fridge for a minimum of 4 hours, but honestly, overnight is what really sets everything beautifully.
Expert Tips for a Perfect Chilled Banana Dessert
Now that you know the steps, let me share a couple of little secrets that take this from good to truly spectacular. Since this is a make ahead dessert, setting yourself up for success before that 4-hour chill is key. I learned this the hard way, trust me! Years ago, I thought I’d save time by just patting the pineapple dry with a paper towel. Big mistake! The next morning, my beautiful banana split cake had little watery puddles around the edges. Yikes!
If you want that refreshing, crisp texture that defines a great chilled banana dessert, you need to listen to Katie. I always refer back to my tested techniques when whipping these up, and you can find my notes on refrigeration for this no bake banana split cake.
Ingredient Clarity: Preventing a Watery Banana Split Cake
Okay, focus on the fruit. Your bananas should be perfectly ripe—yellow with maybe a few tiny brown spots—but still firm enough to slice neatly. We don’t want mushy ones! And please, please, please, drain that canned crushed pineapple until you’re sick of it. I always use a fine-mesh sieve and let it sit over a bowl for at least 20 minutes. Excess moisture will ruin the structure of that cream cheese layer, and nobody wants soup where cake should be!
Achieving the Ideal Make Ahead Dessert Set
While 4 hours will certainly get the job done, if you can manage it, letting this sit overnight is pure gold. The science here is that the cream cheese and whipped topping need time to fully bond and firm up around the fruit. Chilling overnight allows the sugars to redistribute and the layers to fuse together into one solid slab. This ensures that first slice you cut is clean, perfect, and ready for company. It also means you can bake the day before any big party!
Variations on the Classic Banana Split Cake
Now that you’ve mastered the classic, I love mixing things up! Since this is such a flexible base—a gorgeous, creamy canvas, really—it’s fun to experiment with what fruit you use. You definitely want to stick to the no-bake method for this specific banana split cake, but we can certainly play with the fruit layers. I’ve had huge success taking this basic formula and calling it a different kind of layered fruit cake.
You can find my general advice on assembling layered treats right here, which really applies well to these swaps!
Substituting Fruits in Your Layered Fruit Cake
The classic needs pineapple, of course, but what if you wanted a little more zip? Try adding sliced fresh strawberries right on top of the banana layer, or even mixing them in with the pineapple! Strawberries hold up beautifully in the chill. Another great addition is blueberries, though you want to use them sparingly so they don’t bleed too much color into the white cream layer. Just remember, whatever fruit you add, drain it well first. That’s the golden rule for making sure this easy banana split dessert stays firm!
Serving Suggestions for Your Banana Split Cake
Since this banana split cake is so rich and chilled, thinking about what you serve it with is almost as important as making the layers perfect! We treat this like the ultimate Ice Cream Cake Alternative in our house, so you want toppings that enhance the cold factor. A little extra chocolate syrup drizzled right before serving never hurts—you know I love topping everything with dark, rich chocolate!
It’s fantastic on its own, of course, but a light wafer cookie on the side or even a sprinkle of toasted pecans adds a wonderful textural crunch that your guests will just love. For a simple touch, I recommend serving the slices on chilled plates. You can see some of my other favorite pairings for chilled banana desserts on my dedicated page!
Storage & Reheating Instructions for This Retro Banana Dessert
The best part about this banana split cake is how wonderfully it functions as a make ahead dessert! Since we aren’t dealing with eggs or flour that need baking, storage is super simple, but you need to keep it cold. Cover your 9×13 dish tightly with plastic wrap—I usually put a piece of foil over the plastic for extra security—and pop it right back into the refrigerator. It stays perfectly good for up to three days. Do not—I repeat, do not—try to reheat this! It’s meant to be served cold and creamy, otherwise the whipped topping turns soupy. You can read more about keeping chilled desserts perfect here, including a great tip from a friend over at The Kitchen is My Playground: No-Bake Banana Split Cake.
Frequently Asked Questions About Banana Split Cake
I always get so many questions about this recipe—it’s popular for a reason! People want to customize it, or they just want to make sure it holds up for their big party spread. Since I’ve tested this No Bake Banana Split Cake dozens of times, I’ve figured out the answers to the most common snags. You can find some of my favorite tips for making chilled desserts over at Laura’s site, too: No Bake Banana Split Cheesecake.
Can I use fresh pineapple instead of canned in this No Bake Banana Split Cake?
That’s a great question! You absolutely can use fresh pineapple, but you have to be careful. Fresh pineapple has natural enzymes that just *love* to break down whipped topping and cream cheese. If you use it, you need to chop it up and sauté it in a pan for about five minutes to neutralize those enzymes, and then let it cool completely before layering. Honestly, for simplicity, the canned, well-drained pineapple is just easier here!
What is the best way to freeze this Easy Banana Split Dessert?
I usually advise against freezing creamy, layered desserts like this, but if you absolutely must, you can! It’s a decent Ice Cream Cake Alternative, but the texture isn’t quite the same. If you freeze it, wrap it super tightly—foil then plastic wrap is my trick—and keep it frozen for no more than a month. When you thaw it, let it sit in the fridge overnight. Just know the texture of the whipped topping might get a tiny bit grainy, but it’ll still taste lovely.
What makes this recipe better than a Banana Split Dump Cake Recipe?
That’s a question I hear a lot, especially since the Banana Split Dump Cake Recipe is around! The main difference is structure and temperature. This no-bake version gives you that distinct, fluffy, cool, and creamy texture, much like a layered fruit cake, because the layers firm up in the cold. A dump cake is baked, giving it a denser, almost cobbler-like consistency. If you want that classic, refreshing, chilled slice, stick to this no-bake method!
Nutritional Data for the Banana Split Cake
I know some of you are watching macros or counting calories, so I always want to be transparent about what’s in the treats we make! Now, remember, since this banana split cake is made with real butter, cream cheese, and sugar—it’s a treat, not a health food! The following estimates are based on my specific recipe using standard ingredient brands and yield about 12 generous slices. As always with homemade items, your exact numbers might vary a little bit.
- Serving Size: 1 slice
- Calories: 350
- Sugar: 35g
- Fat: 19g
- Saturated Fat: 10g
- Carbohydrates: 45g
- Protein: 4g
It’s definitely a rich dessert, but when you consider all the fresh fruit packed in there, it’s a fair trade for such a delicious, no oven required treat! Enjoy responsibly!
PrintNo-Bake Banana Split Cake

Create this creamy, layered No-Bake Banana Split Cake. It captures the classic ice cream parlor flavors using a graham cracker crust, fresh fruit, and whipped topping, all without turning on your oven. This chilled dessert is perfect for summer parties or potlucks.
- Prep Time: 25 min
- Cook Time: 0 min
- Total Time: 4 hr 25 min
- Yield: 12 servings 1x
- Category: Dessert
- Method: No Bake
- Cuisine: American
- Diet: Vegetarian
Ingredients
- 1 1/2 cups graham cracker crumbs
- 1/2 cup unsalted butter, melted
- 8 ounces cream cheese, softened
- 1 cup granulated sugar
- 1 teaspoon vanilla extract
- 1 (8 ounce) container frozen whipped topping, thawed, divided
- 3 large ripe bananas, sliced
- 1 (20 ounce) can crushed pineapple, drained well
- 1 (10 ounce) jar maraschino cherries, drained and halved
- 1/2 cup chocolate syrup
- 1/4 cup chopped nuts (optional)
Instructions
- Prepare the crust: Mix graham cracker crumbs and melted butter in a medium bowl until combined. Press the mixture firmly into the bottom of a 9×13 inch baking dish. Chill the crust in the refrigerator for 15 minutes.
- Make the cream cheese layer: In a large bowl, beat the softened cream cheese, granulated sugar, and vanilla extract until smooth. Gently fold in half of the thawed whipped topping until just combined.
- Assemble the layers: Spread the cream cheese mixture evenly over the chilled graham cracker crust.
- Arrange the fruit: Place the sliced bananas over the cream cheese layer. Sprinkle the drained crushed pineapple evenly over the bananas.
- Top with remaining whipped topping: Gently spread the remaining half of the whipped topping over the pineapple layer.
- Garnish: Drizzle the chocolate syrup over the top. Arrange the halved maraschino cherries over the surface. Sprinkle with chopped nuts, if using.
- Chill: Cover the dish and refrigerate for at least 4 hours, or preferably overnight, to allow the cake to set completely.
- Serve: Slice and serve this easy banana split dessert cold.
Notes
- Drain the crushed pineapple very thoroughly; excess liquid can make the cake watery.
- For a firmer layer, you can use a mixture of 4 ounces softened cream cheese and 8 ounces cool whip for the filling instead of folding in half the whipped topping separately.
- This make ahead dessert tastes best when chilled for 8 hours or more.
Nutrition
- Serving Size: 1 slice
- Calories: 350
- Sugar: 35
- Sodium: 210
- Fat: 19
- Saturated Fat: 10
- Unsaturated Fat: 9
- Trans Fat: 0
- Carbohydrates: 45
- Fiber: 2
- Protein: 4
- Cholesterol: 45