
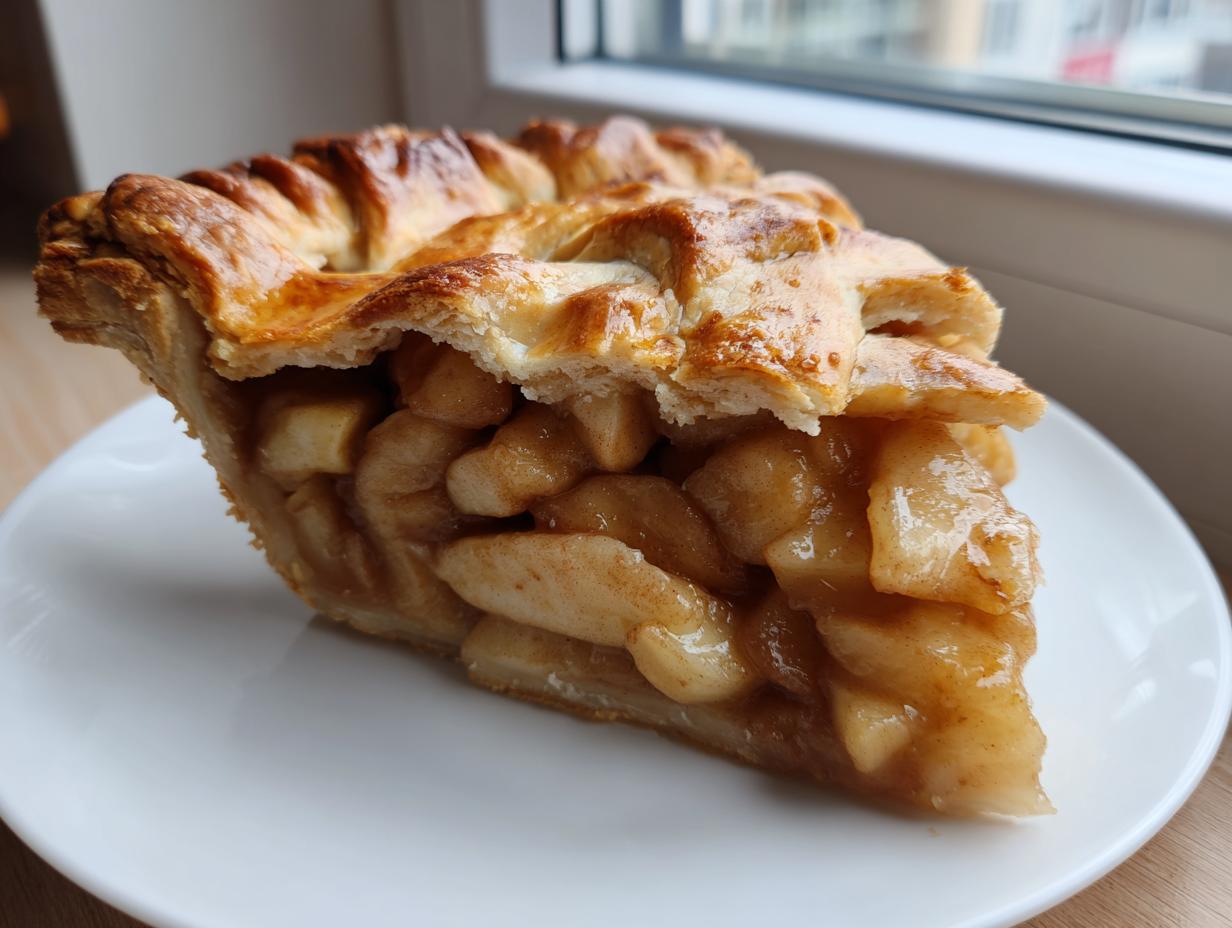
Welcome! I’m Katie, and I’m so glad you found your way to Frosted Fancies. There’s nothing quite like the smell of a perfect, classic dessert filling your home, right? That’s why I am absolutely thrilled to share what I truly believe is the Best Homemade Classic Apple Pie recipe you’ll ever try. Forget those flat, disappointing pies you’ve had before. This recipe guarantees an incredibly flaky, buttery double crust hugging a perfectly spiced, tender filling. After years developing recipes using my Food Science background, I can promise these steps will work for you every single time you tackle an apple pie from scratch.
- Why This Classic Apple Pie Recipe Guarantees Success
- Ingredients for Your Homemade Apple Pie From Scratch
- How to Make Apple Pie: Step-by-Step Instructions
- Tips for the Best Old Fashioned Apple Pie
- Serving Suggestions for Your Apple Pie Comfort Food
- Storage and Reheating Instructions for Apple Pie
- Frequently Asked Questions About Making Apple Pie
- Estimated Nutritional Data for This Apple Pie
- Share Your Apple Pie Baking Experience
Why This Classic Apple Pie Recipe Guarantees Success
I’ve tweaked and tested countless versions over the years, and I finally landed on the absolute best apple pie recipe. It might seem like a lot of steps, but trust me, these little details are what transform a good pie into a spectacular one. When you follow this method, you get true comfort food that tastes exactly like those perfect holiday memories. You can save this recipe right now and know you are set for any gathering.
- The combination of two specific apple varieties for balanced sweet and tart flavor.
- A dual-temperature baking method that sets the bottom crust perfectly.
- A rigorously tested flaky pie crust recipe that shatters beautifully.
The Science Behind the Buttery Pie Crust Recipe
The secret to that gorgeous, flaky texture? Everything must be ice cold! I mean the bowl, the water, and especially the butter. Keeping the butter in small, frozen-solid cubes prevents it from fully blending into the flour. When those cold pockets hit the high oven heat, they generate steam, which creates those airy, separate layers we all crave in a rich buttery pie crust. Overworking the dough is a cardinal sin here; mix just until it whispers that it’s ready to come together.
Achieving the Perfect Cinnamon Spiced Apple Filling
This isn’t just about dumping sugar on apples! My secret is using both Granny Smith for structure and Macintosh for softness—this blend stops everything from turning into mush. We toss everything gently with flour and spices before the apples even hit the dough. This mild pre-coating helps draw out just enough liquid so that when it bakes, you get a thick, luscious cinnamon spiced apple filling without any watery mess pooling at the plate’s bottom. It’s the perfect balance, never overwhelmingly sweet!
Ingredients for Your Homemade Apple Pie From Scratch
Okay, let’s gather our ammunition! Making an amazing homemade apple pie from scratch depends entirely on having the right components ready. Quality matters here, especially when it comes to the fats for the crust. I promise, taking the time to measure these out correctly buys you so much peace of mind later when assembling your beautiful double crust apple pie.
For the Flaky Double Crust Apple Pie Dough
Remember, everything goes in icy cold! This dough needs that temperature contrast to turn out perfectly flaky.
- 2 1/2 cups all-purpose flour
- 1 teaspoon salt
- 1 cup (2 sticks) cold unsalted butter, cut into small cubes
- 1/2 cup ice water, plus more if needed
For the Sweet Spiced Apple Pie Filling
This combination of apples gives you the best flavor depth—you want both the tartness and the sweetness.
- 6 large Granny Smith apples, peeled, cored, and sliced 1/4-inch thick
- 2 large Macintosh apples, peeled, cored, and sliced 1/4-inch thick
- 3/4 cup granulated sugar
- 1/4 cup packed light brown sugar
- 1/4 cup all-purpose flour
- 1 teaspoon ground cinnamon
- 1/4 teaspoon ground nutmeg
- 1/8 teaspoon ground allspice
- 1 tablespoon lemon juice
- 2 tablespoons unsalted butter, cut into small pieces
How to Make Apple Pie: Step-by-Step Instructions
Alright, grab your apron! Now that we have the perfect components laid out, it’s time for the fun part: putting it all together. Making a classic apple pie recipe is more about mindful technique than magic, and I’m going to walk you through every single step so your results are flawless. Remember, that long chill time for the dough is non-negotiable! I rely on a few key published guides to make sure my process is always solid, whether I’m making a simple filling or the whole nine yards.
Preparing the Buttery Pie Crust Dough
This is Step 1, and we need to treat these ingredients gently. In your bowl, combine the flour and salt. Now, toss in those cubed, super-cold butter pieces. Use a pastry blender or your fingertips—I use my hands because I like to *feel* the dough—and cut that butter into the flour until you’ve got mixtures ranging from coarse cornmeal up to things the size of small peas. Those pea-sized chunks are your secret to flakiness! Slowly stream in the ice water, just a tablespoon at a time, mixing until the dough clumps together when squeezed. Don’t knead it! Divide it into two discs, wrap them up tight, and they must chill for at least one hour. Honestly, two hours is even better if you’re not in a rush.
Mixing the Cinnamon Spiced Apple Filling
While the dough is getting happy in the fridge, we move to Step 2, the filling. Take all your beautifully sliced apples and place them in a big bowl—use a bowl bigger than you think you need! Gently toss in the sugars, the flour binder, and all those gorgeous spices: cinnamon, nutmeg, and allspice. Add the lemon juice last and toss *very* carefully. We don’t want bruised apples. Now, here’s where you pause: let that mixture sit on the counter for about 15 minutes. This gentle rest lets those sugars start drawing just a bit of moisture out of the apples, which helps prevent that dreaded soggy bottom. If you’re curious about mastering just the filling ahead of time, I always recommend checking out resources like this guide for homemade apple pie filling.
Assembling Your Double Crust Apple Pie
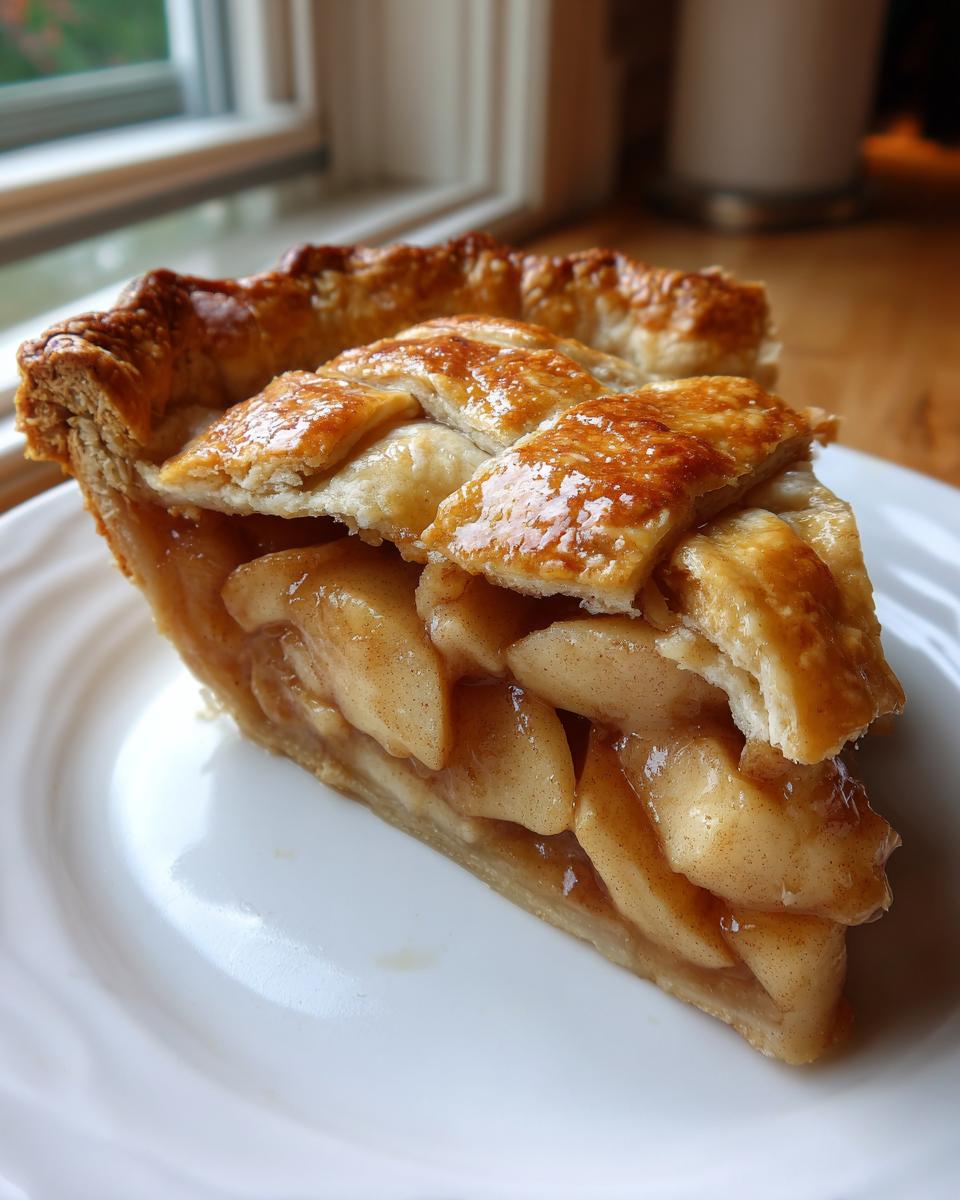
Time for assembly, which is Step 3 and 4! First, dust your surface and roll out the first disc into about a 12-inch circle. Carefully drape that dough into your 9-inch pie plate. Don’t stretch it! Just let it settle in. Now, scoop that spice-coated filling right into the bottom crust. Dot the very top of the filling pile with those two tablespoons of butter pieces—this melts and adds richness. Next, roll out that second disc for the top. Place it over the apples, trim the overhang to leave about an inch around the edge, and then crimp those edges tightly together all the way around to seal the double crust apple pie shut. Don’t forget to make a few nice, deep slits in the top crust; those are the vents where steam escapes. If you peek at the way others make their rustic apple pie, you’ll see vents are key! My favorite reference for a perfect final product is often Kristine’s approach on sealing things up just right.
Baking and Cooling the Perfect Apple Pie
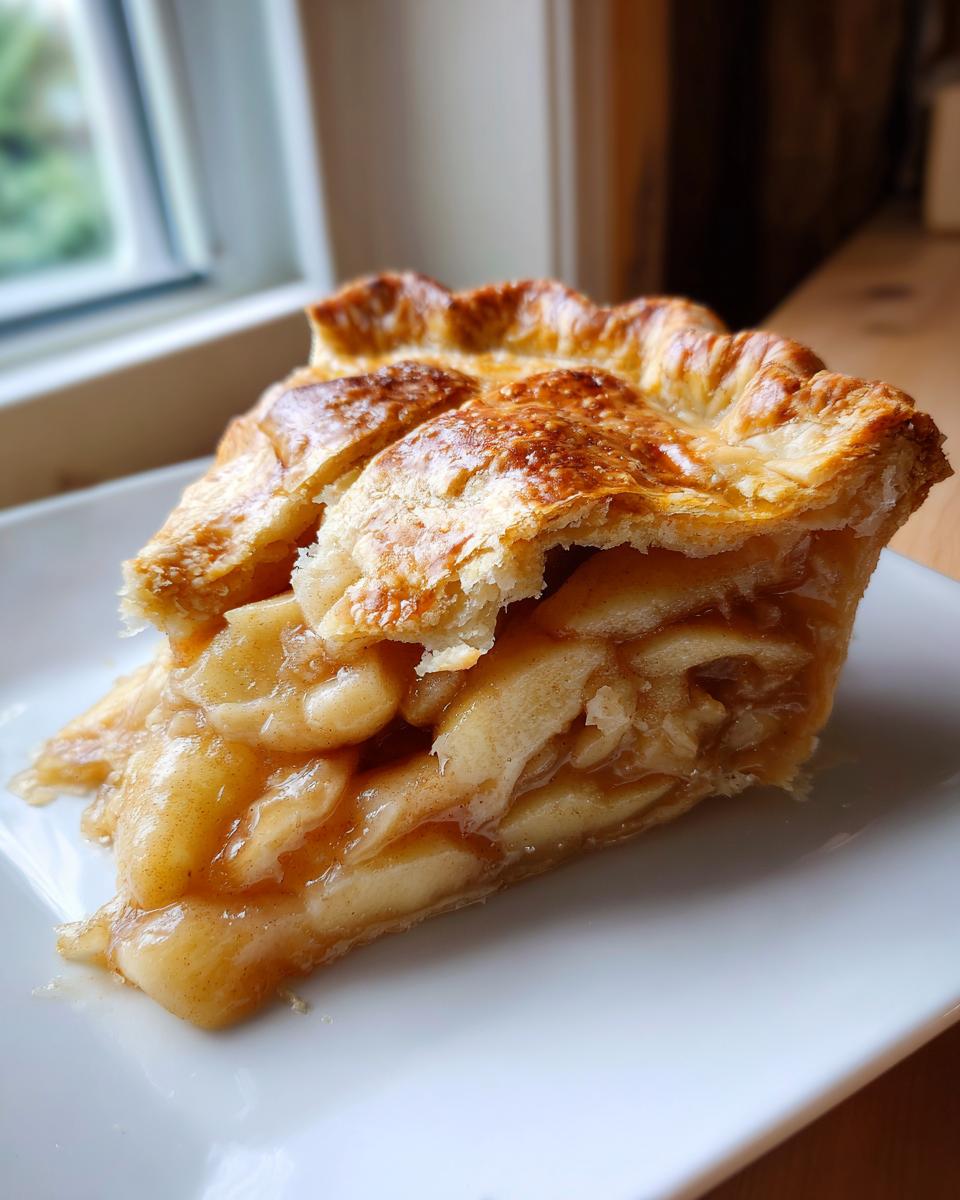
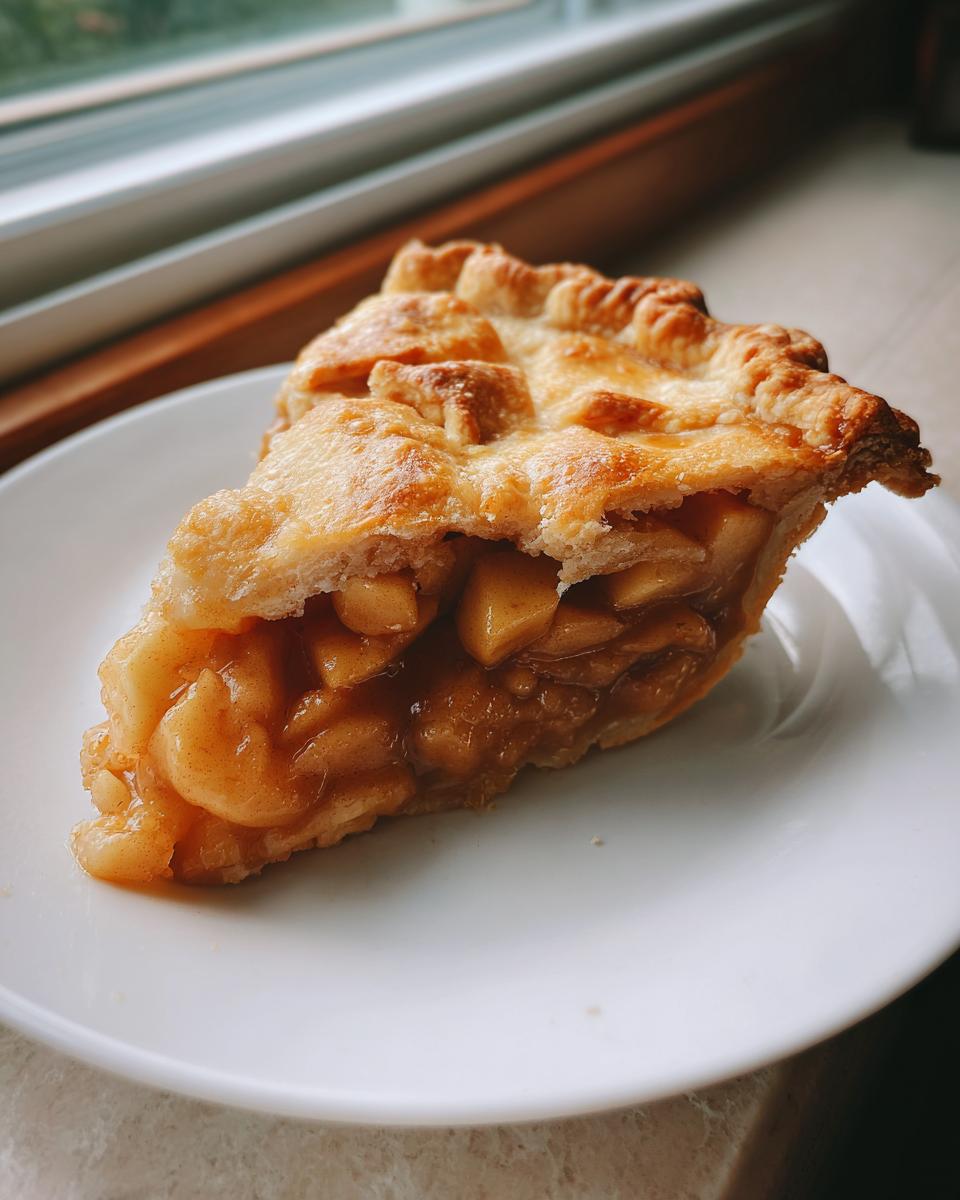
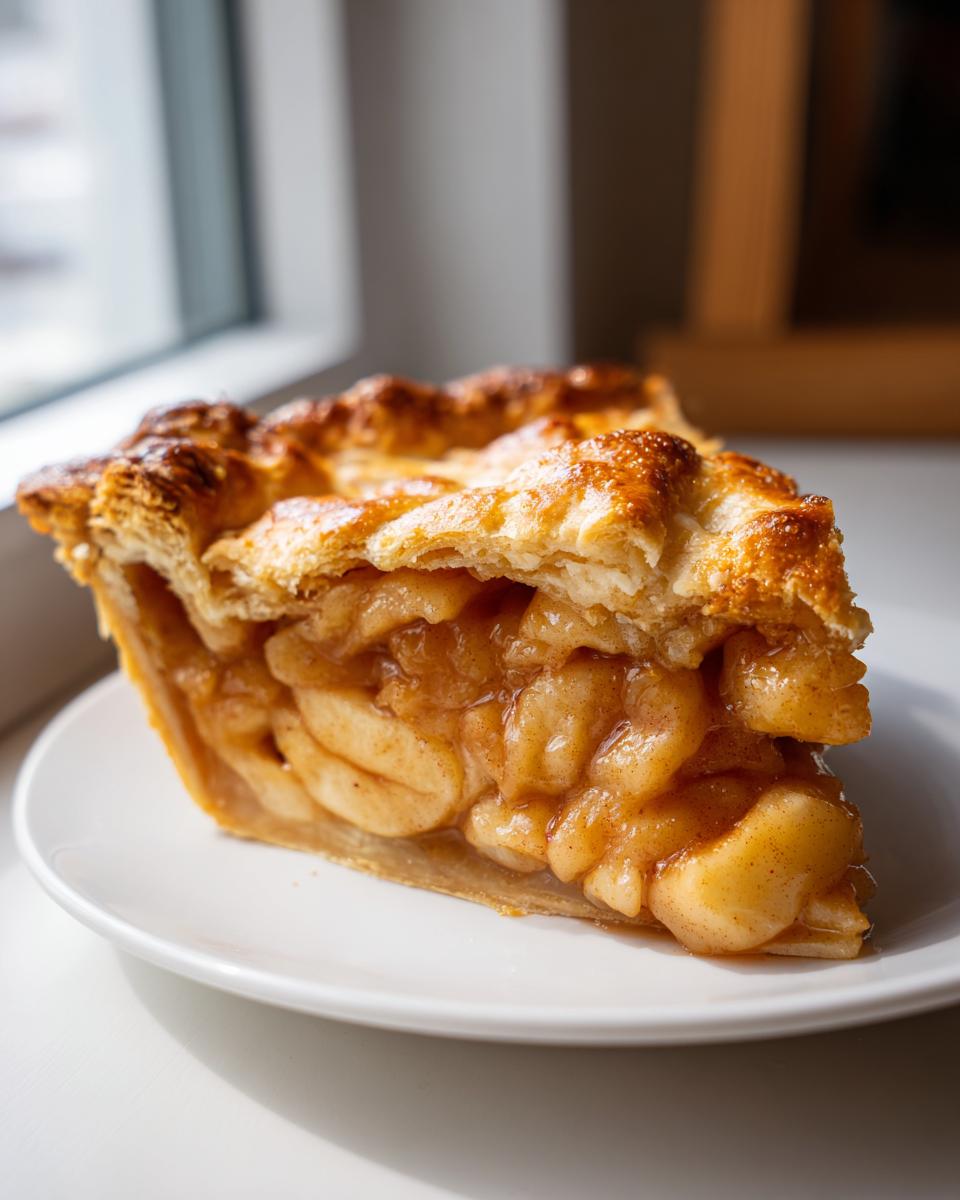
We are almost there! Step 5 is the bake. Preheat your oven to a hot 425°F (220°C). Place your pie on a baking sheet—this saves you from cleaning up any potential bubbling butter overflow. Bake it hard for 15 minutes at that high heat. Then, drop the temperature down to 375°F (190°C) and bake for another 40 to 50 minutes. If the edges start getting too dark, gently wrap foil strips around them. You know it’s done when you see the filling bubbling thickly through those vents. Finally, Step 7 is the hardest part: cooling. You absolutely must let this old fashioned apple pie cool on a wire rack for a minimum of three hours. I know, I know, the smell is torture! But this time is critical; it lets the setting agents (the flour and starch) firm up. If you slice it hot, it will run everywhere. Patience, my friend, patience!
Tips for the Best Old Fashioned Apple Pie
You’ve made the pie, but here are a few little secrets I learned while developing recipes professionally—things that really elevate this from a simple dessert to a truly memorable, old fashioned apple pie. These refined adjustments are what take you from good results to ‘I need that recipe now!’ results. When I need extra inspiration on crust perfection, I often look back at tried-and-true sources like The Food Charlatan’s approach.
Ingredient Notes and Substitutions for Apple Pie
If you can’t find Granny Smith apples—maybe the season is just starting—you can swap them out, but you must adjust the sugar slightly. Try using Jonagold or Honeycrisp instead, and perhaps reduce the granulated sugar by about two tablespoons to compensate for their natural sweetness. Also, just so you know, if you decide you’re tired of rolling out that second crust down the line, the notes in my full recipe explain how to switch this to a crumb topping! That’s the difference between a standard pie and a quick Dutch apple pie recipe. It’s flexibility through understanding the science!
Serving Suggestions for Your Apple Pie Comfort Food
You’ve done the hard work, and now it’s time to enjoy this incredible apple pie comfort food! The wait for it to cool is worth it. Serving this pie warm—not hot, remember we waited three hours?—makes it divine. The classic pairing, of course, is a generous scoop of high-quality vanilla bean ice cream. Watch it melt right down the spiced slopes of the filling. Trust me on this next one, especially if you’re serving this to a crowd: a thin slice of sharp cheddar cheese draped over the warm piece is traditional and unbelievably delicious. It cuts through the sweetness perfectly. This pie is built for family gatherings and cozy nights!
Storage and Reheating Instructions for Apple Pie
You’ve successfully baked the perfect pie, but now we have to keep it perfect until it’s time to eat—or eat the leftovers the next day! Thankfully, this classic apple pie recipe holds up really well, provided you store it correctly. The good news is that letting it cool completely after that initial three-hour cooling period is part of the battle.
If you plan to serve the pie within 8 hours of baking, you can actually leave it right on the counter, covered loosely with foil or a cake dome. My rule of thumb is just to keep it out of direct sunlight or any major heat sources. Don’t put it in the fridge right away! That chilling effect can make the crust get tough faster if it’s not strictly necessary.
For longer storage, which is often required if you’re planning ahead for thanksgiving dessert recipes, you’ll need the refrigerator. Cover the fully cooled pie tightly with plastic wrap—or transfer slices to an airtight container—and you’re good for up to three days. The crust texture will soften a bit in the cold, but don’t panic!
When it comes time to enjoy those leftovers, please don’t try to reheat the whole thing in the oven; it usually dries out the crust or makes the filling too soupy. Instead, I highly recommend reheating individual slices. Pop a slice on a microwave-safe plate and heat it for just 15 to 20 seconds. That light warmth is usually enough to wake up the spices. If you want maximum crust crispness back, pop that microwaved slice onto a baking sheet and warm it in a 300°F oven for about 5 minutes. It brings back that fresh-baked feel beautifully!
Frequently Asked Questions About Making Apple Pie
I know you might still have a few little sticking points after reading through all those details. That’s perfectly normal when tackling homemade apple pie from scratch! When I was first learning the ropes, I had a mile-long list myself. I’ve pulled the most common questions I receive below, so hopefully, we can clear up any lingering doubts before your next fall baking adventure! If you used our easy guide for a classic apple pie, you might have similar questions!
Can I make the pie crust ahead of time?
Oh, absolutely! Making the dough ahead of time is one of my favorite tricks for simplifying holiday baking. You can prepare the two dough discs, wrap them super tight in plastic wrap, and keep them in the refrigerator for up to two days. Trust me, sometimes the dough is even easier to roll out on the second day when it’s had a nice, long rest. Just make sure you pull it out onto the counter about 15 minutes before you plan to roll it out so it isn’t rock hard; you want it firm but pliable for rolling.
What is the best way to prevent a soggy bottom on my apple pie?
This is the number one fear for every baker, isn’t it? A soggy bottom is a tragedy! We tackle this in a couple of ways in this recipe. First, remember that 15 minutes the filling sits? That starts drawing out moisture. Second, the initial blast of high heat (that 15 minutes at 425°F) really shocks the bottom crust into setting up fast before the apples start releasing too much steam. Also, make sure you aren’t skipping the 1/4 cup of flour in the filling—that acts as a crucial binder to keep things tight, even with sweet spiced apple filling.
Are these apples suitable for a Thanksgiving dessert recipe?
Suitability? Darling, this recipe *is* the definition of thanksgiving dessert recipes! This is the quintessential, sturdy, flavorful pie that holds up perfectly on a busy holiday table. Because we use a mix of tart and sweet apples and bake it thoroughly, it holds its structure beautifully, which is exactly what you need when you’re juggling four different dishes. It’s the ultimate classic flavor profile that everyone expects and loves! For a fun twist on toppings, you could even look up variations on Dutch apple pie recipe.
Estimated Nutritional Data for This Apple Pie
Now, I always like to give a heads-up on what you’re eating, even when it’s the best thing you’ve made all year! Keep in mind that these numbers are just my best estimate based on the standard ingredients I used when developing this classic apple pie recipe. Brands and exact apple sizes can change things slightly, so please treat this as general guidance for your apple pie slice.
- Serving Size: 1 slice
- Calories: 450
- Sugar: 35g
- Fat: 25g
- Carbohydrates: 58g
- Protein: 4g
Share Your Apple Pie Baking Experience
Wow, we baked an amazing pie! Seriously, you should be so proud of yourself for tackling this homemade apple pie from scratch. I’ve shared all my secrets for that flaky crust and the perfect balance in the filling, and now it’s your turn to tell me all about it. Did you see how well that crust flaked? Please, don’t keep your success to yourself!
If you followed these steps, I would be thrilled if you could go ahead and leave a rating for this recipe right below. Five stars if it knocked your socks off, which I really hope it did! It helps other home cooks gain the confidence to try making their own classic apple pie.
I want to hear everything! Drop a comment below sharing how it went. Tell me if this became your favorite of all your fall baking recipes, or if you threw caution to the wind and tried that cheddar cheese serving suggestion I mentioned! If you made any tweaks or need clarification on chilling times, just ask. I read every single comment, and I’m always here to help guide you along. If you needed a little extra help along the way, maybe check out tips in this speedy version for next time!
Happy baking, and I can’t wait to see pictures of your golden-brown, perfectly crimped masterpiece!
PrintThe Best Homemade Classic Apple Pie with Flaky Double Crust

This recipe delivers the best homemade apple pie from scratch, featuring a flaky, buttery double crust and a perfectly spiced, tender apple filling that is not too sweet. Follow these simple steps for an old fashioned apple pie that guarantees success.
- Prep Time: 45 min
- Cook Time: 65 min
- Total Time: 110 min
- Yield: 8 servings 1x
- Category: Dessert
- Method: Baking
- Cuisine: American
- Diet: Vegetarian
Ingredients
- 2 1/2 cups all-purpose flour
- 1 teaspoon salt
- 1 cup (2 sticks) cold unsalted butter, cut into small cubes
- 1/2 cup ice water, plus more if needed
- 6 large Granny Smith apples, peeled, cored, and sliced 1/4-inch thick
- 2 large Macintosh apples, peeled, cored, and sliced 1/4-inch thick
- 3/4 cup granulated sugar
- 1/4 cup packed light brown sugar
- 1/4 cup all-purpose flour
- 1 teaspoon ground cinnamon
- 1/4 teaspoon ground nutmeg
- 1/8 teaspoon ground allspice
- 1 tablespoon lemon juice
- 2 tablespoons unsalted butter, cut into small pieces
- 1 large egg, beaten with 1 teaspoon water (for egg wash)
- 1 tablespoon coarse sugar for sprinkling
Instructions
- Prepare the Pie Crust: In a large bowl, whisk together 2 1/2 cups flour and 1 teaspoon salt. Cut in the cold butter using a pastry blender or your fingers until the mixture resembles coarse crumbs with some pea-sized pieces of butter remaining. Gradually add ice water, 1 tablespoon at a time, mixing until the dough just comes together. Do not overmix. Divide the dough in half, flatten each half into a disk, wrap in plastic wrap, and chill for at least 1 hour.
- Prepare the Apple Filling: In a large bowl, combine the sliced Granny Smith and Macintosh apples with granulated sugar, brown sugar, 1/4 cup flour, cinnamon, nutmeg, allspice, and lemon juice. Toss gently until the apples are evenly coated. Let the mixture sit for 15 minutes while you roll out the bottom crust.
- Assemble the Bottom Crust: On a lightly floured surface, roll out one disk of dough into a 12-inch circle. Carefully transfer the dough to a standard 9-inch pie plate. Trim the edges, leaving a 1-inch overhang. Place the bowl of spiced apples into the crust. Dot the top of the apples with the 2 tablespoons of butter pieces.
- Assemble the Top Crust: Roll out the second disk of dough into an 11-inch circle. Place this top crust over the filling. Trim the edges, leaving a 1-inch overhang. Crimp the top and bottom edges together to seal. Cut several slits in the top crust to allow steam to escape.
- Apply Egg Wash: Brush the top crust lightly with the egg wash mixture and sprinkle evenly with coarse sugar.
- Bake the Pie: Preheat your oven to 425 degrees Fahrenheit (220 degrees Celsius). Place the pie on a baking sheet to catch any drips. Bake for 15 minutes at 425°F. Then, reduce the oven temperature to 375 degrees Fahrenheit (190 degrees Celsius) and continue baking for 40 to 50 minutes, or until the crust is golden brown and the filling is bubbly. If the edges brown too quickly, cover them loosely with foil strips.
- Cool: Let the apple pie cool on a wire rack for at least 3 hours before slicing. This allows the filling to set properly.
Notes
- For the flakiest pie crust, keep all your ingredients, especially the butter and water, very cold.
- If you prefer a Dutch apple pie texture, substitute the top crust with a streusel topping made from 1 cup flour, 1/2 cup brown sugar, 1/2 cup cold butter, and 1/2 teaspoon cinnamon mixed until crumbly.
- Using a mix of tart and sweet apples provides the best flavor balance for your sweet spiced apple pie filling.
Nutrition
- Serving Size: 1 slice
- Calories: 450
- Sugar: 35g
- Sodium: 300mg
- Fat: 25g
- Saturated Fat: 15g
- Unsaturated Fat: 10g
- Trans Fat: 0g
- Carbohydrates: 58g
- Fiber: 3g
- Protein: 4g
- Cholesterol: 60mg