
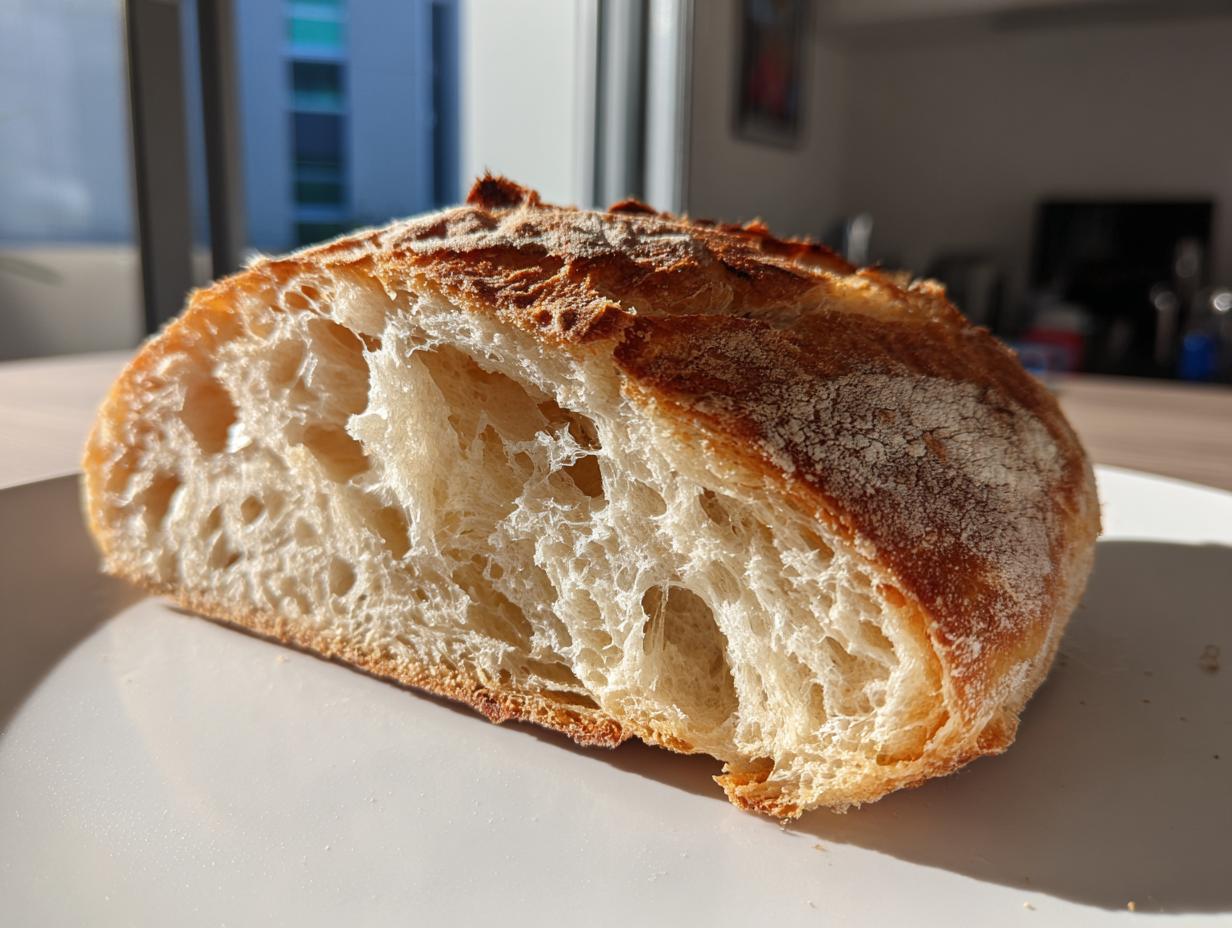
Oh my gosh, can you smell that? That incredible cloud of yeast, warm flour, and that hint of toasty crust hitting the air? That’s the smell of success, my friends! I’m Katie, and I’m here to tell you that you absolutely *can* create that perfect, bakery-style loaf right in your own kitchen. Forget dry, crumbly disappointments. We are achieving the golden ticket here: an Easy Homemade French Bread that features a totally soft, fluffy interior wrapped up in that satisfyingly crackly, crusty exterior. Believe me, after years developing recipes in professional test kitchens and studying the exact science behind gluten development, I perfected this one so you don’t have to worry one bit!
- Why This is the Best Homemade French Bread Recipe for Beginners
- Ingredients for Your Easy French Bread
- Step-by-Step Instructions to Make French Bread
- Tips for Baking Homemade French Bread Success
- Ingredient Notes and Substitutions for French Bread
- Serving Suggestions for Dinner Side Bread
- Storage and Reheating Instructions for Your French Bread
- Frequently Asked Questions About Making French Bread
- Estimated Nutritional Data for Homemade French Bread
- Share Your Homemade French Bread Creations
Why This is the Best Homemade French Bread Recipe for Beginners
I know what you’re thinking: baking French bread is hard. Nope! That’s the old way. My goal here at Frosted Fancies is always to deliver reliable results, and this recipe is specifically designed for Beginner Bread Baking adventures. You don’t need special equipment, just your hands and your oven. We nail that perfect texture—that soft, light bread we all crave—without demanding you spend your entire afternoon waiting around.
I promised you Soft French Bread at Home that tastes like it came from a great little local shop. Don’t hesitate to save this one; I guarantee it will be the recipe you come back to again and again. If you want another super-fast option when you’re in a pinch, you might check out this great Easy 2-Hour French Bread, but this detailed guide gives you the best overall texture.
Achieving Bakery Style Bread Texture
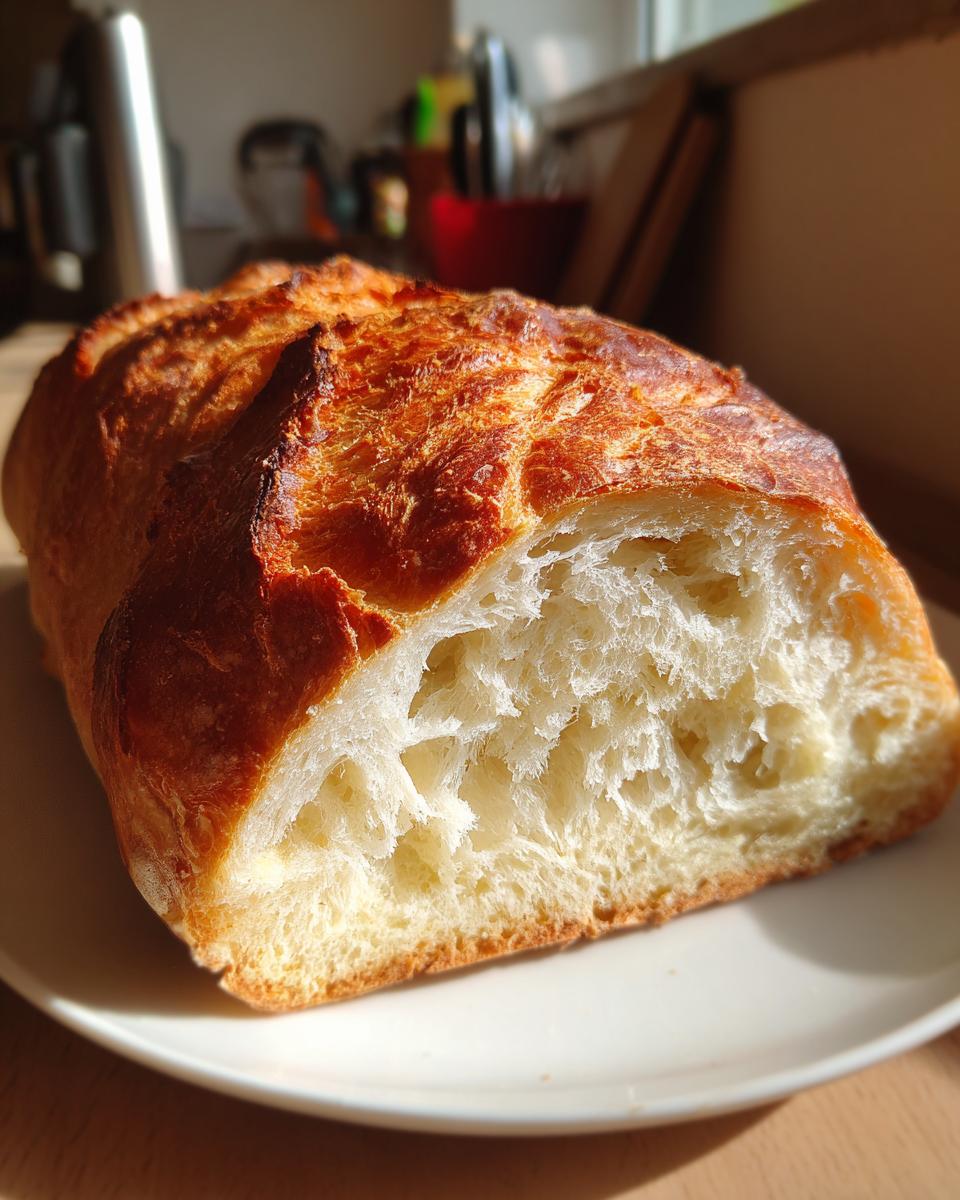
The secret to that fantastic shattering crust and pillowy inside is all about temperature and steam. That high heat—400 degrees, folks—is essential for that quick oven spring. But the real magic trick that gives you that beautiful Bakery Style Bread crunch? It’s steam! We trap moisture in the oven briefly when we bake, and that stops the crust from setting too fast, letting the bread expand fully before hardening up golden brown. It’s simple science, guaranteed to work.
Ingredients for Your Easy French Bread
Okay, look at this ingredient list! Isn’t that why I said this was easy? We’re using stuff you already have in your pantry. No fancy bread flour needed, just simple all-purpose works magic. Honestly, measuring accurately for yeast and water temperature is the most important part of this whole operation, so pay attention to those specifics—it makes a huge difference in your rise!
- 3 cups all-purpose flour (scoop and level these out!)
- 1 1/2 teaspoons salt (don’t skip it, it adds structure!)
- 1 teaspoon sugar (just a little food for our happy yeast)
- 2 1/4 teaspoons active dry yeast (that’s one standard packet)
- 1 1/4 cups warm water (make sure it’s between 105-115°F—too hot kills the yeast, too cold slows it down)
- 1 tablespoon olive oil, plus extra for greasing
- 1 egg white, beaten well with 1 teaspoon water (this is our shiny, golden egg wash!)
Don\’t substitute the olive oil for something super strong smelling; you want a neutral fat here so the yeasty flavor shines through. That’s truly all you need to get a beautiful, tender crumb!
Step-by-Step Instructions to Make French Bread
Alright, this is where the real fun begins! Making this dough is incredibly straightforward, but you have to respect the yeast’s schedule. Don’t rush the rising, even if you’re tempted to check out recipes like the one over at One Hour French Bread. Those extra minutes are what guarantee that wonderfully soft rise we’re aiming for.
Mixing and the First Rise for Fluffy Loaf Recipe
Grab that big bowl and whisk your dry stuff first—flour, salt, sugar, and yeast—just to make sure everything is happy and distributed. Then pour in the warm water and olive oil. I just use a big wooden spoon here; mix it around until it looks like a shaggy mess. Don’t stress about perfect smoothness yet! Lightly oil a clean bowl, plop your dough mass in, turn it over so it gets a little slick coating, cover it up, and put it somewhere warm. We let this hang out undisturbed for a solid 60 to 90 minutes until it looks dramatically puffy—usually doubled in size. That’s your Fluffy Loaf Recipe foundation setting up!
Shaping, Second Rise, and Scoring Your French Bread
Once it’s doubled, gently press the air out—don’t beat it up! Turn the dough onto a lightly floured counter and gently guide it into a long, even loaf, about 12 to 14 inches long. Place that dough gently on your parchment-lined baking sheet. Now, cover it again loosely and let it have its second nap—only 30 minutes this time. This is crucial: during the last 15 minutes of this rest, crank your oven up to 400°F (200°C) so it’s screaming hot when the bread goes in. Use a super sharp knife or a razor blade and slash the top 3 or 4 times diagonally. These scores are important; they control where the steam vents so your loaf doesn’t burst open randomly!
Baking for the Perfect Crusty Exterior Bread
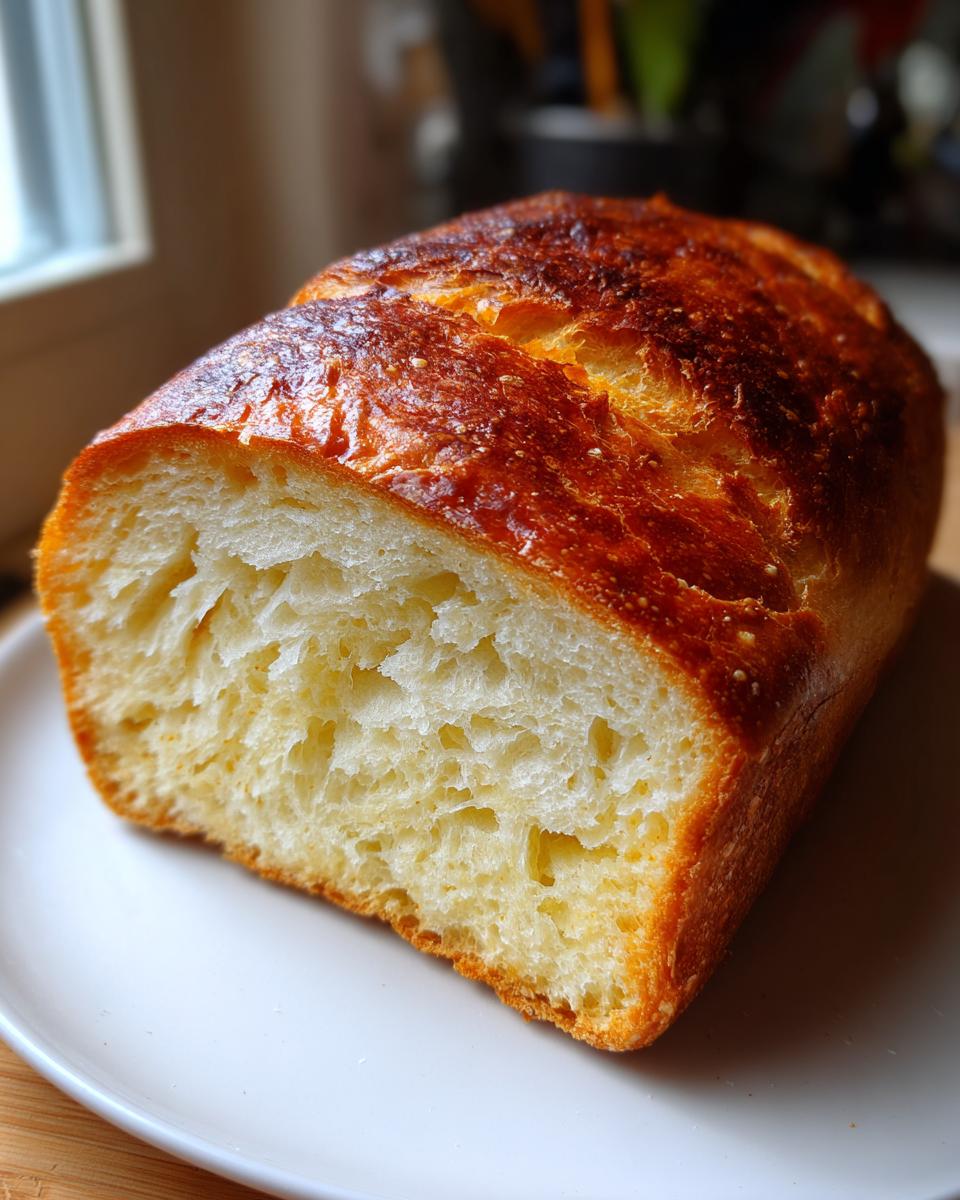
Quickly brush that shiny egg white wash right over the top of your scored loaf. This is what gives you that gorgeous golden sheen. Before you stick the bread in, if you want that truly shatteringly crisp finish, put a shallow metal pan on the bottom rack while the oven preheats. When you slide the bread in, pour about a cup of hot water into that bottom pan—watch out for the steam! Bake for 25 to 30 minutes. You’re looking for deep golden brown, not pale tan. When it hits 200°F inside, you know you’ve nailed that Crusty Exterior Bread we talked about!
Tips for Baking Homemade French Bread Success
Even with a foolproof recipe, a little expert know-how goes a long way! Since I spent years studying how ingredients react, I want to pass on these little shortcuts so you feel totally confident. Don’t worry if your yeast seems slow; sometimes it just needs a slightly warmer spot to wake up. Remember, we are aiming for success here!
- The soft interior comes directly from gentle handling after the first rise. We want to trap those gases, so once it has doubled, just punch down lightly and shape—don’t knead it again!
- If you skipped the water pan for steam, don’t panic about the crust. You can brush the loaf with melted butter immediately after it comes out of the oven for a softer finish instead. I often use this trick when I know the bread is destined for sandwiches the next day.
- For the best results and to see how others achieved that incredible crunch, check out this great article on getting that perfect crackle.
- When you’re ready to look at other wonderful, tested recipes, this guide on Easy Homemade French Bread offers some reliable guidance, too!
- Keep an eye on your oven thermometer; even a small fluctuation can affect how fast that crust sets, especially if you visit sites like this one which focus very heavily on the soft finish!
Ingredient Notes and Substitutions for French Bread
One thing I learned in my food science days is that sometimes readers ask the same ingredient questions over and over. So, let’s just clear the air about a couple of things here so you feel totally secure about your ingredients—especially since we’re aiming for this beautiful, tender crumb!
Yeast confusion is common, I get it! We specifically called for active dry yeast because it needs that warm water activation step to wake up properly. If you happen to only have instant yeast, that’s okay—you can skip the whole 10-minute wait after adding the water and just mix it right in with the dry ingredients. It’s a time saver if you’re really pushing that quick schedule, but the hydration process is the same.
Now, let’s talk flour. I listed all-purpose flour because it performs wonderfully and it’s accessible! But if you want to get really artisanal, you could try substituting up to 1/2 cup of the all-purpose flour with bread flour. Bread flour just has a higher protein content, which means more gluten development, which can give you a slightly chewier profile. Honestly though, for this particular Easy French Bread recipe, AP flour is my tried-and-true choice for keeping things wonderfully soft inside!
Also, a quick note on salt: please don’t swap that salt for something low-sodium if you can avoid it. The salt does way more than just add flavor; it actually helps control that yeast activity, which means it keeps your “soft and fluffy” texture from going overboard and turning into an airy mess during the long rest periods. It’s just as important as the yeast in our whole process!
Serving Suggestions for Dinner Side Bread
Okay, the hard part is over! You have this stunning, golden French bread cooling on the rack. Now what? Honestly, this loaf earns its place as the absolute best Dinner Side Bread imaginable. It doesn’t need anything fancy, but why skip out on the delicious possibilities?
When I pull this out of the oven, the very first thing I do—before it even cools completely—is grab a hefty knife and slice off a thick piece. Melted butter mixed with a pinch of dried Italian herbs? Divine. Trust me on this one!
If you’re serving it alongside soup or stew—like a hearty lentil soup or a big bowl of chili—you need something sturdy enough to really soak up those amazing flavors. This crusty exterior bread is perfect for dipping; it holds up way better than soft white sandwich bread ever could. You have to try taking a few slices, brushing them with garlic butter, and popping them back in the oven for five minutes. Hello, homemade garlic bread! That recipe is totally customizable, and you can see how simple it is over at Jessica’s Recipes.
And the leftovers? Don’t even stress about it! If you happen to have any stale bread tomorrow (which is doubtful, let’s be honest), you know exactly what to do. Those slightly crusty ends are perfect for turning into amazing croutons for your next salad. It’s just another reason why making this Simple Yeast Bread is worth the effort!
Storage and Reheating Instructions for Your French Bread
The moment you take this gorgeous loaf out of the oven, you want to resist slicing it immediately, I know! But seriously, let it cool completely on a wire rack. If you try to slice into it while it’s still hot, the steam trapped inside escapes too quickly, and sadly, that perfect fluffy interior can turn gummy really fast. We don’t want gummy bread, do we? Never!
Once it’s stone cold, how you store it determines if that beautiful crust survives. Do *not* wrap it tightly in plastic wrap immediately. That traps moisture right against the crust, and we all know what that does: it turns a crusty exterior into a sad, soggy blanket. For keeping it fresh for a day or two, I recommend wrapping it loosely in a clean kitchen towel and then placing that towel inside a large paper bag. This keeps the interior soft while allowing a tiny bit of air exchange to preserve some of that crust’s integrity.
If you need to keep it longer than two days, slicing it before freezing is always the best bet. Wrap the individual slices tightly in plastic wrap first, then toss them into a large freezer bag. They thaw incredibly fast on the counter!
Reheating to Bring Back the Crunch
This is the best part about having fresh-baked French bread—reheating it makes your kitchen smell like you just pulled it out of the oven all over again! If you have a half or three-quarter loaf left: mist the crust lightly with water—just a spritz or two, don’t soak it. Then, pop it directly onto the middle rack of a 350°F oven for about 5 to 8 minutes. That quick blast of dry heat will crisp up that exterior beautifully while gently warming the soft inside. If you’re warming up individual slices for dipping (which you should be!), a quick 2–3 minutes in a toaster oven does the trick perfectly.

It’s just like magic! If you’re looking for more brilliant tips on handling your leftovers, check out the fantastic advice on using up bread over at Mel’s Kitchen Cafe. Fresh bread is meant to be enjoyed immediately, but knowing how to revive it is a skill every baker needs in their back pocket!
Frequently Asked Questions About Making French Bread
It’s so common to have questions when diving into bread making! Yeast, timing, texture—it can feel like a science project, I know. But honestly, most of the perceived difficulty goes away once you understand the ‘why’ behind the steps. I pulled together the questions I get asked most often about this specific Homemade French Bread Recipe so you can bake confidently!
Can I make this Quick French Bread Recipe in under an hour?
That is the million-dollar question, isn’t it? We all love speed! While you might find some recipes promising One Hour Bread Recipe results, I have to be honest: achieving that truly soft, fluffy interior while still getting a decent crust takes time for the yeast to work its magic properly. If you cut the first rise short, you end up with dense bread. This recipe clocks in around 2 hours and 20 minutes total, but most of that is hands-off rising time. You’re only actively working on it for maybe 20 minutes total! Think of it as 20 minutes of work for a loaf that tastes like it took a whole day.
How do I get the soft interior expected in a Fluffy Loaf Recipe?
That beautiful, tender crumb—the hallmark of a great loaf! That comes down to two things we covered carefully: the kneading and the water. When you knead for those full 5 to 7 minutes, you are developing the gluten structure just enough to create those air pockets without making the dough tough. Also, when mixing, sticking to the 1 1/4 cups of water exactly is key. That hydration level lets the flour soak up what it needs, resulting in that perfect, airy texture we associate with a Fluffy Loaf Recipe. Don’t be tempted to add extra flour while kneading!
Is this recipe suitable for making Bread for Sandwiches?
Absolutely, yes! This makes fantastic Bread for Sandwiches! A slight tweak might make it even better for lunch, though. If you want a less shiny, more matte finish that really holds up to fillings, simply skip brushing the egg white wash on before baking. Instead, once the bread is magically out of the oven and cooling, brush the top lightly with a little melted butter. That will soften the crust slightly and give you that classic sandwich loaf look while keeping the interior perfectly soft. You can see other great tips on using your fresh loaves scattered around sites like I Heart Naptime!
Estimated Nutritional Data for Homemade French Bread
Now, I know many of you are curious about the numbers behind the goodness. Since I believe in being totally transparent—and since I’m focusing on making sure this recipe is simple and accessible—here is a general idea of what you’re looking at for one slice of this incredible loaf.
Remember, because we are using simple whole ingredients and this recipe is relatively low in fat compared to some enriched breads, it’s a great choice for your dinner table! However, food science tells me that slight variations in ingredients, especially brand differences in flour or how much water your flour actually absorbs, mean these numbers are always just a guideline.
Consider this your friendly disclaimer: the figures below are based on dividing the whole recipe into 14 equal servings. Always use this as an approximation when calculating daily intake!
- Serving Size: 1 slice
- Calories: 150
- Fat: 1.5g
- Saturated Fat: 0.3g
- Trans Fat: 0g
- Cholesterol: 0mg
- Sodium: 250mg
- Carbohydrates: 30g
- Fiber: 1.5g
- Sugar: 1g
- Protein: 4g
If you’re watching your sodium, remember that the salt measurement plays a huge role in this tally. If you need to lower it, you can try reducing the salt by about 1/4 teaspoon, but promise me you’ll taste the dough first! Yeast loves a little salt to keep it in check, and we don’t want salty bread turning into a flat brick!
Share Your Homemade French Bread Creations
Seriously, I am so excited for you to get this amazing French Bread in your hands—or, well, on your table! Baking should be fun, and seeing your success is genuinely the best part of building this little corner of the internet. I put all my professional testing knowledge into making sure this recipe works perfectly for your first time, but I definitely want to hear how it went!
Did you nail that crusty exterior? Did your kitchen smell heavenly while it was baking? Please, don’t be shy! Drop a rating right down below—five stars if you loved it, or let me know what you thought if you ran into a snag. Remember, your feedback helps me keep these recipes reliable for everyone who follows!
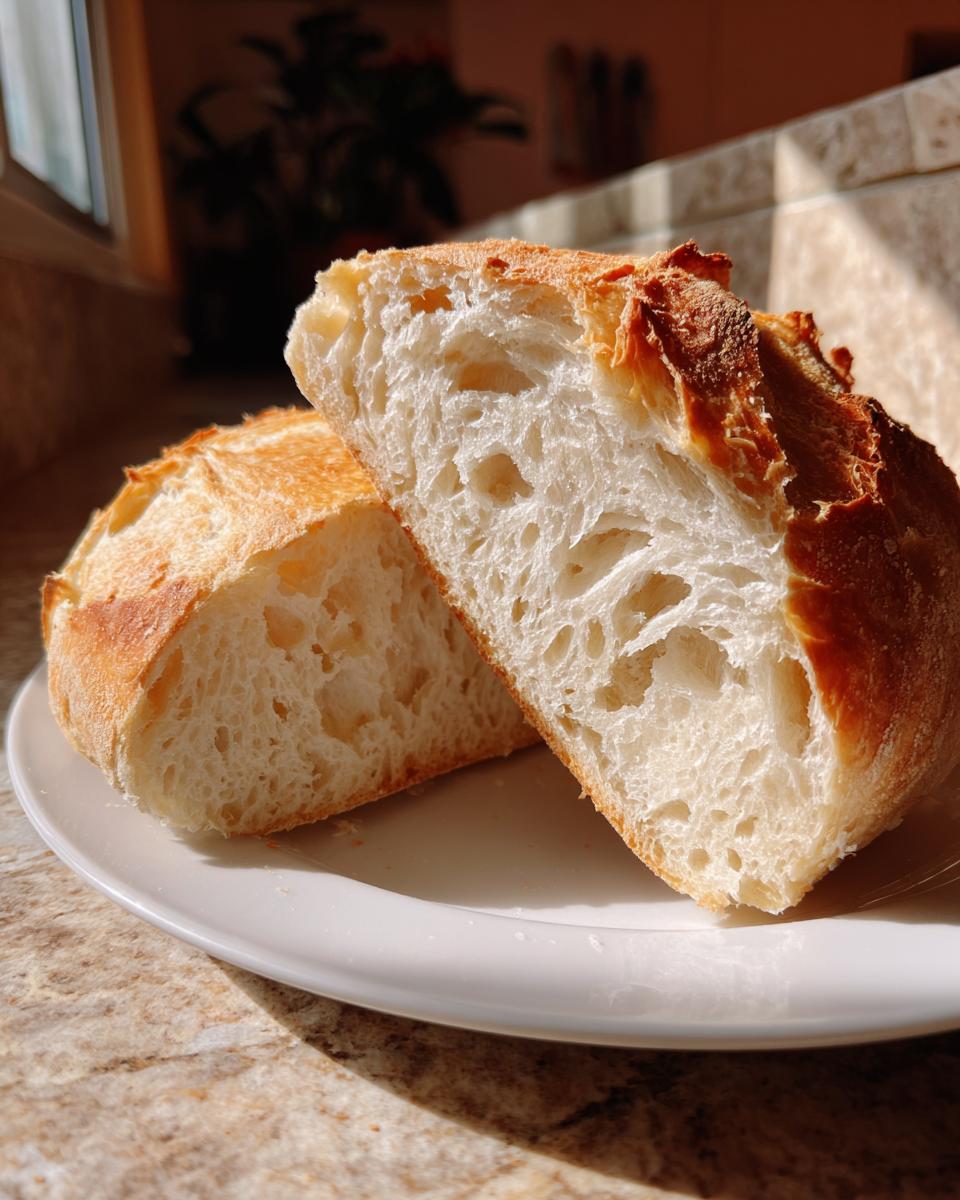
And oh, the photos! If you snapped a picture of your golden, crusty loaf—maybe sliced open showing off that soft, fluffy interior—snap a tag on social media! It warms my heart to see my tested recipes showing up in real home kitchens. You can check out some other gorgeous versions over at Tasty With Lena for inspiration before you post yours!
Making bread from scratch doesn’t have to be intimidating, and I hope this recipe proved that to you. Keep practicing, keep enjoying that fresh yeast smell, and remember: you are a capable cook. Happy baking, and I can’t wait to read your comments!
PrintEasy Homemade French Bread with Soft Fluffy Interior and Crusty Exterior
You can make amazing, truly soft fluffy French bread at home with simple ingredients. This easy recipe guides you to a golden, crusty loaf perfect for dinner or sandwiches.
- Prep Time: 20 min
- Cook Time: 30 min
- Total Time: 140 min
- Yield: 1 large loaf 1x
- Category: Dinner
- Method: Baking
- Cuisine: French
- Diet: Vegetarian
Ingredients
- 3 cups all-purpose flour
- 1 1/2 teaspoons salt
- 1 teaspoon sugar
- 2 1/4 teaspoons active dry yeast
- 1 1/4 cups warm water (about 105-115°F)
- 1 tablespoon olive oil, plus more for greasing
- 1 egg white, beaten with 1 teaspoon water (for egg wash)
Instructions
- In a large bowl, whisk together the flour, salt, sugar, and yeast.
- Add the warm water and olive oil to the dry ingredients. Mix with a spoon until a shaggy dough forms.
- Turn the dough out onto a lightly floured surface. Knead for 5 to 7 minutes until the dough is smooth and elastic.
- Lightly grease a large bowl with olive oil. Place the dough in the bowl, turning to coat. Cover the bowl with plastic wrap or a clean kitchen towel.
- Let the dough rise in a warm place for 60 to 90 minutes, or until it has doubled in size. This is your first rise.
- Gently punch down the risen dough. Turn it out onto a lightly floured surface and shape it into a long loaf, about 12 to 14 inches long.
- Place the shaped loaf on a baking sheet lined with parchment paper or on a baking stone.
- Cover the loaf loosely and let it rise again for 30 minutes. This is your second rise. Preheat your oven to 400°F (200°C) during the last 15 minutes of this rise.
- Score the top of the loaf 3 or 4 times diagonally with a sharp knife or razor blade.
- Brush the top of the loaf evenly with the egg white wash.
- Bake for 25 to 30 minutes, or until the crust is deep golden brown and the internal temperature reaches 200°F (93°C). For a crispier crust, place a shallow pan of water on the bottom rack during the first 10 minutes of baking.
- Remove the bread from the oven and transfer it to a wire rack to cool completely before slicing.
Notes
- For a truly crusty exterior, create steam in your oven by placing a pan of hot water on the bottom rack while the oven preheats and for the first part of the bake.
- If you want a softer crust, skip the egg wash and simply brush the loaf with melted butter immediately after it comes out of the oven.
- This bread is excellent for making sandwiches or serving warm with butter.
Nutrition
- Serving Size: 1 slice
- Calories: 150
- Sugar: 1
- Sodium: 250
- Fat: 1.5
- Saturated Fat: 0.3
- Unsaturated Fat: 1.2
- Trans Fat: 0
- Carbohydrates: 30
- Fiber: 1.5
- Protein: 4
- Cholesterol: 0