
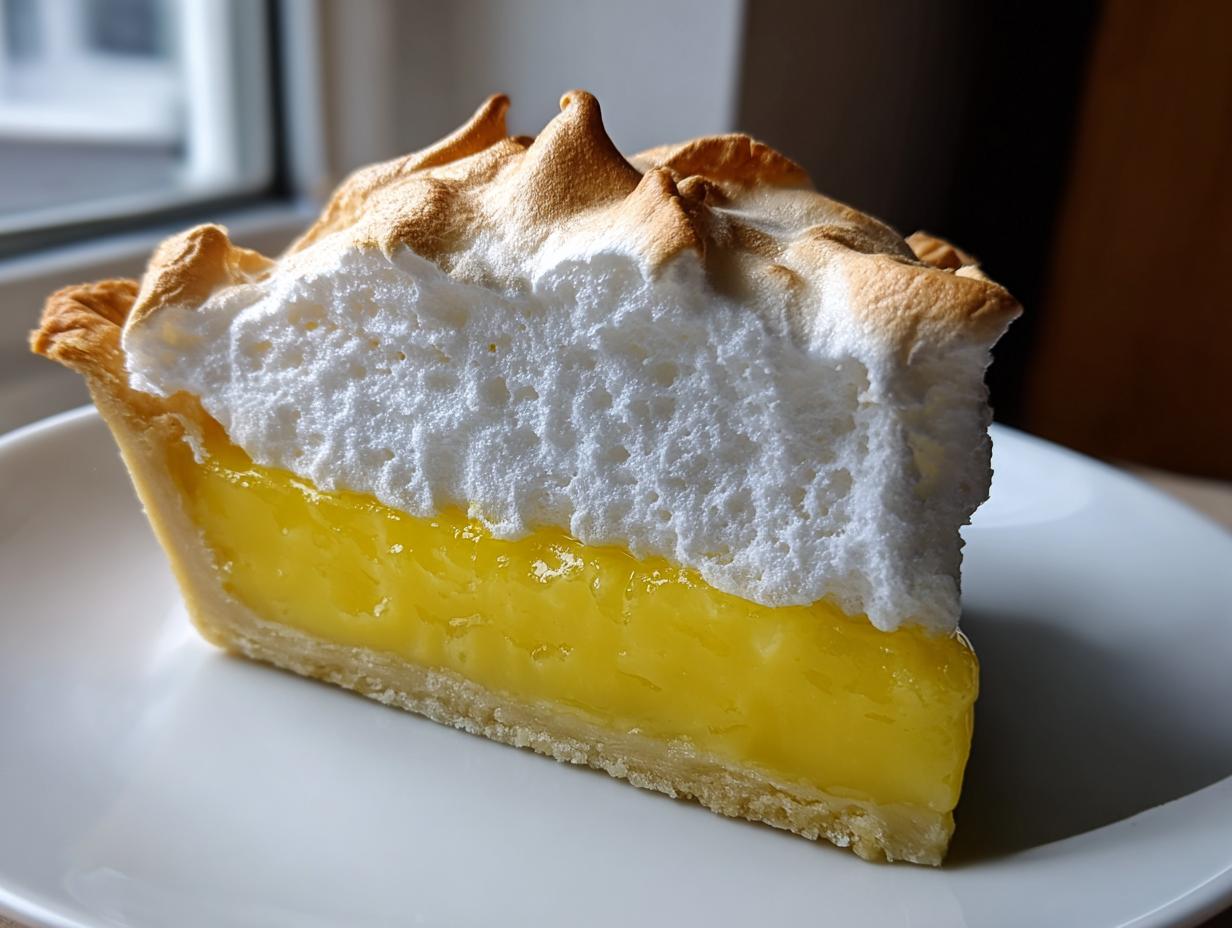
There isn’t anything quite as satisfying as slicing into a perfect pie where everything just *works*—a crisp crust, a filling that wobbles just right, and a topping that touches the sky. That’s exactly what we’ve got here! Forget those sad, watery fillings you’ve encountered; this is my tried-and-true **Grandma’s Classic Lemon Meringue Pie from Scratch**. Having spent years professionally testing recipes, I can tell you that honoring the classics, especially when it means perfecting the tart balance of a great **lemon meringue**, always pays off. This recipe is my reliable map to that tall, fluffy topping every single time.
- Why This Classic Lemon Meringue Recipe Works Every Time
- Ingredients for Your Homemade Lemon Pie From Scratch
- Step-by-Step Instructions for the Best Lemon Meringue
- Expert Tips for No Weep Lemon Meringue Tips
- Storage and Serving Suggestions for Your Lemon Meringue
- Variations on the Classic Lemon Meringue
- Frequently Asked Questions About Lemon Meringue Pie Recipe
- Estimated Nutritional Data for Lemon Meringue
- Share Your Zesty Lemon Dessert Creations
Why This Classic Lemon Meringue Recipe Works Every Time
When you’re making a showstopper like this, you need building blocks that just won’t fail you. I promise you, this isn’t some flimsy, run-of-the-mill lemon meringue pie recipe. We’re focusing on stability and maximum flavor! We want that bright, zesty punch without the headache. Trust me, I took notes from my years in the test kitchen to make sure this version is reliable so you can bake it with confidence.
- We use a specific method that keeps the lemon custard thick and stops it from weeping later—that terrible watery layer that forms between the filling and the meringue? Gone!
- The meringue mix has built-in protections against shrinkage, which means those towering peaks stay exactly where you put them.
If you want to see how beautiful these turn out, check out some other great bakers who have made successful citrus desserts like this! You can see some inspiration here.
Achieving the Perfect Tart and Sweet Lemon Meringue
You know those store-bought fillings? They taste like sugar water. Not this pie! The secret to that gorgeous tart and sweet pie flavor is using *only* fresh lemon juice and zest. Bottled juice just doesn’t have that bright, sharp edge. I add the zest right at the end with the butter so those essential oils really perfume the whole filling. It’s what makes this dessert sing!
Foolproof Buttery Pie Crust Tutorial
This meringue deserves the best foundation, so please don’t skip this step! The most crucial part here is that your crust must be baked completely beforehand—we call that blind baking—and then cooled down. If you put hot filling into a lukewarm crust, the pastry softens right away. For the best result, I recommend following my buttery pie crust tutorial closely. A fully cooled, crisp base keeps that custard sitting perfectly stable until you slice into it!
Ingredients for Your Homemade Lemon Pie From Scratch
Okay, let’s talk ingredients! This is where we ditch the boxes and embrace the true flavor of a homemade lemon curd recipe. Having the right stuff here makes all the difference in creating that ‘best lemon meringue’ experience. Since we need a partially baked crust, I’ve separated the list into what you need for the crust (which you should have ready to go!), the filling, and that gorgeous meringue topping. You’ll notice I’m very specific about the egg whites—don’t forget that part!
For the Lemon Filling (Lemon Curd Recipe Base)
This is the heart of the pie, so be generous with those fresh lemons!
- 1 1/2 cups granulated sugar (yes, that much, we need that structure!)
- 1/4 cup cornstarch
- 1/4 teaspoon salt
- 1 1/2 cups cold water
- 3 large egg yolks, lightly beaten
- 1/2 cup fresh lemon juice (seriously, only fresh!)
- 1 tablespoon lemon zest
- 2 tablespoons unsalted butter
For the Fluffy Meringue Topping
This is what makes it look like a showstopper! Make sure these sit out on the counter first.
- 4 large egg whites, room temperature (crucial for volume!)
- 1/4 teaspoon cream of tartar (my secret for extra stability!)
- 6 tablespoons granulated sugar (for the actual meringue)
And don’t forget the crust! Remember you need one full recipe for a single 9-inch pie. If you’re looking for proven methods for a sturdy base, you can see some great tips on perfecting your crust technique here.
Step-by-Step Instructions for the Best Lemon Meringue
This is where the magic happens! Following these steps carefully, especially around the temperature changes, is what separates this recipe from just any old easy lemon meringue recipe. Don’t rush the heating or the cooling—that’s my biggest piece of advice for getting that perfect, stable structure that makes everyone gasp when you pull it out of the oven. If you want to see how beautifully these turn out, check out the successful citrus dessert results other bakers have achieved over at this link for inspiration!
Preparing the Lemon Filling Base
First thing first, make sure that crust you made is completely cool, okay? Seriously, let it sit! Step two is combining your 1 1/2 cups of sugar, cornstarch, and salt right in your saucepan. Whisk it well dry, *then* slowly whisk in the cold water until it’s all smooth. Now, heat this over medium heat, stirring constantly until it boils hard. You *must* let it boil for a full minute after it thickens! This cooks out the starch flavor. Next, while that’s hot, take about a cup of that mixture and drip it *slowly* into your lightly beaten egg yolks while you whisk nonstop. This stops you from scrambling them! Then, pour those tempered yolks back into the saucepan. Cook it gently until it thickens up again—just bubbling softly now—and then stir in your lemon juice, zest, and that beautiful butter until it melts. That rich, zesty lemon filling is ready!
How to Make Perfect Meringue
Before you touch the egg whites, go back and check your mixing bowl and whisk attachments. They must be spotless—no grease, not a speck! Grease equals sad, flat meringue! Put your room temperature egg whites and that tiny bit of cream of tartar in there and start beating on medium speed until you get soft peaks, you know, the kind that flop over a bit. Now, add that remaining 6 tablespoons of sugar, just a spoonful at a time, beating well after each addition. Crank up that mixer to high speed and keep going until you have true stiff, glossy peaks. This is how to make perfect meringue—it should stand straight up when you lift the whisk!
Assembly and Baking the Lemon Meringue Pie
Pour that hot filling right into your cooled crust immediately. Next, take your fluffy meringue and gently spread it over the filling. Listen closely: you need to make sure the meringue touches the crust all the way around the edge. This seals everything in and prevents that awful shrinkage! Use the back of a spoon to make pretty swirls on top. Bake it at 350°F until those peaks turn lightly golden, maybe 12 to 15 minutes. If you prefer a torch, use it! The most important final step? Let it cool slowly on a wire rack at room temperature for at least four hours before you even *think* about putting it in the fridge. That slow cooling sets that structure perfectly.
Expert Tips for No Weep Lemon Meringue Tips
Whew, we made it to the baking stage, but I know what you’re worried about—the dreaded weep! I call this our advanced section on getting those great no weep lemon meringue tips because nobody wants a sad, watery pie the next morning. We talked about sealing the edge when setting the meringue, but there are two other secrets that really nail the stability.
First, the egg whites! I know I mentioned making sure your bowl is grease-free, but the *other* secret is making sure you dissolve all that sugar perfectly while whipping. If you have undissolved sugar granules floating around in the meringue, they tend to seep out as the pie cools, causing that weeping layer. Beat it until it feels completely smooth when you rub a little between your fingers.
Second, temperature shock is the enemy! When you move that hot pie directly into a cold fridge, the sudden temperature change causes the meringue to contract intensely, forcing moisture out. That’s why we let it cool down slowly on the counter for hours first. This patient cooling allows the structure to set up properly. For more amazing guidance on protecting your beautiful pie, I highly recommend checking out the tips on this site; they really get into the science of keeping things stable!

Storage and Serving Suggestions for Your Lemon Meringue
Okay, you’ve baked your masterpiece! Resist the urge to slice into it right away—and resist the urge to rush it into the fridge! That slow cooling period we talked about after baking is non-negotiable if you want that perfect, glossy finish. Let your beautiful showstopper dessert sit right on the counter, uncovered, until it’s completely room temperature, which can take around four hours. If you cover it while it’s still warm, you trap condensation, and that’s just asking for trouble.
Once it’s totally cool, you can absolutely cover it loosely and pop it into the refrigerator. But here’s the catch: the meringue really doesn’t like the cold for too long. Honestly, this pie is best eaten the day it’s made. If you must keep it longer, it’ll last about two days in the fridge, but the texture will start to soften. For serving, you just need a nice sharp knife and a good plate. It really doesn’t need anything else! For more info on how long this pie keeps, check out these general pie tips here.
Variations on the Classic Lemon Meringue
While this full-sized pie is truly unbeatable, sometimes you just need a different format, right? Maybe you’re taking this to a potluck or you just want something easier to serve without needing a dedicated pie server! We can absolutely pivot this amazing filling and topping into other fun shapes.
If you’ve ever wanted little bursts of sunshine, making mini lemon meringue tarts is a fantastic option. You just bake your crusts in mini tart pans (or even a mini muffin tin in a pinch), fill them with the cooked lemon custard, and top each one with a dollop of meringue and a quick torch. They look so elegant!
Another great way to handle leftovers or just change things up is making lemon meringue bars. You bake the filling in a sheet pan with a bottom crust, and then you spread the meringue over the top before baking until golden. Once they’re chilled, you just slice them into squares. They are so much easier to grab and go!
Frequently Asked Questions About Lemon Meringue Pie Recipe
I always get so many questions after people try this recipe because even though it’s classic, there are a few spots where people get nervous. Don’t worry, I’ve got you covered! These are the things I hear most often about making the classic lemon pie.
Can I use bottled lemon juice instead of fresh?
Oh, this is the million-dollar question! While you *can* use bottled juice if you are in a real pinch, I strongly advise against it for this recipe. Bottled juice doesn’t have the same punch or brightness. That vibrant, zesty lemon dessert flavor we’re aiming for comes straight from fresh juice and zest. If you use the bottled stuff, you might find the filling tastes a little flat, even with the zest added.
What happens if I skip pre-baking the crust?
You’ll end up with a pastry shell that’s soggy in the middle—and that’s sad! Since the lemon filling is quite wet, it steams the crust from the bottom up. Since we want that flaky bottom for our homemade lemon pie from scratch, you have to bake it mostly blind first to set the structure before the wet filling goes in. It’s totally worth the extra 15 minutes!
How long does this Lemon Meringue Pie last once made?
Honestly, this pie is at its absolute peak on the day it’s made! Because the meringue is so delicate, it really prefers to be eaten fresh. If you store it, make sure it’s fully cooled and then cover it loosely in the fridge. It should last maybe two days maximum before the meringue starts getting a little soggy or weeping starts happening, no matter how many no weep lemon meringue tips you use. For the best experience, aim to serve it within 24 hours.
What’s the trick for really tall, fluffy meringue topping?
It all comes down to two things: absolute cleanliness and temperature. Make sure your bowl and whisk are spotless—zero fat! Then, your egg whites need to be at room temperature. Cold whites just do not whip up to the volume they should. Once you add the sugar for the meringue, you just keep beating until you have those stiff peaks that truly stand up proud. It’s how you get that gorgeous cloud-like look!
If you want to check out more common issues and great tips on making your lemon meringue pie recipe perfect, this resource has some great advice!
Estimated Nutritional Data for Lemon Meringue
Now, I know some of you are real food science nerds like I was back in school, and you want to see the numbers! I always try to give a rough idea of what you’re looking at here, even though these are just estimates. Remember, my goal is to make great food, not run a certified lab! Since we’re making a big, beautiful pie, these numbers are based on that 8-serving yield we talked about, so everything is per slice.
This wonderful showstopper dessert packed with lemon zest and sugar clocking in around 380 calories per slice. That sweetness comes at a cost, as you can see, we are looking at about 45 grams of sugar per serving, but you also get a decent amount of fat from that lovely buttery crust we worked so hard on!
Here is the quick rundown:
- Serving Size: 1 slice
- Calories: 380
- Sugar: 45g
- Total Fat: 18g
- Carbohydrates: 52g
- Protein: 6g
Keep in mind these are just estimates based on the standard ingredients I listed earlier. How much butter you use in your crust or how thick you spread the meringue can change these figures a bit! But seriously, when something tastes this good, I try not to worry too much about the exact carb count!
Share Your Zesty Lemon Dessert Creations
I absolutely love hearing from you when you tackle one of my favorite recipes! This is what it’s all about—creating something brilliant in your own kitchen. Once you’ve pulled that gorgeous, golden-topped pie out of the oven, please come back here and let me know how it went!
Did you manage to grow those meringue peaks sky-high? Did your family immediately devour that wonderful zesty lemon dessert? Leave a comment rating the recipe and tell me about any little tweaks you made. Seriously, I want to see pictures of your successes!
If you snapped a beautiful photo of your finished pie, hop over to social media and tag me! Seeing your results truly makes my day and inspires me to keep perfecting and sharing these classic recipes. If you’re looking for more inspiration from other bakers, you can check out some great community feedback over at this link. Happy baking, and I can’t wait to hear about your beautiful lemon meringue!
PrintGrandma’s Classic Lemon Meringue Pie from Scratch

Make this classic lemon meringue pie featuring a buttery crust, zesty lemon filling, and a tall, fluffy meringue topping. This recipe focuses on foolproof steps for a tart and sweet showstopper dessert.
- Prep Time: 30 min
- Cook Time: 35 min
- Total Time: 4 hours 5 minutes
- Yield: 8 servings 1x
- Category: Dessert
- Method: Baking
- Cuisine: American
- Diet: Vegetarian
Ingredients
- 1 recipe for Buttery Pie Crust (for one 9-inch pie)
- 1 1/2 cups granulated sugar
- 1/4 cup cornstarch
- 1/4 teaspoon salt
- 1 1/2 cups cold water
- 3 large egg yolks, lightly beaten
- 1/2 cup fresh lemon juice
- 1 tablespoon lemon zest
- 2 tablespoons unsalted butter
- 4 large egg whites, room temperature
- 1/4 teaspoon cream of tartar
- 6 tablespoons granulated sugar (for meringue)
Instructions
- Prepare and partially bake your 9-inch pie crust according to your preferred recipe. Cool completely.
- For the lemon filling, whisk together 1 1/2 cups sugar, cornstarch, and salt in a medium saucepan. Gradually whisk in the cold water until smooth.
- Cook the mixture over medium heat, stirring constantly, until it thickens significantly and boils. Boil for one minute, stirring constantly. Remove from heat.
- In a separate bowl, lightly beat the egg yolks. Slowly temper the yolks by whisking about one cup of the hot sugar mixture into the yolks.
- Pour the tempered yolk mixture back into the saucepan with the remaining hot sugar mixture. Return to medium heat. Cook, stirring constantly, until the filling thickens again and bubbles gently. Do not boil vigorously.
- Remove the filling from the heat. Stir in the lemon juice, lemon zest, and butter until the butter melts completely.
- Pour the hot lemon filling into the cooled, pre-baked pie crust.
- For the meringue, place the 4 room temperature egg whites and cream of tartar in a clean, grease-free mixing bowl. Beat with an electric mixer on medium speed until soft peaks form.
- Gradually add the 6 tablespoons of sugar, one tablespoon at a time, beating well after each addition. Increase speed to high and beat until stiff, glossy peaks form. The meringue should hold its shape firmly.
- Spread the meringue evenly over the hot lemon filling, making sure the meringue touches the edge of the crust all the way around to prevent shrinking. Create decorative swirls with the back of a spoon.
- Bake the pie at 350°F (175°C) for 12 to 15 minutes, or until the meringue peaks are lightly golden brown. Alternatively, use a kitchen torch to brown the peaks.
- Cool the pie completely on a wire rack at room temperature for at least 4 hours before slicing. Avoid placing it in the refrigerator immediately to prevent weeping.
Notes
- To prevent weeping meringue, make sure your mixing bowl and whisk attachments are completely free of any grease or fat residue before whipping the egg whites.
- For a stable filling, ensure you boil the cornstarch mixture for a full minute after it thickens.
- Cool the pie slowly at room temperature before chilling to help the meringue set without shrinking or weeping.
Nutrition
- Serving Size: 1 slice
- Calories: 380
- Sugar: 45g
- Sodium: 150mg
- Fat: 18g
- Saturated Fat: 9g
- Unsaturated Fat: 9g
- Trans Fat: 0g
- Carbohydrates: 52g
- Fiber: 1g
- Protein: 6g
- Cholesterol: 110mg