
Hello there, and welcome! I’m Katie, and I’m so thrilled you stopped by Frosted Fancies. If you’ve ever spent hours meticulously decorating sugar cookies only to watch the beautiful design smear or the icing refuse to dry, trust me, I know your pain! That frustration stops right here. This guide is built on years of professional recipe development where I studied the actual science behind why some frostings fail. Forget grainy, sticky surfaces; I’m sharing my foolproof Royal Icing recipe here that guarantees a smooth, professional, **cookie icing** finish that dries rock hard. You deserve results that look as good as they taste, and thanks to a little Food Science knowledge, we’re going to achieve that perfect decorative shell every single time!
- Why This Is Your Best Cookie Icing Recipe (Expert Tested Results)
- Gathering Ingredients for Your Perfect Cookie Icing Recipe
- Step-by-Step Royal Icing Tutorial: Achieving Piping Consistency Icing
- Tips for Success When Making Decorating Cookie Icing
- How to Make Icing Dry Hard: Setting and Curing Times
- Storing Leftover Cookie Icing for Future Use
- Frequently Asked Questions About Cookie Icing
- Estimated Nutritional Data for This Cookie Icing Recipe
- Share Your Beautiful Cookie Icing Creations
Why This Is Your Best Cookie Icing Recipe (Expert Tested Results)
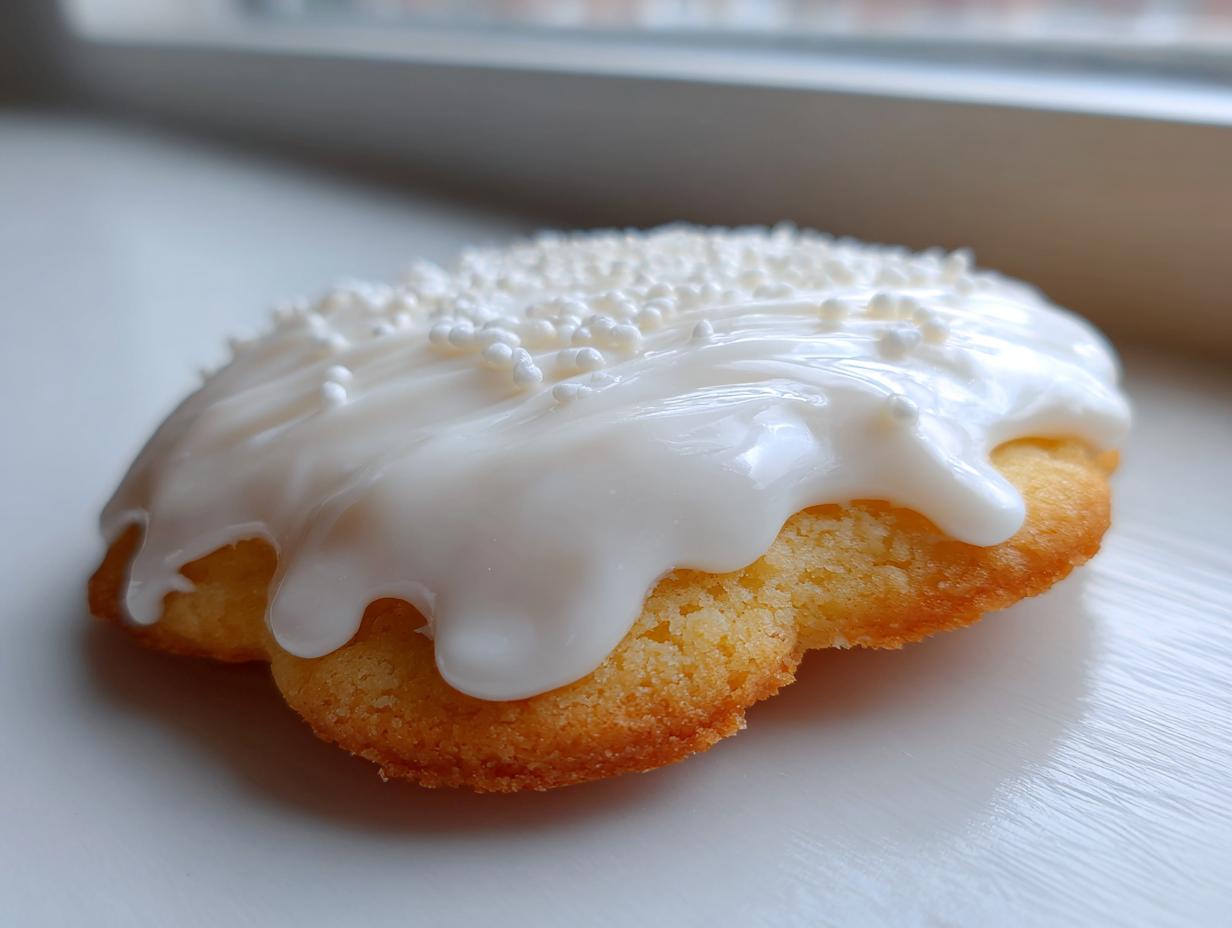
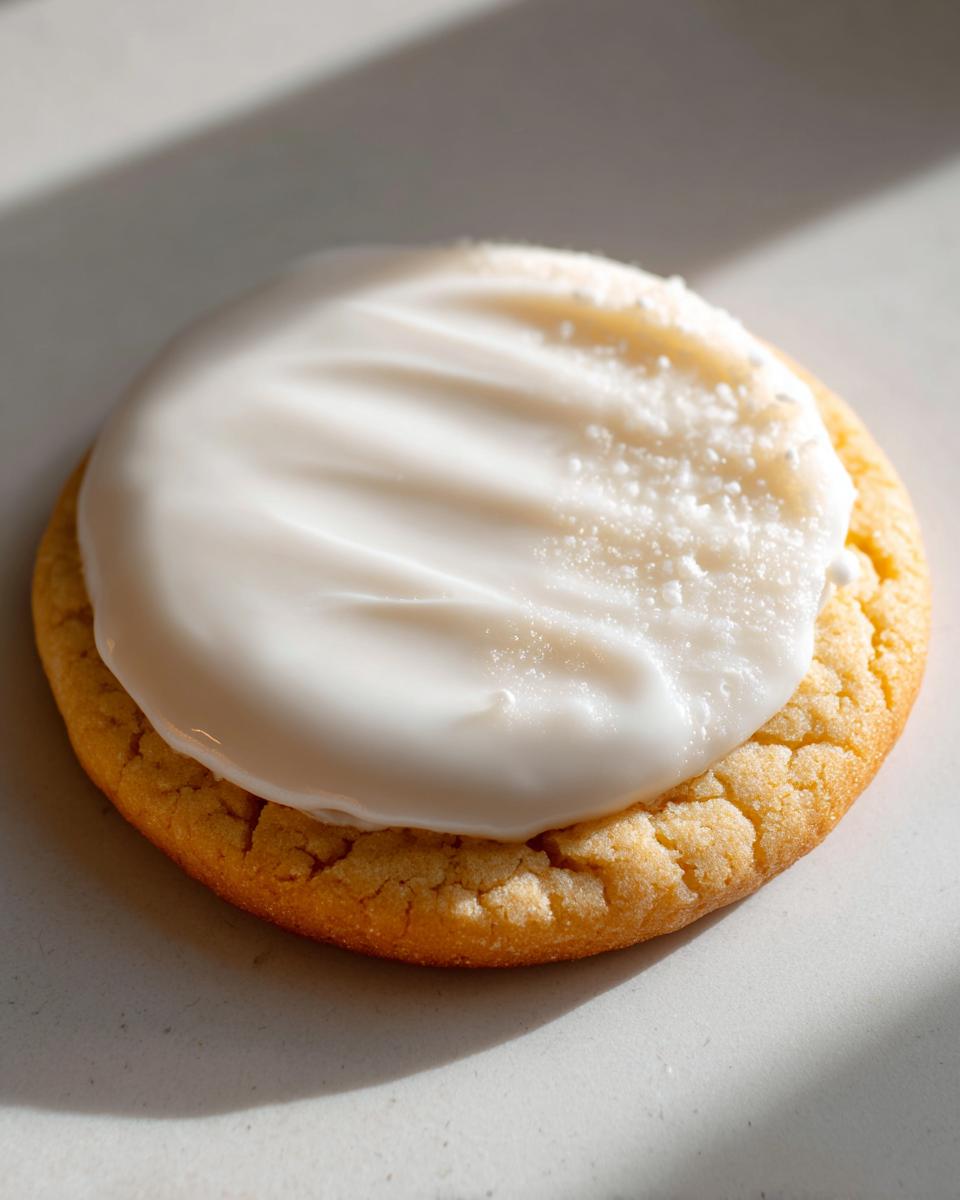
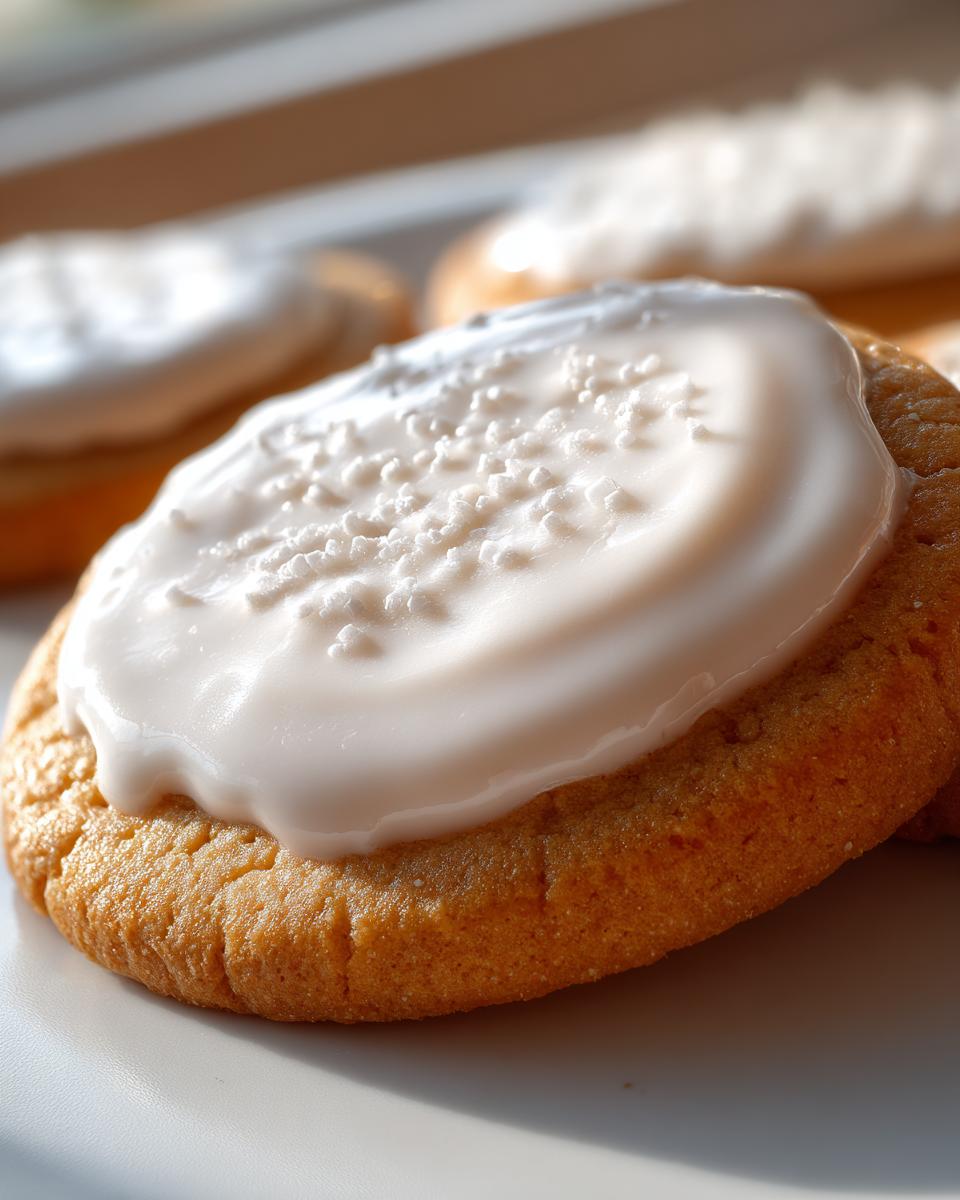
You’ve landed on what truly is the Best Cookie Icing Recipe out there for decorated cookies. Why am I so sure? Because this Royal Icing is engineered to perform! It dries completely hard, which means you can stack your holiday cookies, ship them across the country, or display them without worrying about smudges or damage. That’s the professional-grade result you need, and it makes for a truly Durable Cookie Topping.
If you’re tired of soft, sticky frosting, then check out how this Royal Icing recipe compares to standard recipes. We are aiming for that crisp, sugary shell. For easier stacking and gifting success, try this sugar cookie icing that hardens.
The Science Behind Sugar Cookie Frosting That Hardens
The secret ingredient that guarantees performance is meringue powder. Folks often ask if they can swap it out, but honestly? Don’t risk it if hard icing is your goal! The protein structures in meringue powder create a strong network as the icing dries. This network traps the sugar crystals, locking them into a crisp, clean finish.
This simple addition is what makes the difference between a beautiful, sharp design and a soft, melt-prone glaze. It’s the chemistry that ensures your hard work stays perfect!
Gathering Ingredients for Your Perfect Cookie Icing Recipe
Okay, let’s get our supplies lined up! When we talk about achieving that Smooth Cookie Icing finish, the quality and preparation of your ingredients matter a lot. My background in the test kitchen taught me that even the smallest steps, like sifting, make a huge difference here.
You only need four core items for this powerhouse cookie icing recipe, but pay close attention to that powdered sugar! You absolutely must sift it before measuring it out. Trust me, lumps will ruin your beautiful borders. If you’re aiming for cookies that look bakery-worthy, you’ll want to check out the tips over at this sugar cookie icing recipe for some extra guidance on smooth mixes.
Here is exactly what you need to gather for a batch that covers about two dozen medium cookies:
- 3 tablespoons Meringue Powder
- 4 cups Powdered Sugar, sifted *very* well
- 6 tablespoons Warm Water
- 1 teaspoon Vanilla Extract (optional, but I love the hint of flavor!)
Step-by-Step Royal Icing Tutorial: Achieving Piping Consistency Icing
Now for the fun part—mixing! This Royal Icing Tutorial is incredibly fast; you’ll be decorating before you know it. First, combine your measured meringue powder and the all-important sifted powdered sugar in a large bowl. I like to give them a quick whisk by hand just to make sure they are fully acquainted before the mixer comes out. If you want to see another great method for getting that perfect piping look, check out the details on this foolproof royal icing recipe!
Next, drizzle in the warm water and the vanilla, if you’re using it. Start the electric mixer on the absolute lowest speed—otherwise, you’ll dust your entire kitchen with sugar! Once it’s just combined, crank that speed up to medium-high. You need to beat this mixture for a solid five to seven minutes. Seriously, don’t stop early! This high-speed whipping is what builds those strong structure-holding peaks, giving you your perfect piping consistency icing.

When it’s done, it should look stiff, glossy, and hold its shape when you lift the whisk. My little quality check is to lift the whisk and see if the peak stands straight up without drooping. That’s when you know you’ve nailed it! For more decorating tips on getting sharp lines, you should explore the techniques shared over at this tutorial.
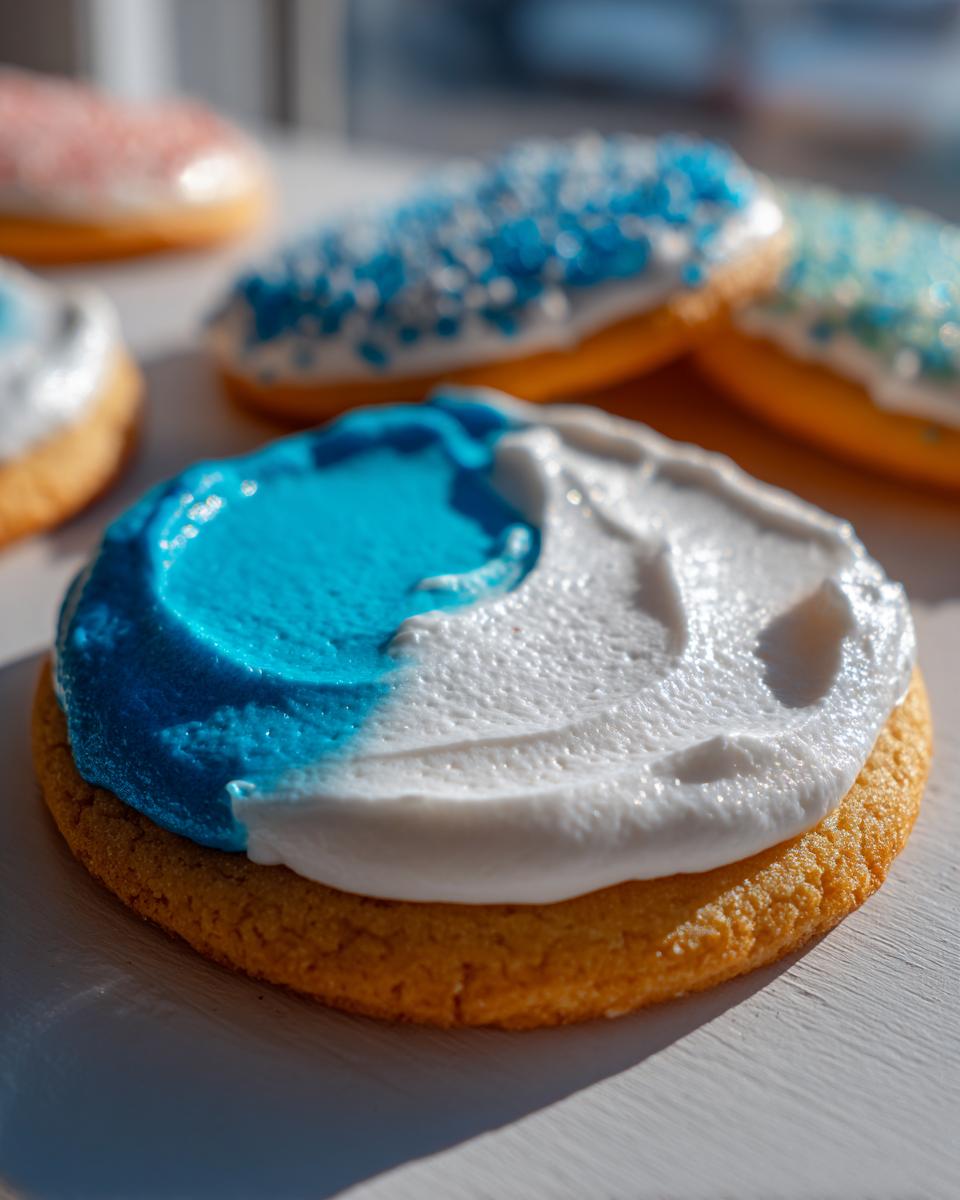
Adjusting Your Cookie Icing Consistency: Piping vs. Flooding
Not all decoration styles are the same, right? Piping details requires that stiff icing we just made, but if you want to fill in the center of a cookie shape—that’s called flooding—you’ll need it thinner. This is where we control the magic!
To thin it out for flood consistency—that beautiful, glassy finish you see on professional decorated cookies—we add water extremely slowly. Add water just a half teaspoon at a time, beating well after each addition. You’re waiting for the “ribbon test”: when you lift the whisk, the icing should flow off in a thick ribbon that sinks back into the bowl and disappears completely after about ten seconds. That’s the sign of perfect flow! If you accidentally thin it too much for your piping consistency icing, don’t panic. Just mix in a tablespoon of sifted powdered sugar at a time until it stiffens back up. Mastering these two textures is the key to professional results.
Tips for Success When Making Decorating Cookie Icing
You’ve got your stiff base icing—now let’s talk about coloring it and keeping things flawless! When you add gel food coloring, you are technically adding a bit of extra moisture, so you might need to stir in a tiny sprinkle of powdered sugar afterward to bring it back to perfect piping consistency. Always use gel colors, not liquid drops, because liquid drastically changes the texture we just worked so hard to perfect for that Glossy Icing for Cookies finish.
The biggest enemy during mixing is air bubbles! After you finish whipping your icing, I always let it sit on the counter, uncovered, for about five minutes. This lets the big surface bubbles pop naturally. If you see tiny ones, gently pop them with a toothpick before you even begin decorating. For more tips on getting that amazingly smooth and shiny result, you’ll want to see this guide on making cookie icing that hardens smoothly.
How to Make Icing Dry Hard: Setting and Curing Times
This is the moment of truth! All that beautiful decorating time means nothing if your cookie icing stays soft. The waiting game can be tough, but patience is essential here. Once your cookies are decorated, you must let them dry uncovered at room temperature. No cheating by putting them in the fridge, please!
Humidity is the enemy here. High moisture in the air can make the icing take forever to cure or, worse, never fully harden. For a truly firm, touchable surface that’s perfect for stacking or packing, you generally need six to eight hours. For the absolute sturdiest, crackle-proof finish needed for shipping, I always wait overnight. You want that satisfying, crisp feel when you gently press the surface.
If you are trying to rush things, remember that the icing needs to be completely set. To see how other bakers ensure their frosting sets firm, check out the great advice on making sugar cookie icing that hardens. This royal icing recipe should give you the reliable set you are looking for, as seen in this cookie icing that hardens guide!
Storing Leftover Cookie Icing for Future Use
Okay, you made beautiful cookies, but you still have some gorgeous icing left over. Don’t throw it out! Royal icing is sturdy, which is exactly why we love it. You need to transfer any leftover icing into a truly airtight container. I mean it—air is the enemy when you’re trying to keep it fresh!
Store the container at cool room temperature, never in the fridge, since that can mess with the texture. It will keep well for a couple of weeks, which is fantastic for when you want to whip up quick batches of cookies later. When you’re ready to use that simple 4 ingredient cookie icing again, don’t panic if it looks a little thick or separated. Just stir it gently with a spatula—no mixer needed—and it should come right back to life! You can find some extra tips on reviving your icing over at my favorite recipe critic site.
Frequently Asked Questions About Cookie Icing
Can I substitute meringue powder?
I strongly advise against it if you’re aiming for that hard, durable finish! While you technically *can* use just powdered sugar and water sometimes, the meringue powder is what gives us that reliable structure, sharp piping, and truly firm set. For the Best Cookie Icing Recipe that holds up to stacking and travel, stick to the powder. People often look for guides on making icing that hardens, and meringue powder is the key component in most successful recipes.
How do I get a ‘Perfect Cookie Finish’?
That shiny, flawless look comes down to technique in two spots! First, you must sift your powdered sugar meticulously to guarantee a Smooth Cookie Icing base. Second, make sure you beat the icing for the full 5 to 7 minutes mentioned in the instructions. That long whip creates microscopic air bubbles that pop during drying, leaving behind that beautiful, Glossy Icing for Cookies finish. You can find more tips on achieving that look over at this recipe guide!
Can I use raw egg whites instead of meringue powder?
This is a very common question! Years ago, people used fresh egg whites, but I always recommend using the meringue powder, especially when you want that flawless Sugar Cookie Frosting That Hardens. Meringue powder is pasteurized, which makes the icing much safer for items that might be gifted or served to folks who are sensitive. Plus, the consistency is so much more consistent and reliable for getting that perfect Piping Consistency Icing. Safety and reliability win out every time in my kitchen!
Estimated Nutritional Data for This Cookie Icing Recipe
Because we’re talking simple ingredients—mostly sugar and protein here—the nutritional profile is straightforward. Keep in mind that since this is a recipe for pure decoration, you’re not usually eating a huge serving of it! This estimate is based on a serving size of about 1/4 cup of the finished icing mixture.
- Calories: Around 140 per serving
- Fat: 0g
- Protein: 1g
- Carbohydrates: 35g (mostly from sugar)
Just a small note from my science corner: since ingredient brands vary widely, please treat these numbers as a good ballpark estimate for planning purposes.
Share Your Beautiful Cookie Icing Creations
I truly hope this guide for a rock-solid, beautiful cookie icing gives you the confidence to tackle those amazing decorated cookies!
If you try out this Meringue Powder batch, please come back here and leave me a little star rating below. Knowing what works for you in your own kitchen is the best part of running Frosted Fancies for me!
And please, snap a picture! I absolutely live for seeing your finished sugar cookies. Tag me on social media and let me know how your sugar cookie frosting that hardens performed—did it hold those crisp lines perfectly? I can’t wait to see your colorful creations. For more inspiration on decorating techniques, you can always check out the useful guide on making sugar cookie icing that hardens!
PrintFoolproof Royal Icing Recipe That Dries Hard for Perfect Cookie Decorating

Learn how to make the best cookie icing that hardens completely. This Royal Icing recipe gives you a smooth, glossy finish perfect for detailed decorating, gifting, and stacking your sugar cookies.
- Prep Time: 10 min
- Cook Time: 0 min
- Total Time: 10 min
- Yield: Covers about 2 dozen medium cookies 1x
- Category: Dessert
- Method: Mixing
- Cuisine: American
- Diet: Vegetarian
Ingredients
- 3 tablespoons Meringue Powder
- 4 cups Powdered Sugar, sifted
- 6 tablespoons Warm Water
- 1 teaspoon Vanilla Extract (optional)
Instructions
- In a large bowl, combine the meringue powder and sifted powdered sugar.
- Slowly add the warm water and vanilla extract (if using).
- Beat the mixture with an electric mixer on low speed until combined, about 1 minute.
- Increase the speed to medium-high and beat for 5 to 7 minutes until the icing is stiff, glossy, and holds firm peaks. This is your piping consistency.
- To achieve flood consistency for filling in areas, add water, one half teaspoon at a time, beating well after each addition, until the icing slowly flows off the whisk in a ribbon that disappears into the bowl after about 10 seconds.
- Divide the icing into separate bowls for coloring, if desired.
- Use immediately for piping details or flood large areas. Allow decorated cookies to dry uncovered at room temperature for several hours, or overnight, until the icing is completely hard to the touch.
Notes
- For the smoothest finish, sift your powdered sugar before measuring and mixing.
- If the icing is too thin for piping, add more sifted powdered sugar, one tablespoon at a time.
- If the icing is too thick for flooding, add water, one quarter teaspoon at a time.
- Store unused icing in an airtight container at room temperature for up to two weeks; stir well before reusing.
Nutrition
- Serving Size: 1/4 cup icing
- Calories: 140
- Sugar: 35g
- Sodium: 5mg
- Fat: 0g
- Saturated Fat: 0g
- Unsaturated Fat: 0g
- Trans Fat: 0g
- Carbohydrates: 35g
- Fiber: 0g
- Protein: 1g
- Cholesterol: 0mg