
Hello and welcome to Frosted Fancies! I’m Katie Hayes, and I am genuinely so happy you stopped by today. If you’ve ever wanted that rich, tangy slice of heaven that only cheesecake can deliver, but you just can’t face the water bath or the hours of waiting, then you are in exactly the right spot.
We are diving headfirst into the world of cheesecake bites! These little gems are my absolute go-to when I need something decadent but fuss-free. Seriously, these are no-bake, which means zero oven time—perfect for those sweltering summer days or last-minute party panic!
After years of perfecting recipes professionally in test kitchens, trust me when I say I know the science behind creamy, stable desserts. This recipe is engineered for success, giving you that perfect, dense texture every single time, even without baking. Get ready for some unbelievably delicious individual cheesecake desserts!
- Why These No-Bake Cheesecake Bites Are Your New Favorite Quick Dessert Recipes
- Assembling Your Creamy Cheesecake Bites Ingredients
- Step-by-Step Guide to Making Easy Cheesecake Bites
- Ingredient Notes and Substitutions for Perfect Cheesecake Bites
- Tips for Success with Your Mini Cheesecake Bites Recipe
- Make Ahead Desserts: Storing Your Cheesecake Bites
- Serving Suggestions for Individual Cheesecake Desserts
- Frequently Asked Questions About Cheesecake Cups
- Share Your Delicious Individual Cheesecake Desserts
Why These No-Bake Cheesecake Bites Are Your New Favorite Quick Dessert Recipes
I’m telling you, once you see how fast these cheesecake bites come together, you’ll never go back to making a huge springform pan cake again—unless it’s for a huge crowd, of course! These are just the perfect little pops of creamy goodness.
Forget the fuss. These are my go-to because they meet every need a busy home baker has. They are quick, they are gorgeous, and honestly, they are almost impossible to mess up. Check out why these should be your next go-to:
- They deliver maximum creaminess with minimal time investment.
- They are portable and so easy to serve!
If you want to see another fantastic example of how amazing these smaller treats can be, check out this recipe for the best ever mini cheesecake bites—it’s seriously good! This no-bake version is just as reliable.
Perfect for Entertaining: Party Cheesecake Ideas
These are spectacular party cheesecake ideas because they take all the stress out of serving. No one needs a messy slice or a wobbly tower of dessert! Guests can easily grab one (or three!) without needing plates and forks right away. Plus, because they’re individual, you always know exactly how many you have ready to go. They look so chic on a tiered tray!
Fuss Free Cheesecake Experience
The best part, hands down, is the lack of heat required. We are talking about a completely fuss free cheesecake experience here. If you’re nervous about cracking or baking temperatures, this recipe eliminates all the usual anxiety. We skip that whole water bath drama and head straight for the chilling phase. It’s dessert magic with just a mixer and a fridge!
Assembling Your Creamy Cheesecake Bites Ingredients
Okay, gathering your ingredients is where the real quality control comes in! Since we aren’t baking these cheesecake bites, the quality of your starting materials really shines through. Don’t skimp here; grab the good stuff. I’ve broken down exactly what you need below so you can organize your mise en place before you even touch the mixer. Precision matters when you’re aiming for that perfectly creamy texture!
I always look at this list and think about how much effort we are *saving* by not turning on the oven. It’s genius! You can find my foundational recipe notes on ingredient handling over at mini cheesecake bites recipe, which I relied on heavily when testing this no-bake version.
For the Crust Base
- 1 1/2 cups graham cracker crumbs (I like to pulse mine fresh in the food processor!)
- 1/4 cup granulated sugar
- 6 tablespoons unsalted butter, which you must melt completely before adding.
For the Creamy Filling
- 16 ounces full-fat cream cheese, and listen closely: it has to be completely softened. Room temperature is key, or you’ll get lumps, and we hate lumps!
- 1/2 cup granulated sugar
- 1 teaspoon vanilla extract
- 1 large egg (Yes, even in no-bake, that egg helps stabilize it in the fridge, but don’t worry about cooking it!)
Optional Topping Variations for Your Cheesecake Bites
This is the fun part where you personalize your treats! Keep these separate until the very last second when you pull the chilled bites out of the cups.
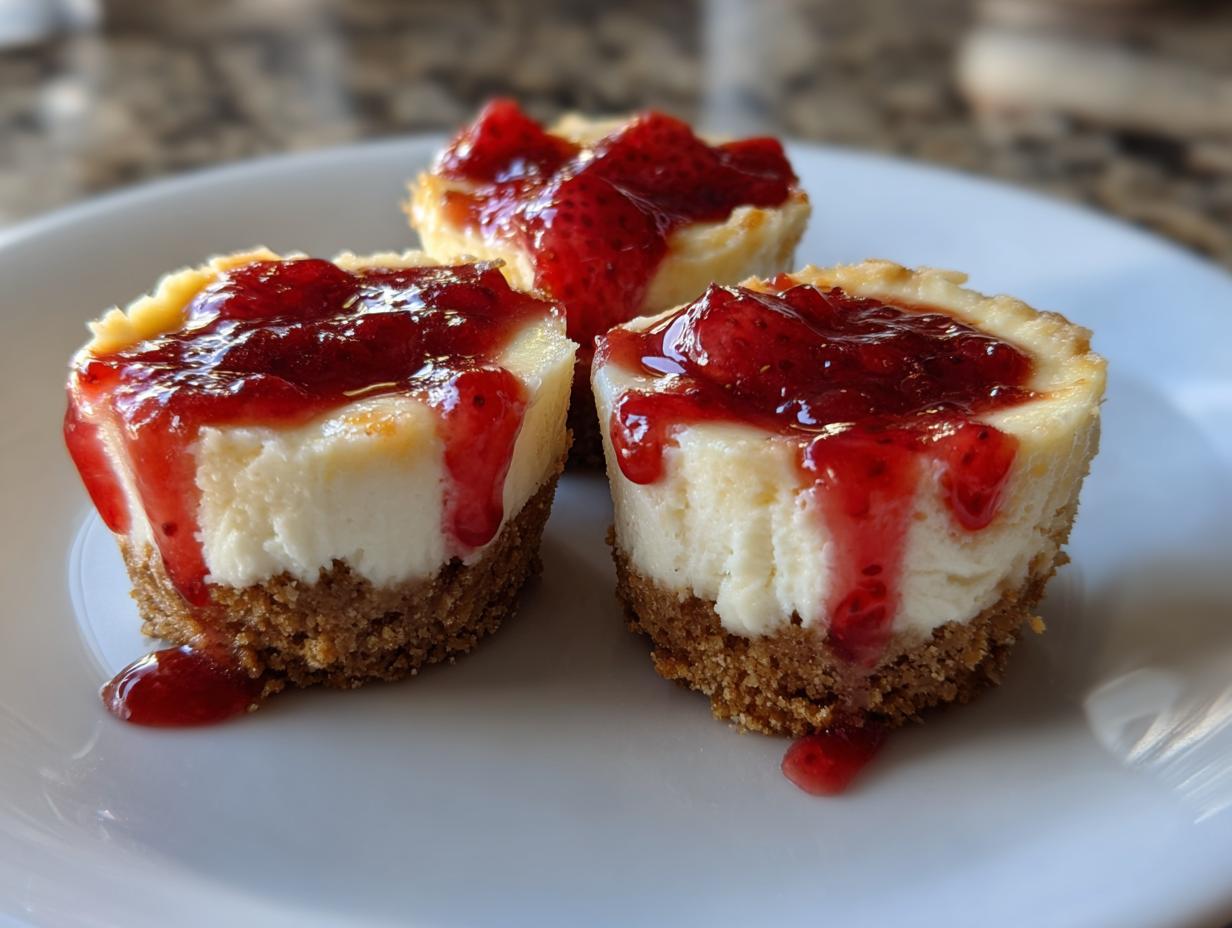
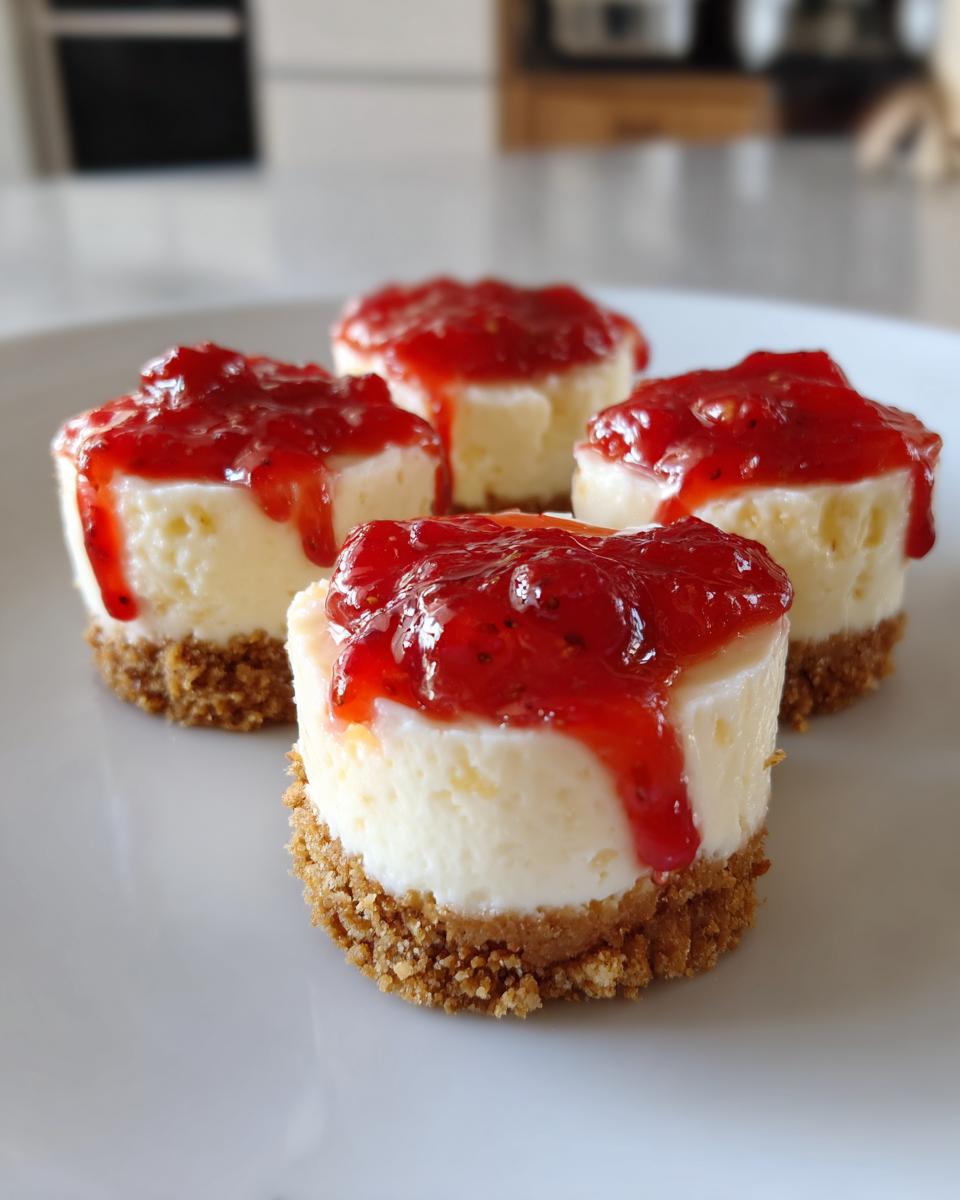
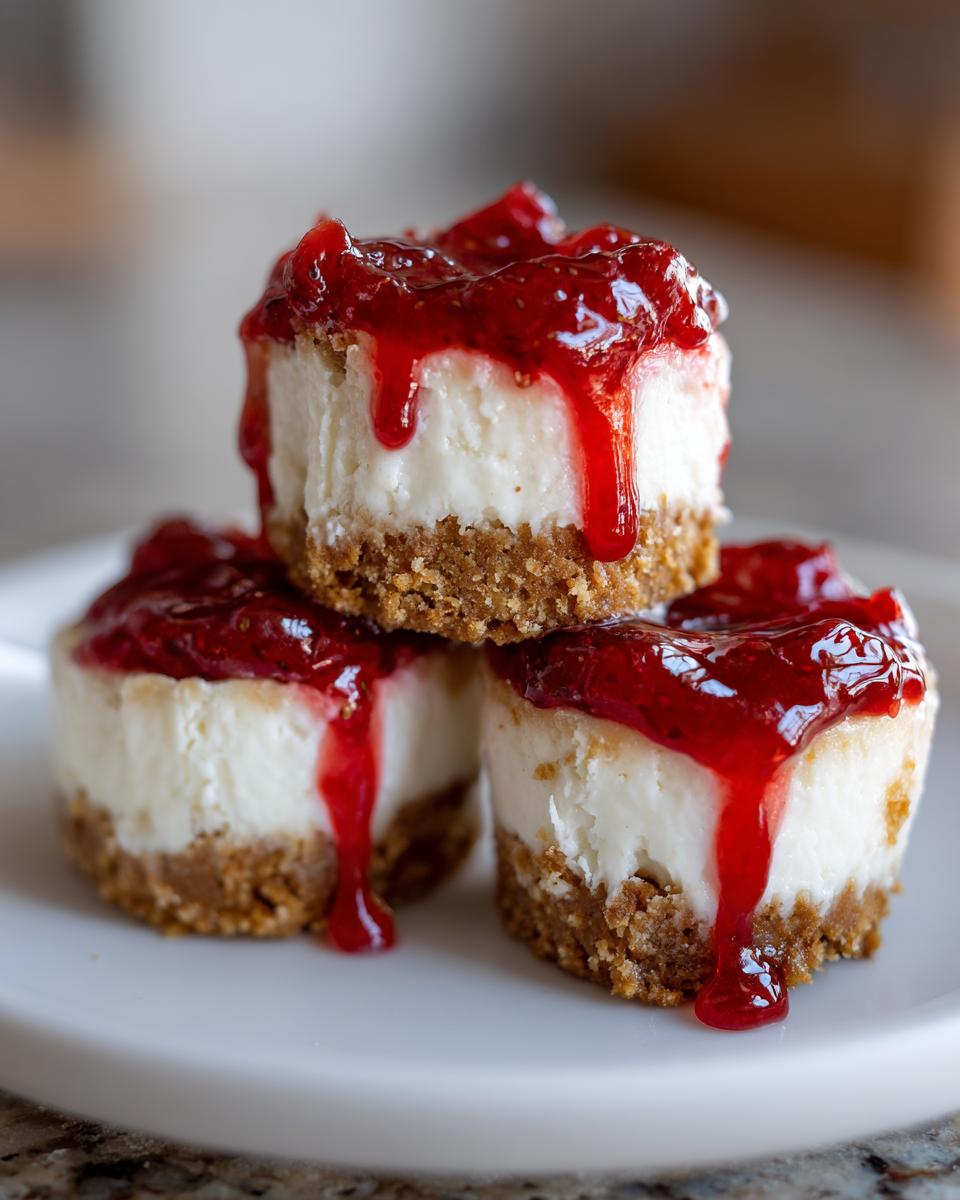
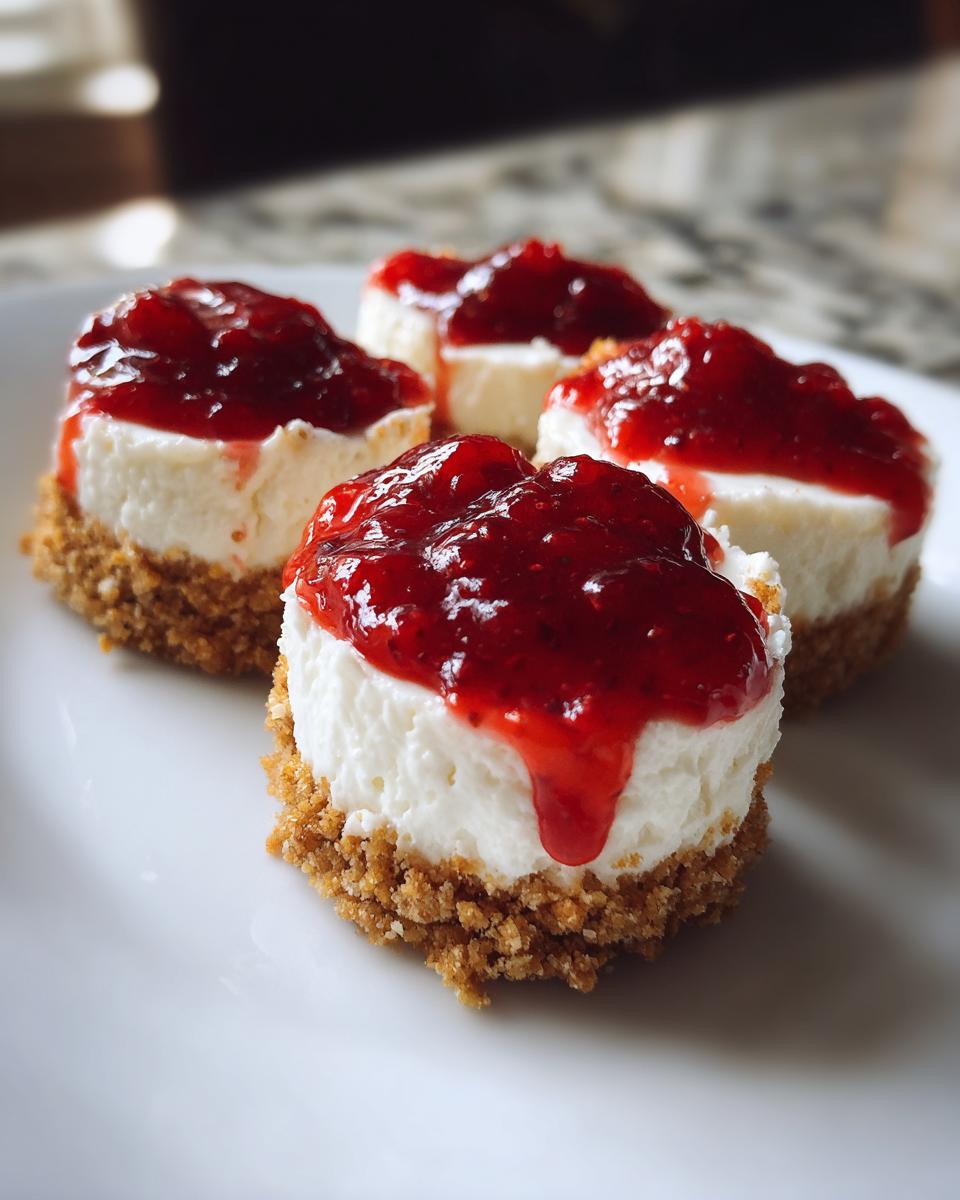
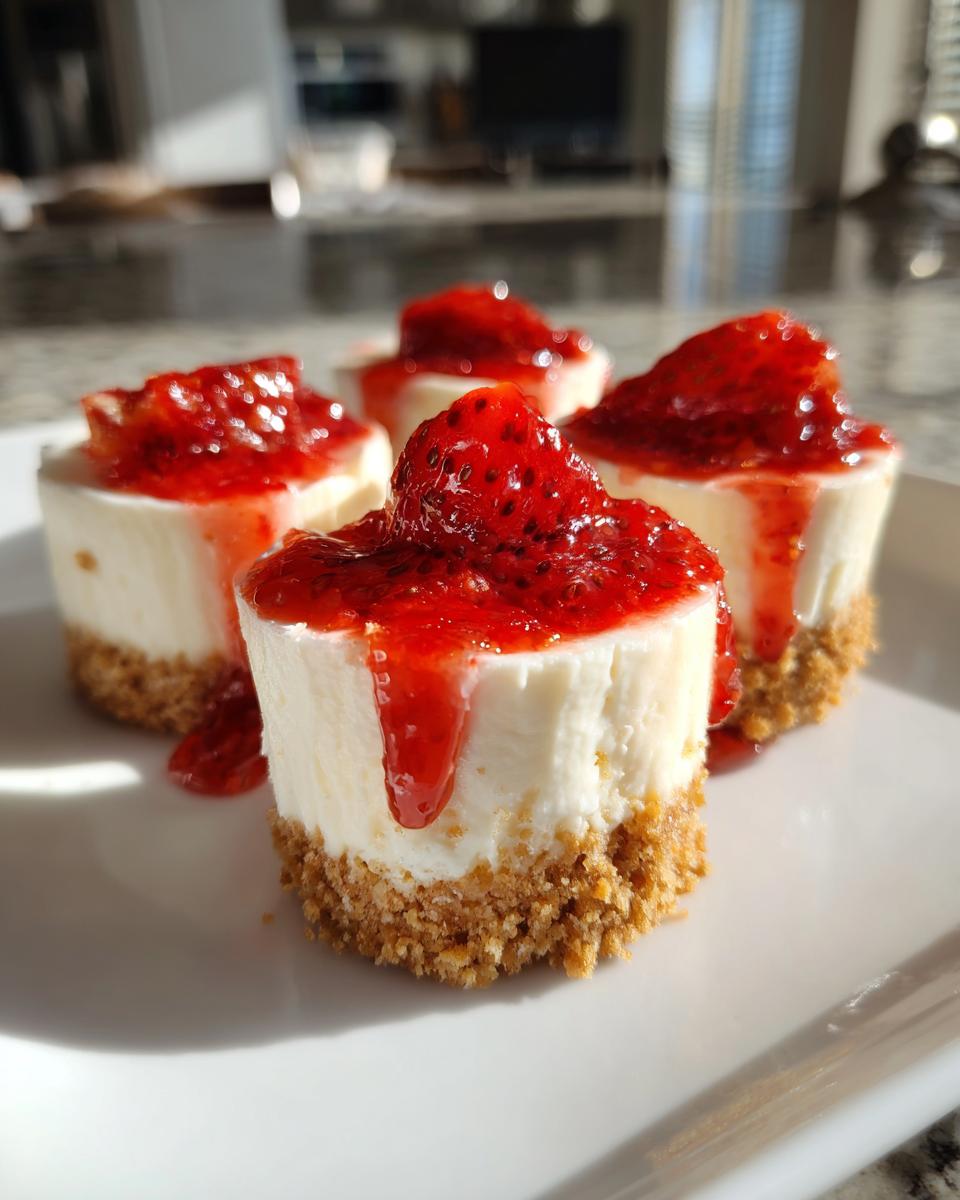
- Strawberry compote (easy to whisk up!)
- Chocolate ganache (just melted chocolate and a bit of heavy cream)
Step-by-Step Guide to Making Easy Cheesecake Bites
Alright, let’s get these delicious cheesecake bites assembled! Because there’s no oven involved, the structure of this recipe relies heavily on cold temperatures—so keep your freezer handy! I’ve seen people rush this process, and trust me, you just end up with a crumbly mess. Patience is our secret ingredient here today.
You can find a great overview of the technique used in this no-bake mini cheesecake guide, but hang tight, because my tips make the process even smoother!
Preparing the Crust and Chilling
First thing’s first: get your mini muffin tin ready! You absolutely need paper liners for easy removal later, so line all 24 cups. Now, take your crust mixture—the crumbs, sugar, and melted butter—and mix until it resembles wet sand. Spoon about one tablespoon into the bottom of each liner and press it down firmly. I mean *firmly*! Once they are all packed down, pop the whole tin into the freezer for about 15 minutes while you move onto the filling. That quick freeze locks the crust in place.
Mixing the No Bake Cheesecake Bites Filling
This is where that beautiful, creamy texture happens! Grab your large bowl and beat that softened cream cheese and the 1/2 cup of sugar together until it is perfectly smooth. Scrape down those sides—you don’t want any unmixed pockets! Next, beat in your vanilla and the single egg. My pro tip, learned from years in the lab creating these things, is to beat the egg *just* until it disappears. Overmixing at this stage incorporates too much air, and we want dense and creamy, not airy!
Setting and Finishing the Miniature Desserts for Parties
Spoon that incredible filling over your chilled crusts, filling each cup about three-quarters of the way up. Then, we wait. These cheesecake bites need time to set up properly. You absolutely must refrigerate them for a minimum of four hours, but if you can let them go overnight, those individual cheesecake desserts will be unbelievably perfect. Once they are rock solid, peel off those liners and top them with your compote or chocolate drizzle right before serving your miniature desserts for parties!
Ingredient Notes and Substitutions for Perfect Cheesecake Bites
I want you to feel totally confident making these cheesecake bites, so let’s talk specifics about the ingredients. Remember, since there’s no baking to force everything together, the base ingredients have to be spot on for that dreamy texture we are aiming for. I always get questions about the cream cheese firmness, so pay close attention to that!
We want fantastic results every time, and my collection of tried-and-true tips, which you can see reinforced over at mini cheesecake bites sites, should help you troubleshoot before you even start mixing.
Crust Adjustments and Texture Tips
When you’re pressing down that graham cracker mixture, the most important thing is density. If your crust is loose, it’ll crumble when you pull the liner off later. My favorite trick to ensure a solid base for your cheesecake bites is to use the bottom of a small, clean drinking glass. It gets way more leverage than your thumb, packing that buttery crumb down perfectly!
Cream Cheese Quality for Creamy Cheesecake Bites
You simply must use the full-fat, brick-style cream cheese here. Please don’t try swapping in the whipped tub stuff—it’s already got too much air and liquid added! That brick variety melts down into that signature smooth texture we need for these creamy cheesecake bites. If it’s not fully softened, you’ll end up with little chunks, and that is not what we want in our beautiful no-bake treats.
Tips for Success with Your Mini Cheesecake Bites Recipe
Even though this recipe is straightforward, I always have a few little secrets I use to guarantee professional results when making these cheesecake bites. Having developed hundreds of recipes, I know exactly where things can go sideways, even with something as simple as no-bake!
My top piece of advice? Temperature control is everything! If your cream cheese is even slightly too cold, you’ll end up fighting lumps the entire time, which ruins that smooth texture we worked so hard for. Make sure that block cheese has been out on the counter for at least an hour, maybe more if your kitchen is chilly.
Also, when you go to top these miniature desserts for parties, wait until they are *truly* firm. If you try to drizzle chocolate over them when they are even slightly soft, the topping might just slide right off the side. You can see some great visuals over at best ever mini cheesecake bites that show exactly the firmness you should aim for before topping them!
Make Ahead Desserts: Storing Your Cheesecake Bites
This is honestly one of the best features about these cheesecake bites—they are superstars when it comes to planning ahead! Knowing you have a delicious treat ready to go is such a relief, especially when you’re planning a big event.
Because these are no-bake, they function perfectly as make ahead desserts. Once they are set firm in the fridge, you can store them in an airtight container for up to four days. That’s right, four whole days of creamy goodness waiting for you! I often make a batch on Tuesday, and they are still incredible by Friday when company comes over. Planning is key, and these little guys make stocking the dessert table so easy! You can review some great storage tips when comparing styles over at no-bake pink velvet cheesecake bites.
Serving Suggestions for Individual Cheesecake Desserts
The strawberry compote and chocolate ganache are fantastic, but why stop there when you have mastery over these perfect individual cheesecake desserts? Since the base is so classic and creamy, it loves almost anything you throw on top!
For a bright, zesty kick, try grating a little fresh lemon zest right over the top before serving. Or, if you prefer rich indulgence, a light drizzle of salted caramel sauce makes these cheesecake bites feel almost gourmet. Fresh mint leaves also add a beautiful pop of color and freshness. Honestly, explore your topping drawer—these little cups are ready for anything!
You can get loads of creative inspiration on how beautiful these can look when decorated over at mini cheesecakes galleries!
Frequently Asked Questions About Cheesecake Cups
I know you might have a few lingering questions before you dive into making these cheesecake bites! That’s totally normal. Developing confidence in the kitchen means knowing what to expect. Since I’ve spent so much time perfecting this mini cheesecake bites recipe, let me clear up a few things people usually ask me about these cheesecake cups.
We want every batch to be a total win, so check out these quick answers!
Can I make these cheesecake bites without a mini muffin tin?
Oh, absolutely! If you don’t have a mini muffin tin, don’t panic. You can use a standard 12-cup muffin tin, but you’ll need to double the recipe or just accept you’ll get fewer treats. You could also use small silicone molds if you have them—they make popping them out super easy! Just remember, if you use larger silicone cups, the chilling time might need to increase slightly to ensure they stay firm.
How long do these no bake cheesecake bites last in the fridge?
For the very best creamy cheesecake bites texture, you want to eat them within the first two days, but honestly, they hold up wonderfully. As I mentioned before, they remain perfectly safe and delicious for up to four days in an airtight container. Any longer and the crust can start to get a little soft from the moisture, although they’ll still taste fine!
What is the best way to get the paper liners off the finished mini cheesecake bites recipe?
This is key for presentation! If you chilled them for the full minimum time of four hours, they should peel off easily. But if you struggle, try this little trick: when they are rock solid from the fridge, just let them sit at room temperature for about five minutes. That tiny bit of warmth right on the edge helps the paper separate cleanly from the crust without tearing or leaving crumbs everywhere. You can always find more comparison styles on how to present these over at strawberry cheesecake bites resources!
Share Your Delicious Individual Cheesecake Desserts
Now that I’ve spilled all my secrets for the creamiest, easiest cheesecake bites recipe you will ever meet, it’s your turn! Seriously, seeing what you create in your own kitchens is the absolute best part of running Frosted Fancies.
I put my years of recipe development into this, and I truly believe it’s foolproof, but I always love hearing your feedback. Did you top yours with chocolate? Did you manage to save any overnight?
Please, please come back and leave a rating when you make them—it helps other home cooks who are nervous about trying something new! If you want to see more fabulous, high-impact, low-effort treats, check out these easy no-bake cheesecake bites ideas as well.
And if you snap a picture of your gorgeous platter of individual cheesecake desserts, tag me on social media! I want to cheer you on. If you happen to try out those super fun strawberry crunch variations, you can see how others topped theirs over at making mini strawberry crunch cheesecake bites. Happy baking—or better yet, happy *no-baking*!
PrintEasy No-Bake Mini Cheesecake Bites

Create creamy, decadent mini cheesecake bites without turning on your oven. This easy recipe uses simple ingredients for perfect individual desserts ideal for parties or quick treats.
- Prep Time: 20 min
- Cook Time: 0 min
- Total Time: 4 hr 20 min
- Yield: 24 bites 1x
- Category: Dessert
- Method: No-Bake
- Cuisine: American
- Diet: Vegetarian
Ingredients
- 1 1/2 cups graham cracker crumbs
- 1/4 cup granulated sugar
- 6 tablespoons unsalted butter, melted
- 16 ounces cream cheese, softened
- 1/2 cup granulated sugar
- 1 teaspoon vanilla extract
- 1 large egg
- Optional Topping: Strawberry compote or chocolate ganache
Instructions
- Prepare a mini muffin tin by lining 24 cups with paper liners.
- In a small bowl, combine the graham cracker crumbs and 1/4 cup sugar. Pour in the melted butter and mix until the crumbs are evenly moistened.
- Press about 1 tablespoon of the crumb mixture firmly into the bottom of each lined muffin cup to form the crust. Place the tin in the freezer while you prepare the filling.
- In a large bowl, beat the softened cream cheese and 1/2 cup sugar with an electric mixer until smooth. Scrape down the sides of the bowl.
- Beat in the vanilla extract and the egg until just combined. Do not overmix the batter.
- Spoon the cheesecake filling evenly over the chilled crusts, filling each cup about three-quarters full.
- Refrigerate the cheesecake bites for at least 4 hours, or until completely firm. For best results, chill overnight.
- Once firm, carefully remove the paper liners. Top each mini cheesecake bite with your choice of strawberry compote or chocolate ganache before serving.
Notes
- For a firmer crust, press the crumbs down using the bottom of a small glass.
- If you want a slightly sweeter crust, add 1 tablespoon of brown sugar to the crumb mixture.
- These individual cheesecake desserts are excellent for make ahead entertaining; they keep well in the refrigerator for up to four days.
Nutrition
- Serving Size: 1 bite
- Calories: 150
- Sugar: 12
- Sodium: 110
- Fat: 10
- Saturated Fat: 6
- Unsaturated Fat: 4
- Trans Fat: 0
- Carbohydrates: 14
- Fiber: 0
- Protein: 3
- Cholesterol: 30