
If you are anything like me, the minute someone mentions a potluck or a Game Day gathering, my brain immediately starts spinning through my best easy appetizer ideas. You need something that travels well, is totally crowd-pleasing, and doesn’t take up your entire afternoon, right? Well, stop spinning! I’m Katherine Hayes, and after years of developing recipes professionally, I’ve perfected the formula for ultimate ease. These taco pinwheels are my secret weapon—they take a mere 15 minutes of hands-on time and the make-ahead component is a total lifesaver. Forget complicated layers; this is simple, cheesy perfection.
- Why You Need These Easy Taco Pinwheels for Your Next Party Snack Recipes
- Assembling the Creamy Taco Filling for Your Taco Pinwheels Recipe
- Rolling and Chilling: Secrets to Perfect Tortilla Pinwheels Easy Slices
- How to Prepare and Serve Your Fiesta Pinwheels
- Tips for Success with Your Taco Pinwheels
- Storage and Reheating Instructions for Leftover Taco Pinwheels
- Serving Suggestions for Appetizers for a Crowd
- Frequently Asked Questions About Mexican Roll Ups
- Estimated Nutritional Data for Simple Party Food
- Share Your Kitchen Creations
Why You Need These Easy Taco Pinwheels for Your Next Party Snack Recipes
I promise you, these are about to become your go-to for any event, big or small. When I was developing recipes for magazines, the number one request was always for something genuinely easy that looked fancy. These Taco Pinwheels deliver that high-impact result with minimal effort, which is why they fly off the plate first at any gathering. They just scream fun fiesta roll ups!
- They tick every box for top-tier easy appetizer ideas: flavorful, cheesy, and perfectly bite-sized.
- They are the absolute rockstar of reliable game day food because they sit perfectly fine in the fridge until you need them.
- No oven time required! Zero cooking means less stress when you’re juggling a dozen other things before guests arrive.
Quick Prep Snacks: Ready in Minutes
Seriously, the active time here is just 15 minutes total. Since there’s no actual cooking involved once the filling is mixed, your oven stays free for, well, whatever else you need to bake! If you’re scrambling for last-minute contributions, these quick prep snacks save the day without ever tasting rushed. I often make the filling right after running errands—it’s that fast.

The Ultimate Make Ahead Appetizers
This is where the magic happens! The recipe requires you to roll those tortillas up tightly and chill them for at least two hours. Don’t skip this! That chilling time firms up the cheese mixture beautifully. It means you can assemble these entire taco pinwheels the night before your party. Then, all you do is slice and serve when everyone shows up. It’s the definition of stress-free entertaining!
Assembling the Creamy Taco Filling for Your Taco Pinwheels Recipe
Okay, friends, now for the heart of the matter: the filling! Since these are no-bake taco pinwheels, the quality of this spread determines the whole experience. As someone who specialized in the chemistry of cooking, I can tell you that consistency is everything here. If your cream cheese isn’t perfectly temperate, you end up with lumps, and nobody wants a lumpy party snack!
We need that smooth, luscious base before we even think about adding our savory mix-ins. Trust me on the temperature check; it makes all the difference in getting the ultimate creamy taco filling.
Essential Ingredients for Flavorful Taco Pinwheels
Grab your ingredients! You’ll notice that the meat is optional, which is great if you need a fast vegetarian snack. Whatever you choose, make sure everything measured out is ready to go before you start mixing.
- The cream cheese *must* be softened—I mean truly soft, almost spreadable.
- We need that beautiful Mexican cheese blend. Make sure it’s shredded, not cubed!
- Don’t forget your taco seasoning packet—that’s the flavor powerhouse for these taco pinwheels.
- If you’re using ground beef or chicken, it has to be fully cooked and completely drained. Nobody wants soggy, greasy taco pinwheels!
- Drain those olives well, and give your green onions a nice, fine chop.
Achieving the Perfect Creamy Taco Filling Consistency
First step: In a medium bowl, beat that softened cream cheese until it’s light and fluffy. Then, stream in the shredded cheese and the entire packet of taco seasoning. Beat it until it looks uniform. If it’s not smooth now, it won’t be later!
Once your base is gorgeous and velvety, gently fold in the olives, onions, and your optional meat. You want to fold them in gently so you don’t deflate all the air we just beat into the cheese. This careful handling is what keeps our filling light and spreadable, ensuring you have the best texture for those cheesy tortilla roll ups.
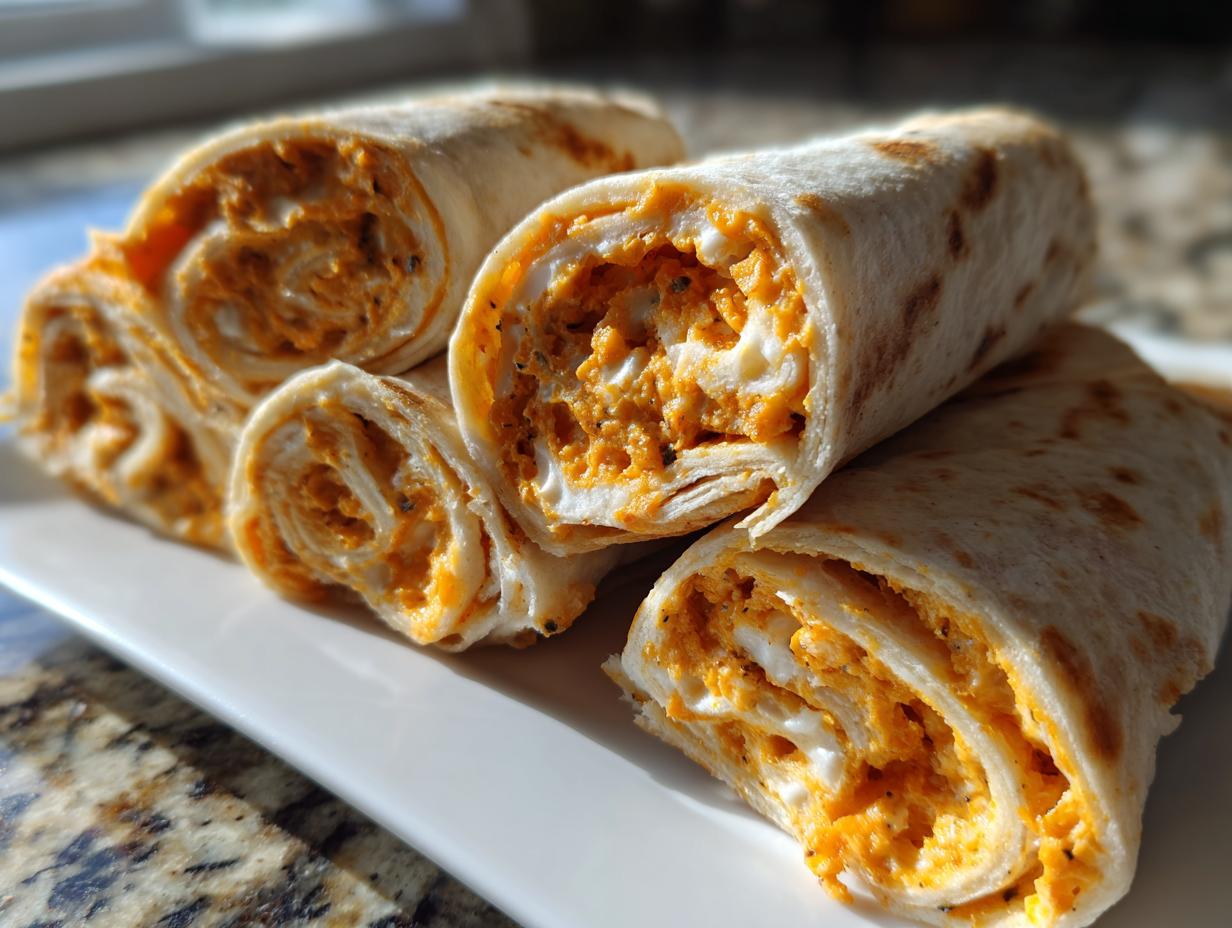
Rolling and Chilling: Secrets to Perfect Tortilla Pinwheels Easy Slices
This is where we turn a bowl of deliciousness into potential game-day gold! You’ve got your filling spread evenly across those big 10-inch flour tortillas. Now, the rolling part is where I learned a thing or two back in the test kitchens. If you roll loosely, you get gaps, and when you slice them, you end up with sad, floppy spirals instead of neat little rounds. We want tight, compact logs so that when you slice them, you get beautiful, defined rings—that’s the magic of these tortilla pinwheels easy!
Start rolling right at that edge, keeping the tension firm but steady. Don’t press so hard you tear the tortilla, but keep it snug against the filling all the way to the end. Once you have your tight log, wrap it immediately and tightly in plastic wrap. This is not the time to be shy with the cling film!
And now for the non-negotiable step: chilling! We need those logs to firm up in the fridge for a minimum of two hours, but honestly, overnight is even better. That cooling time solidifies the cream cheese filling, transforming the soft spread into something almost sliceable. If you try to cut the logs warm, the filling just squishes out everywhere. Patience here guarantees those stunning, clean cuts every single time.
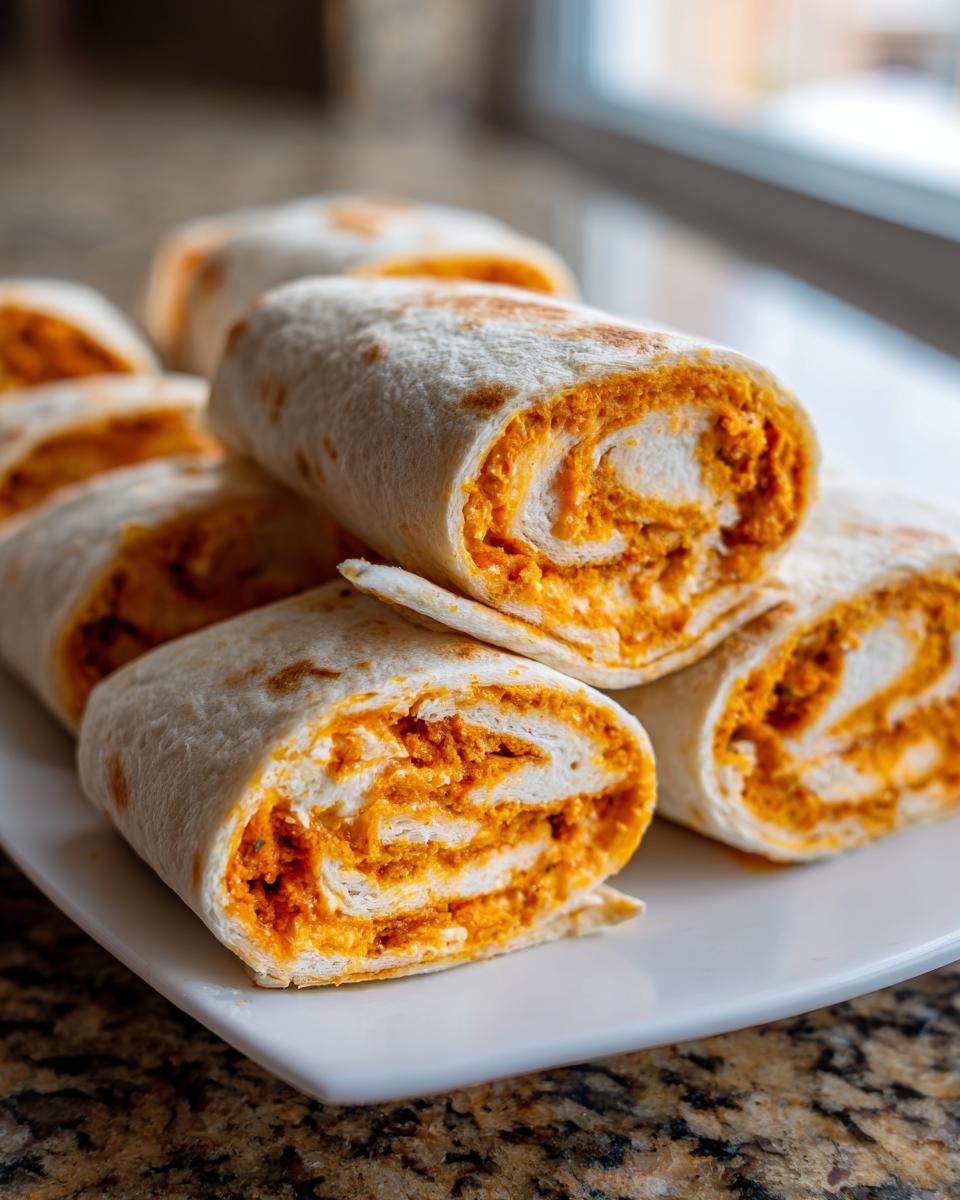
How to Prepare and Serve Your Fiesta Pinwheels
Your logs have chilled, they are firm, and now it’s time for the big reveal! Take those tightly wrapped tortilla logs out of the fridge. I always give them a little wiggle check to make sure they feel rock solid. Now, grab your sharpest knife. Dull knives are the enemy of tight slices, trust me; they tend to mash the roll instead of cutting cleanly through it.

Slice off the ends first—these are usually a bit messy anyway. Then, aim for slices about 1-inch thick all the way down the log. Even though they look great when fresh from the fridge, these amazing Fiesta Pinwheels are actually fantastic served cold, which is great for entertaining!
If you *absolutely* must serve them warm (maybe it’s a chilly evening?), pop them on a baking sheet for about 5-7 minutes at 350°F just to warm them through gently. But honestly, they are designed to be a refreshing, no-cook appetizer, so cold is my usual vote for ease and flavor balance!
Tips for Success with Your Taco Pinwheels
Even genius recipes sometimes need a little tweak based on your specific kitchen or ingredients on hand. Coming from a background in recipe development, I always advise cooks to pay attention to the details that help maintain the *structure* of a dish, especially since these taco pinwheels are built around rolling things tightly. The wrong tortilla choice, for instance, can lead to frustrating tears!
When choosing your tortillas, this is critical: make sure they are as fresh as possible. Stale tortillas are brittle and will crack the second you try to roll them firmly. If yours feel slightly stiff, try microwaving them for about 10 seconds wrapped in a damp paper towel; that little bit of steam makes them super pliable. This small adjustment stops tearing and keeps the structure sound as we make these fantastic taco pinwheels.
Ingredient Notes and Substitutions for Cheesy Tortilla Roll Ups
Let’s talk swaps! If you can’t find the exact Mexican blend cheese, feel free to use sharp cheddar, or even Pepper Jack for a little kick. Just make sure whatever cheese you pick shreds well. If you’re going vegetarian, skip the meat entirely! The cheese and mix-ins provide plenty of flavor that satisfies even my meat-loving family members when eating these cheesy tortilla roll ups.
If you use shredded chicken instead of beef, you might want to add a teaspoon of taco seasoning directly to the chicken first, just to make sure the flavor pops. We are looking for structural integrity here; we want the filling to be spreadable but firm enough that when we slice those taco pinwheels, they hold their shape beautifully.
Storage and Reheating Instructions for Leftover Taco Pinwheels
One other huge advantage of these little beauties is how long they hide well in the fridge! Since we are using cream cheese and tortillas, they keep really well. Wrap any leftover logs tightly—or keep your cut taco pinwheels in an airtight container—and they’ll be good for about three to four days. That makes them perfect for grabbing as an unplanned snack the next day!
Now, about reheating: while I love mine served cold or at room temperature, if you want them warm, just place the slices on a baking sheet lined with parchment. Pop them into a 350°F oven for maybe five to seven minutes. You want them warmed through, not crispy, just to bring that cheese back to life. Seriously, these taco pinwheels are designed for easy leftovers!
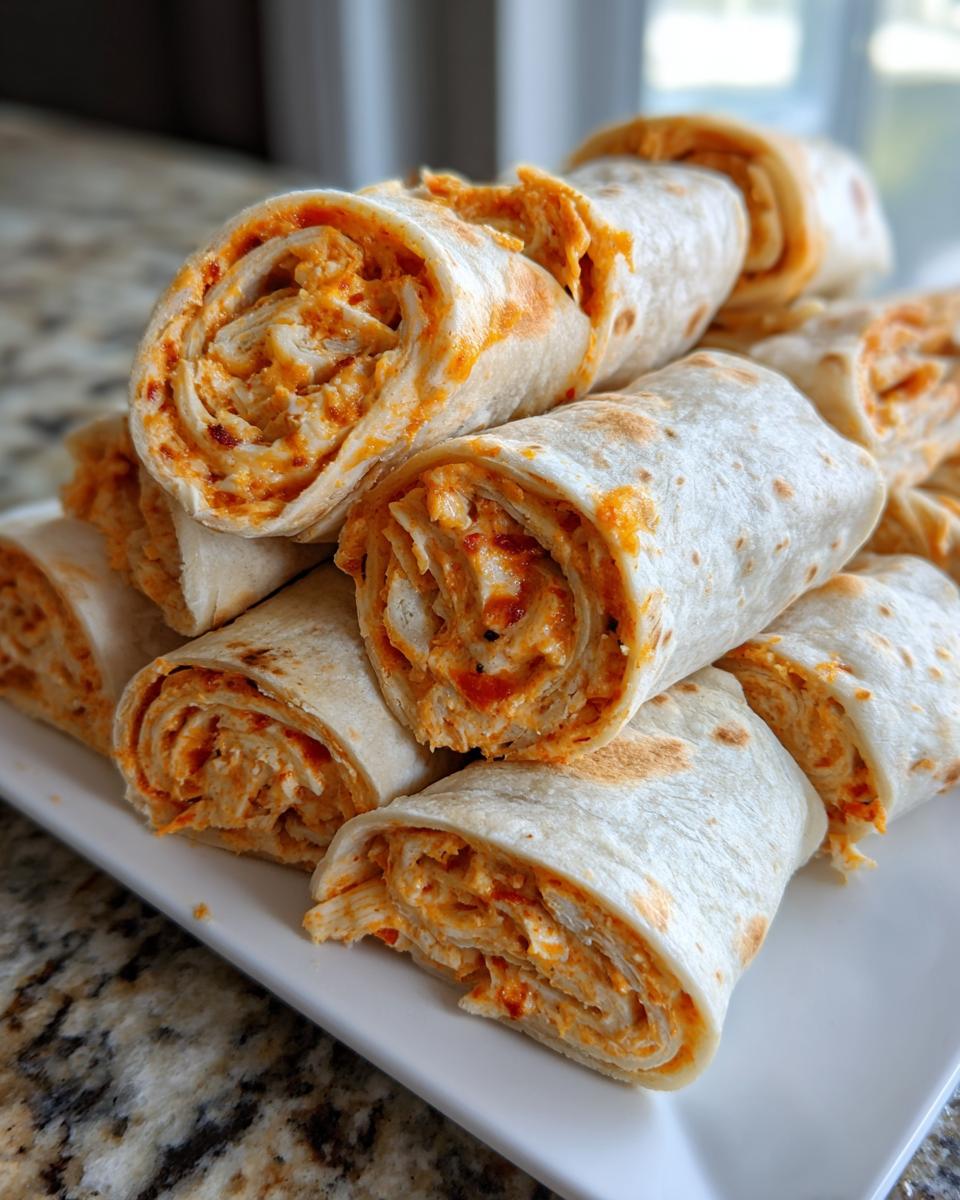
Serving Suggestions for Appetizers for a Crowd
While these taco pinwheels are flavorful enough to stand all on their own—seriously, that creamy taco filling is addictive—it’s always fun to dress up an appetizer spread, especially when you’re hosting a crowd! When I’m planning appetizers for a crowd, I like to offer a few easy dips that complement the savory, slightly spiced flavor profile. It just pulls the whole Mexican-inspired theme together beautifully.
You absolutely cannot go wrong by setting out a trio of classics. Guacamole is a must; the rich, fresh avocado plays so nicely against the salty cheese in the pinwheels. Set out a bowl of good quality salsa—pick your medium spice level—and definitely include some cool sour cream. The contrast between the cool sour cream and the seasoned filling is just heavenly.
If you want to elevate it just a bit more without adding any extra work, you can whip up a small bowl of plain Greek yogurt mixed with a tablespoon of lime juice and a tiny pinch of salt. It acts just like Mexican crema! Think about setting everything on a big platter so people can easily grab a slice and go. These look fantastic when you arrange them around a little bowl of salsa or guacamole for a real showstopper!
Frequently Asked Questions About Mexican Roll Ups
It’s normal to have a few questions floating around before you commit to an appetizer, especially when you’re planning for a group! When I developed these taco pinwheels, I tried to make them as foolproof as possible, but sometimes you need a little extra reassurance. Here are the things people ask me most often about these simple, delicious Mexican roll ups.
Can I make the filling for these Mexican Roll Ups ahead of time?
Oh, yes, absolutely! This is one of my favorite tricks for making party day easier. You can mix up the entire cheese and seasoning, plus the olives, onions, and meat if you are using it, and store that creamy taco filling in an airtight container in the fridge for up to two days. When you’re ready to assemble, just let the mix sit out on the counter for about 20 minutes to soften up a bit so it spreads easily over the tortillas.
However, I really, really advise against spreading the filling onto the tortillas until you are ready to roll the logs. The moisture from the cheese mixture can start to make the tortillas a little soggy after a few hours, and we don’t want them sticking together or getting gummy before that crucial chilling time!
Do I have to use flour tortillas for these Quick Finger Foods?
Flour tortillas work best because they are flexible and sturdy enough to handle being rolled tightly around that dense cheese filling without tearing. If you try corn tortillas, they will almost certainly crack. You *could* try using low-carb tortillas, but be aware that those tend to tear much more easily, so you’ll need to microwave them until they are super soft first. For the best results and those professional-looking spirals, stick with the 10-inch flour ones! These are fantastic quick finger foods precisely because the standard tortilla works so well.
Can these be served warm, or only cold?
These Fiesta Pinwheels are designed to be served cold or at room temperature, which is why they make such brilliant appetizers for a crowd. That chilling time firms everything up beautifully. If you do prefer them warm—maybe for a cozy winter game night—you can absolutely warm them up! Just arrange the sliced pinwheels on a baking sheet; don’t try to heat the log before slicing. Bake them at 350°F for about 5 to 7 minutes, just until the cheese starts to look melty again. Any longer and you risk the tortilla getting too crispy or the filling trying to escape!
What if I don’t have many olives? Can I skip them or substitute?
Totally fine! Those olives are in there mostly for a burst of salty flavor and a little color contrast, but they are certainly not mandatory! If you don’t like olives, leave them out entirely. If you want a swap, try finely minced jarred pimentos or even some chopped mild green chilies for a little tang. Just remember, any extra liquid needs to be drained really well so it doesn’t ruin the texture of your main filling when you make these simple party food bites!
Estimated Nutritional Data for Simple Party Food
I know a lot of you are keen on knowing the numbers, even when we’re talking about super fun appetizers like these taco pinwheels. As a food scientist, I always have to put the disclaimer out there first: the nutrition facts listed below are just estimates! They are based on the ingredients listed in the recipe, assuming you are making the vegetarian version (no meat added), and dividing the total recipe yield by four servings (about 4 pinwheels per serving). Your actual numbers will change based on the exact brands and specific cheese blends you use.
But looking at these figures, I’m pretty happy! For a bite-sized treat, they aren’t too heavy on the calories, and the fat content comes mostly from the cheese and cream cheese base, which is expected for these rich Fiesta Pinwheels.
- Serving Size: About 4 pinwheels
- Calories: 210
- Fat: 15g (Saturated Fat: 8g)
- Sodium: 450mg (Remember that comes from the taco seasoning and olives!)
- Carbohydrates: 15g
- Protein: 7g
See? These are wonderfully satisfying simple party food options that you won’t have to feel guilty about serving! They taste decadent, but the numbers look reasonable for party fare.
Share Your Kitchen Creations
Now that you’ve gone and made these incredible Taco Pinwheels, I really, truly want to see them! This is the best part of running Frosted Fancies—seeing your kitchen triumphs. When I developed this recipe, I focused on making sure it was reliable, and knowing you succeeded is the biggest compliment I can get!
If you loved how easy these were for your last gathering or if they became a new favorite game day food, please do me a favor and leave a rating for the recipe right here on the page! Stars matter so much in letting other busy home cooks know that this is a winner they can trust. You can click those little stars right below the recipe card when you have a second.
And if you snapped a picture of your perfectly sliced, beautiful Mexican roll ups arranged on a platter, tag me on social media! I’m always scrolling through and sharing my favorites on my stories. It always brings a huge smile to my face to see my tried-and-true recipes popping up in kitchens all over the country. Don’t forget to use the hashtag so I can find your amazing platter of party snack recipes!
Happy cooking, and I can’t wait to see what you’ve made!
PrintUltimate Easy Cheesy Taco Pinwheels (Make-Ahead Friendly)

Make these easy taco pinwheels for your next gathering. This recipe uses simple ingredients to create a cheesy, flavorful appetizer perfect for game days or parties. They are simple to prepare and taste great cold or warm.
- Prep Time: 15 min
- Cook Time: 0 min
- Total Time: 15 min
- Yield: About 32 pinwheels 1x
- Category: Appetizer
- Method: Chilling/No Bake
- Cuisine: Mexican-Inspired
- Diet: Vegetarian
Ingredients
- 1 (8 ounce) package cream cheese, softened
- 1 cup shredded Mexican cheese blend
- 1 packet (1 ounce) taco seasoning mix
- 1 cup cooked, drained ground beef or shredded chicken (optional for non-vegetarian version)
- 1/2 cup sliced black olives, drained
- 1/4 cup chopped green onions
- 4 large (10-inch) flour tortillas
Instructions
- In a medium bowl, combine the softened cream cheese, shredded Mexican cheese, and taco seasoning mix. Mix until completely smooth and combined.
- If using meat, stir the cooked ground beef or chicken into the cheese mixture.
- Stir in the sliced black olives and chopped green onions. This creates your creamy taco filling.
- Lay one flour tortilla flat on a clean surface. Spread about one-fourth of the cheese mixture evenly over the entire surface of the tortilla, leaving a small border around the edges.
- Starting from one edge, tightly roll the tortilla into a log shape. Wrap the log tightly in plastic wrap.
- Repeat this process with the remaining three tortillas and filling.
- Refrigerate the wrapped logs for at least 2 hours, or up to 24 hours, to allow them to firm up. This step is key for clean slices.
- When ready to serve, unwrap the chilled tortilla logs. Use a sharp knife to slice each log into 1-inch thick pinwheels.
- Arrange the taco pinwheels on a serving platter. Serve immediately, or keep chilled until serving time.
Notes
- For a vegetarian option, skip the ground beef or chicken. The cheese filling is flavorful on its own.
- You can use reduced-fat cream cheese, but the texture may be slightly less firm when slicing.
- These pinwheels are excellent served cold, making them a perfect make-ahead appetizer for parties.
- If you prefer a spicier filling, add 1/4 teaspoon of cayenne pepper or a dash of hot sauce to the cheese mixture.
Nutrition
- Serving Size: 4 pinwheels
- Calories: 210
- Sugar: 1
- Sodium: 450
- Fat: 15
- Saturated Fat: 8
- Unsaturated Fat: 7
- Trans Fat: 0.2
- Carbohydrates: 15
- Fiber: 1
- Protein: 7
- Cholesterol: 35