
Hello, and welcome back to Frosted Fancies! I’m Katie, and today we are absolutely skipping the oven. Seriously, ditch the preheating anxiety because we are making **avalanche cookies**! If you need a treat that comes together faster than you can decide what to watch on TV, this is it. These are truly the ultimate no-bake dessert, turning everyday pantry staples into fudgy, crunchy clusters of happiness. I just adore recipes like this one because they prove you don’t need complicated steps or hours of work to make something everyone goes wild for. These simple confections deliver huge flavor with zero stress.
- Why You Will Love These Easy Dessert Recipes for Avalanche Cookies
- Ingredients Needed for Classic Peanut Butter Avalanche Cookies
- Expert Tips for Perfecting Your Avalanche Cookies
- Step-by-Step Instructions for No Bake Avalanche Cookies
- Serving Suggestions for These Crispy Cereal Cookies
- Storage and Reheating Instructions for Leftover Avalanche Cookies
- Frequently Asked Questions About Making Avalanche Cookies
- Nutritional Estimates for This Simple Confection
- Share Your Experience Making These Avalanche Cookies
Why You Will Love These Easy Dessert Recipes for Avalanche Cookies
Honestly, these **avalanche cookies** are the recipe I turn to when I need a massive win with minimal effort. They check every box when it comes to simple sweets. They’re incredibly forgiving, which is why they are such great easy dessert recipes, especially for busy holidays or last-minute party needs.
- They are completely no-bake! That means no standing over a hot oven in the summer.
- They come together in about 15 minutes of actual hands-on time, making them perfect quick snacks.
- The texture is just unbeatable—that creamy peanut butter mixed with the crunch of the cereal is addictive.
- They are so recognizable and loved, making them fantastic bake sale ideas that disappear fast. If you need inspiration for fewer ingredients, check out this version: Low Ingredient Avalanche Cookies.
Ingredients Needed for Classic Peanut Butter Avalanche Cookies
When you make these **avalanche cookies**, precision in ingredients really matters, especially since there’s no baking to fix mistakes! We aren’t dealing with multiple components here—no glaze needed—so we can list everything clearly. Getting the right amounts of peanut butter and the coating chocolate ensures everything holds together beautifully. I trust the measurements in this list implicitly because they are balanced for perfect fudgy results.
You’ll need to gather:
- One full cup of creamy peanut butter—not the natural, oily kind, please!
- One cup of marshmallow fluff. If you’re melting marshmallows instead, be careful with the amount!
- Twelve ounces of white chocolate or almond bark, melted. Almond bark sets up firmer, which I sometimes prefer.
- Four cups of your favorite crispy rice cereal (you know, the one that makes great crispy cereal cookies).
- Optional extras: One cup of mini marshmallows and one cup of mini chocolate chips if you want a chunkier texture.
Expert Tips for Perfecting Your Avalanche Cookies
Listen, since these **avalanche cookies** rely on melting and mixing rather than the structure baking provides, technique is everything! My goal is always a fudgy-but-sturdy cluster, not a chocolate-dipped puddle. The absolute most important thing for these peanut butter treats? Work fast once that melted white chocolate hits the bowl. It starts setting up almost immediately because the cool cereal mixture sucks the heat right out of it.
A quick stir is all you need to coat everything evenly. Resist the urge to overmix once the chocolate is in! Also, since we’re dealing with melted chips, never, ever microwave your white chocolate or almond bark for too long. Even a minute past smooth can cause it to seize up and get grainy. Just short bursts and constant stirring are key to keeping that coating silky and beautiful. Trust me, nobody wants stiff, seizing chocolate in their delicious peanut butter treats.
Ingredient Notes and Substitutions for Avalanche Cookies
When developing this classic recipe, the texture remained my biggest focus for these **avalanche cookies**. If you can, use almond bark over standard white chocolate chips. Almond bark is designed to melt smoothly and re-harden with a nice snap, whereas some white chocolate chips can stay a little soft. If you must use chips, add just a teaspoon of coconut oil to help them thin out slightly when melting.
Regarding the peanut butter, please stick to creamy and shelf-stable. Natural peanut butter separates too much and just won’t bind correctly with the fluff or melted marshmallows. For those mini marshmallows mixed in, consider tossing them quickly in a tiny bit of powdered sugar before adding them to the cereal. This stops them from sticking to everything else while you’re mixing!
Step-by-Step Instructions for No Bake Avalanche Cookies
Okay, let’s get these incredible **avalanche cookies** mixed! Since this is a no-bake recipe, speed is your friend during the final stages. We’re relying on the marshmallow fluff and melted chocolate to be our binder, so keeping things moving once the chocolate comes out is crucial for success. Grab your biggest bowl; you’ll need room for all that delicious crunch!
Melting the Chocolate and Combining the Base
First off, line a baking sheet—this is important so they don’t stick! Next, we build the base. Combine the peanut butter and marshmallow fluff in your microwave-safe bowl. Heat in short 30-second bursts, stirring well between each time, until it’s totally smooth and creamy. This step needs your full attention so you don’t scald the fluff. Once smooth, dump in your crispy rice cereal and any optional chips or marshmallows. Gently fold it all together until nothing is dry. This is where the foundational structure happens!
Forming and Setting the Avalanche Cookies
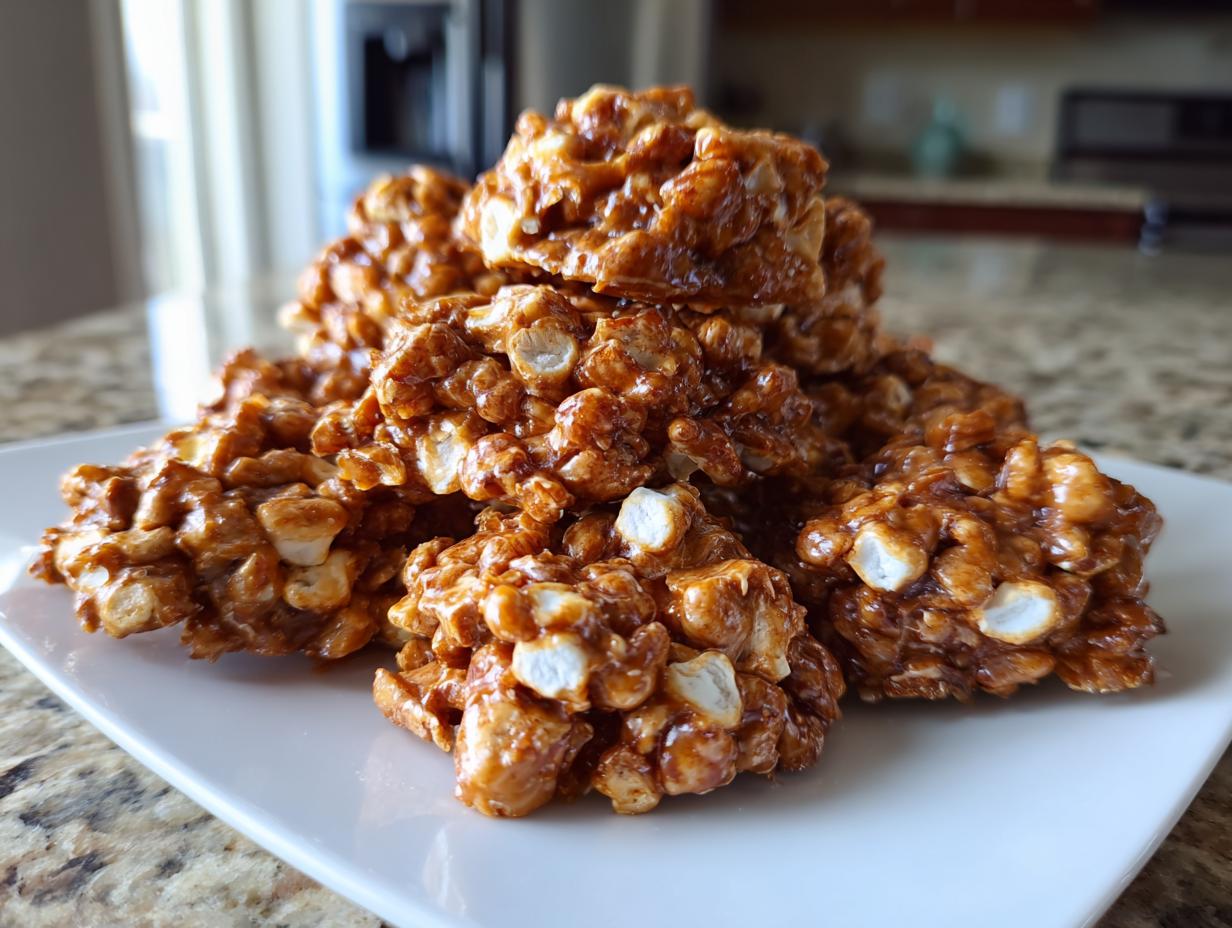
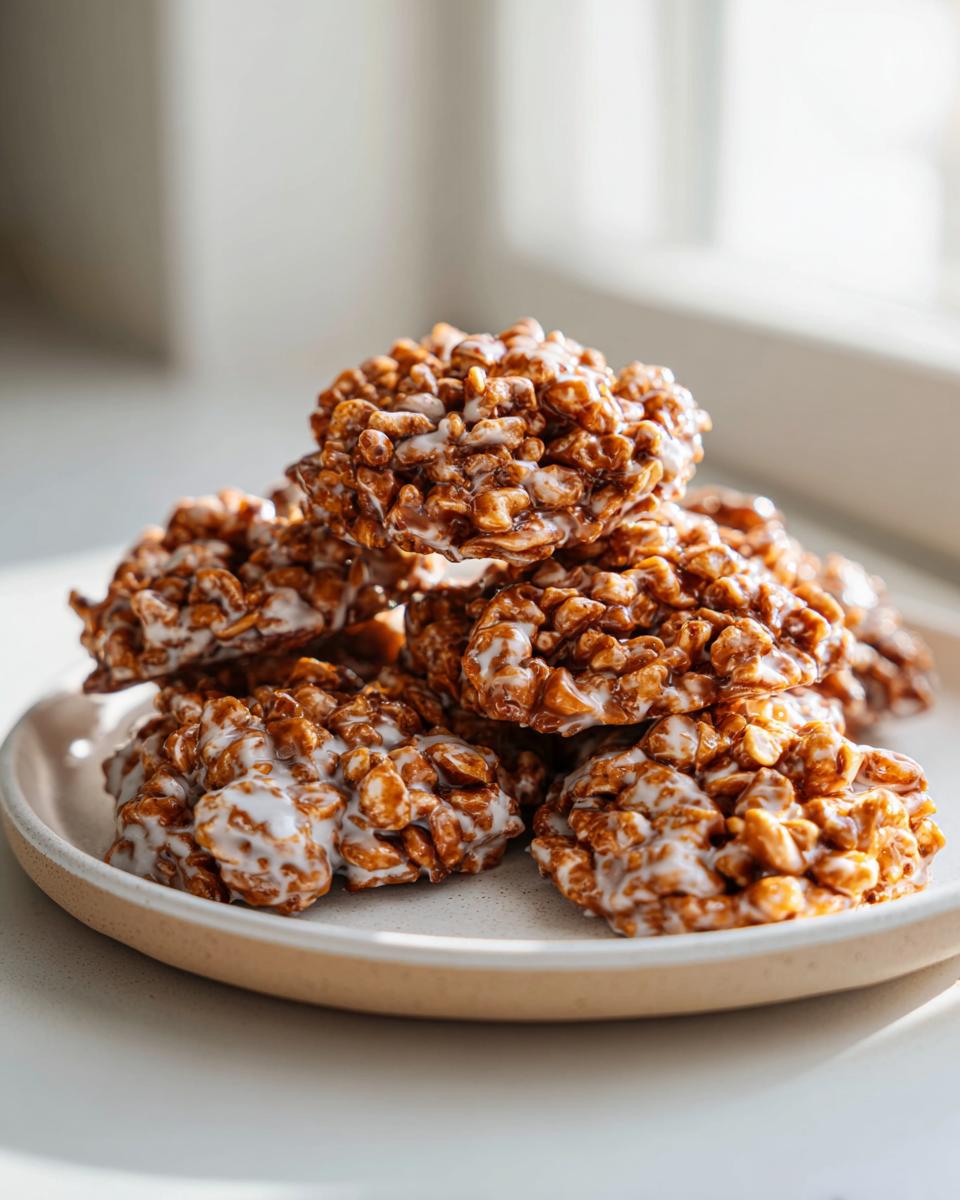
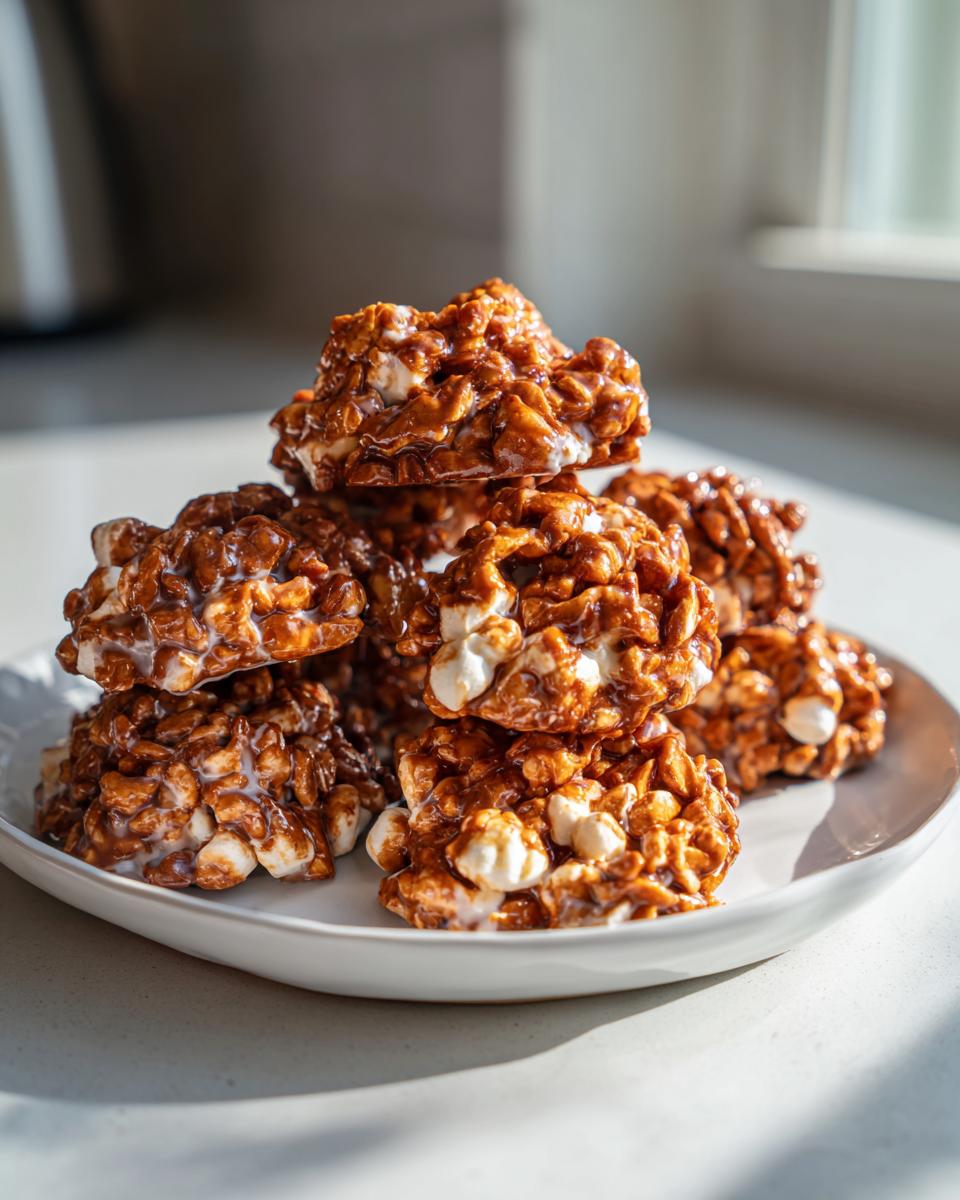
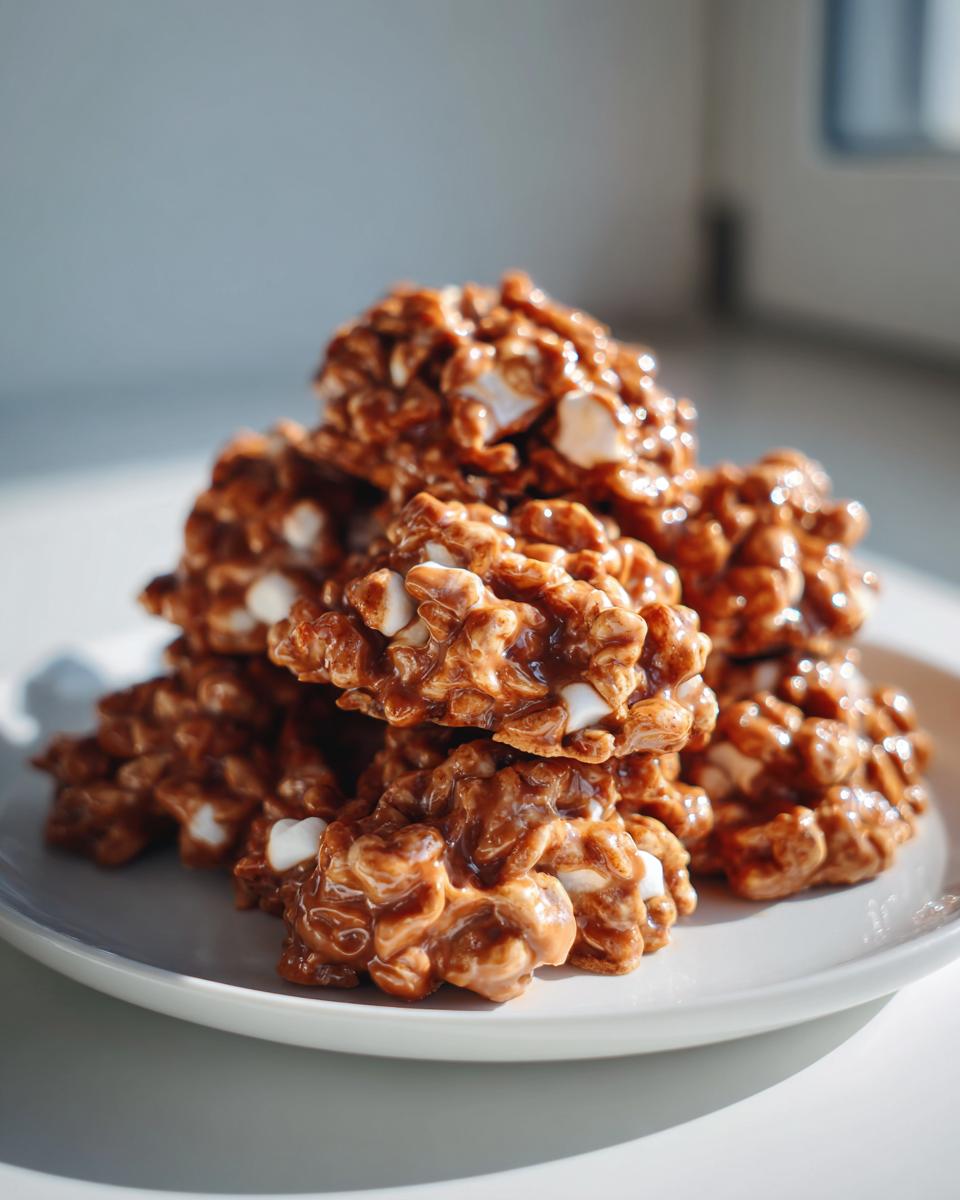
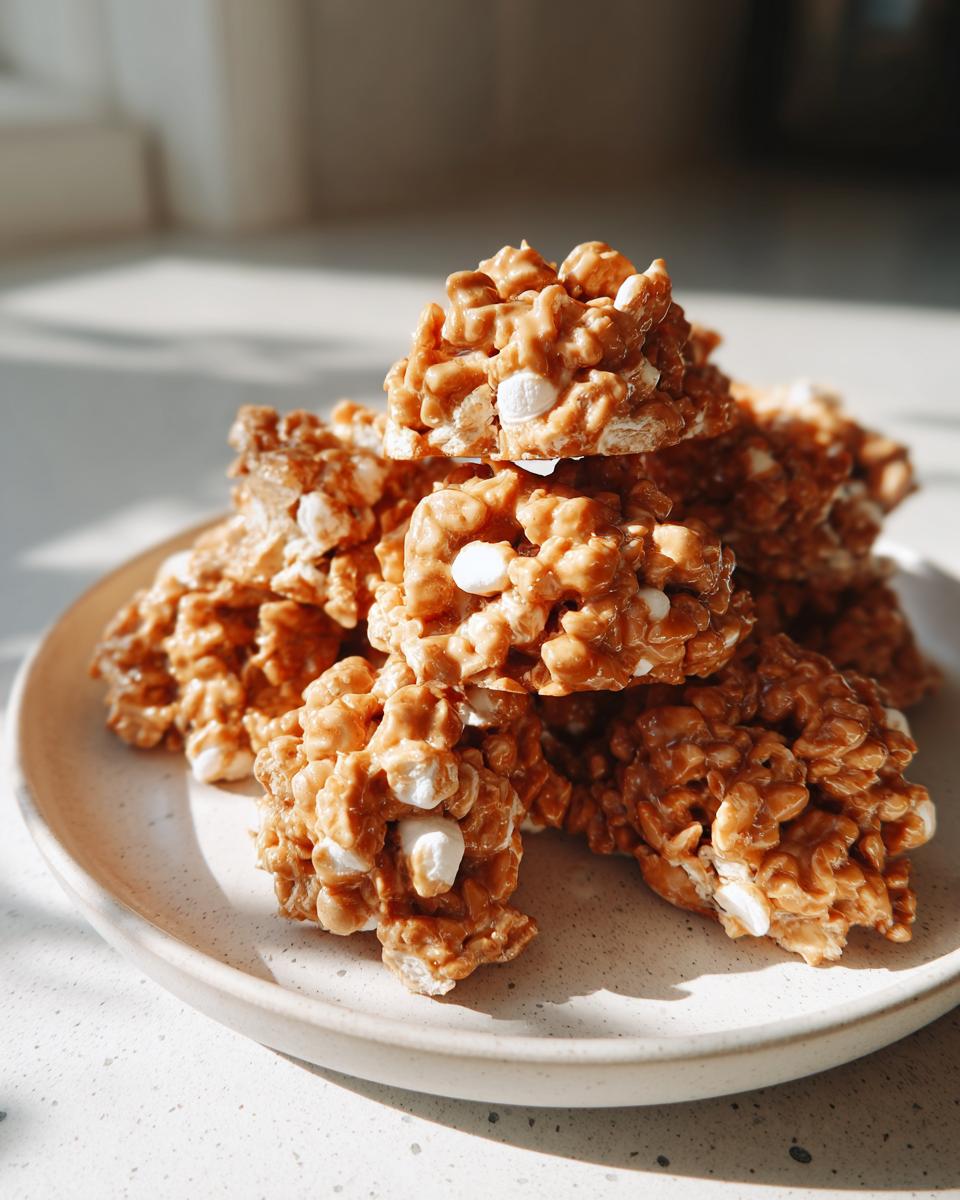
Now for the magic—time to add the coating! Melt your white chocolate or almond bark using the microwave method (short bursts!). As soon as it’s liquid silk, pour it right over that cereal mixture. You must stir constantly and quickly here! Once everything looks evenly coated in white chocolate, immediately drop spoonfuls onto your prepared parchment paper. Don’t fuss about making them perfect circles; they are called *avalanche* cookies for a reason! Let them set up either on the counter for an hour or pop them into the fridge for about 20 minutes if you simply can’t wait to dig in. These **avalanche cookies** hold up great on a platter, just like you see on sites like this one!
Serving Suggestions for These Crispy Cereal Cookies
Honestly, these **avalanche cookies** are so versatile because they are technically a candy cluster, not a true cookie! That means presentation is half the fun. Since they set up beautifully firm, they look fantastic nestled on a platter with other assorted holiday treats, or just piled high in a cute bowl as easy party treats.
I love pairing these with something dark to cut through the sweetness, like a strong cup of black coffee or even a cold glass of milk. For holiday cookie trays, try dusting about half of them very lightly with cocoa powder just before they set completely. It gives them an extra visual layer and hints at that chocolate richness inside. They travel so well, too! If you are gifting them, tucking them into small cellophane bags tied with a colorful ribbon makes for a wonderful homemade neighbor gift. You can see how fun they look when piled up on this site; they are always a smash hit!
Storage and Reheating Instructions for Leftover Avalanche Cookies
The best thing about these **avalanche cookies** is that they are low-maintenance even after you eat them! Because they are no-bake—held together purely by chocolate, peanut butter, and marshmallows—you don’t have to worry about them getting stale like a traditional baked cookie. They are fantastic for making ahead of time, which is why they shine as brilliant bake sale ideas.
Just keep them in a single layer or separated by wax paper inside a truly airtight container. I usually keep mine right on the counter since room temperature is fine, but if your kitchen is warm in the summer, popping them into the fridge will keep them firm. They hold up beautifully for at least a week. See how sturdy they are? That’s why I love them; check out these tips from this great resource!
Frequently Asked Questions About Making Avalanche Cookies
I get so many questions since I first shared this simple recipe for **avalanche cookies**! It’s completely normal when dealing with no-bake treats, as people worry about them falling apart or setting correctly. Because I’ve made these hundreds of times in my test kitchen, I’ve ironed out all the tricky spots, so you don’t have to guess. Here are the most common things folks ask about when pulling these together.
Can I make these avalanche cookies without peanut butter?
Yes, you absolutely can! If you have an allergy or just prefer something else, sunflower seed butter works really well. Or, try a creamy almond butter. Just remember, the texture might be slightly softer since those oils react differently than classic Jif-style peanut butter. You can see some ideas over at this link.
What is the best way to store these No Oven Desserts?
These are some of the easiest no oven desserts to store! Keep them in a single layer, separated by wax paper, inside a container that seals tightly. While they are fine on the counter for about a week, if your house is warm, placing them in the fridge keeps them extra firm and crisp.
Nutritional Estimates for This Simple Confection
Now, I know what you might be thinking: delicious? Yes. Healthy? Well, they are treats! But I always like to give you the full picture here at Frosted Fancies so you know exactly what’s going into your body. These **avalanche cookies** are made with simple ingredients, but the peanut butter and white chocolate mean they pack a little punch. These numbers are just estimates based on the recipe as written, but they give you a good baseline.
For one cookie, you’re looking at approximately:
- Calories: 220
- Sugar: 18g
- Fat: 13g
Remember, since we aren’t baking them, the nutritional profile stays very true to the ingredients you put in. For more inspiration on fun recipes, you can check out this site!
Share Your Experience Making These Avalanche Cookies
I poured all my knowledge into making sure these **avalanche cookies** are absolutely foolproof, and now it’s your turn! Head down to the comments below and let me know how they turned out for you. Did you try adding extra mix-ins? Did you stick to the classic almond bark?
Leave a rating so others can see how easy they are to make! And please, share your pictures over on social media tagging me—I love seeing your creations. You can also find some other great inspiration over at this spot, or check out the original inspiration from this recipe. Happy snacking!
PrintThe Ultimate No-Bake Peanut Butter Avalanche Cookies (Classic Recipe)

Make these irresistible Avalanche Cookies for a quick, crowd-pleasing no-bake treat. These simple confections combine creamy peanut butter, crispy cereal, and melted white chocolate for a fudgy, chewy bite.
- Prep Time: 15 min
- Cook Time: 0 min
- Total Time: 1 hr 15 min
- Yield: 20 servings 1x
- Category: Dessert
- Method: No Bake
- Cuisine: American
- Diet: Vegetarian
Ingredients
- 1 cup creamy peanut butter
- 1 cup marshmallow fluff (or melted marshmallows)
- 12 ounces white chocolate or almond bark, melted
- 4 cups crispy rice cereal (like Rice Krispies)
- 1 cup mini marshmallows (optional mix-in)
- 1 cup mini chocolate chips (optional mix-in)
Instructions
- Line a baking sheet with parchment paper.
- In a large microwave-safe bowl, combine the peanut butter and marshmallow fluff. Microwave in 30-second intervals, stirring between each, until smooth and easily combined.
- Gently fold in the crispy rice cereal and any optional mix-ins, like mini marshmallows or chocolate chips, until everything is evenly coated.
- Melt the white chocolate or almond bark according to package directions, usually in the microwave in 30-second bursts, stirring until completely smooth.
- Pour the melted white chocolate over the cereal mixture. Stir quickly until all the ingredients are coated in chocolate. Work fast, as the mixture will start to set.
- Drop spoonfuls of the mixture onto the prepared baking sheet. You can form them into rough mounds or drop them as clusters.
- Allow the cookies to set completely at room temperature for about 1 hour, or place them in the refrigerator for 20 minutes to speed up the process.
- Store these easy dessert recipes in an airtight container.
Notes
- For a richer flavor, you can substitute half of the white chocolate with milk chocolate or semi-sweet chocolate chips.
- If you prefer a slightly firmer cookie, use regular marshmallows instead of marshmallow fluff, melting them gently with the peanut butter before mixing in the cereal.
- These are excellent bake sale ideas and travel well when kept cool.
Nutrition
- Serving Size: 1 cookie
- Calories: 220
- Sugar: 18g
- Sodium: 110mg
- Fat: 13g
- Saturated Fat: 6g
- Unsaturated Fat: 7g
- Trans Fat: 0g
- Carbohydrates: 24g
- Fiber: 1g
- Protein: 4g
- Cholesterol: 5mg