
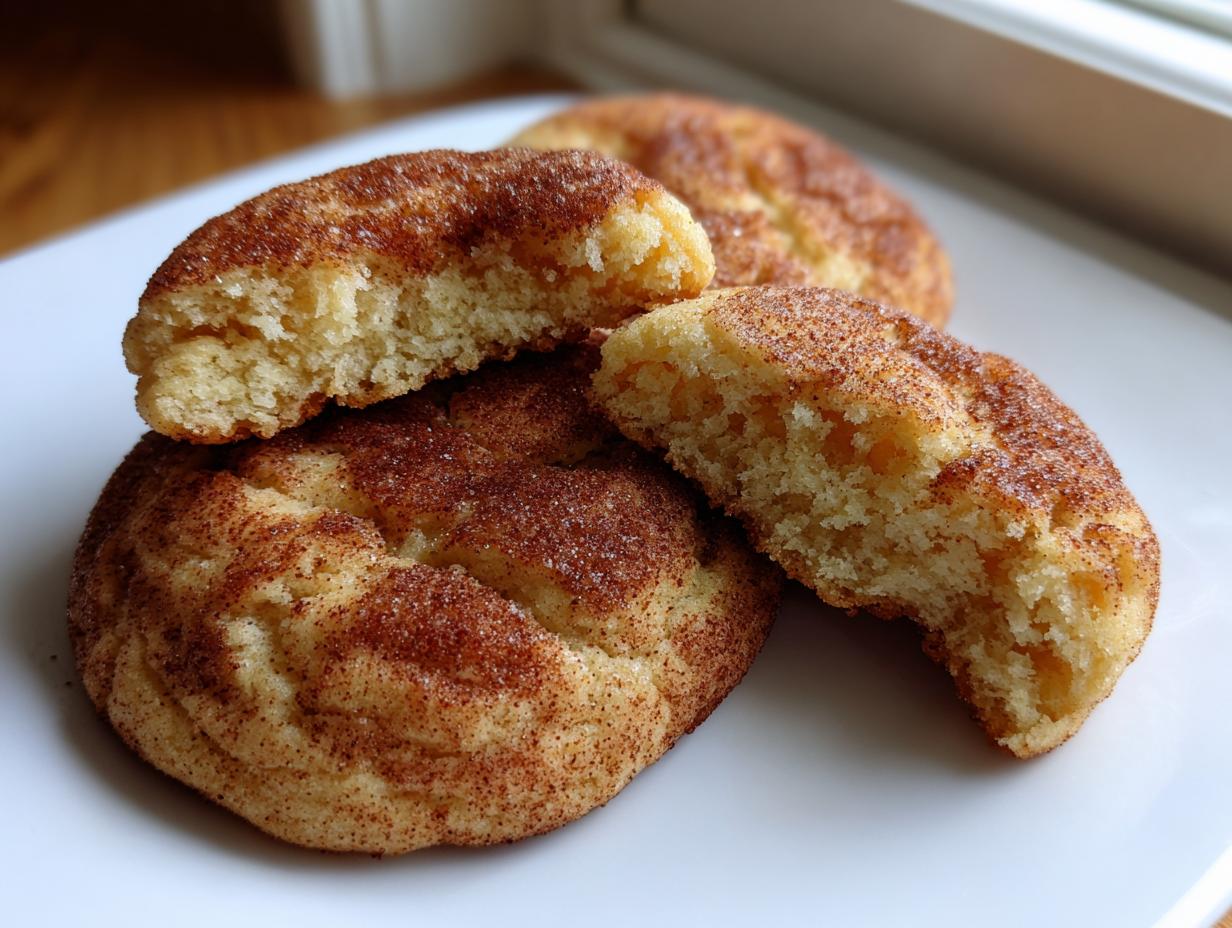
Oh, you are in the EXACT right mood! There’s just something about pulling a tray of warm, crinkly cookies out of the oven that takes you right back to childhood, isn’t there? We’re not messing around with shortcuts here; these are truly the classic Snickerdoodle cookies you remember—buttery, soft in the middle, and boasting that perfect, unmistakable tang. I’m Katie, and thanks to my background in Food Science, I understand exactly *why* this recipe works magic. We’ve spent years perfecting the ratios so you get that beautiful crackle and the ultimate chewy cookie center every single time. Forget dry, puffy pucks; these turn out perfectly soft!
- Why This Snickerdoodle Recipe Delivers the Perfect Texture
- Gathering Your Ingredients for Authentic Snickerdoodle Cookies
- Step-by-Step Instructions for Perfect Snickerdoodle Cookies
- Tips for Achieving That Signature Chewy Cookie Center
- Storage and Keeping Your Snickerdoodle Cookies Fresh
- Serving Suggestions for These Classic Holiday Cookie Treats
- Frequently Asked Questions About Snickerdoodle Recipe Variations
- Estimated Nutrition for One Snickerdoodle Cookie
- Share Your Experience Baking These Snickerdoodle Cookies
Why This Snickerdoodle Recipe Delivers the Perfect Texture
It’s all about the science behind the softness when we talk about Snickerdoodle cookies. We aren’t just tossing things in a bowl! We’re aiming for that lovely, slightly crisp edge contrasted with a really substantial, chewy cookie center. The secret weapon, the one ingredient you absolutely cannot skip, is the cream of tartar. If you’re curious about what that little white powder does, you really should check out my guide on the magic of cream of tartar in baking. It’s what gives us that signature zip!
Key Factors for Classic Snickerdoodle Cookies
To ensure success, pay close attention to these three things right at the start. They set the stage for the whole batch:
- Butter needs to be properly softened—you know, cool a little bit, but soft enough that your finger leaves an indent. Not melty goo!
- Be gentle when adding the flour mixture. Seriously, mix only until the streaks disappear. Overmixing kills the chewiness we are working so hard to achieve.
- Make sure your cream of tartar is fresh. Old tartar loses its acidic kick, and without that kick, you lose the tang and you change how the cookie spreads. We want authentic!
Gathering Your Ingredients for Authentic Snickerdoodle Cookies
Okay, let’s get our mise en place ready! This is where trust is built, right? Knowing that every measurement is precise means you can relax and just enjoy the process. If you follow my measurements here—especially for what goes into the dough versus what goes into the coating—you’ll get those beautiful, cracked tops everyone loves.
Honestly, these ingredients are so basic, which is why I love them so much. Flour, sugar, butter, eggs, vanilla—standard stuff! But the heavy hitters that make these *Snickerdoodle cookies* special are the leavening agents. You need both baking soda *and* that beloved cream of tartar. When you look at the list below, you’ll see exactly how much of each wonderful thing goes into making about three dozen of these beauties.
- One full cup (that’s 16 tablespoons!) of unsalted butter, making sure it’s nice and soft.
- One and a half cups of granulated sugar to go into the main batter for sweetness.
- Two large eggs. Don’t let them be ice cold; let them sit on the counter for about 20 minutes first!
- Two teaspoons of good vanilla extract. That’s my starting point, never skimp on the vanilla!
- Two and three-quarters cups of all-purpose flour. Level those cups off; we don’t want too much flour!
- Two teaspoons of that tangy cream of tartar—this is the star!
- One teaspoon of baking soda.
- Half a teaspoon of salt to balance everything out.
Coating Ingredients for the Cinnamon Sugar Cookies
This part is super important because it creates the spicy shell! Don’t try to eyeball this. The contrast between the plain dough and this heavy coating is what makes them look so classic and beautiful when they bake up.
You’ll need a separate, small bowl—preferably shallow so you can roll the dough balls around easily—for:
- A quarter cup of plain granulated sugar.
- Two full tablespoons of ground cinnamon. Make sure that cinnamon is fresh and fragrant; it really impacts the final smell!
Step-by-Step Instructions for Perfect Snickerdoodle Cookies
This is where the fun really starts! Before you even touch the butter, make sure your oven is humming along at 375 degrees F (190 degrees C). I always recommend lining your baking sheets with parchment paper—it makes clean-up a breeze and helps ensure the bottoms don’t brown too fast. Since you asked about the best way to prepare your sheets, I put together a quick guide on my absolute favorite baking sheet preparation methods.
Mixing the Dough Base for Your Snickerdoodle Recipe
Grab that trusty mixer! In a big bowl, we start by creaming the soft butter and the large amount of sugar—that’s 1 1/2 cups—until it looks genuinely light and fluffy, maybe like thick whipped cream. Now, add those two eggs, but here’s a secret: add them one at a time, making sure the first one is fully incorporated before you drop in the second. Then, stir in your vanilla. In a separate bowl, whisk your dry bits: flour, baking soda, salt, and that essential cream of tartar. I cannot stress this enough: when you add the dry stuff to the wet, mix ONLY until you don’t see huge streaks of flour anymore. Seriously, stop the mixer! Overmixing develops tough gluten, and we are aiming for tender, not tough.
Rolling and Coating the Snickerdoodle Cookies
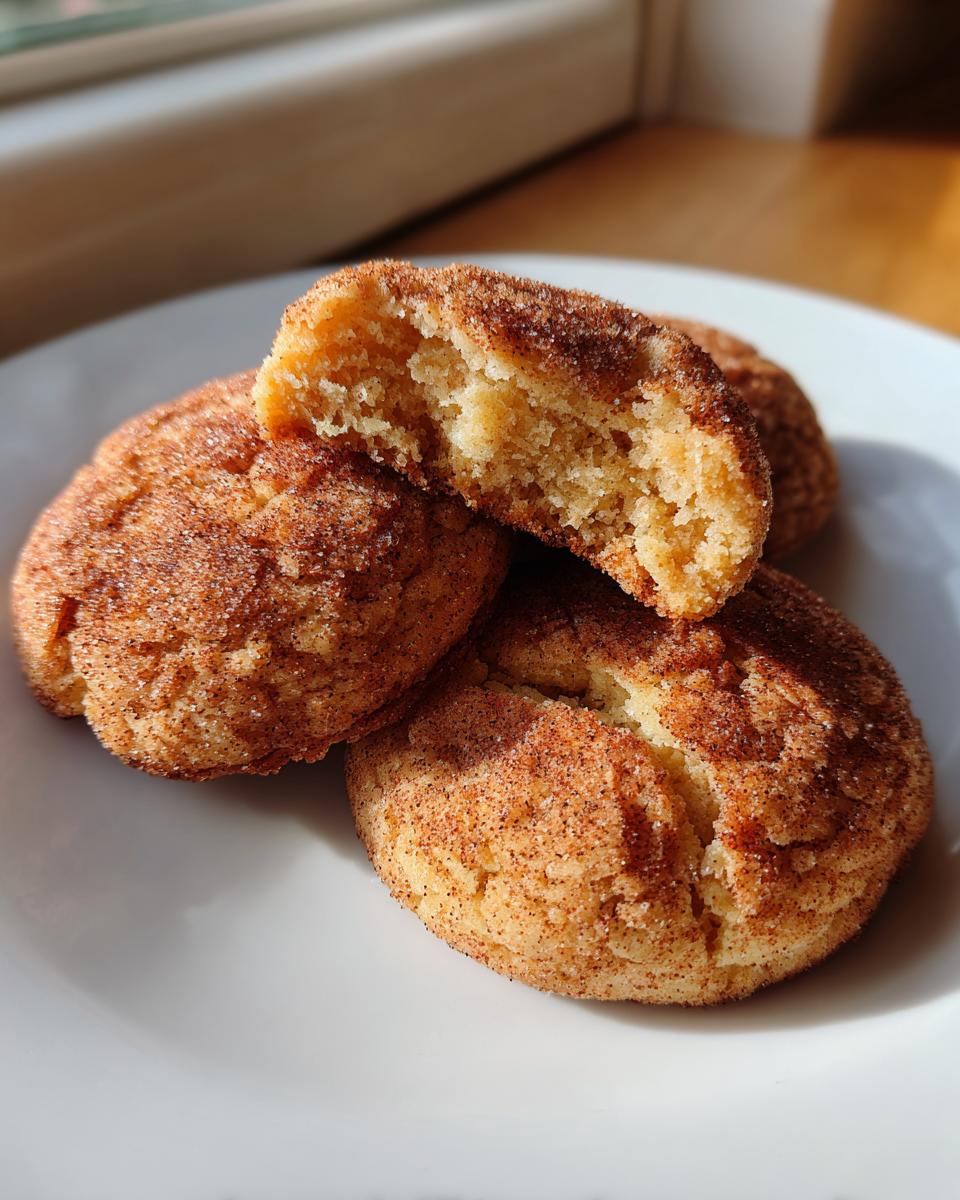
Now for the best part! Take your dough and roll it into uniform, one-inch balls. If you keep them consistent, they bake evenly, which is key for that perfect texture contrast. Next, take those little dough spheres and completely bury them in your cinnamon-sugar mixture. I mean fully coat them! Roll them around until every bit of dough is covered in that spicy grit. That coating is what cracks open in the heat, showcasing that beautiful swirl. Place them on your prepared sheets with plenty of room to breathe—about two inches apart. They need elbow room to spread out into their proper cookie shapes.
Pop those trays in the preheated oven for just 8 to 10 minutes. Remember what I said about the baking surface? If you’re using a dark metal sheet, they might be done closer to 8 minutes. Keep an eye on them!
Tips for Achieving That Signature Chewy Cookie Center
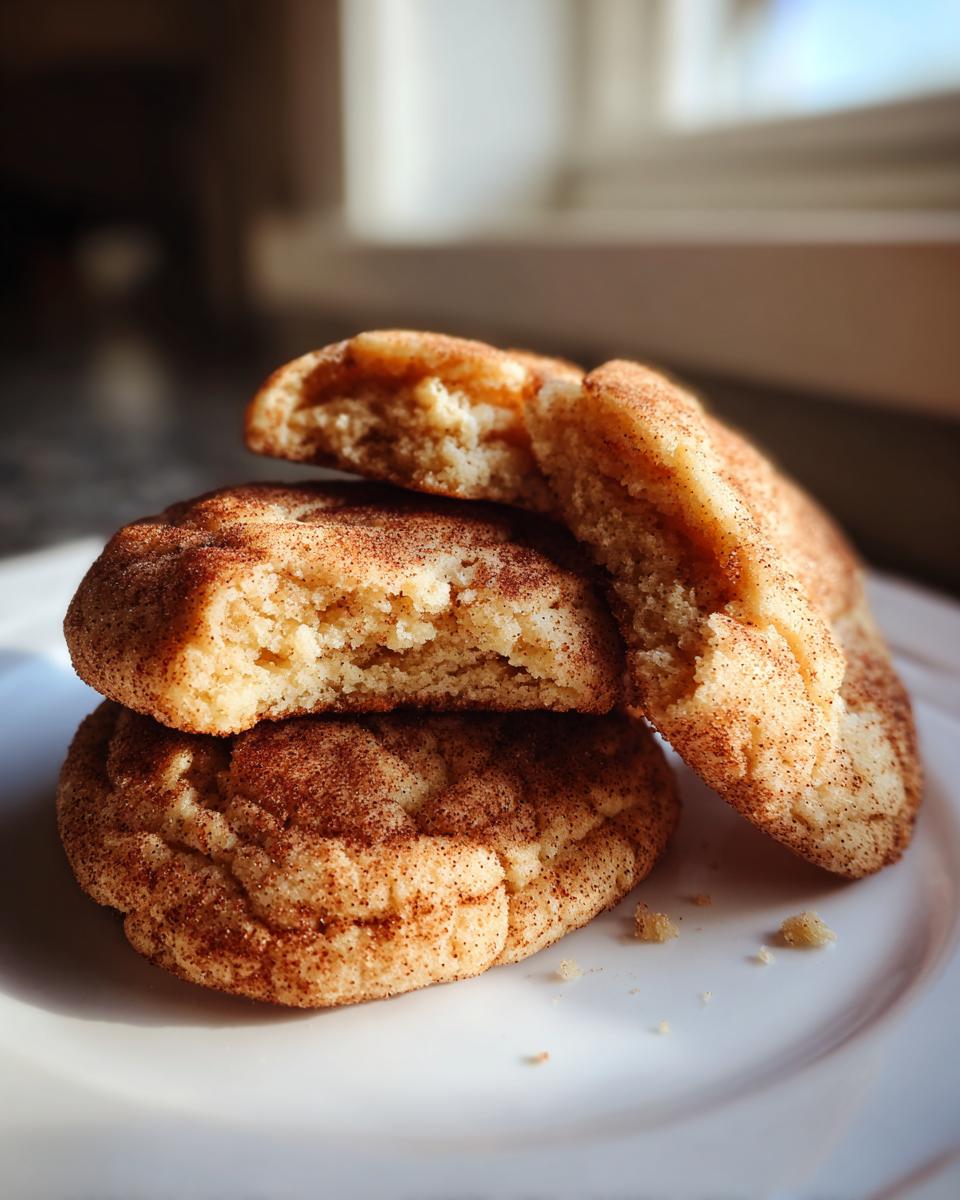
Okay, this is where we move from just *good* cookies to the kind of Snickerdoodle cookies that people beg you for the recipe of. It’s all about how you handle them right at the end, especially if you are obsessed with that soft, melt-in-your-mouth texture, just like me! Getting that ideal chewy cookie center requires just a little patience and ignoring the urge to pull them out the second the timer rings.
My top trick, the one I learned from years in the test kitchens, is dialing back the oven time just slightly. When the edges look set—meaning they aren’t gooey anymore—but the very center still looks a little soft and puffy, pull them out! Trust me on this one. They continue to bake with the residual heat of that hot pan, which sets the center perfectly as they cool.
If you find your cookies always seem to spread too thin, or maybe they look a little pale, you have an easy fix right there in the notes: dough chilling! It seems like an extra step, I know, but it makes a huge difference. Pop that whole bowl of dough into the fridge for about 30 minutes before you even scoop out the balls.
Chilling solidifies the butter just a bit more, which means the cookies take longer to melt when they hit that hot oven. Less spread means they stay thicker, and thicker cookies always have a better chance of sporting that glorious-yet-unbaked, chewy cookie center. If you’ve ever wondered why some batches spread flat like pancakes, low dough temp is almost always the culprit!
Storage and Keeping Your Snickerdoodle Cookies Fresh
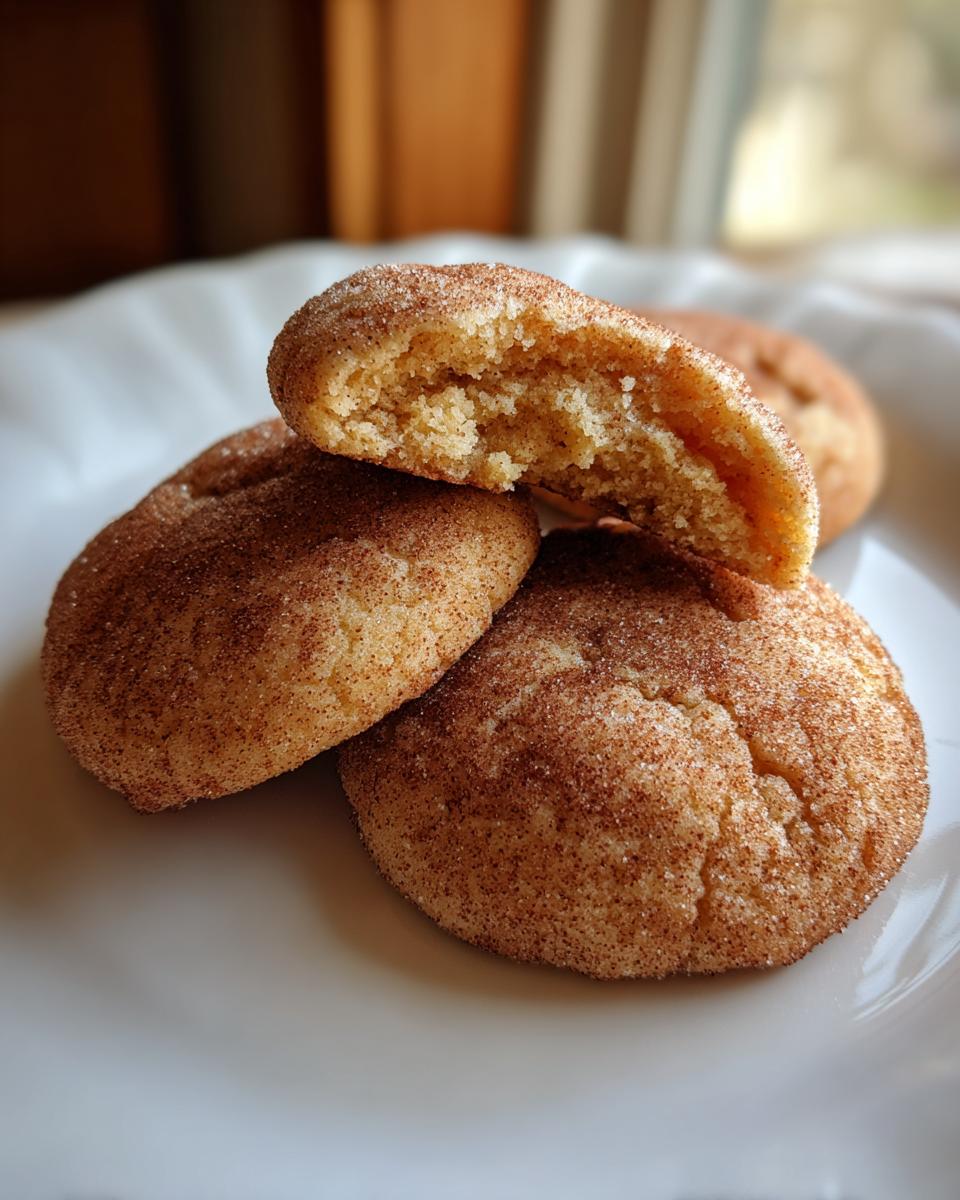
These aren’t the type of cookies you want to leave sitting out uncovered on the counter! If you do that, they’ll turn into crunchy little hockey pucks before lunchtime the next day. We want these old-fashioned cookies to stay soft and buttery, especially that lovely center we worked so hard to achieve.
The absolute best way to keep them fresh, whether they are day one or day three, is in a truly airtight container. I prefer using a good quality cookie tin or a sturdy plastic container with a tight-fitting lid. Don’t stack them too tightly if you can help it—maybe try layering them with a small piece of parchment or wax paper in between any delicate rows. This stops them from sticking together and preserves that cinnamon coating.

If you’ve made a massive batch (and who hasn’t?), you are in luck! These freeze beautifully. Place the cooled-completely cookies on a baking sheet and flash freeze them for about an hour. Once they are hard, transfer them to a freezer-safe bag or container. They stay fantastic for up to three months in the freezer. When you want a fresh cookie fix, just let them thaw on the counter for about 20 minutes at room temperature, and they taste like they were just pulled from the oven!
Serving Suggestions for These Classic Holiday Cookie Treats
Honestly, the best pairing for any cookie that has this much cinnamon-sugar glory is usually the simplest one, right? These aren’t fancy cookies that need complicated sauces or toppings. They are peak comfort food, and they deserve the classic partners we grew up with!
When I pull a batch of these Snickerdoodle cookies out of the cooling rack, my kids immediately make a beeline for the fridge for milk. A tall, cold glass of milk is non-negotiable when you have a slightly tangy, ridiculously soft cookie like this. The milk washes down that sweet cinnamon coating and the butteriness just sings.
For the grown-ups, you know I’m reaching for my coffee mug, especially in the morning. These are just as good for breakfast as they are for dessert! The slight tartness from the cream of tartar cuts right through the bitterness of a medium-roast coffee beautifully. If you’re serving these up when company comes over, especially around Thanksgiving or Christmas, turn them into a full-on classic holiday cookie presentation.
Try setting them out on a tiered platter with some good-quality vanilla wafers or maybe some peanut butter blossoms. You don’t need to overthink it, though. A plate of these warm beauties, maybe with a small bowl of sea salt flakes nearby (just for dipping the edges, don’t judge!), is pure magic. They are simple, nostalgic, and perfectly satisfying all on their own!
Frequently Asked Questions About Snickerdoodle Recipe Variations
I get so many questions about tweaking this recipe, and I totally get it! Sometimes you’re missing one thing, or maybe you want to double or triple your batch because these Snickerdoodle cookies disappear too fast from the counter. While I always push for sticking to the tried-and-true method for that perfect flavor, here are a few answers to the things I hear most often about our favorite cinnamon sugar cookies.
If you’re looking for more in-depth answers on ingredient swaps in general, I actually put together a whole guide on common baking substitutions, but here are the quick hits for snickerdoodles!
Can I make Snickerdoodle cookies without cream of tartar?
You technically *can*, but the result just won’t be the same classic cookie. Remember I said the cream of tartar gives that signature sharp tang? If you leave it out completely, you are left with a standard sugar cookie that spreads a little more, and frankly, tastes a bit flat. If you just can’t find it, you can try replacing the 2 teaspoons of cream of tartar with 1 teaspoon of lemon juice mixed with 1 teaspoon of milk, but honestly, I wouldn’t even bother unless you are sending them to someone who truly can’t have it. Go get some tartar!
How do I prevent my cinnamon sugar cookies from spreading too much?
This is the eternal struggle, isn’t it? We want that lovely thickness for that perfect chewy cookie center. If your cookies are flattening out into thin disks, it always comes down to two things: room temperature butter that was *too* soft, or dough that wasn’t chilled long enough. The best fix, hands down, is chilling the dough. Even if the recipe says you can bake immediately, I highly recommend chilling those rolled balls for at least 30 minutes before baking. That little bit of cold time keeps them holding their shape better when they hit the heat, ensuring they bake up tall and crinkly rather than wide and thin.
What if I want to make a huge, quadruple batch for a party? Just multiply everything by four! The main thing to remember when baking a huge recipe like that is oven management. You shouldn’t crowd the pans, so make sure you have plenty of parchment sheets ready. You might need to bake in shifts, which means keeping the extra dough covered tightly in the fridge until you are ready for the next round.
Estimated Nutrition for One Snickerdoodle Cookie
Now, I know some folks look at a delicious, buttery, cinnamon-sugar-covered dream like this and immediately think, ‘Oh no, the calories!’ I totally get it! While I firmly believe that baking and enjoying these wonderful old-fashioned cookies is great for the soul—and that’s half the battle—it’s smart to know what you’re eating, too.
Since these are made entirely from scratch using real butter and proper sugar, they are certainly a treat! The numbers below are calculated based on making exactly 3 dozen cookies as the recipe dictates. I’ve done the heavy lifting here by looking at the FDA guidelines and standard ingredient weights, so you can see roughly what one perfect, warm cookie contains.
Please remember this is just an estimate, though. If you use a richer butter, or if you roll your dough balls a little bigger than my one-inch suggestion, your numbers might shift just a tiny bit. Use this as a guideline, not gospel, when enjoying these delightful cinnamon sugar cookies!
- Serving Size: 1 cookie
- Calories: 150
- Sugar: 15 grams (That’s where all the flavor hides!)
- Sodium: 80 mg
- Total Fat: 8 grams
- Saturated Fat: 5 grams
- Unsaturated Fat: 3 grams
- Trans Fat: 0 (We love that!)
- Carbohydrates: 19 grams
- Fiber: 0 grams
- Protein: 2 grams
- Cholesterol: 30 mg
See? Not nearly as scary as you might think for something this comforting! Now go ahead and have another one—you earned it when you took the time to bake them yourself instead of grabbing something pre-packaged!
Share Your Experience Baking These Snickerdoodle Cookies
Well, that’s it! You’ve successfully mastered the art of the true, tangy, perfectly cracked Snickerdoodle cookies. I really, truly hope your kitchen smells amazing right now. I’m already dreaming about the next batch I need to make!
Now that you’ve pulled them out and they’ve cooled (or maybe you couldn’t wait and burned your tongue on a warm one—I won’t tell anyone!), I really need to hear about it. Did you get that beautiful crackle on top? How was that chewy cookie center when you finally bit into it?
Don’t keep your success to yourself! I absolutely thrive on seeing how my recipes turn out in *your* homes. Did you find yourself eating them with milk, or did you dip the edges into coffee like I sometimes do?
Take a moment and leave a quick rating below—just click those stars to let me know what you thought of the recipe overall. And please, drop a comment telling me your favorite part! Getting feedback on these cinnamon sugar cookies means the world to me, and it helps other bakers decide to try them too. Happy baking for next time!
PrintClassic Snickerdoodle Cookies

Bake soft, buttery sugar cookies with a distinct tang, rolled in a classic cinnamon-sugar coating for that familiar, cracked appearance.
- Prep Time: 20 min
- Cook Time: 10 min
- Total Time: 30 min
- Yield: 3 dozen 1x
- Category: Dessert
- Method: Baking
- Cuisine: American
- Diet: Vegetarian
Ingredients
- 1 cup unsalted butter, softened
- 1 1/2 cups granulated sugar
- 2 large eggs
- 2 teaspoons vanilla extract
- 2 3/4 cups all-purpose flour
- 2 teaspoons cream of tartar
- 1 teaspoon baking soda
- 1/2 teaspoon salt
- 1/4 cup granulated sugar for rolling
- 2 tablespoons ground cinnamon for rolling
Instructions
- Preheat your oven to 375 degrees F (190 degrees C). Line baking sheets with parchment paper.
- In a large bowl, cream together the softened butter and 1 1/2 cups of sugar until light and fluffy.
- Beat in the eggs one at a time, then stir in the vanilla extract.
- In a separate medium bowl, whisk together the flour, cream of tartar, baking soda, and salt.
- Gradually add the dry ingredients to the wet ingredients, mixing until just combined. Do not overmix.
- In a small, shallow bowl, mix the 1/4 cup of sugar and 2 tablespoons of cinnamon for the coating.
- Roll the dough into 1-inch balls. Roll each ball thoroughly in the cinnamon-sugar mixture until fully coated.
- Place the coated dough balls about 2 inches apart on the prepared baking sheets.
- Bake for 8 to 10 minutes. The edges should be set, but the centers should still look slightly soft.
- Let the cookies cool on the baking sheet for 5 minutes before transferring them to a wire rack to cool completely.
Notes
- For the best tang and texture, use fresh cream of tartar.
- If you prefer a chewier cookie center, slightly underbake them by about one minute.
- You can chill the dough for 30 minutes before rolling to help prevent spreading.
Nutrition
- Serving Size: 1 cookie
- Calories: 150
- Sugar: 15
- Sodium: 80
- Fat: 8
- Saturated Fat: 5
- Unsaturated Fat: 3
- Trans Fat: 0
- Carbohydrates: 19
- Fiber: 0
- Protein: 2
- Cholesterol: 30